Using Apple Notes with Apple Pencil – The Ultimate Guide
The Apple Pencil is an amazing tool to write on the iPad. I find myself using it everyday to sketch or take notes using applications like Procreate, Notability and GoodNotes. However, if you are an Apple Notes user, can you use the Apple Pencil? The answer is a resounding yes! Apple Pencil works great with Apple Note and this guide will teach you all you need to know.
But how do you use Apple Pencil with Apple Notes? While the rest of this tutorial will cover all the details of using Apple Pencil with Apple Notes, to use Apple Pencil with Apple Notes, do the following:
- Open Apple Notes
- Click on the “pencil in a circle” button
- Choose your color and line thickness
- Write inside your note with your Apple Pencil
Before we get started with the tutorial, if you are looking to learn more about apps like Notion, Todoist, Evernote, Google Docs, or just how to be more productive (like Keep Productive’s awesome Notion course), you should really check out SkillShare. Skillshare is an online learning platform with courses on pretty much anything you want to learn. To learn more about Skillshare and its vast library of courses and get 30% off, click the link below:
SkillShare – Online Learning Platform
If you are looking to keep your mac running at it’s best, check out CleanMyMac X by MacPaw. I have been using CleanMyMac for years it keeps my Mac running optimally by:

- Removing unnecessary files and junk from my mac
- Running optimizations to improve performance
- Easy to use app uninstaller to remove apps cleanly
- Malware removal
For more information on CleanMyMac X, click the link below:
CleanMyMac X – The Ultimate Cleaner for Your Mac
If you are trying to decide whether to take notes on your iPad or on paper, you should read my article on the advantages and disadvantages of each at the link below:
Taking Notes on an iPad vs Paper article
If you are looking to pick up an iPad but don’t want to spend a ton of money or looking to sell your current device for a fair price, you should check out Gazelle. Gazelle is a great place to buy certified (each device goes through a 30-point inspection process), pre-owned devices like iPads and iPhones as well as to easily get cash for your current devices, even if they are damaged.
For more information on how to buy or sell a device on Gazelle, click the link below:
Gazelle – A Smart Way to Buy and Sell Devices
Open Note You Want to Write In
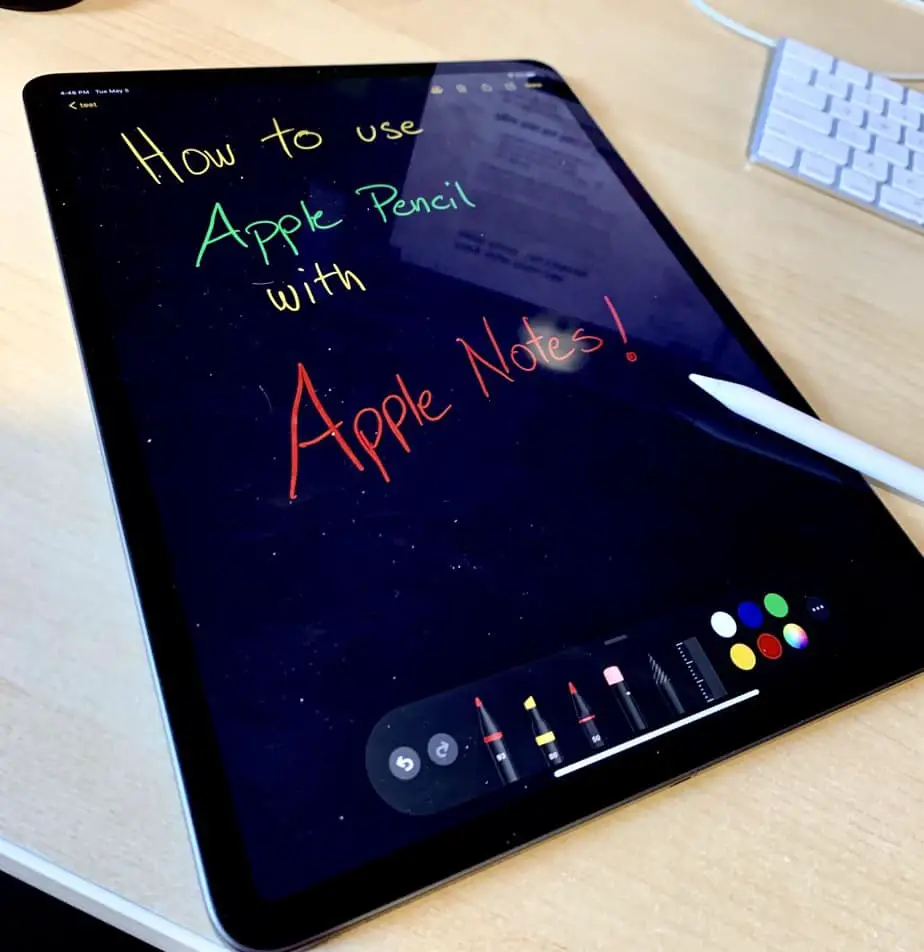
Open up Apple Notes. Navigate to the note that you want to write in with your Apple Pencil and open it.
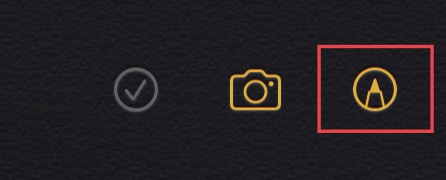
Click on the pencil icon in a circle in the lower right-hand corner of the screen as shown in the screenshot above. This will enable stylus mode in Apple Notes.
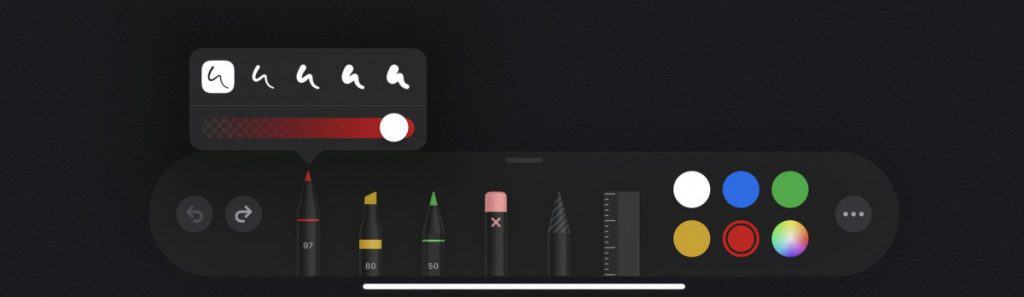
The Drawing/Writing Palette in Apple Notes

Once you press the pencil in a circle button, the drawing/writing palette will appear at the bottom of the Apple Notes screen as shown above. The palette contains the following sections:
- Undo/Redo (left and right curled arrows)
- Pen
- Highlighter
- Pencil
- Eraser
- Selector tool
- Ruler
- Color palette
- Other options (the ellipsis … )
The Undo button (arrow button curling to the left) undoes the last thing you did. You can press it multiple times to undo multiple things you have done in reverse order.
The Redo button (arrow button curling to the right) will redo what you did and is used if you press Undo and decide you actually wanted what you were trying to undo. Like the Undo button, you can press the Redo button multiple times to redo things you had previously undone.
An example would be if you wrote a bunch of words using your Apple Pencil and undid it by pressing the Undo button a bunch of times. You then decide you actually wanted the words you undid so you press the Redo button multiple times until all the words are back on the screen.
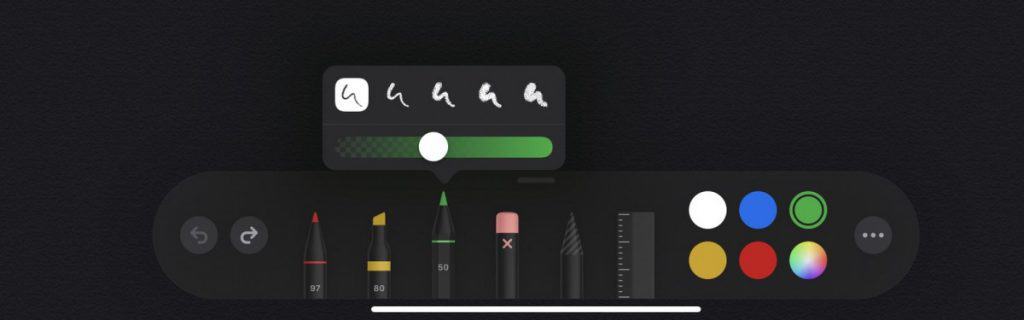
The Pen Tool
The pen tool allows you to write or draw in Apple Notes like a pen. If you press and hold on a second and release the pen tool, the pressure and opacity pop-up will appear.
Apple Notes provides five preset line thicknesses in the pen too and an opacity slider as shown in the image above. The opacity slider is cool because it allows you to manually set the opacity of the line you are writing or drawing.
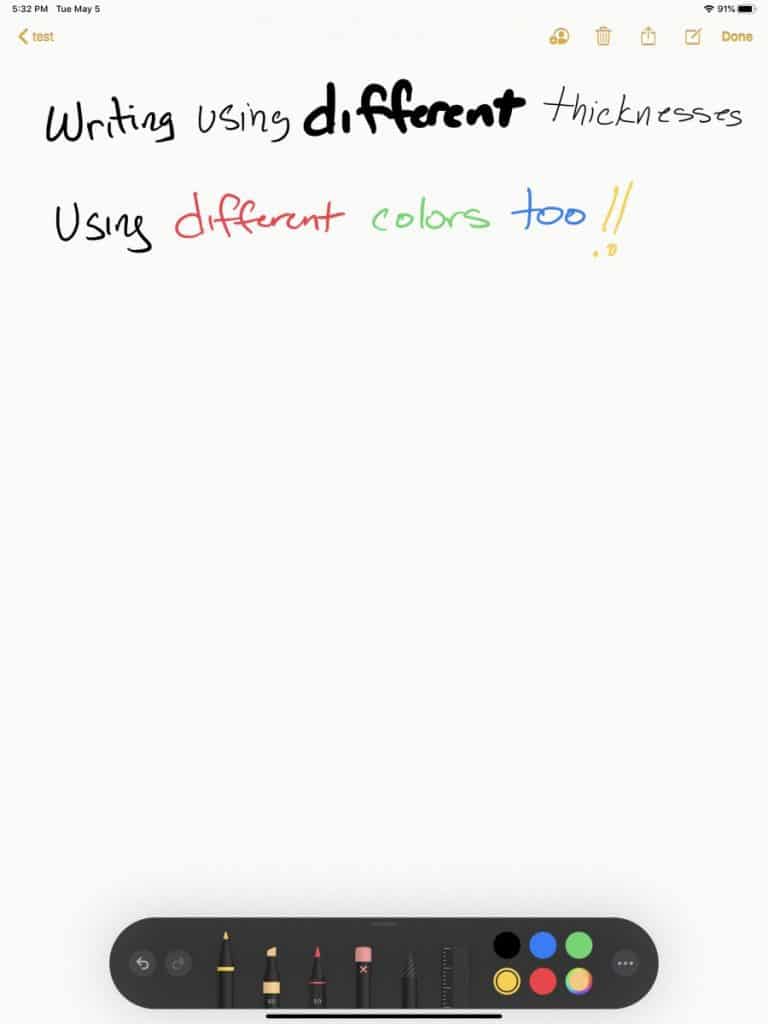
You can use both different thicknesses and colors using the pen tool.
The Highlighter Tool
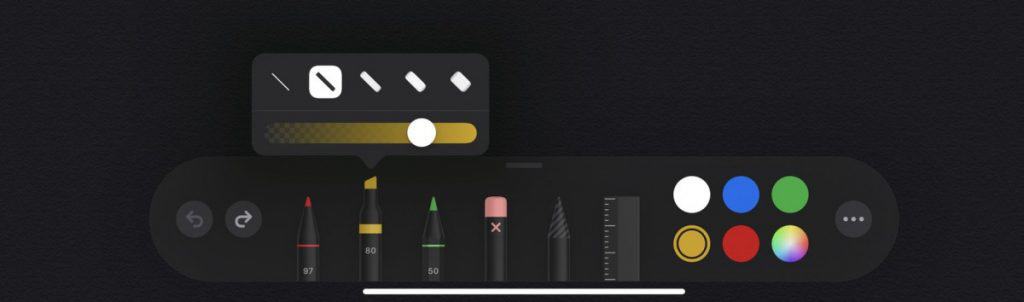
The highlighter tool works exactly as it sounds. It allows you to highlight whatever you go over with it. Like the Pen tool, you have five preset thicknesses to choose from.
You also have the opacity tool to set the level of opacity for your highlights.
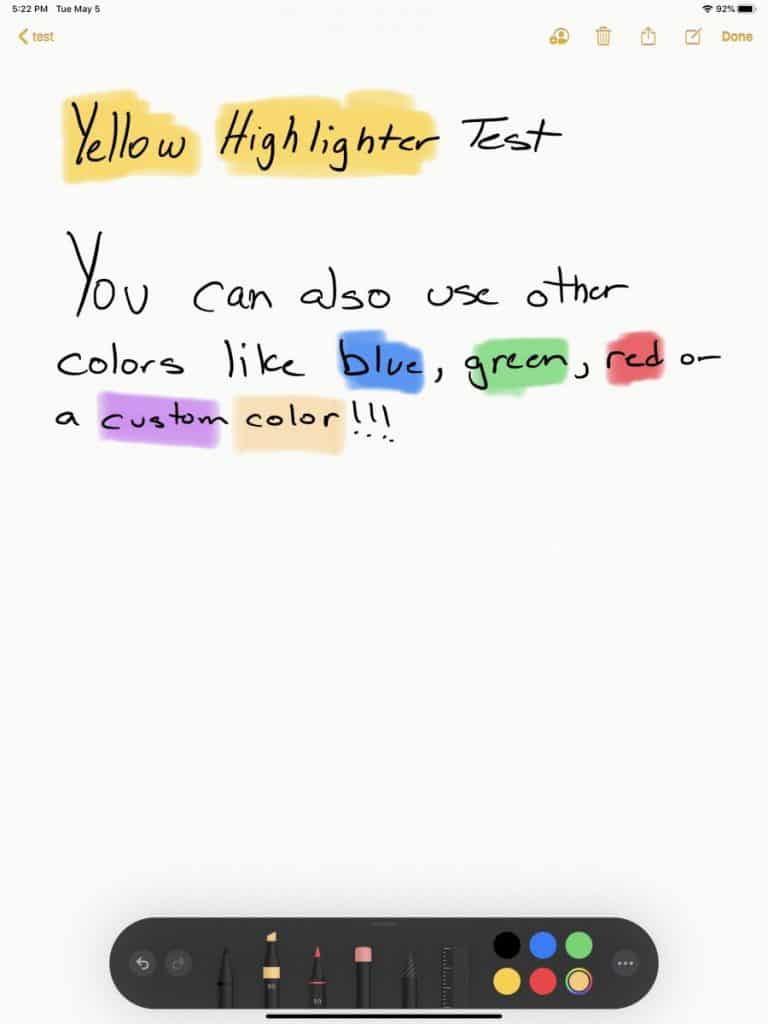
As you can see from the image above, you can highlight in any color.
The Pencil Tool
The pencil tool is great for drawing. It really is amazing how well Apple implemented this tool to replicate writing with a pencil.

The pressure sensitivity of the Apple Pencil combined with the flexibility of the pencil tool makes drawing with the Apple Pencil really fun!
Eraser Tool
The Eraser tool does what you would think: erases the content you create. The eraser tool has two options:
- Object Eraser
- Pixel Eraser
Object Eraser
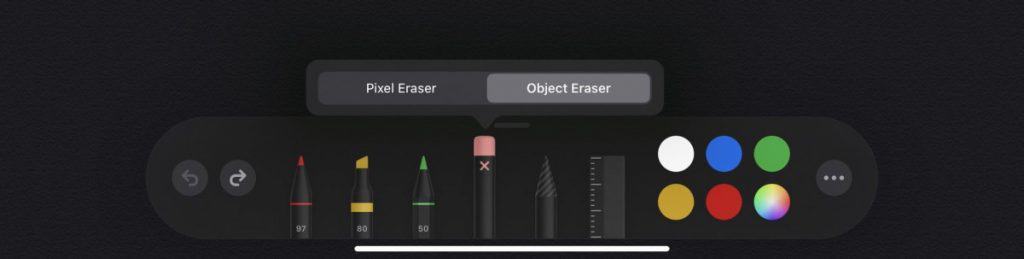
The object eraser works a little different than a normal eraser. When you write or draw something, that writing or drawing becomes a series of objects. For example, if you print “Merry Christmas”, each letter will likely be an object. If you press on an object with your Apple Pencil while in object eraser mode, that object will be deleted.
Pixel Eraser
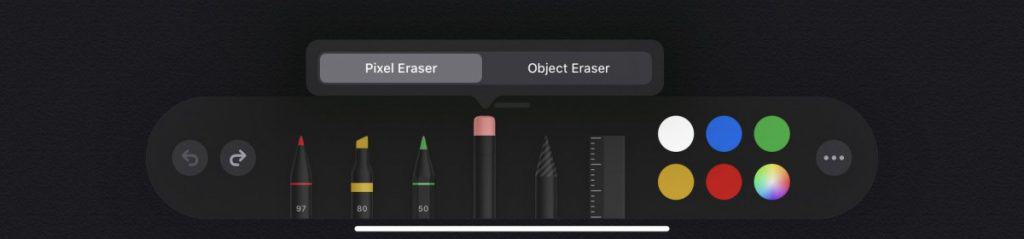
Pixel Eraser mode works like a normal eraser. You select it and run your Apple Pencil over the area you want to erase.
Selector Tool

One of the best features you get writing in Apple Notes with your Apple Pencil that you don’t get writing on paper is the ability to move stuff around. That is the job of the selector tool.
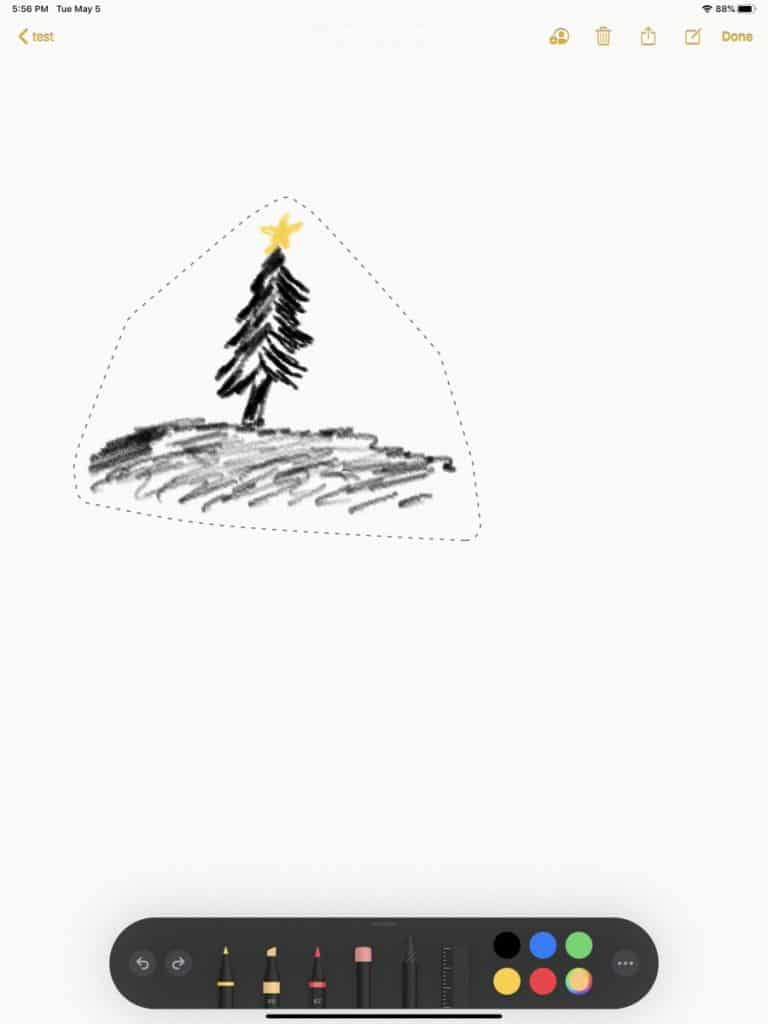
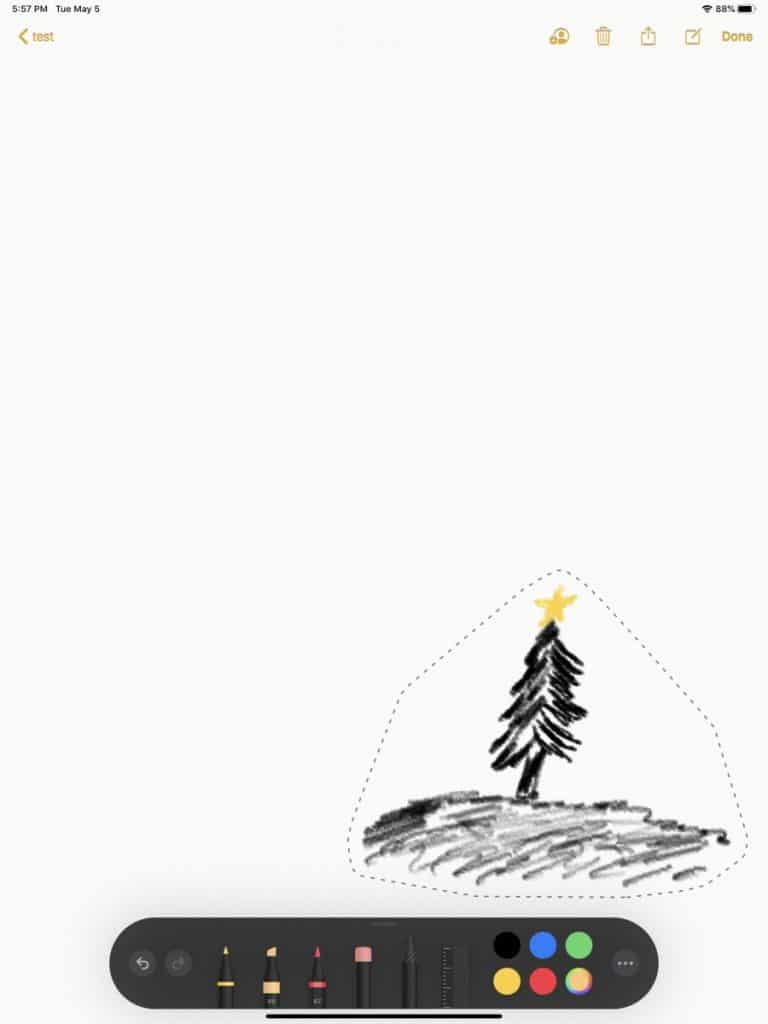
The selector tool allows you to outline the content you want to move to select it. You then drag the content to the area of the page you want it to appear (as you can see in the screenshots above).
Ruler
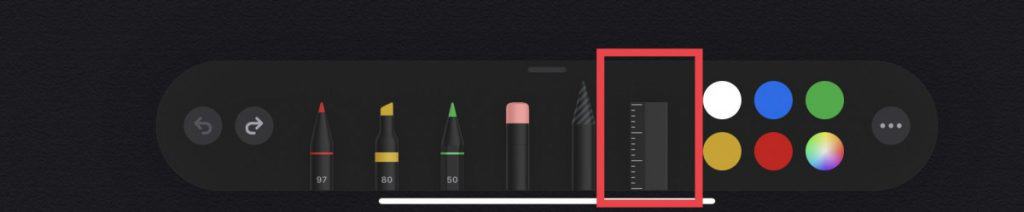
The ruler tool enables you to draw straight lines and measure how long you want them to be.
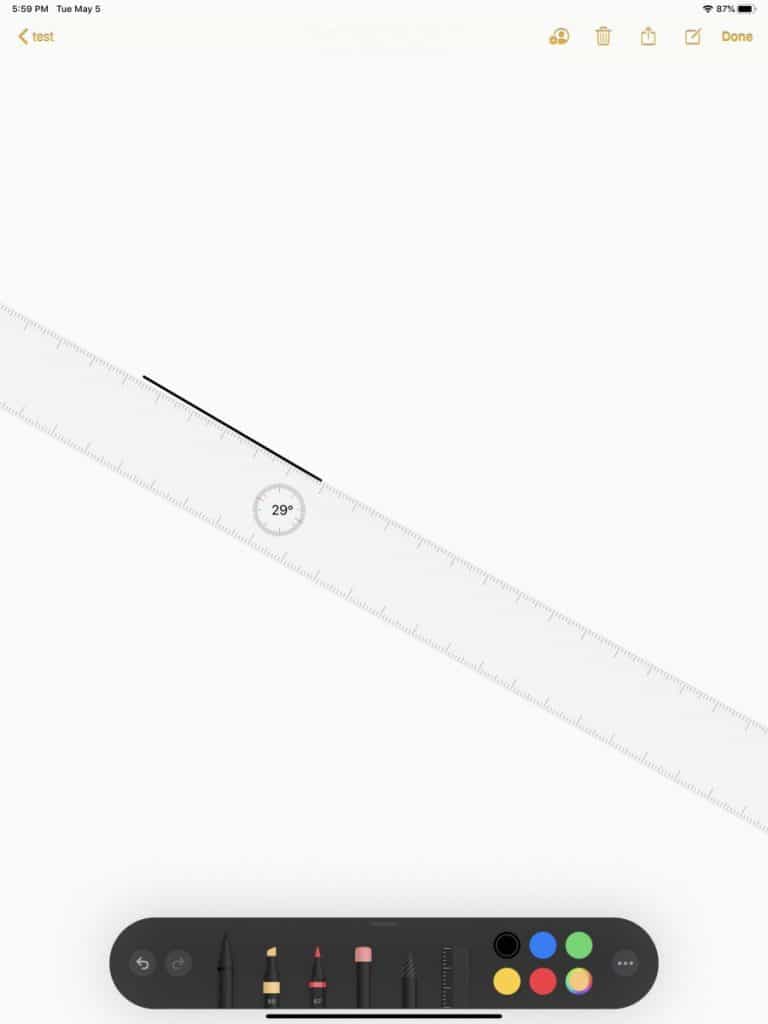
To use the ruler tool, simply select it. You use two fingers to position the angle and location of the ruler on the page. Then simply draw the line where you want it.
Color Palette

The color palette provides five preset colors plus a custom color.
| Mode | Colors on Color Palette |
|---|---|
| Dark | white, blue, green, yellow, red, custom |
| Light | black, blue, green, yellow, red, custom |
Custom Color Selector
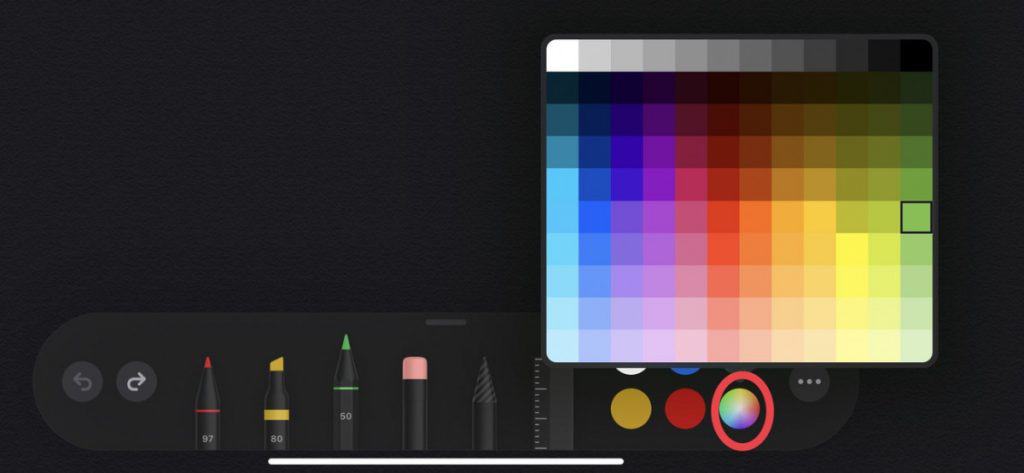
When you press the custom color button, a color menu will appear. simply click on the color you want and that color will occupy that spot and will be available for use.
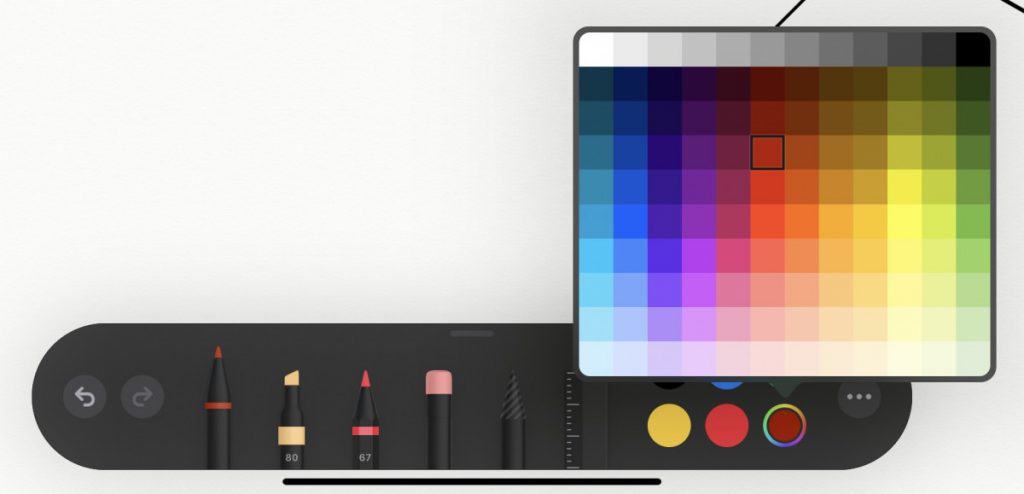
The change the color to another color, simply click on the custom color button and select a different color from the color menu.
Summary
Using the Apple Pencil in Apple Notes is surprisingly fun. Whether it is writing a note, annotating it or simply drawing, the experience of using the Apple Pencil in Apple Notes is refreshing and easy to pick up.
While there are better note-taking options for Apple Pencil like Notability and GoodNotes and better drawing applications for Apple Pencil like ProCreate, Apple Notes works well with the Apple Pencil.
I hope this tutorial was helpful to you. Good luck!
Want More Tips and Tricks? Subscribe to our Newsletter!
If you haven’t already subscribed, please subscribe to The Productive Engineer newsletter. It is filled with tips and tricks on how to get the most out of the productivity apps you use every day. We hate spam as much as you do and promise only to send you stuff we think will help you get things done.
Check Out Our YouTube Channel!
We have a YouTube channel now and we are working hard to fill it with tips, tricks, how-tos, and tutorials. Click the link below to check it out!
Check out our Resources Page
Check out our resources page for the products and services we use every day to get things done or make our lives a little easier at the link below:
Other Articles You Might Be Interested In
How to Use Things for Mac
link to How to Use Things for Mac
What iOS To-Do App Should I Use?
link to What iOS To-Do App Should I Use
How to Create a Mind Map on a Mac
link to How to Create a Mind Map on a Mac
How to Use the Evernote Web Clipper
link to How to Use the Evernote Web Clipper