How to Create a Mind Map on a Mac
Mind maps are a great way to get your ideas out in a visual way. Today I will walk you through how to make a mind map on a Mac using MindNode.
Before we get started with the tutorial, if you are looking to learn more about apps like Notion, Todoist, Evernote, Google Docs, or just how to be more productive (like Keep Productive’s awesome Notion course), you should really check out SkillShare. Skillshare is an online learning platform with courses on pretty much anything you want to learn. To learn more about Skillshare and its vast library of courses and get 30% off, click the link below:
SkillShare – Online Learning Platform
If you are looking to keep your mac running at it’s best, check out CleanMyMac X by MacPaw. I have been using CleanMyMac for years it keeps my Mac running optimally by:

- Removing unnecessary files and junk from my mac
- Running optimizations to improve performance
- Easy to use app uninstaller to remove apps cleanly
- Malware removal
For more information on CleanMyMac X, click the link below:
CleanMyMac X – The Ultimate Cleaner for Your Mac
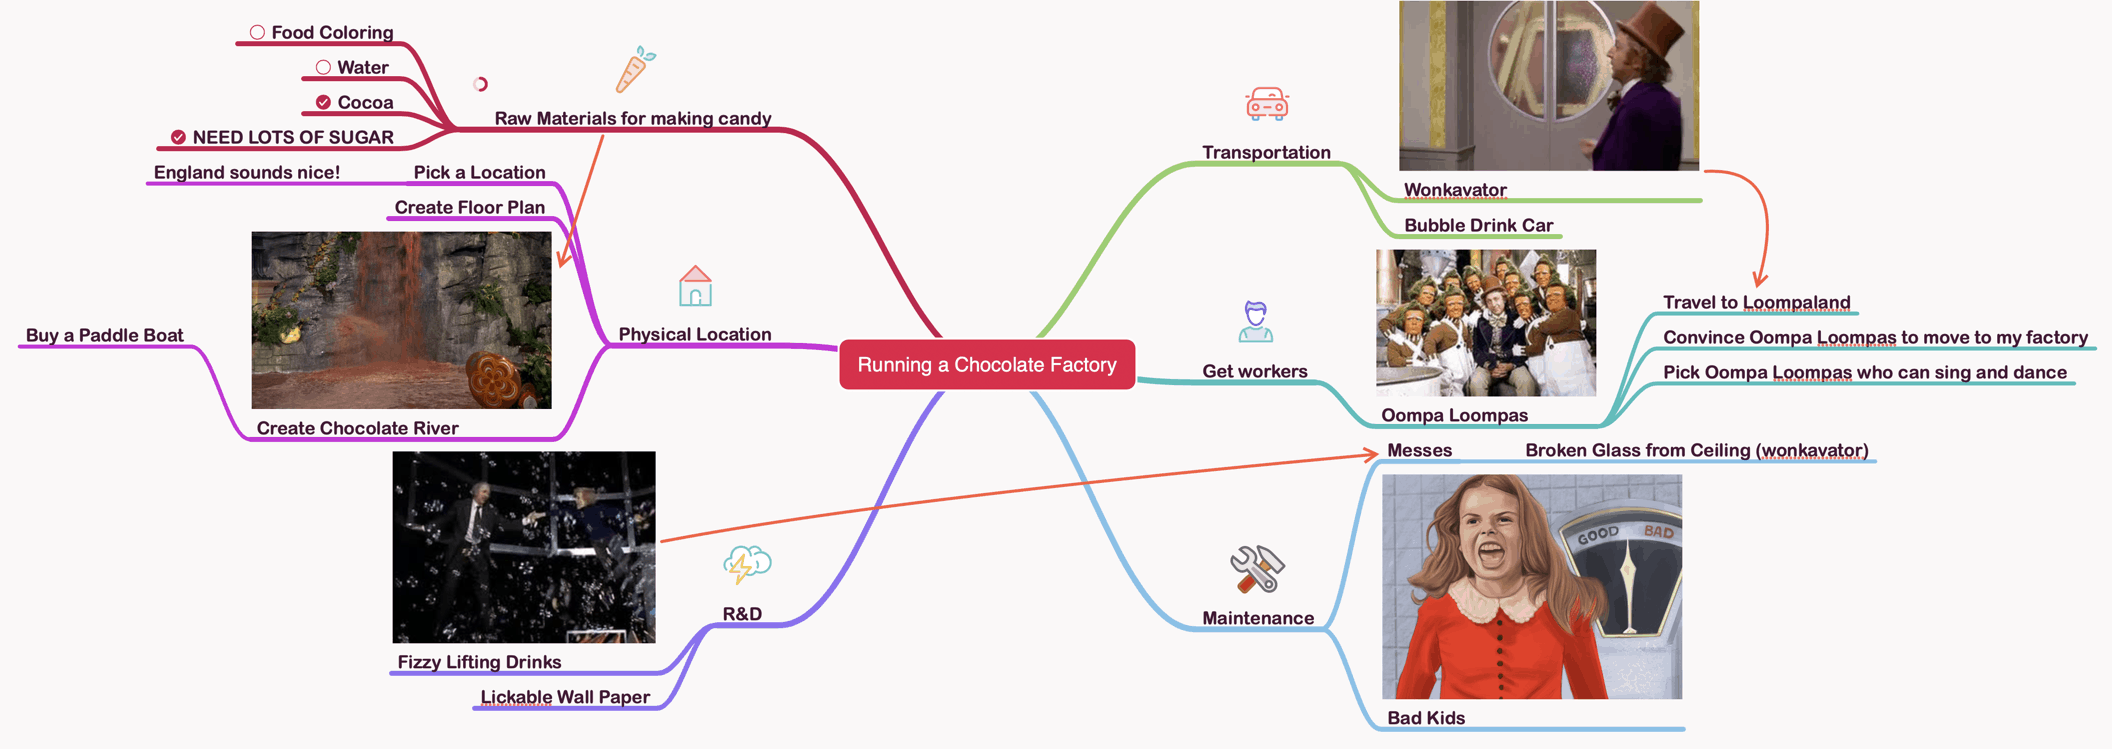
What is a Mind Map?
A mind map is a diagram that shows a hierarchical relationship between various components of the subject the mind map is covering. Mind maps are primarily composed of the following:
- Main Node
- Parent Nodes
- Child Nodes
- Connections
In this post, we will walk you through how to build a mind map using your Mac and an application called MindNode.
What is MindNode
MindNode is a mind mapping application made by IdeasOnCanvas. It is very good application for those starting to build mind maps as the user interface is very clean and easy to navigate. MindNode is available in the Mac App Store.
MindNode 6 link to Mac App Store
Getting Started with MindNode
Create a new MindNode Document
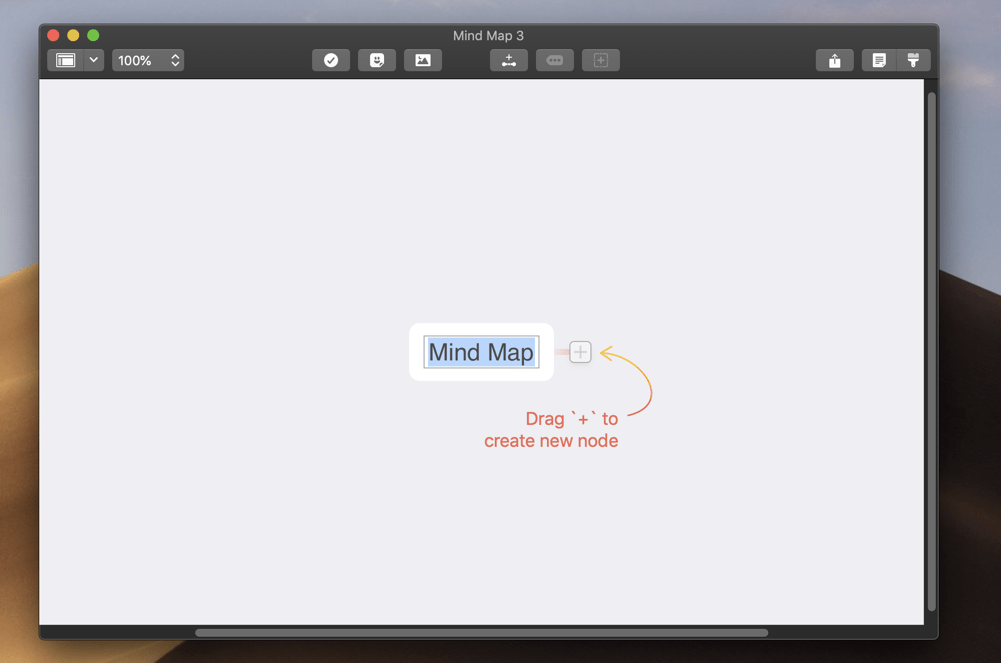
Open MindNode and press the keyboard command Command-N to create a new mind map document.
Changing the Name of the Parent Node in MindNode
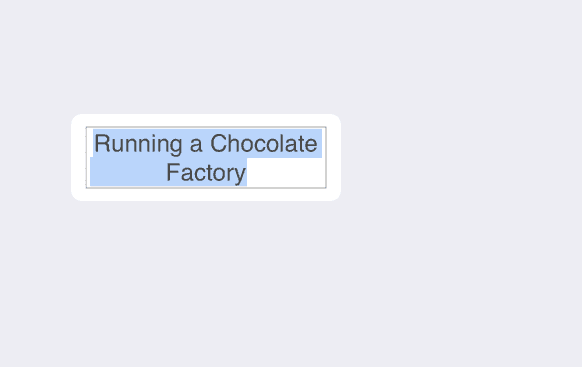
To change the name of the main node, double-click on the current name and type the new name and press “Enter”.
Adding Child Nodes to Nodes in MindNode
Adding child nodes to nodes is a key part of making a mind map. To add a child node:
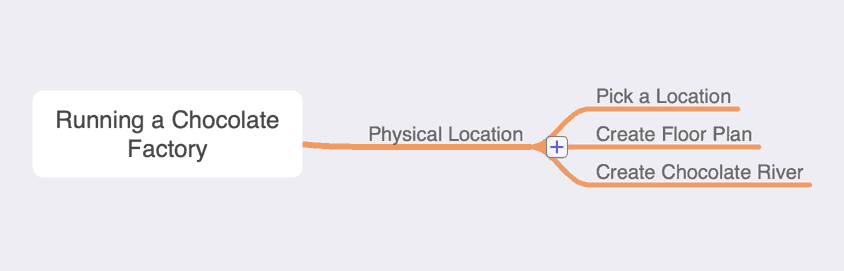
- Click on the parent (or main) node
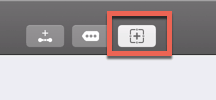
- Press on the “+” button to the right of the node name
- Double click on the newly-created node and give it a name
The original node is now a parent node to this new node. The new node you just created is now a child node to the original node in step 1.
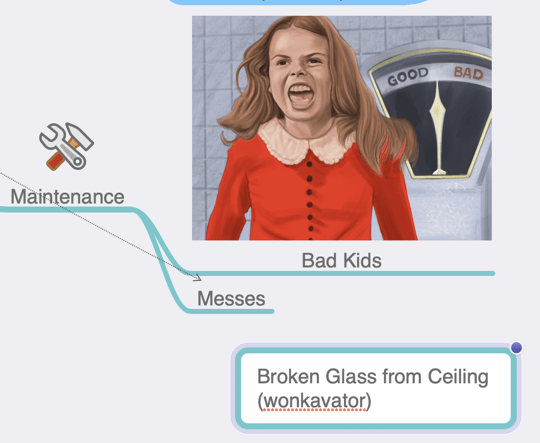
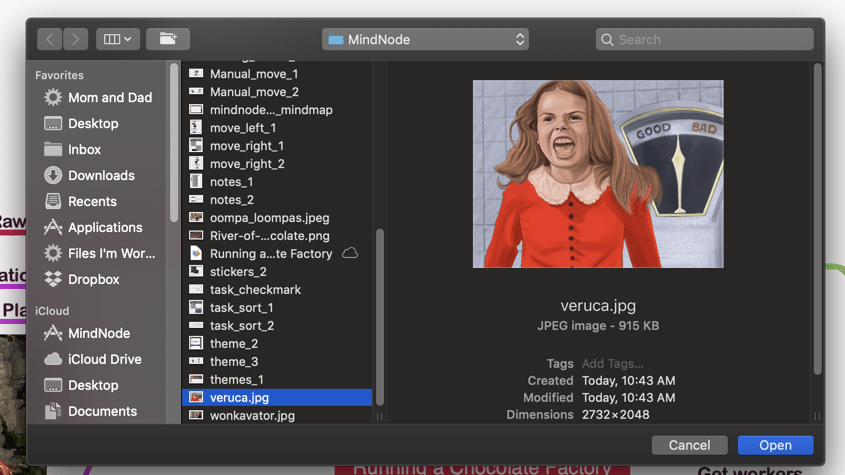
Adding External Images to MindNode
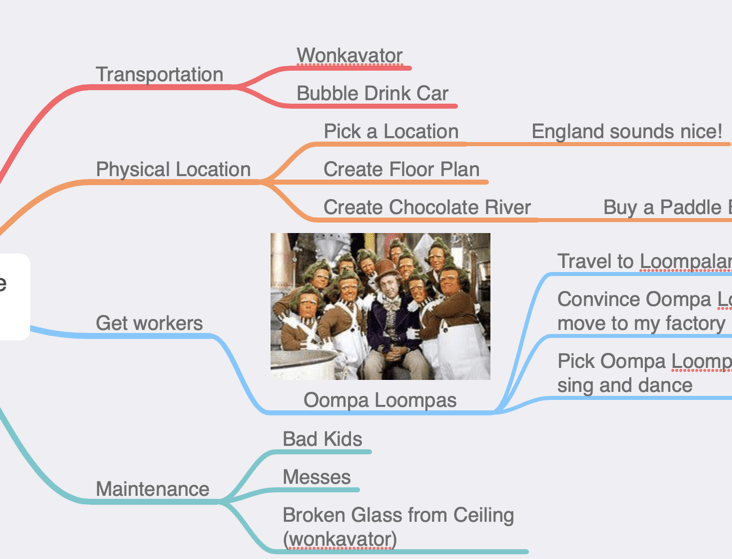
To add an image to your mind map in MindNode, simply drag your image onto the node where you want the image to be. The image should pop into place.

Alternately, you could use the “add image” button on the top bar of the MindNode window. Pressing the “add image” button will bring up a pop-up box representing the Photos app user interface.
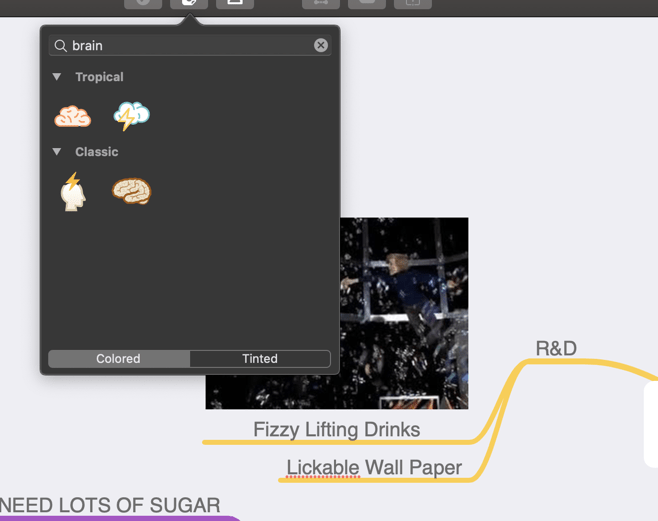
Adding Stickers to MindNode
MindNode supports the ability to add stickers to the nodes in MindNode. To add stickers to a node:
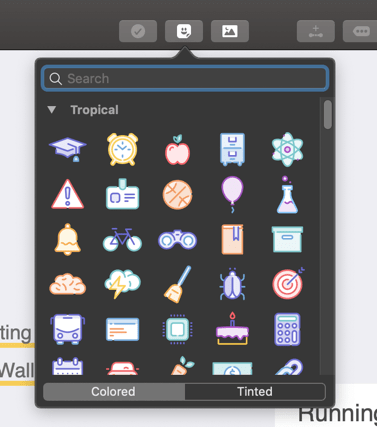
- Click on the stickers button
- Either scroll down to or type in the name of the sticker you want to use
- Drag the sticker from the pop-up window onto the node you want to add the sticker to
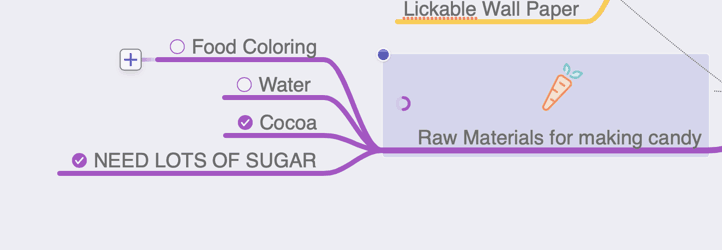
Adding Task circles to a Node
You can also add task circles to nodes in MindNode. Task circles are essentially checkboxes that allow child nodes of a node to have a checkbox next to them. To add task circles to a child nodes of a node:
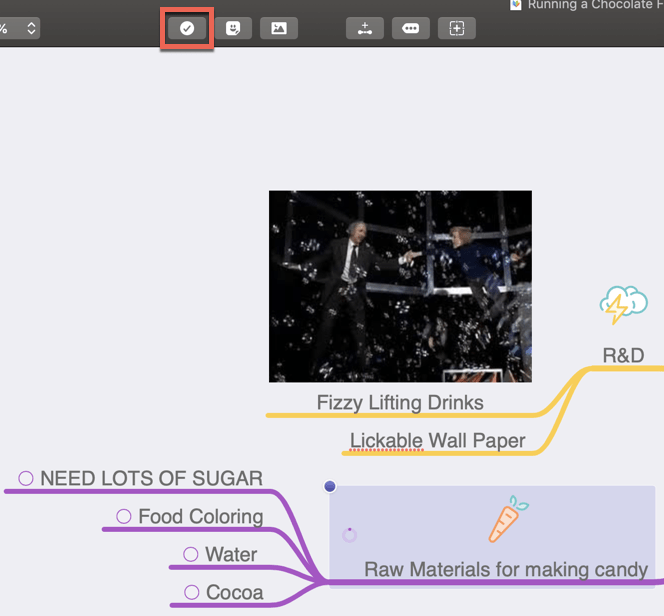
- Select the node you want to add task circles to the child nodes of
- Click on the “add/remove task” button
Task circles will now be added to child nodes. If you click on a task circle, it will display a checkmark inside it. To remove the task circles simply select the parent node and press the “add/remove task” button in the top bar of the MindNode window.
Creating a Connection between two Nodes in MindNode
Sometimes, nodes can have a relationship that you want to display in the mind map. This functionality is supported in MindNode and is very straight-forward to set up.
To setup a connection between two different nodes:
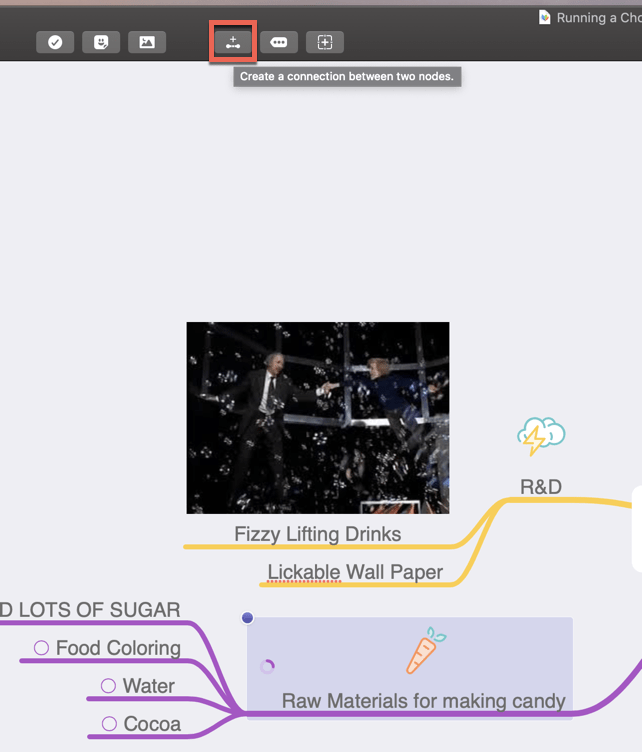
- Select the first Node
- Press the “Create a connection” button. You will now be in connection mode
- Drag the connection to the node you want to connect to
- Click on the node you want to connect to

Your nodes now have a connection in MindNode. The default connection is a straight line. However, you can bend the connection line.
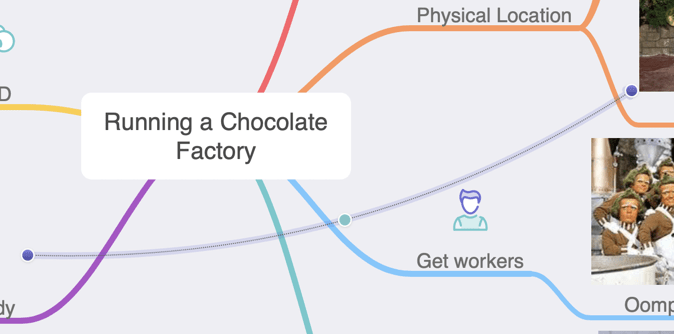
To bend the connection line:
- Click on the turquoise circle in the middle of your connection
- Drag the circle to create the curve and release when done
Do you have an M1 Mac Mini or Mac Studio and want to get the best accessories for it? Check out my Mac accessories guide here.
Folding Nodes in MindNode
Sometimes you don’t want to view all the nodes of a given parent node. MindNode supports the ability to fold a node so that you don’t see its child nodes. To fold a parent node:
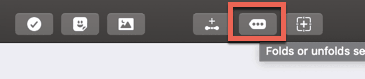
- Select the parent node
- Press the “fold/unfold” node button in the top icon bar of the MindNode window
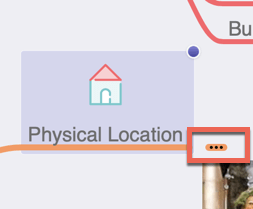
The child nodes will disappear from the screen and will be replaced by an ellipsis (…). To unfold a parent node simply perform the same steps as above.
Focus Mode in MindNode
Similar to folding nodes, sometimes you want to focus on a very specific piece of the mind map on your screen.
To enable focus mode:
- Select to node you want to focus on
- Press the “Focus” button in the icon bar at the top of the MindNode window

To leave focus mode simply redo the steps above.
Organizing Nodes in MindNode
Once you have added all of your nodes and connections to your mind map, it may not look very neat. Creating a mind map is an iterative process and it is very easy to look at your final creation and be a little sad about how it looks. Fortunately MindNode makes it extremely easy to rearrange nodes.
Move all nodes to the right
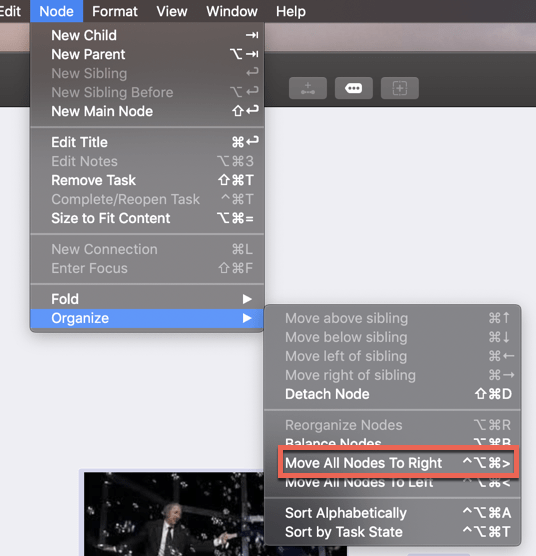
To move all of your nodes to the right side of the main parent node:
- Select all the Nodes (keyboard shortcut: Command-A)
- Go to Node -> Organize -> Move All Nodes to Right

All of your nodes should now be on the right side of the main parent node. To undo use the undo keyboard shortcut (Command-Z)
Move all nodes to the left
To move all of your nodes to the left side of the main parent node:
- Select all the Nodes (keyboard shortcut: Command-A)
- Go to Node -> Organize -> Move All Nodes to Left

All of your nodes should now be on the right side of the main parent node. To undo use the undo keyboard shortcut (Command-Z)
Balance Nodes in MindNode
Sometimes your mind map may seem unbalanced, with more nodes on one side than the other. Use the “Balance Nodes” function to fix this:
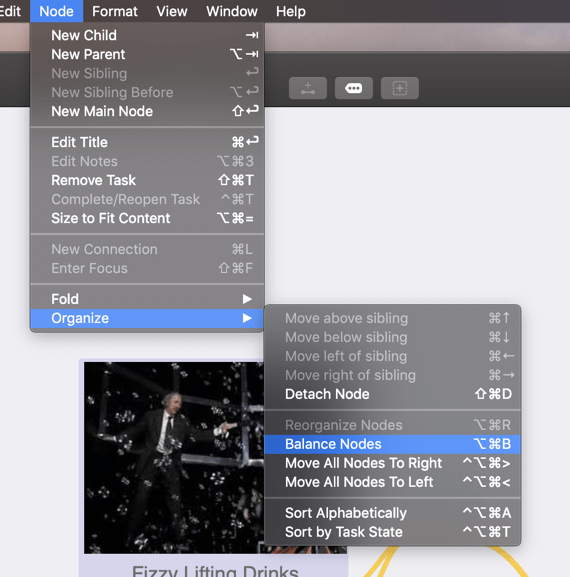
To balance the nodes on each side of the main node:
- Select all the nodes (Command-A)
- Go to Node -> Organize -> Balance nodes

The nodes should be evenly distributed on each side of the main node.
Detaching a Node from a Parent Node
MindNode supports the ability to detach a child node from its parent node.
To detach a node:
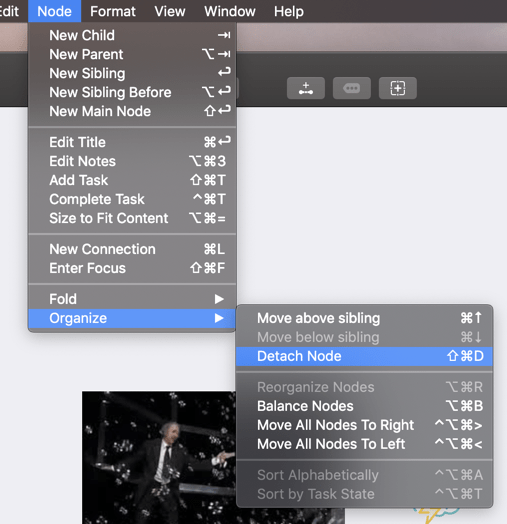
- Select the child node you want to detach
- Go to Node -> Organize -> Detach Node
The node will now be completely detached from any other node.
Attaching a Detached Node to a new Parent Node
To attach a detached node to a new parent node:
- Click and hold on the detached node
- Drag the node onto the new parent node and hold until the user interface changes
- Release the mouse button
Size to Fit Content
You can size total area of your mind map to fit the content of your mind map. To use the size to fit content functionality:
- Select all (keyboard shortcut: Command-A)
- Go to Node -> Size to Fit Content
You should notice your mind map content change a little. Personally I don’t use this function much but wanted to show it to you for sake of completeness.
Sort Nodes Alphabetically
You can sort your nodes alphabetically in MindNode. To sort alphabetically:
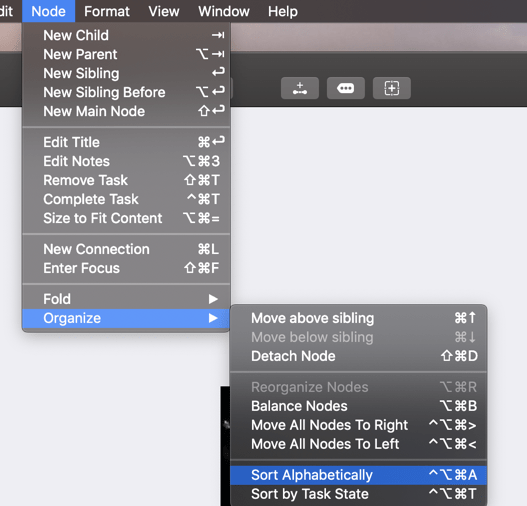
- Select to parent node of the nodes you want to alphabetize.
- Go to Node -> Organize -> Sort Alphabetically

Your child nodes should not be sorted alphabetically
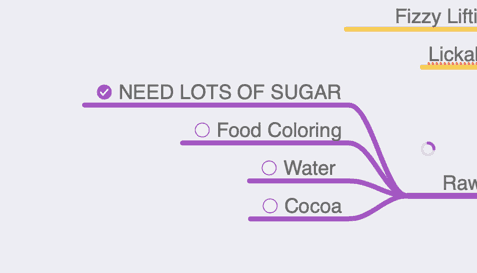
Sort Nodes by Task State
If you are using the task functionality, you may want to sort those tasks by their state (i.e. on/off).
To sort your child tasks by state:
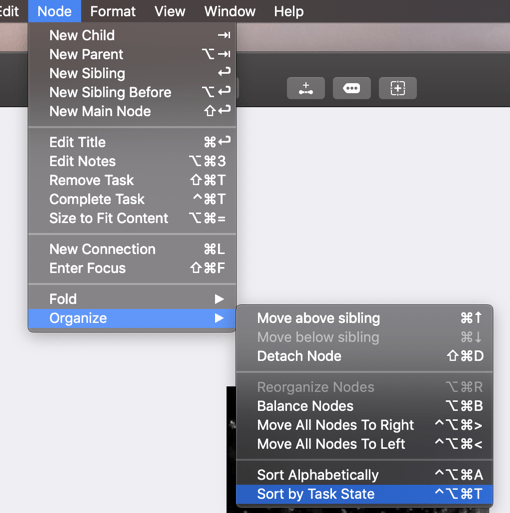
- Select the parent node of the child tasks
- Go to Node -> Organize -> Sort by Task State
The tasks will now be sorted by task state with the unchecked tasks appear first.
Manually Moving Nodes in MindNode
While MindNode offers a bunch of ways to move your nodes around, you will likely need to move some around manually as well.
To move a node:
- Select the node you want to move
- Click and drag the node to where you want it and release the mouse button

Repeat as necessary to get the mind map to look the way you want.
Protect your Mac from malware, phishing and viruses with Norton 360. Norton 360 is the end-to-end software solution to protect your Mac from threats. For more information, click the link below:
Norton – Multiple layers of protection for your Cyber Safety
Themes in MindNode
Each person wants their mind map to look a different way: different colors, tones, etc. MindNode has a bunch of pre-built themes you can apply to your mind map.
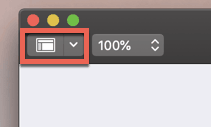
To apply a new theme to your mind map:
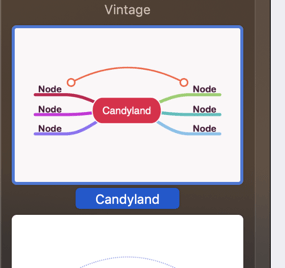
- Press the “Themes” button in the upper-left corner of the MindNode window
- Scroll through to the theme you want to apply and double-click on it

The new theme should now be applied.
Adding Notes to a Node in MindNode
You can add notes to your MindNode nodes to provide further context. To add a note to a node:
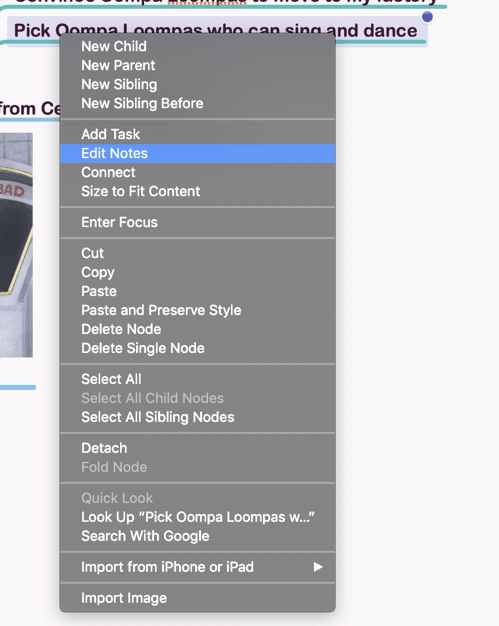
Select the nodes, right click and select edit notes
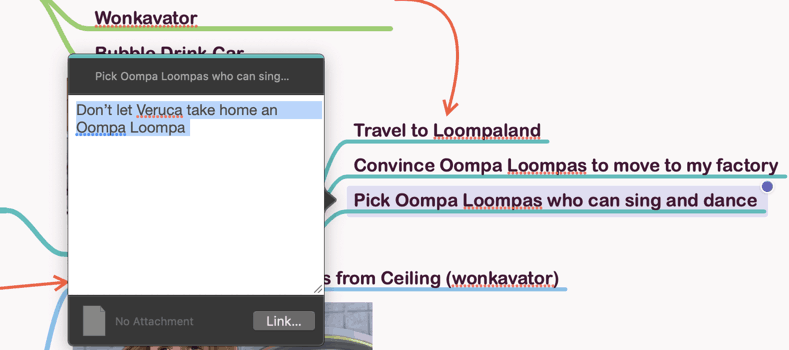
Type in your notes.
OPTIONAL: Add a file attachment to the note by pressing the “Link…” button and selecting the file
How to View an Outline of your Mind Map in MindNode
MindNode supports the ability to view your mind map as an outline. To view your mind map as an outline:

- Go to View -> Outline (or use keyboard shortcut: Command-5)

An outline of your mind map will now be displayed on the right hand side of the MindNode window. To toggle off the outline simply press Command-5 again.
Summary

Mind mapping can really help you get your ideas out and see how all the elements of your idea relate to each other. By being such a visual medium, mind maps allow you to work through these relationships and potentially uncover new insights. MindNode for Mac is a great tool for getting started making mind maps on the Mac.
Please Subscribe to our Newsletter
If you like the content on this site, please subscribe to our newsletter. We promise not to be spammy!
Subscribe Form
Check out our Resources page
Check out our resources page for the products and services we use everyday to get things done or make our lives a little easier at the link below:
Helpful Links
Posts You May Be Interested In
How to Create a Project Tracker in Notion