How to use Loom Video Recording
This blog post will walk you through how to use the Loom Video Recording service.
Before we get started with the tutorial, if you are looking to learn more about apps like Notion, Todoist, Evernote, Google Docs, or just how to be more productive (like Keep Productive’s awesome Notion course), you should really check out SkillShare. Skillshare is an online learning platform with courses on pretty much anything you want to learn. To learn more about Skillshare and its vast library of courses and get 30% off, click the link below:
SkillShare – Online Learning Platform
What is Loom?
Loom is a screen recording service. It allows you to record your computer screen and upload it to your Loom account. Using Loom is a simple as signing up for a Loom account and downloading the desktop client. Alternatively, you can install the Google Chrome Extension as it also allows you to record your screen as well.
How to record video in Loom
Recording video in Loom is remarkably easy. Loom can record video either via a desktop client or via Google Chrome extension.
How to record video using Loom Desktop Client
To record video using the Loom desktop client:
- Open the Loom desktop Client
- Select recording type
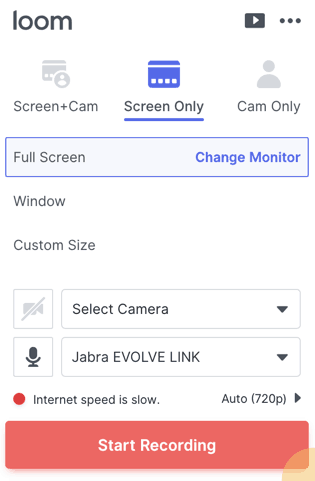
Select what you want to record
My main user interface of the client is very clean and easy to understand. At the top there are three primary recording options:
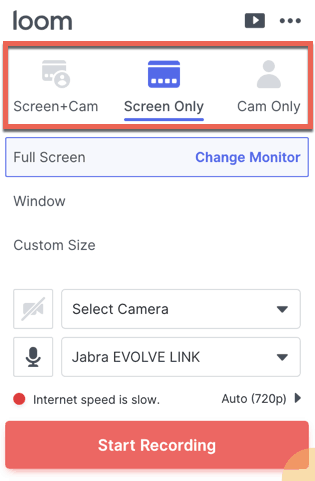
- Screen + Cam
- Screen only
- Cam only
“Screen + Cam” allows you to record both your screen and your pc/mac camera at the same time. “Screen only” records only your screen while “Cam Only” records just your pc/mac camera.
Select the area you want to record on your Screen
If you select to record your screen, Loom provides three options for how you record your screen:
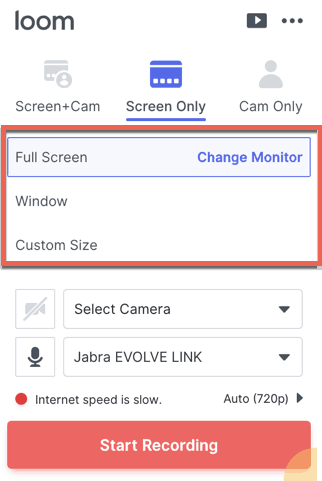
- Full Screen – records your entire Desktop
- Window – records a specific application window
- Custom Size – records a portion of the Desktop based on selection (requires Pro subscription)
If you chose “Cam Only”, you will not see this menu option.
Select your camera and microphone sources
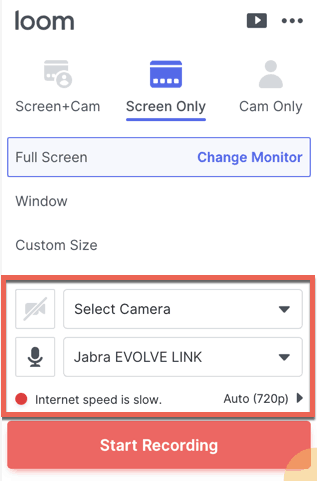
The last configurable option before recording is selecting the camera and microphone you want to use. If you are not recording your camera, it will display “Select Camera” for the camera.
It is a good idea to have a good microphone or headset if you are narrating your Loom videos. If you are looking for a good recommendation, head over to our Gadget Accessories page to check out our top pick for headsets, the Jabra Evolve UC stereo headset:
link to Gadget Accessories page
Press “Start Recording” to begin your recording session
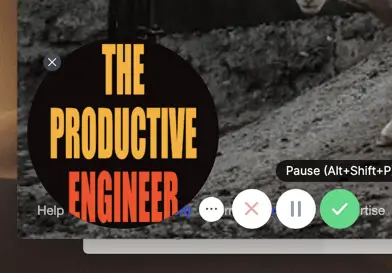
Finally, you are ready to record! Press the red “Begin Recording” button. You will get a short countdown and then your recording session will begin. When the recording begins, a red “recording” button will appear on the left hand side of the desktop. If you hover on it, it will expand down vertically to reveal three more buttons:

- Pause button
- Delete button
- Drawing tool button – requires Pro Subscription
Recording button
The recording button has two functions. It indicates that you are recording when it is red and also, when pressed while recording, ends the recording.
Pause button
The pause button pauses the video. You can also pause the video by pressing the following keyboard shortcuts:
- option/alt, shift, P
Delete button
The delete button, indicated as a garbage can, stops the recording and deletes the video.

A confirmation dialog will display asking whether you want to delete the recording.
The last tool is the drawing tool button. The pen tool allows you to drawing on your video. It is meant to be used as a focusing tool. To use the drawing tool:

- Click on the drawing tool
- Select one of the color presets available to use
- Use your cursor to focus on the item you want the view to focus on
That is all there is to it!
How to record video in a browser
As I referenced earlier in the post, Loom offers a Google Chrome extension. Enclosed below is the link:
Loom only supports Google Chrome for this functionality.
Once you have installed the Loom Chrome extension, close and re-open Google Chrome. In my experience with the extension, it wouldn’t work after install unless I exited and re-opened Google Chrome.
To record a Loom video using the Google Chrome extension:
- Press the Loom icon in your Chrome browser
Press the Loom icon in Chrome. This will bring up the Loom extension user interface.

- Select recording type
Select one of the following options for recording type:
- Screen + Cam
- Screen only
- Cam only
- Select Full Desktop or Current Tab
The Chrome extension is a little more limited than the full desktop client in terms of what you can record. While the desktop client can record the whole desktop, an application window or a selected area, the Chrome extension can only record:
- Full desktop
- Current Tab
Full Desktop records the whole desktop. Current Tab only records the currently selected Google Chrome tab.
- Configure settings
- Start recording
Once you start the recording, you have the following controls available to you via the Loom control area in the lower-left corner of the Chrome tab (from right to left):
- Start Recording (will be a green checkmark when you are recording)
- Pause recording
- Delete recording
As we saw earlier the extension, not being a full desktop application, is missing some of the features of the desktop client.
- Press the green checkmark button to end recording
Once you press the green checkmark button, your video will be uploaded to Loom and Chome will open to the video in your Loom my video page.
What is the maximum recording length can you record on Loom?
Per Loom’s support site, there is no recording duration limit for Loom. Loom will prompt you 2 hours into your video just to make sure you didn’t forget to turn off recording. While this check is a very reasonable one to make, especially given Loom is storing your video, it can mess with certain immersive recordings like if you are recording a long Minecraft session.
Working with your videos inside the Loom website
Editing your Loom videos
The editing options in the Loom website are somewhat limited. There are four options:

- Settings
- Trim
- Call-to-action – requires Pro subscription
- Custom Thumbnail – requires Pro subscription
Settings
Inside the settings are the following options that can be toggled on or off:
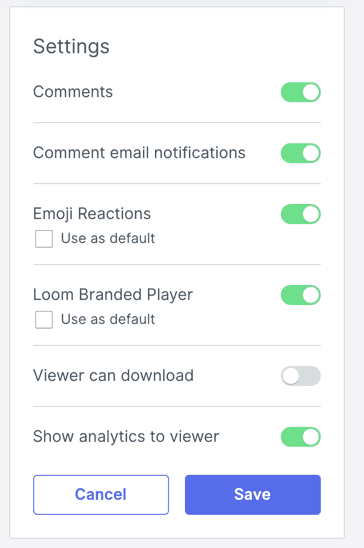
- Comments
- Comment email notifications
- Emoji Reactions
- Loom Branded Player
- Viewer can download
- Show analytics to viewer
Trim
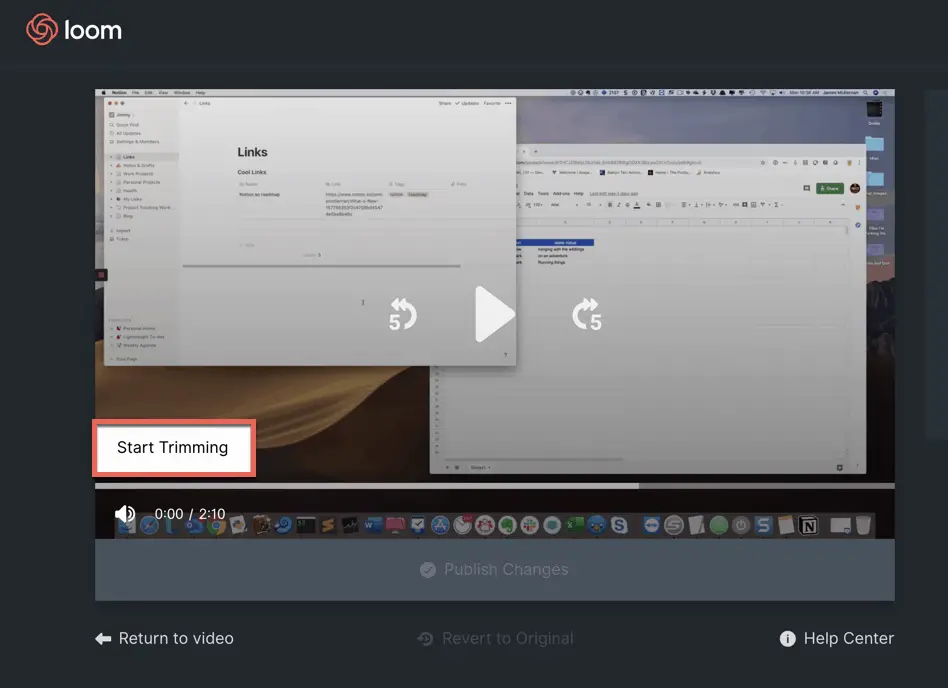
The Trim option launches a trimming view of the video with a button (Start Trimming) that launches the trimming functionality.
Call-to-action

The call-to-action option allows you to add and position a button in the video that will launch a URL. You can change the color of the button background and text as well as select the shape of the button from a drop-down.
Custom Thumbnail
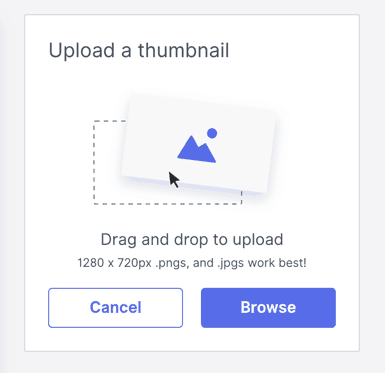
Loom supports the ability to add a custom thumbnail to your video. Loom recommends that the thumbnail be a 1280 x 720px image.
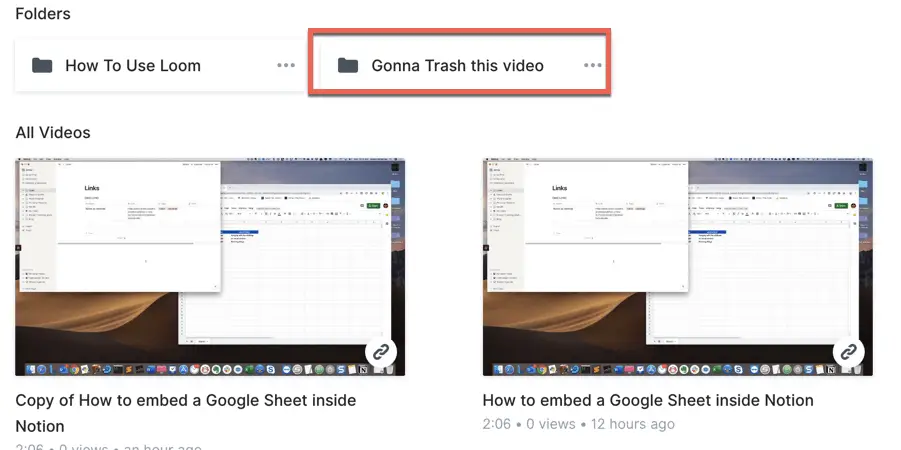
Organizing your Loom Videos
Loom supports creating folders to keep all of your videos organized. To create a new folder:

On the My Videos screen, click the “New Folder” button
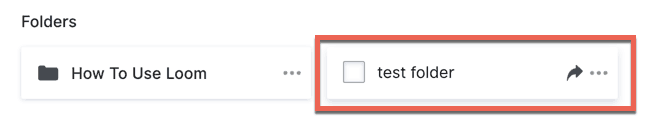
Name your new folder
Click and hold the video you want to move and drag it onto your new folder.
Duplicating a Loom Video
Sometimes you want to be able to duplicate a video, trim or edit it, and send it out to a particular audience. Loom supports the ability to duplicate your videos.
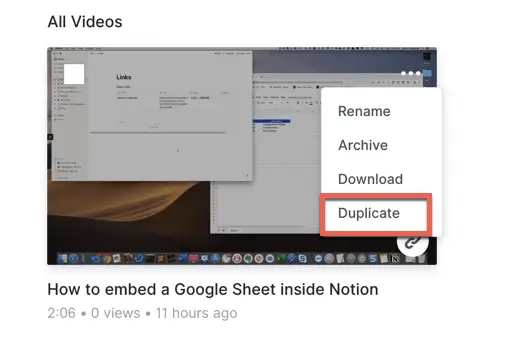
To duplicate a video:
- From the my-videos screen, click on the video you want to duplicate and press the ellipsis in the upper-right hand corner of the video
- Select duplicate from the options provided
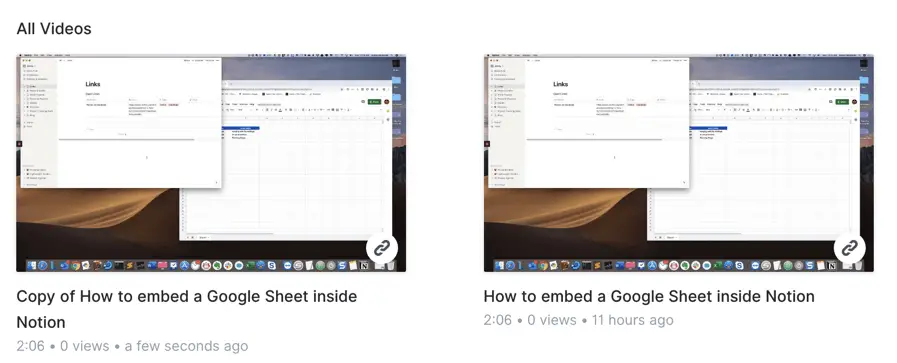
A copy of your video will show up in the my videos section.
Sharing your Loom videos
Loom videos can be shared with others. There are three ways a video can be shared from Loom:

- Link Sharing
- Public
- Custom Access
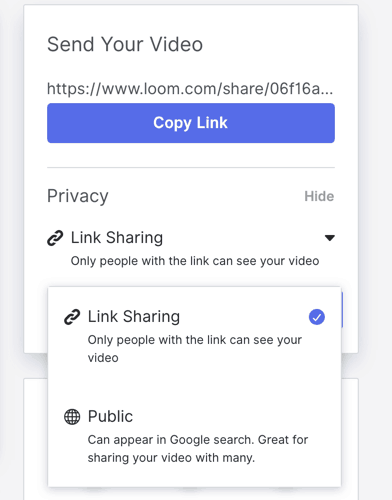
Link sharing, as the name implies, allows anyone who has the link to view the video. Public means that anyone can view the video while custom access enables the Loom account holder to manually enable only users they enable via adding their email address. No one else will be able to access the video.
How to download your Loom videos

While Loom offers the ability to share videos, most users will want to download their videos to further edit them and ultimately publish them on other platforms like YouTube. To download a video, just click the “download” icon underneath the video. Your video will download in MP4 format.
How to Delete Loom Videos Individually

Deleting a video from Loom is as just as easy as downloading. Simply click the delete (trash can) icon to delete the video.
How to Delete a Group of Loom
Deleting multiple videos from Loom is slightly cumbersome but definitely doable. You need to perform the following steps:
- Create a new folder that will store all the videos you want to delete
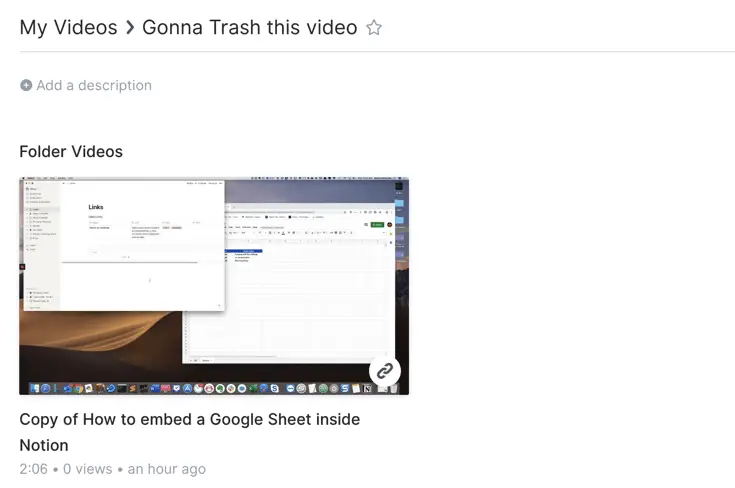
- Return to the my videos page and click on “Archived” in the lower-left corner of the screen.
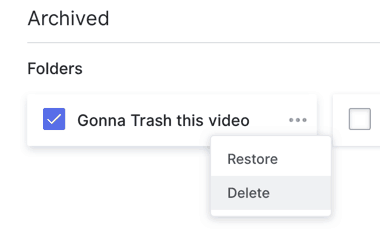
- Select folder you want to delete, click the ellipsis and select “Delete”
Loom pricing plans
Loom comes with a 15 day trial of all the functionality to start. If you want to continue using Loom, there are two tiers:
- Basic
- Pro
The Basic tier is the free tier. It supports up to 100 recent videos to be stored in the service however video quality is not HD.
The Pro tier supports:
- HD video up to 4K
- Unlimited video storage
- Additional recording tools including emphasis, the drawing tool and custom recording dimensions.
- Premium Editing Suite including custom thumbnails and video call to actions
The Pro subscription is $10/month or $96/monthly. If you have a team of 10 or more, you can contact Loom and they will work with you on a plan.
Please Subscribe to our Newsletter
If you like the content on this site, please subscribe to our newsletter. We promise not to be spammy!
Subscribe Form
Check out our Resources page
Check out our resources page for the products and services we use everyday to get things done or make our lives a little easier at the link below: