A Guide to How to Bullet Journal using Evernote
Bullet journaling has become very popular in the last couple of years. Bullet journals provide several key benefits:
- Common Taxonomy
- Flexibility
- Makes it easy to get your ideas down on paper
- Strong Organizational System
Typically bullet journals are maintained in a physical notebook. However, physical notebooks come with an inherent limitation: they are analog. The implication of this is if you lose your journal, all the ideas and information is gone forever. It can be beneficial to use a note-taking application such as Evernote to bullet journal instead. There are several advantages to this approach, such as automatic backup and improved search and information retrieval. This blog post will outline how to use Evernote as your bullet journal solution. Listed below are the steps needed to effectively bullet journal in Evernote:
- Create a Notebook to Hold Your Bullet Journal Entries
- Determine the Structure of Your Bullet Journal Notebook
- Create A Template for Your Bullet Journal Note
- Populate Your Bullet Journal Note with Your Ideas
Before we get started with the tutorial, if you are looking to learn more about apps like Notion, Todoist, Evernote, Google Docs, or just how to be more productive (like Keep Productive’s awesome Notion course), you should really check out SkillShare. Skillshare is an online learning platform with courses on pretty much anything you want to learn. To learn more about Skillshare and its vast library of courses and get 30% off, click the link below:
SkillShare – Online Learning Platform
If you are new to Evernote or simply looking to improve your productivity in Evernote, you should check out my Beginner’s Guide to Evernote at the link below:
Beginner’s Guide to Evernote – The Productive Engineer
This comprehensive guide will teach you all you need to know to use Evernote productively.
What is a Bullet Journal?
A bullet journal is an analog (i.e., pen and paper) journaling system that provides daily and monthly views of your tasks, events, and notes. Ryder Carroll created the bullet journal and he created a great website that explains the bullet journal system in extensive detail. Please visit https://bulletjournal.com for more information on the bullet journal process.
Why Evernote for Bullet Journaling?
Evernote is considered one of the best online note-taking services. You can access this service using any device. All of your notes sync automatically.
The ubiquity of your notes being accessible across all of your devices lends itself nicely to bullet journaling. You can capture your ideas and tasks wherever you are without worrying about bringing your notebook.
If you are looking to learn how to harness the power of Evernote Home, check out our Ultimate Guide to Evernote Home.
Log into Evernote
To get started with creating a bullet journal in Evernote, you need to log in. If you do not have an Evernote account, you will need to create one.

Go to the Evernote webpage (https://evernote.com/compare-plans).
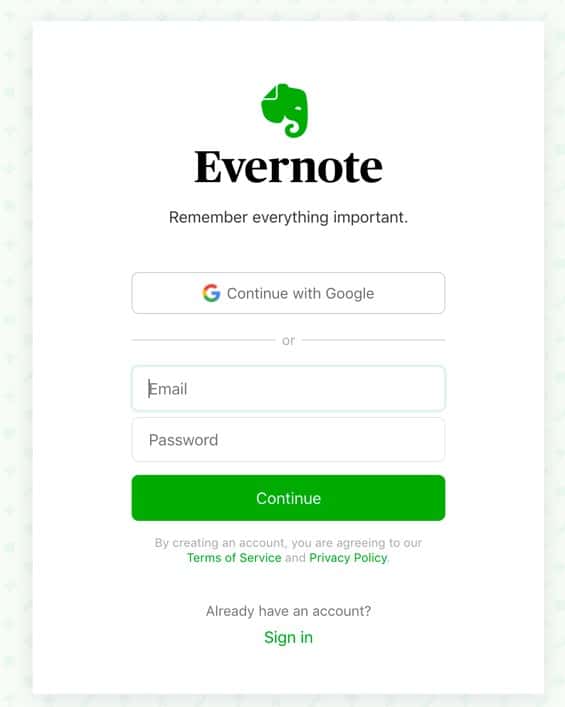
You can either use your Google login or manually provide your email address and password to create your account.
Once you have your account set up on the platform, you will be able to set up your bullet journal structure in Evernote. While you may get started with a free account, you will need to pay a subscription fee if you want more features on your account. For more information on the features available with each option, please visit the following link:
Creating bullet journals in Evernote
Let’s get started with creating our bullet journal. It is important to remember that the creation of the bullet journal system assumed that the user uses a physical journal. As a result, there are several conventions that we will convert to digital equivalents to optimize for use in Evernote.
Typically, bullet journals contain four essential components:
- An index
- A future log
- A monthly log
- A daily log
The index functions essentially as a table of contents for the system. Much like an index page of a website is the core hub of that website, the index note will function as the hub of our bullet journal system.
The future log is the multi-month view of our journaling system. There are several options for how long the future log will go. You can do quarterly, 6 months or a year. Given that there is no paper limit in our digital log, we will set up our future log to capture a full year.
The monthly log captures all the tasks, events and notes for the current month. The daily log captures all of the tasks, events, and notes for the current day.
We will mimic the above structure in our Evernote bullet journal system. However, we will take advantage of the capabilities of Evernote to enhance the system.
Here are the initial steps to follow to get started:
Create a Notebook for Your Bullet Journal in Evernote
The first thing we need to do is to create a notebook to hold all of our bullet journal notes. Notebooks in Evernote act like folders.
To create a notebook in Evernote, do the following:
In the right-hand panel of the Evernote Window, select Notebooks. The notebook window should appear in the main pane of the Evernote window.
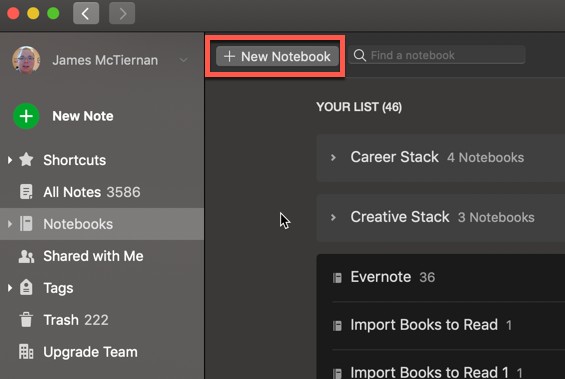
In the upper-left-hand corner of the main pane, select + New Notebook. This will bring up the New Notebook dialog box.

Type in the name of your notebook (I chose “Bullet Journal” for mine) and select Private for access control. If you want to share your bullet journal with others, select Shared.
Your bullet journal notebook is now available for use.
Create an Index Note for Your Bullet Journal
The index note serves as the table of contents for your bullet journal. You will use the index to navigate to the various areas in your bullet journal. Having an index will save you time getting to a specific place in your bullet journal.
To create an index note for your bullet journal in Evernote, do the following:
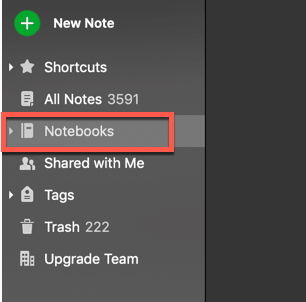
Click on Notebooks in the left-hand panel of the Evernote window. This will bring up the Notebooks view in Evernote.

Double-click on your Bullet Journal Notebook to open the notebook.
Click on the + New Note button in the left-hand panel to create a new note inside your bullet journal notebook.
In the note title text box (it should say “Untitled”), type in the name of your index note (I chose “Index” because I am so creative J) and press Enter.
Click in the body of your index note and type “Tasks”, bold it, and press Enter.
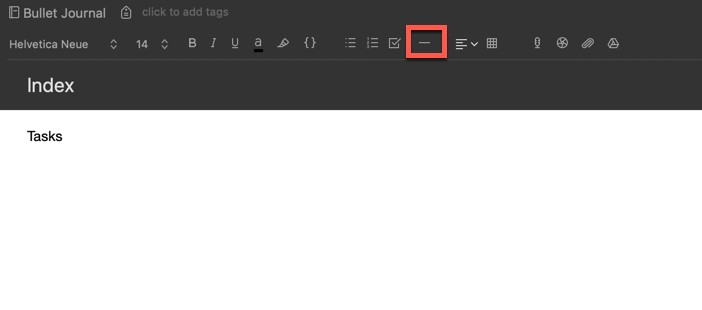
Hit Enter a few more times to create some space for entries. Then add a horizontal rule by either press the “Horizontal Rule” button in the Note formatting section of your note or by using keyboard shortcut Shift Command H on a Mac or Shift Ctrl H on Windows.
Next, hit Enter once and then type in “Events”, bold it, and Press Enter.
Hit Enter a few more times to create some space for entries. Then add a horizontal rule by either press the “Horizontal Rule” button in the Note formatting section of your note or by using keyboard shortcut Shift Command H on a Mac or Shift Ctrl H on Windows.
Next, hit Enter once and then type in “Notes”, bold it, and Press Enter.

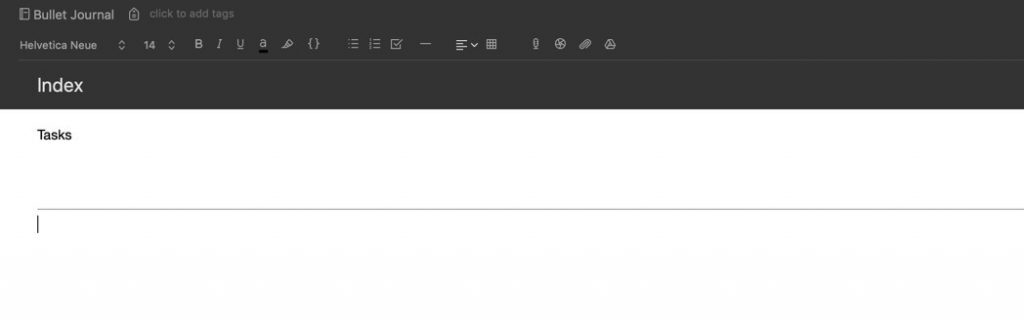
Your index note is ready for use. Your index note should look like the image below:
We will fill it in later on in this tutorial.
Create a Future Log Note for Your Bullet Journal
In bullet journaling, a future log contains the schedule of things that you wish to carry out in the future (hence the name). It usually features all the responsibilities that you intend to fulfill over the next year. It is important to set medium and long-range goals.
To create a future log note in Evernote, do the following:
Click on Notebooks in the left-hand panel of the Evernote window. This will bring up the Notebooks view in Evernote.
Double-click on your Bullet Journal Notebook to open the notebook.
Click on the + New Note button in the left-hand panel to create a new note inside your bullet journal notebook.
In the note title text box (it should say “Untitled”), type in the name of your future log note (I chose “Future Log”) and press Enter.
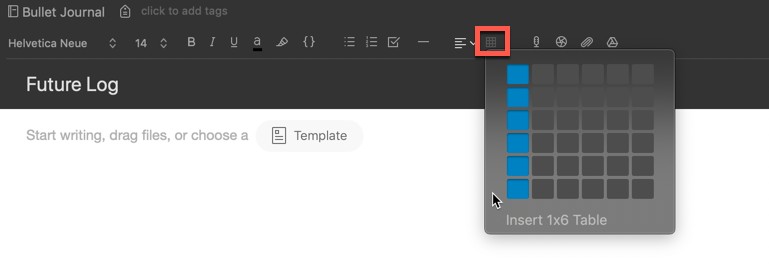
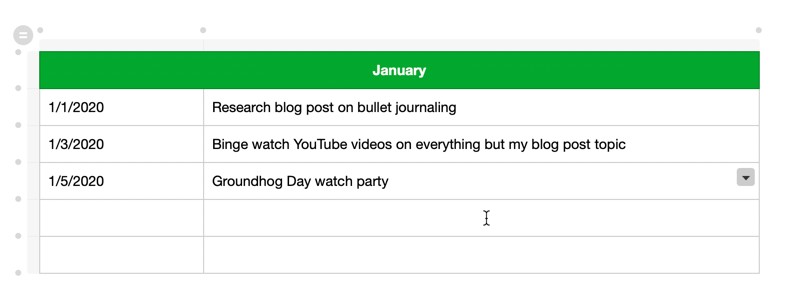
Click on the body of your future log. In the Note formatting bar, press the “Table” button and choose a 2 x 6 (2 Columns, Six Row) table. The left column will hold the date and the right will hold the task, event or note.
In the top cell, type in the name of the first month of your future log, bold and center the text and press Enter. If you are starting in January, type “January”. If you are starting in April, type “April”.
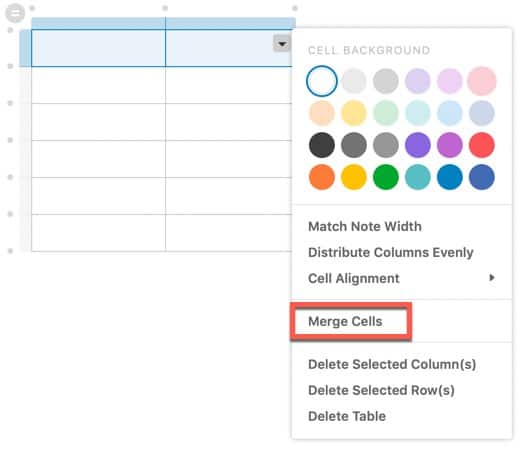
Let’s merge the two cells in the top row and add some color to the top cell to indicate is the title of the table. Hold down Shift and click on both cells in the top row. Click on the drop-down arrow and select Merge Cells. The top two cells should be one cell now. Click on the drop-down menu pointer and select a cell background color.
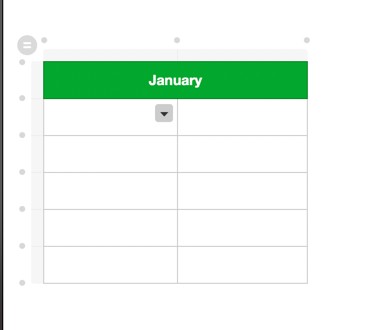
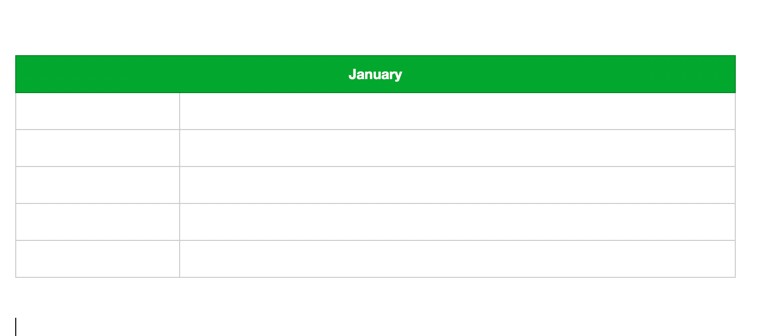
Stretch out the width of the table by hovering over the right edge of the table until the pointer changes to the adjust width icon. Click and drag the edge to the right until the size is how you want it.

Copy the table by selecting it. Paste it underneath the existing table and change the title to the next month. Repeat over and over until you have the next 12 months in your future log.
Now that you have your future log in hand, it is time to move over to the monthly log.
Create a Monthly Log Note for Your Bullet Journal
In the future’s log, you plan out everything that you want to finish months in advance. Over time, you can add as well as delete these events. While the future’s log does help you with planning, you need to have a monthly schedule to achieve these goals.
To create a monthly log note in Evernote, do the following:
Click on Notebooks in the left-hand panel of the Evernote window. This will bring up the Notebooks view in Evernote.
Double-click on your Bullet Journal Notebook to open the notebook.
Click on the + New Note button in the left-hand panel to create a new note inside your bullet journal notebook.
In the note title text box (it should say “Untitled”), type in the name of your future log note (I chose “Monthly Log”) and press Enter.

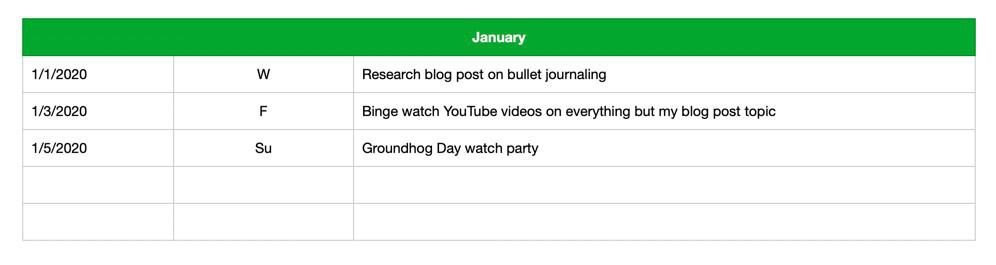
Add a table with 3 columns and 6 rows. Select the three top cells by holding down Shift and clicking each cell. Click on the drop-down menu arrow and select Merge Cells.

Add a background color to the top cell by selecting the cell, clicking on the drop-down arrow and selecting the desired background color.

Click on the top cell and type in the name of the month. Bold it, change the text color and center the text.
Click and drag the right border of the cell to size it to your needs.
Add more rows to the table as you accumulate more tasks, events, and notes
The first column will hold the date. The second column will contain the day of the week while the third column will hold the task, event or note.
Both the future and monthly logs help us increase our overall productivity. However, we still need to get down to our daily schedule. This is where the daily log comes into play.
Create a Monthly Log Note for Your Bullet Journal
With the monthly log, you have carefully planned out the end goal for the month. To achieve the desired result, you need to organize the activities you undertake throughout the day. This is done in the daily log.
To create a daily log note in Evernote, do the following:
Click on Notebooks in the left-hand panel of the Evernote window. This will bring up the Notebooks view in Evernote.
Double-click on your Bullet Journal Notebook to open the notebook.
Click on the + New Note button in the left-hand panel to create a new note inside your bullet journal notebook.

In the note title text box (it should say “Untitled”), type in the name of your future log note (I chose “Daily Log”) and press Enter.
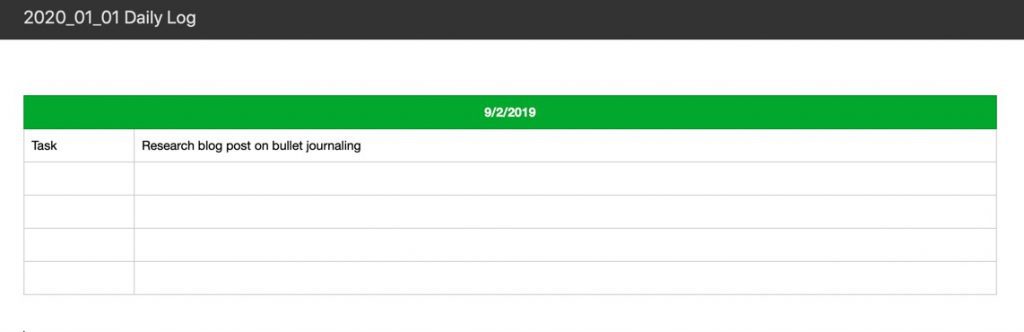
Add a 2 column, 6-row table to the daily log note.
Select the two top cells of the table by holding down Shift and clicking on each cell.
Click on the drop-down arrow and select Merge Cells.
Click on the top cell and type in the date. Bold it, change the text color and center the text.

The left column will hold the type of entry you are making in the log. Remember there are three types of entries:
- Task
- Event
- Note
You will enter one of these types. In the right-hand column, you will enter the task/event/note.
Some tips for setting up your daily log:
- Keeping in mind the goals for the day, start by
making plans on how you want to start your day.
- Make a detailed list of all the things that you
must finish at specific times during the day.
- By sticking to the schedule you created in your daily logs consistently over time, no goal is too hard to achieve. With such detailed planning, you gain mastery over your time and increase productivity.
Putting the Bullet Journal System to Use
Now that we have our system set up, we need to start using it. When bullet journaling, you typically fill it in using the following order:
- Future Log
- Monthly Log
- Daily Log
Think of it as using a top-down, least specific to the most specific model.
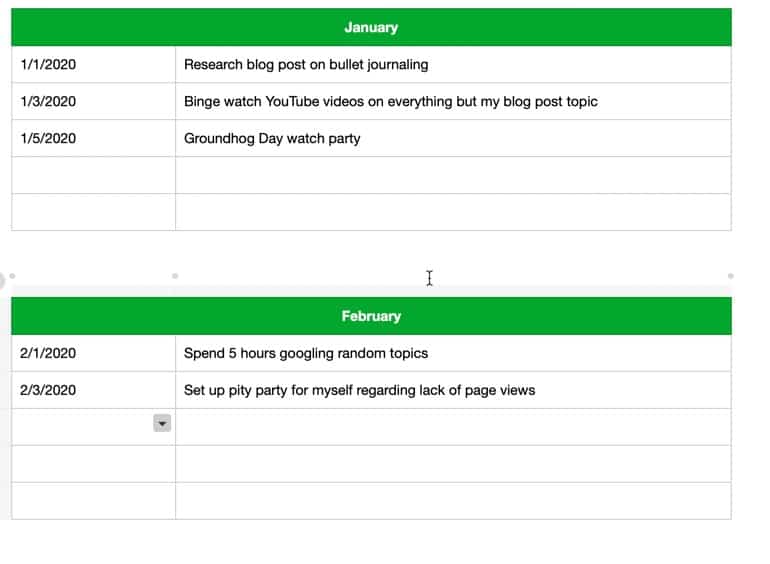
First, fill in your future log with any tasks, events, and notes you have.
Next, add all of the items for the first month into your monthly log.
Fill in your daily log with all of the items that have today’s date.
The only thing we have left to do is to populate our index note. In an analog bullet journal system, we would reference the page number but in Evernote, there really isn’t a concept of a page number. The next best thing, however, is to use note links. I actually wrote an article on how to use note links:
How to Link Notes in Evernote – A Step-by-Step Guide
Note links allow you to place a link to one note in another. This works perfectly for our index. To create a note link to the daily log, do the following:
Open the Bullet Journal Notebook.
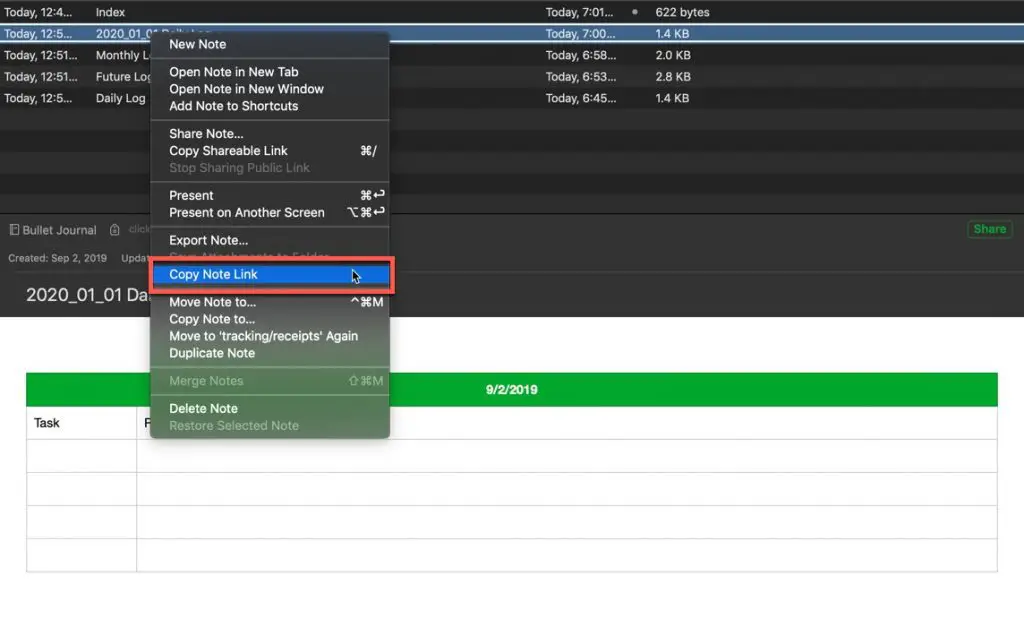
In the list of notes, right-click on the daily log and select Copy Note Link to copy the note link to your clipboard.
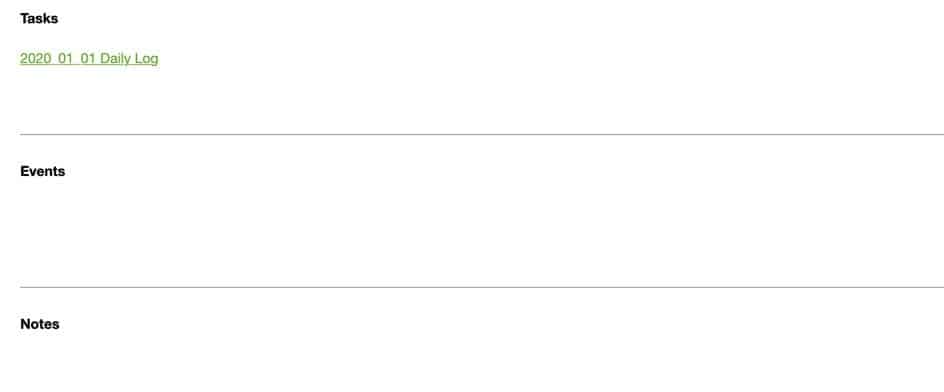
Open your Index note and paste the link into the index note
You should now have a link in your index with the title of your daily log note. Clicking on this link will open that daily log note.
Tips for Bullet Journaling in Evernote
For your future, monthly and daily logs, add a date prefix to your note name
As you use your bullet journal system, you will have multiple future, monthly and daily logs. In order to head-off any future headaches, I recommend prefixing your note name with the date. For the future log, I would use the year like so:
[YEAR] future log
This will prevent duplicates causing you problems down the road. For the monthly log, I would recommend the following naming convention:
[YEAR]_[MONTH] Monthly Log
A monthly log for January 2020 would be:
2020_01 Monthly Log
This makes sorting your monthly logs easier.
Finally for the daily logs, I recommend the following naming convention:
[YEAR]_[MONTH]_[DAY] daily log
The daily log for February 28th 2020 would be:
2020_02_28 daily log
Using these naming conventions will seem unnecessary at first but will really make your system more flexible and easier to use as it grows in size.
Looking to Improve Your Writing?
If you are looking to improve your writing, you should give Grammarly a try. Grammarly checks your writing for all sorts of grammatical mistakes. It also will prompt you when you overuse certain words and can even provide recommendations based on the tone you want to strike such as casual, authoritative or informative. The best part is that Grammarly is free to get started. Check it out at the link below:
Want More Tips and Tricks? Subscribe to our Newsletter!
If you haven’t already subscribed, please subscribe to The Productive Engineer newsletter. It is filled with tips and tricks on how to get the most out of the productivity apps you use every day. We hate spam as much as you do and promise only to send you stuff we think will help you get things done.
If You Use Public Wifi, You Need a VPN!

Using public wifi at places like your favorite coffee shop exposes you to attack. VPNs protect you from these attacks and NordVPN is the best VPN solution out there. Enclosed below is an infographic with five tips for shopping safely online:

Hackers are out there looking to get your data. Companies like NordVPN help protect you from them. For more information, please visit the link below:
Check Out Our YouTube Channel!
We have a YouTube channel now and we are working hard to fill it with tips, tricks, how-tos, and tutorials. Click the link below to check it out!
Check out our Resources page
Check out our resources page for the products and services we use every day to get things done or make our lives a little easier at the link below:
Helpful Links
Bullet Journal Website
Link to Bullet Journal Website
Article You May Be Interested In
Ten Great Tips for Using Todoist
Link to Ten Great Tips for Using Todoist
A Beginner’s Guide to Trello
Link to A Beginner’s Guide to Trello