Tips for Using Google Keep Like A Pro
Google keep is a note-taking application. It is a versatile app that offers a variety of tools that helps to make you more organized and productive. As Google Keep is developed by Google, it automatically syncs to your Google drive. Syncing with Google is probably the best thing about Google Keep. It helps make using Google Keep simple and useful. As a result, you can access your Google Keep account and data from any device where you use your Google account.
In order to get the benefit of this amazing application, it is good to know some tips and tricks for using it effectively. No worries, we have got you covered! This blog post is focused on providing 20 tips for using Google Keep more effectively. This post will walk through each tip step-by-step. We will show you each tip on both the web application on the browser (using Google Chrome) as well as the Android Google Keep app. By the end of this blog post, you will be able to use Google Keep like a pro. Listed below are the 20 Tips for Using Google Keep:
- Adding labels to notes.
- Adding colors to notes.
- Pinning a note.
- Setting reminders.
- Locating reminders.
- Archiving notes.
- Recording audio notes.
- Adding images to notes.
- Adding drawings to notes.
- Turning note into a checklist.
- Making a copy of a note.
- Undoing an action.
- Setting your favorite view.
- Adding a link to a note.
- Disabling rich link previews.
- Setting the default time of reminders.
- Collaborating with others.
- Adding and switching Google accounts.
- Copying notes to Google Docs.
- Making a quick search.
If you are new to Google Keep, you should really check out Beginner’s Guide to Google Keep.
If you are a student looking to use Google Keep in your day-to-day studies, our Complete Guide to Google Keep for Students has a ton of tips and tricks geared for students.
Adding labels to notes
Google Keep allows you to add labels to your notes to keep you organized. Labels function like tags and help categorize your notes. This feature is helpful when need to find a note. Notes with the same labels are classified in the same category. For example, if you had two notes that both contained information about cars, you could assign a Car label to each note. You could then search for all notes that contain the Car label and both notes would be returned in the search query.
But before you can search notes with labels, you first need to know how to assign labels to notes. In order to add a label to your note, follow the following methods:
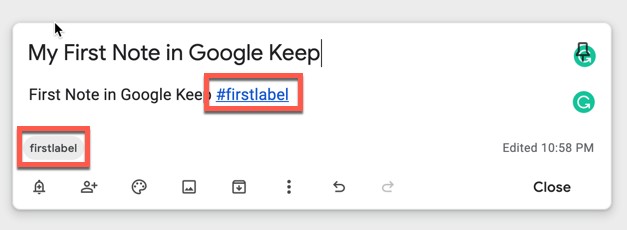
1st Method:

- To add a label to your note, use # at the start of your label name while creating a note.
- A suggestion list will appear when you will start typing your label name after the hashtag#.
- Select any of the suggested labels or type out your own label name.
2nd Method:
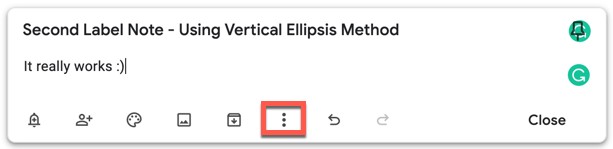
- Click on the three-dot icon present at the lower right corner
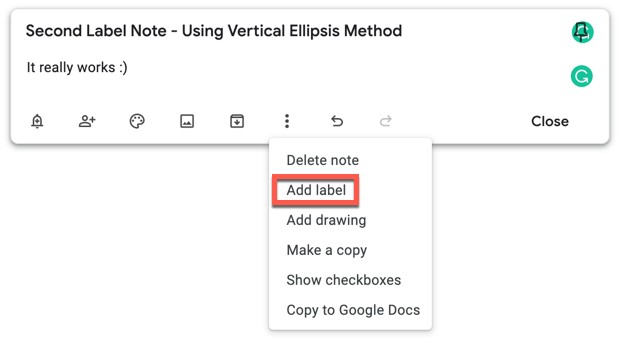
- Select Add Label.
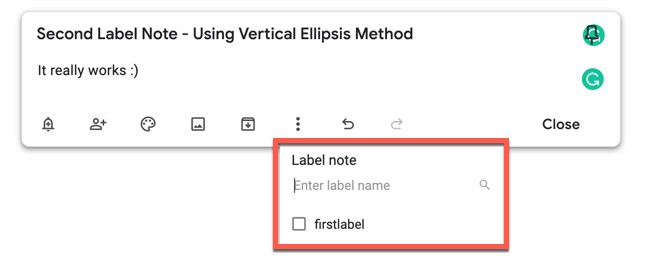
- Now, type in the name of the new label.

Press the Create “NAME OF LABEL” to add the label to your note
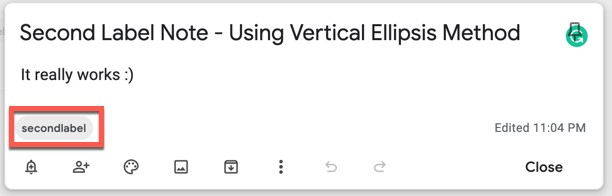
Your label should now be assigned to your note.
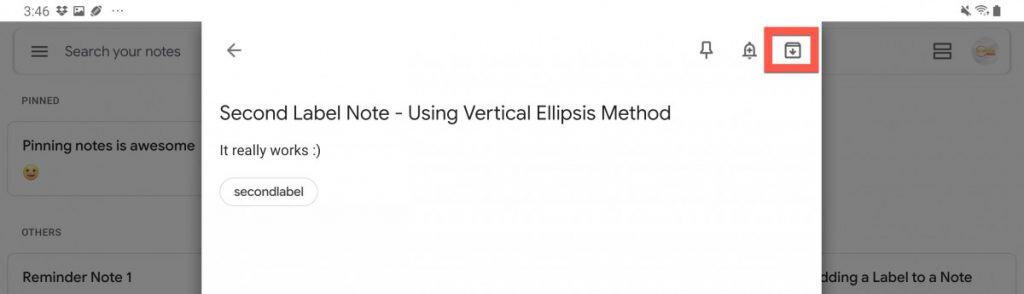
3rd Method (This one is for the Android version of Google Keep):
- Touch or hold a note from the main list view
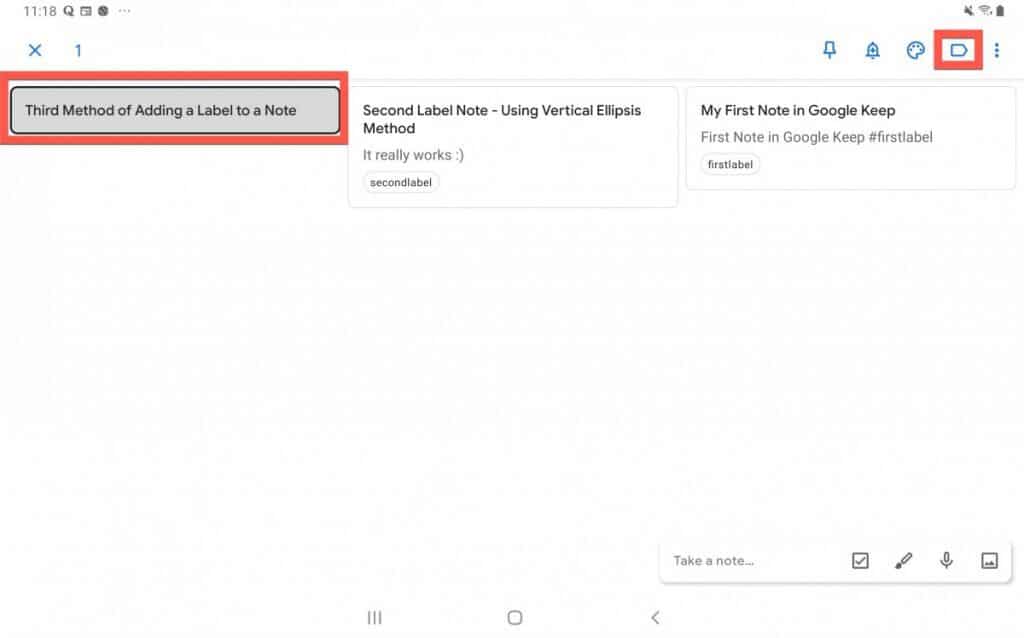
- Now, tap the label icon present at the upper-right corner of the screen to add a label to that note.
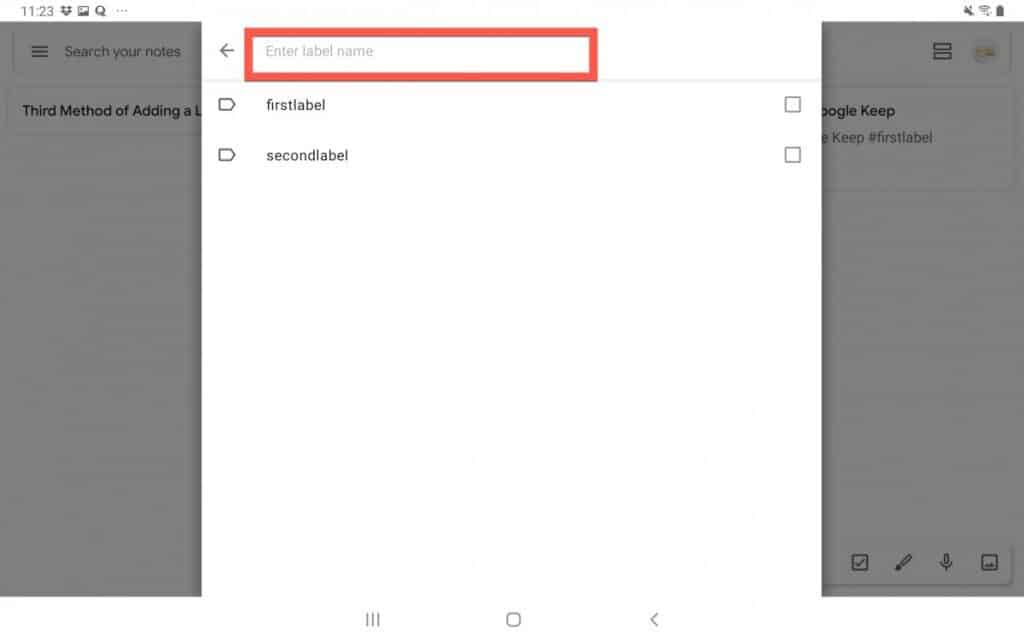
- Type in the name of your label
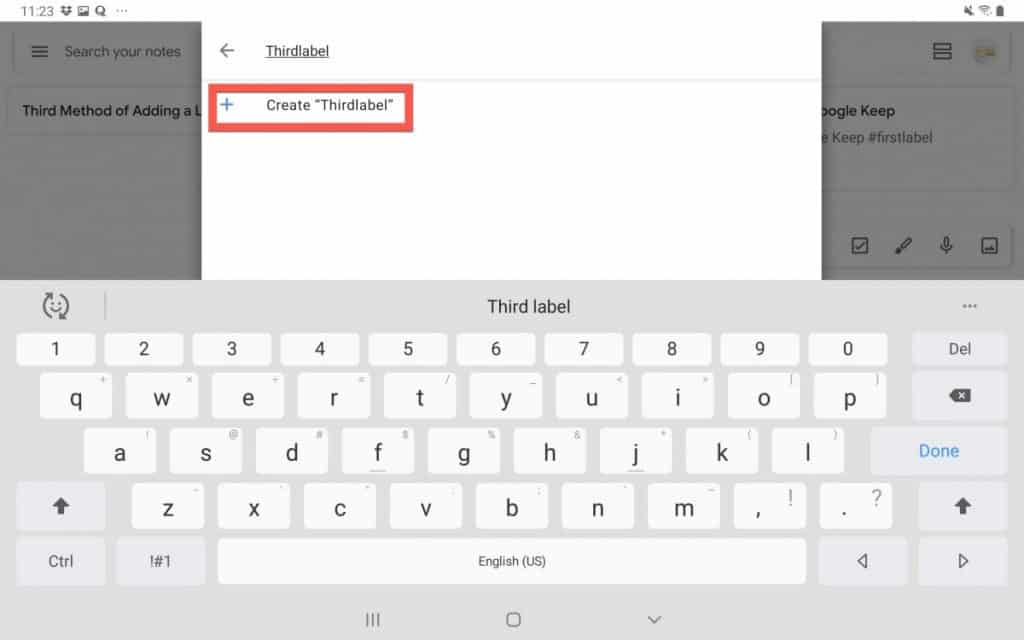
- Press Create “NAME OF LABEL” to add the label to the note.
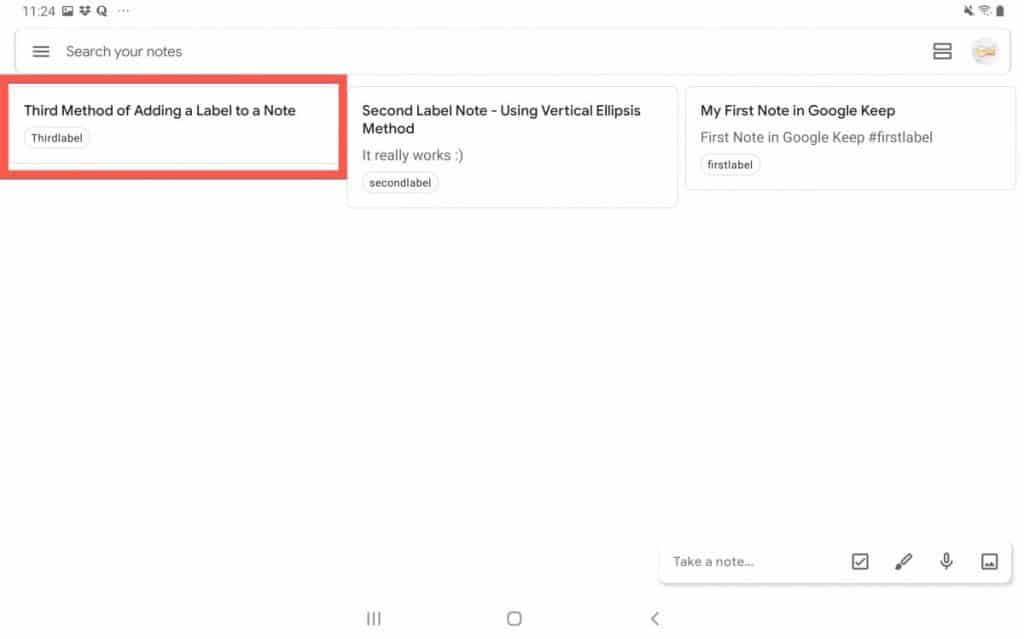
Your label should now be added to your note.
Adding Colors to notes
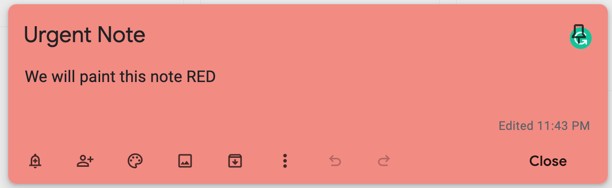
You can distinguish your notes with the help of assign a color to the note. With the help of color, you can assign specific colors to specific type of notes. For example, you can assign your urgent notes as red, personal notes as green. Therefore, just by seeing the color of note you’ll be able to know the type of note, which can be helpful.
In order to add colors to your notes in the web version of Google Keep, follow the steps provided below:
- Open the note you want to add a color to
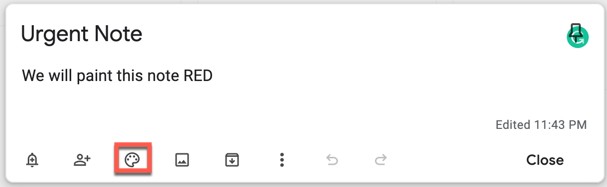
- Tap the palette icon present in the bottom toolbar of the note.
Select the color you want.
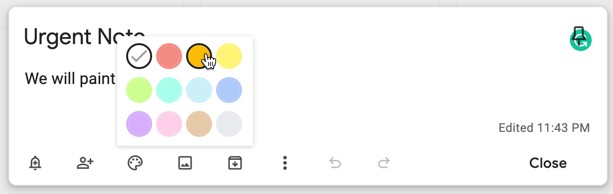
Your note will now be shaded in the color you chose.
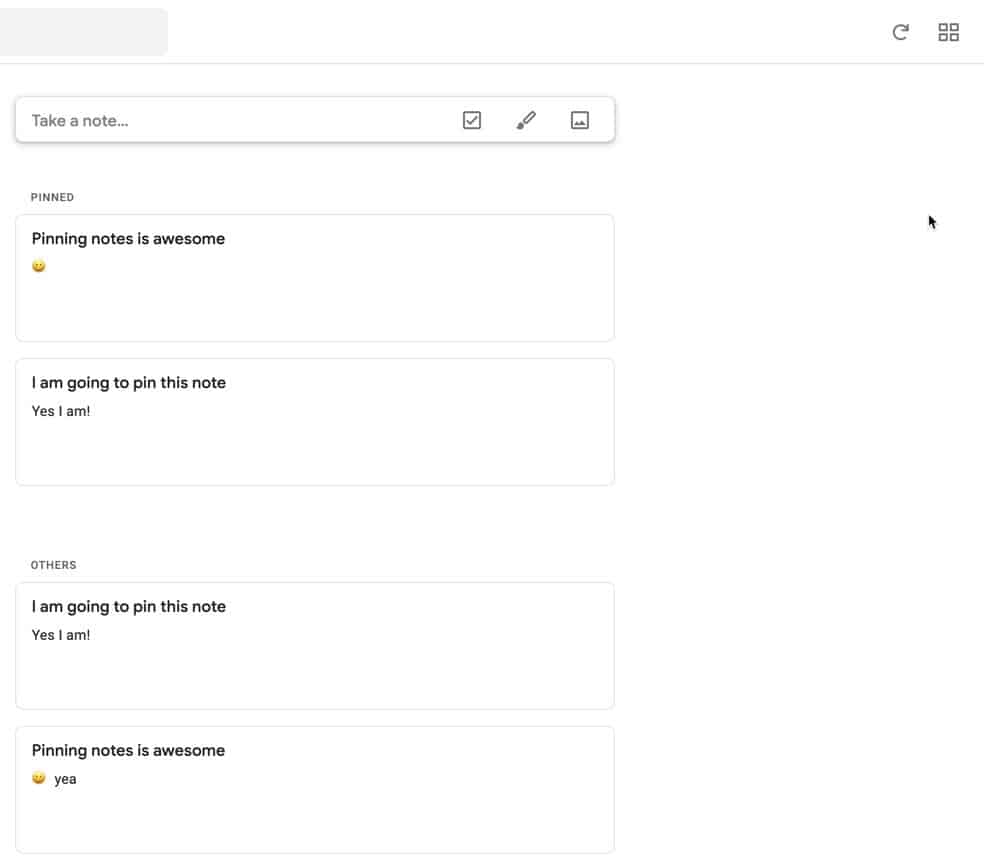
Pinning a note
Google Keep offers the ability to pin your most important notes.
In order to put a pin a note in the web app, follow the simple steps given below:
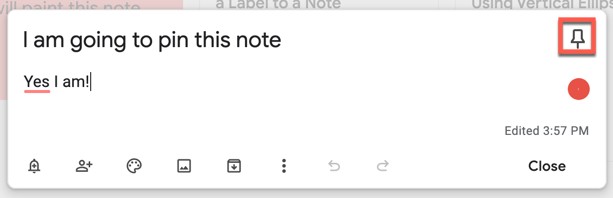
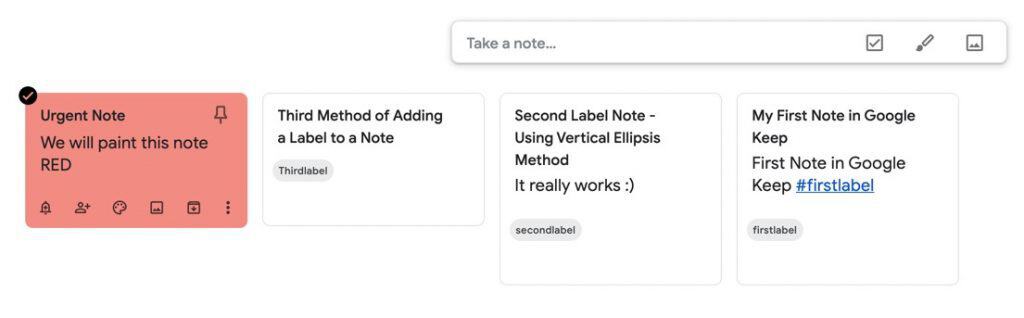
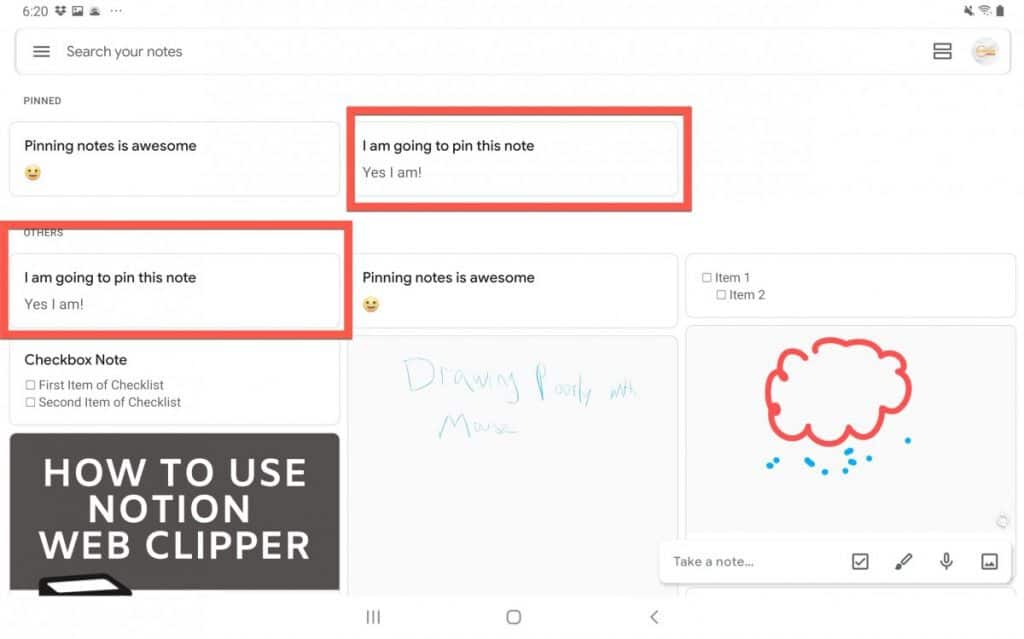
- Select a note you want to pin from the main note list.
- Tap the Pushpin icon present at the top right corner.
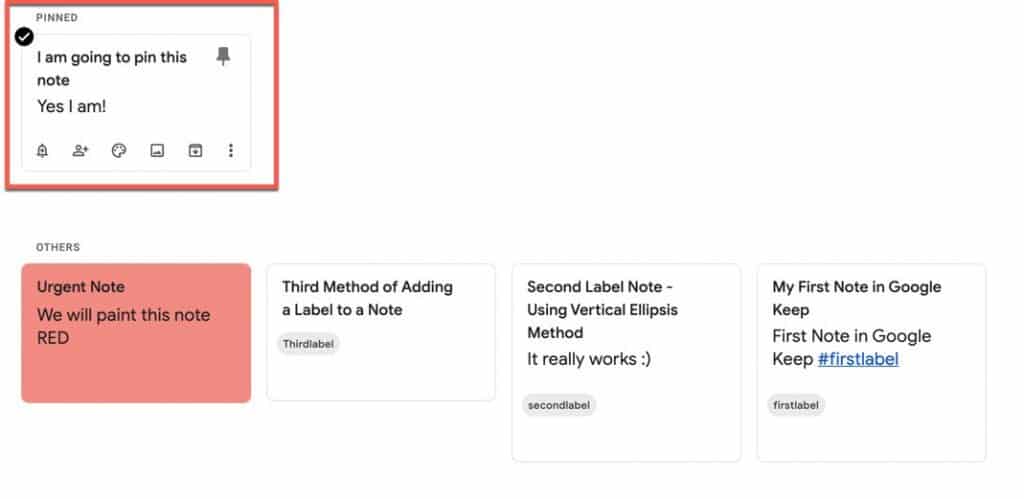
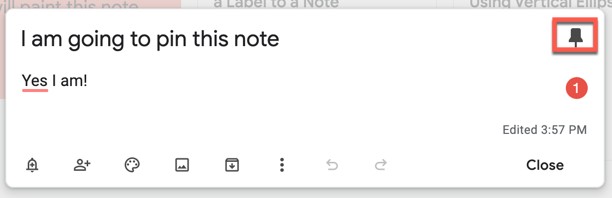
- The selected note will be pinned and appear above all of your notes.
Tip: To unpin a pinned note, tap on the pushpin icon again.
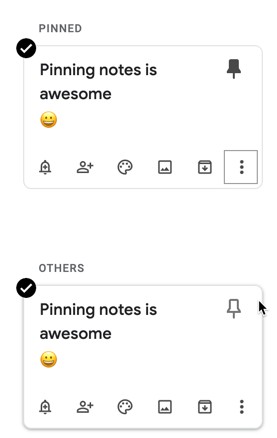
In order to put a pin on a note in the Google Keep Android app, follow the simple steps given below:
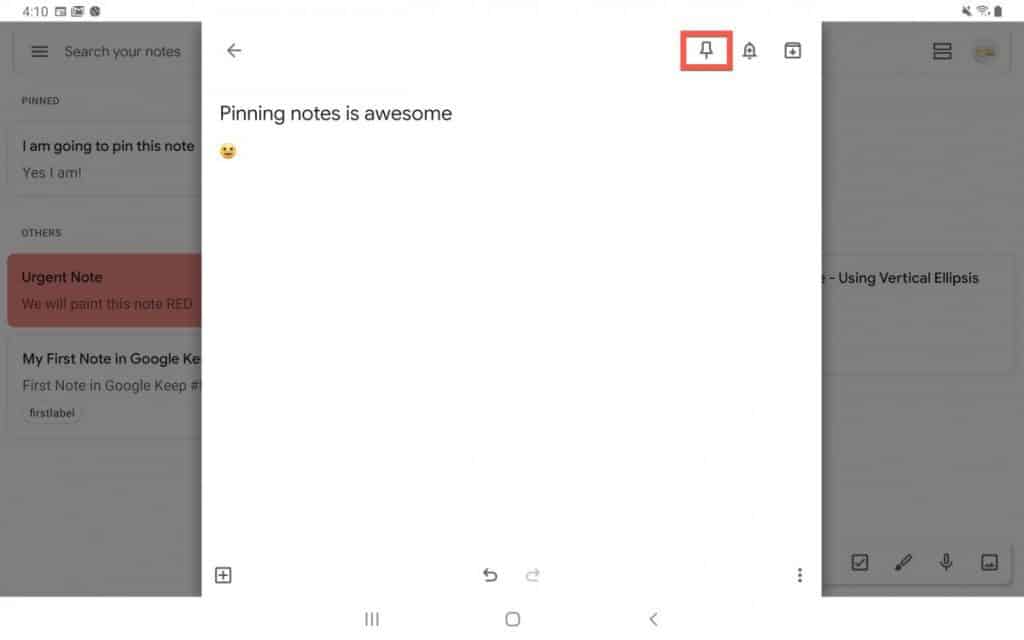
- Open the note you want to pin
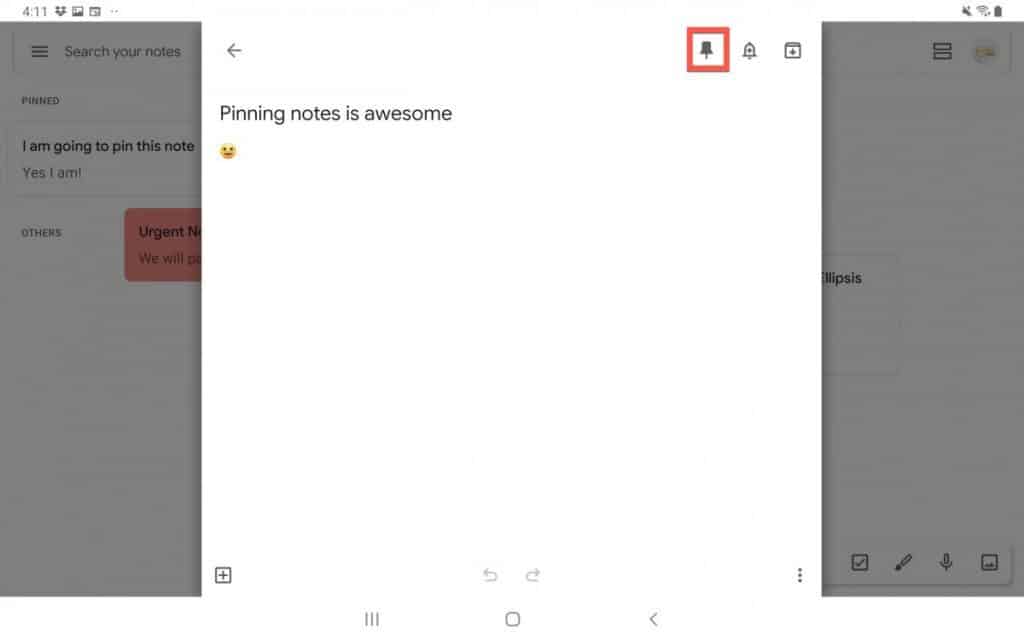
- In the upper-right hand corner, press the Pushpin icon
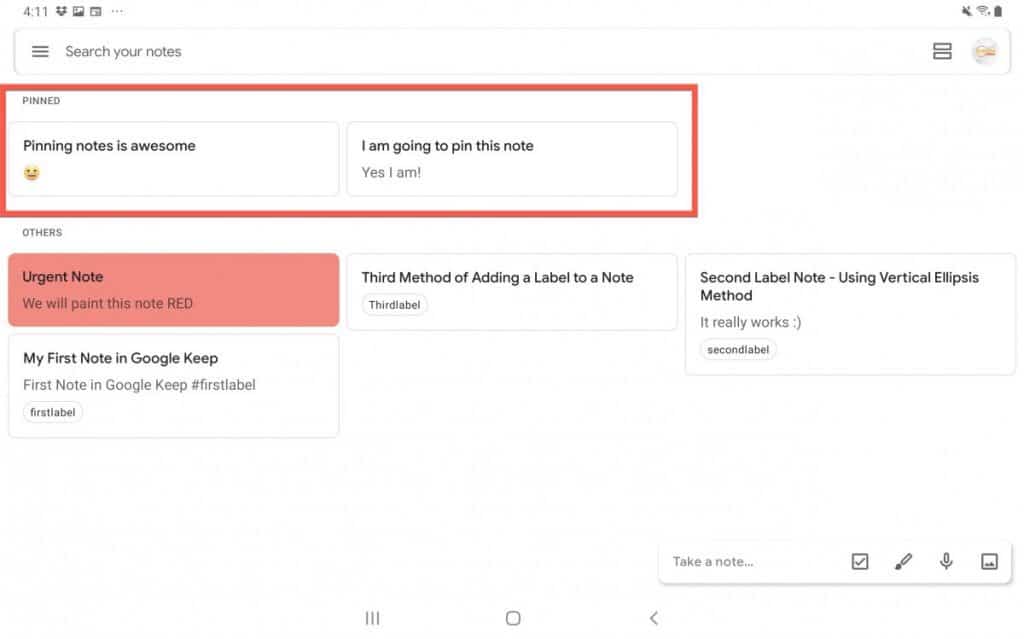
The note will now appear in the Pinned section at the top of your Google Keep window.
Setting reminders
In order to complete your note within a specified period of time, set reminders to alert you on the due date/time. This feature helps you stay on top of your important tasks. There are two types of reminders that Google Keep offers:
- Time and date reminders
- Location reminders
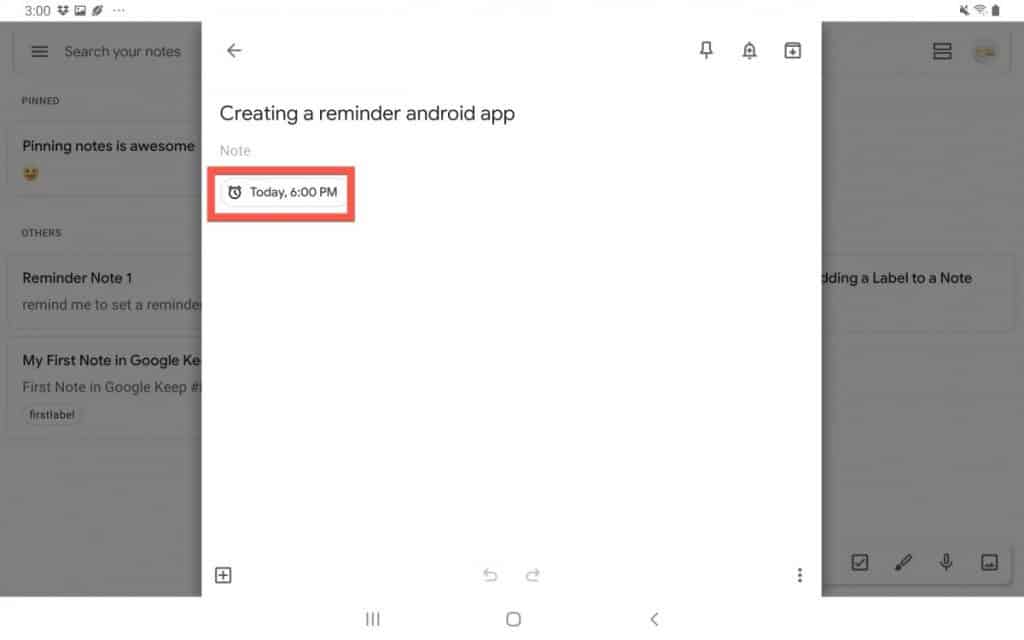
In order to set a reminder for a note in the web app, follow the following steps:
- Open that note where you want to add a reminder.
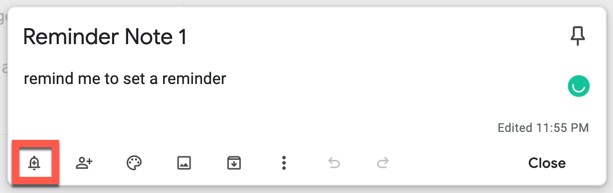
- Tap the Bell icon in the lower left corner of the note window.
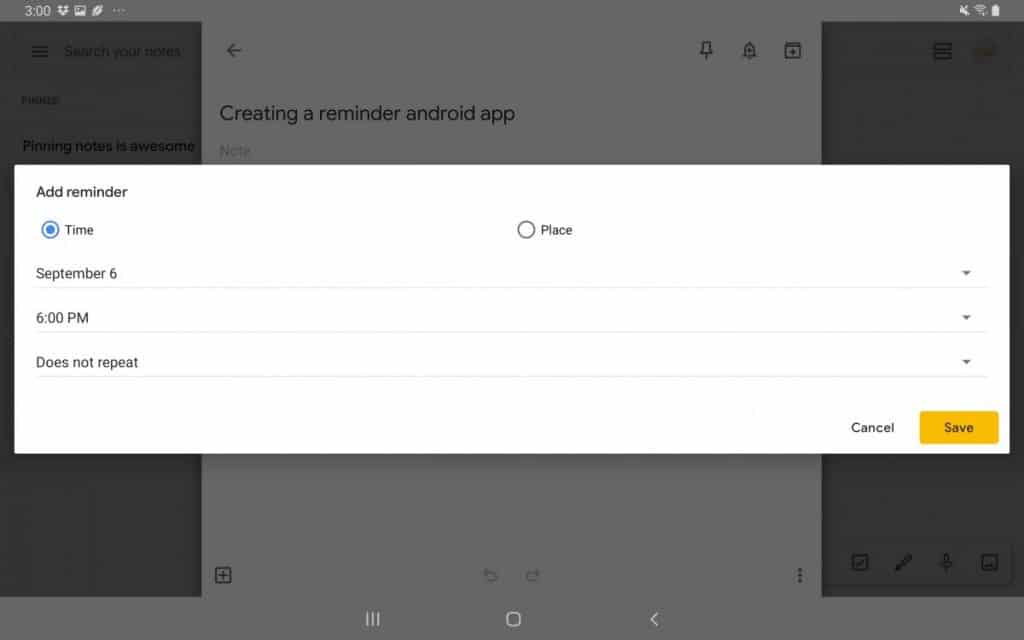
Google Keep, as mentioned earlier, can allow you to pick either a date and time or a location to be the trigger for your reminder. When setting the date/time, you have three choices:
- Tomorrow
- Next Week
- Pick date & time
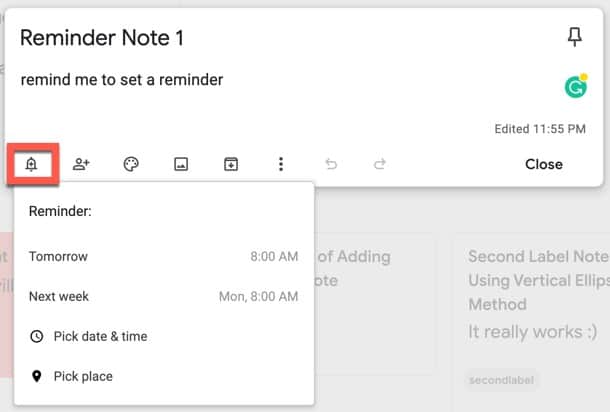
Tomorrow allows you to set the reminder to be the next day at a time you choose. Next week allows you to select a date and time the following week while pick date & time allows you to pick any future date and time.
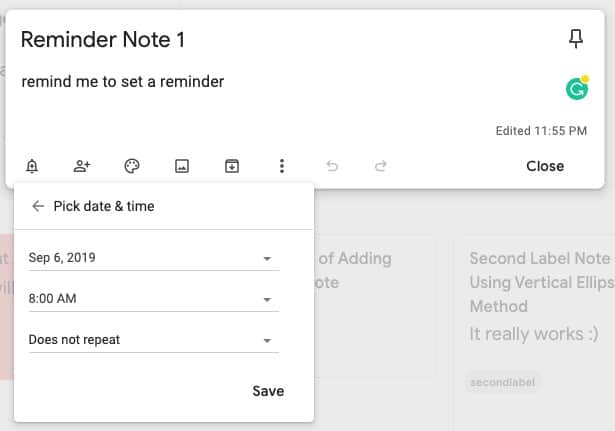
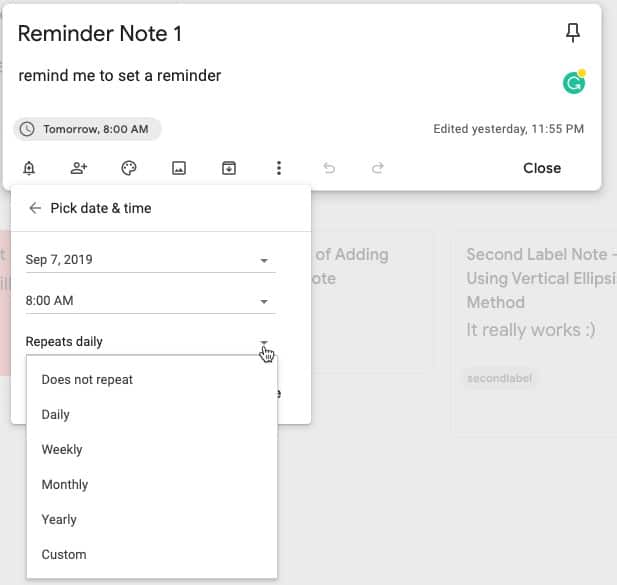
If you choose pick date & time, you also get the option to make the reminder a recurring reminder. There are several options for the recurring reminder interval that can be set in Google Keep:
- Daily
- Weekly
- Monthly
- Yearly
- Custom
The first four options are self-explanatory but to quickly review:
- Daily = recur every day at the same time
- Weekly = recur every week at the same time
- Monthly = recur every month at the same time
- Yearly = recur every year at the same time
Custom is where things get more interesting. The custom option is very powerful. It allows you to completely control the intervals you get notified. You can do for example:
- Every other day
- Every third week on Mondays, Wednesdays and Fridays
- Every fourth month on the first Saturday of that month
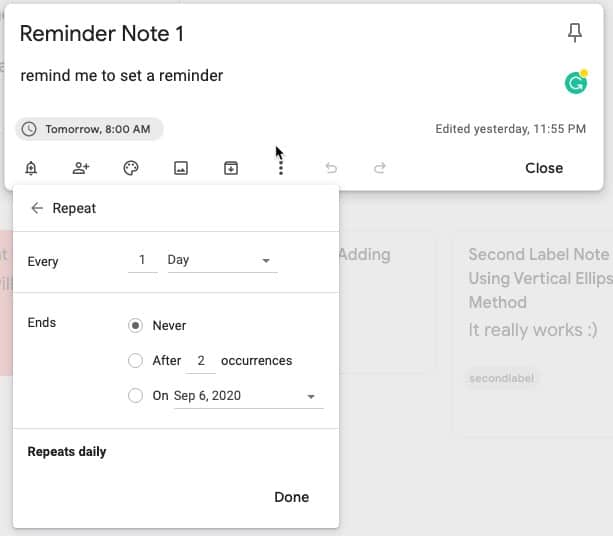
Not only can you control the interval but you can also control when to end the recurring reminder. There are three options for ending a recurring reminder:
- Never
- After [X Number of] occurrences
- On a specific date
The interesting option is the After [X Number of] occurrences option. This is great when you have a task that occurs consistently for a fixed period of time.
If location is more important than time, you can set your task to remind you when you are at or close that location. A great application of this functionality is shopping lists. I want to be reminded to pick up milk when I am near the supermarket. Time is less important in this case than location.
To set your reminder to alert you at a specific location, do the following:
- Open your note and click on the Bell icon
- Click on the Pick place option
Type in the name or address of the location. Google Keep will auto-populate based on what you type.
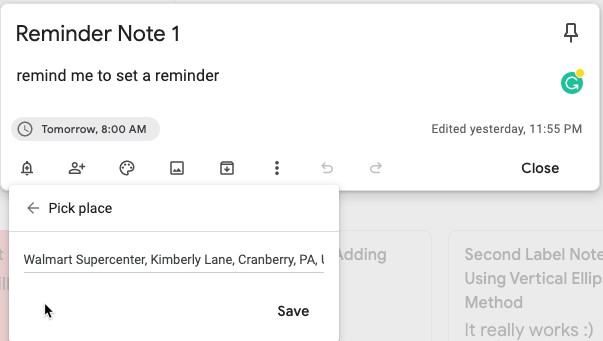
- Press Save to assign the location reminder to your note
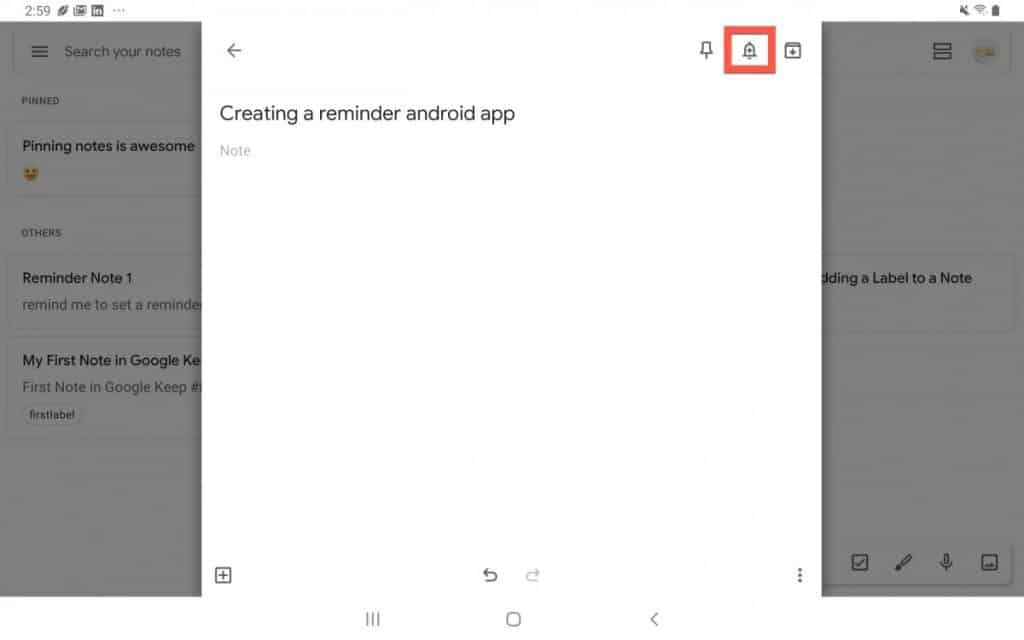
In order to set a reminder for a note in the web app, follow the following steps:

Open note and click on the Bell icon in upper-right hand corner of note window
Select either Time or Place type reminder and press Save
Your reminder will be assigned to your note.
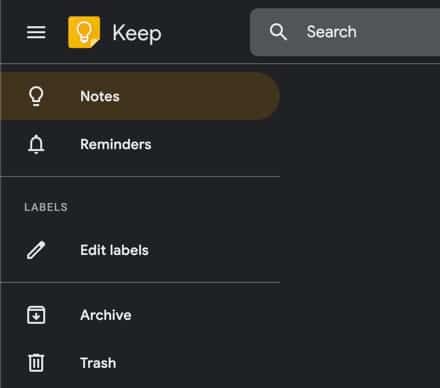
Locating reminders
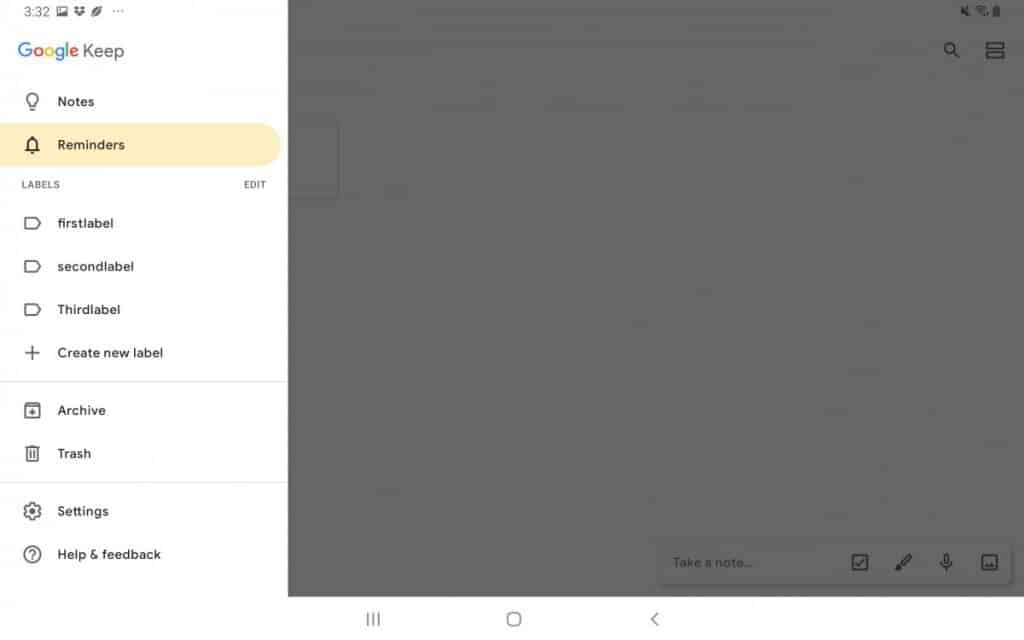
If you can’t remember which notes have reminders, there is no need to worry! You can locate all your reminders in the web app by following the simple steps given below:
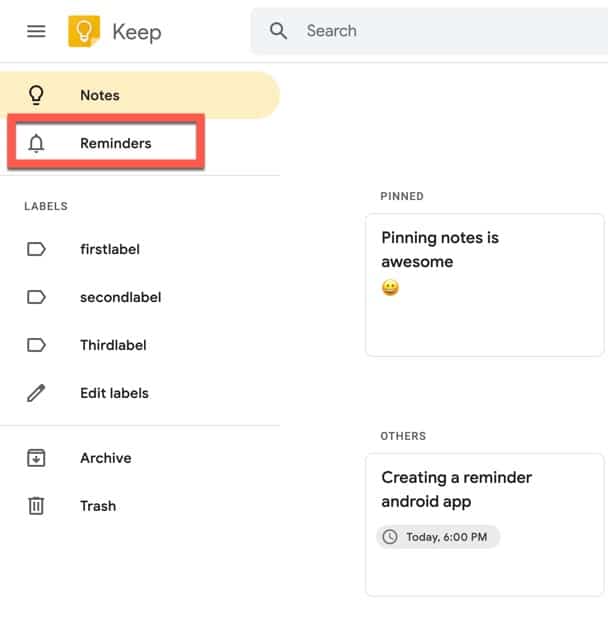
- Click the three-line menu icon, present at the top left corner.
- Select Reminders option from the list.
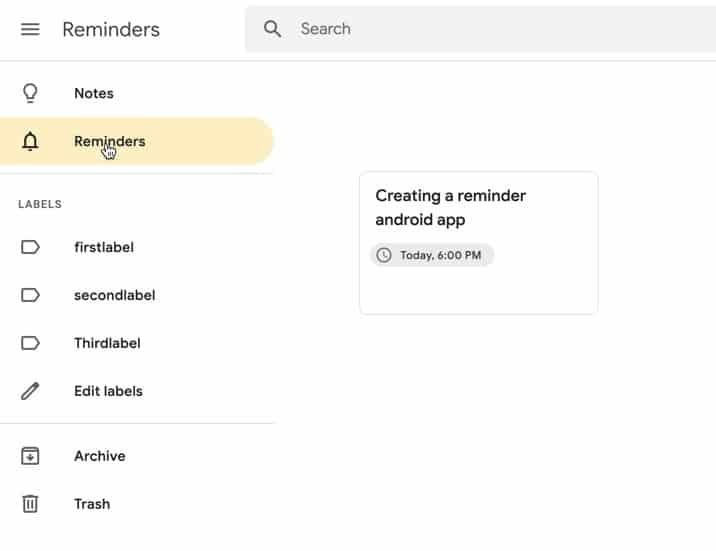
- All the notes will appear with which reminders were set.
To find all your notes with reminders in the Android version of Google Keep, do the following:
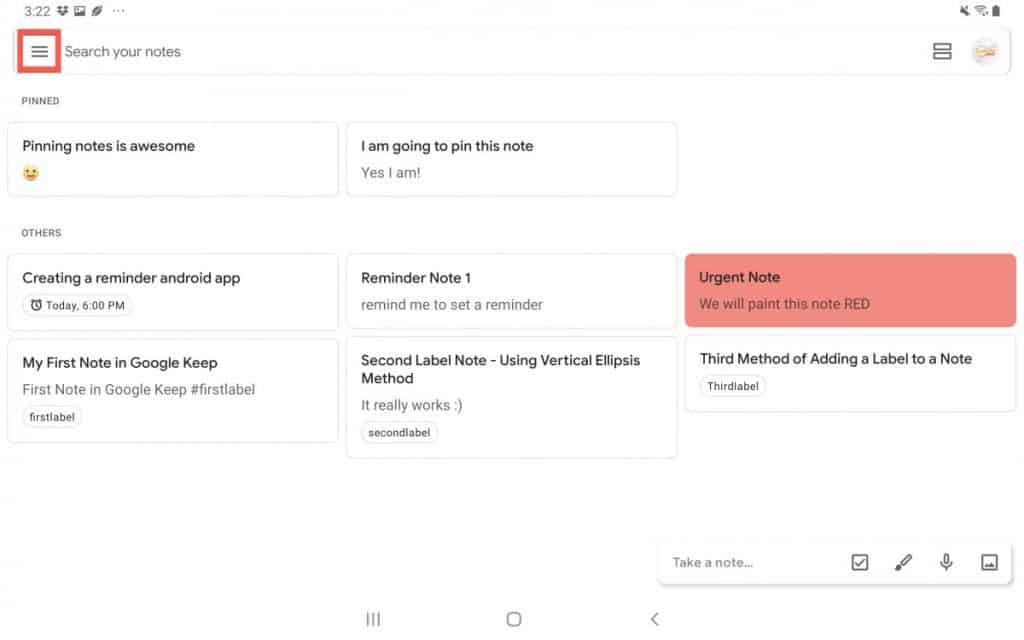
- Press the three-bar icon in the Search your notes search box
2. Select Reminders
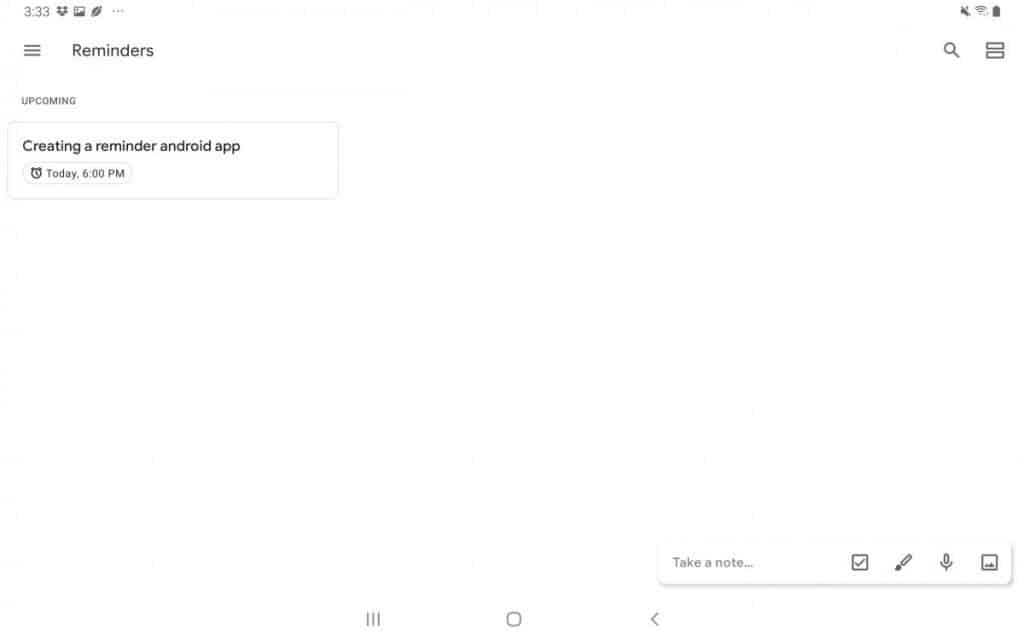
All of your notes that have reminders will be displayed in the window.
Archiving notes
Google Keep allows you to move those notes that have not been actively accessed to the archive folder. With this feature, you can move a note from the main notes list to the archive folder. Moving less active notes to the archive folder makes your inbox tidy.
To archive a note in the web app, follow the steps given below:
- Open that note you want to archive.
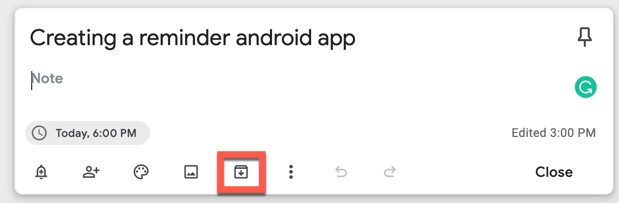
- Tap the archive icon present at the right corner.
- The selected note will be moved to the archive folder.
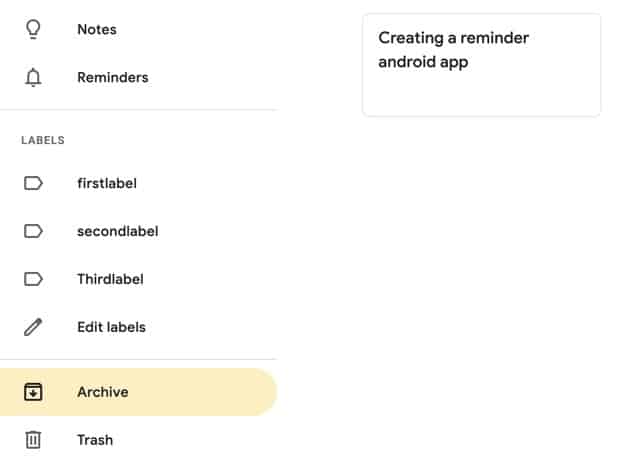
Tip: You can retrieve all your archived notes directly from the archive folder.
To move a note to the archive folder in the Android version of Google Keep, do the following:
Open the note and press the archive icon
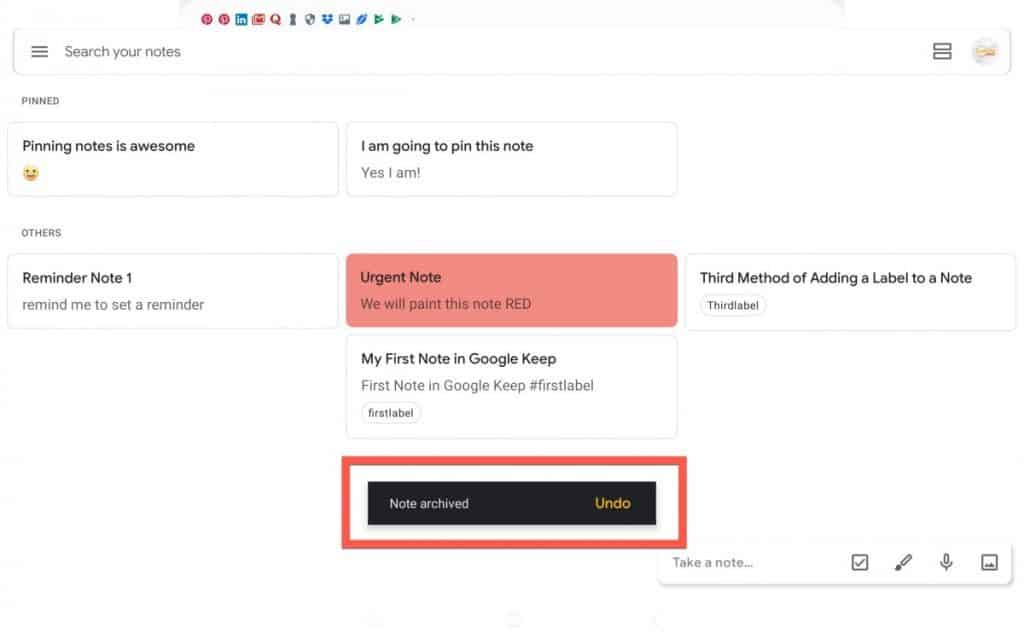
A message will pop-up indicating your note was archived will appear.
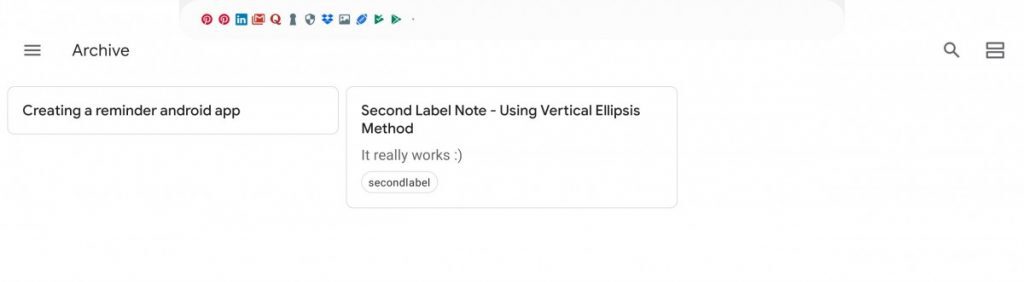
Your note will now reside in the archive folder.
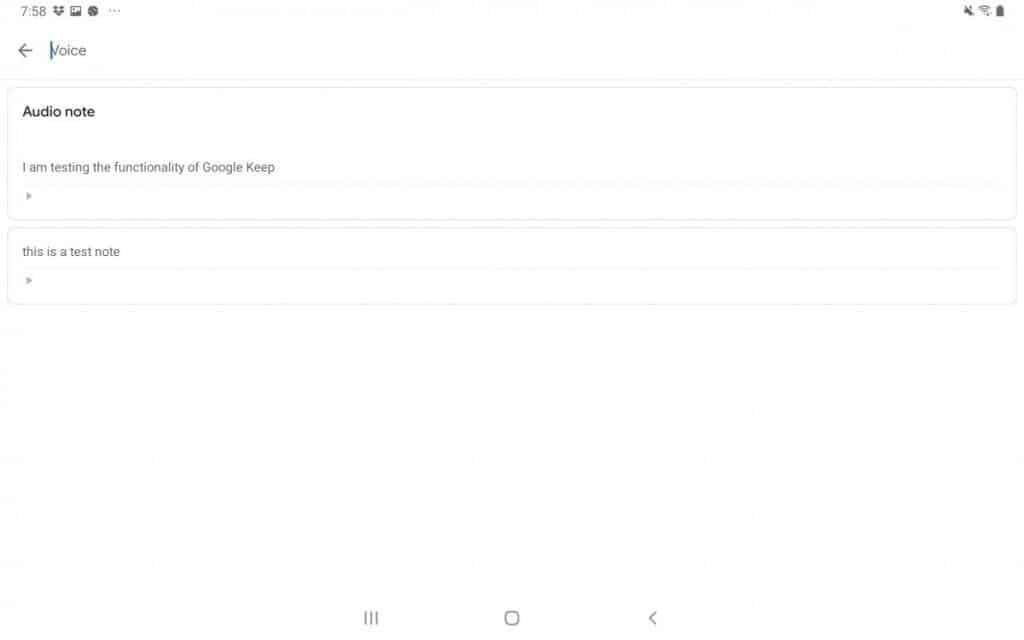
Recording audio notes
This feature of Google Keep works only on Android and IOS mobile devices. Google Keeps also you to record audio and save it to your note.
To record an audio note, follow the steps given below:
1st Method:
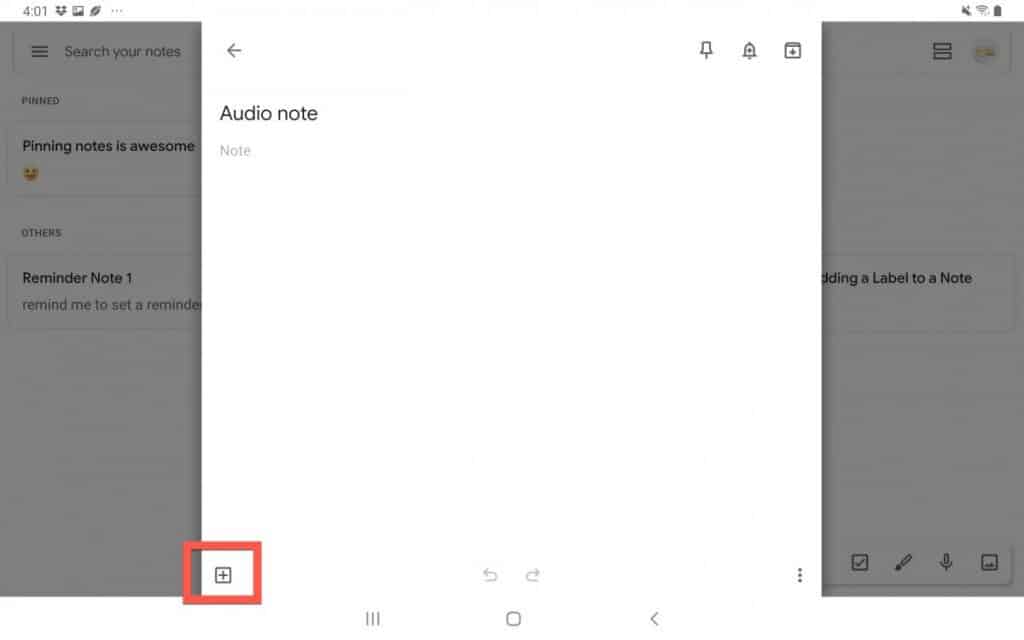
- Tap the ‘+’ icon in your note.
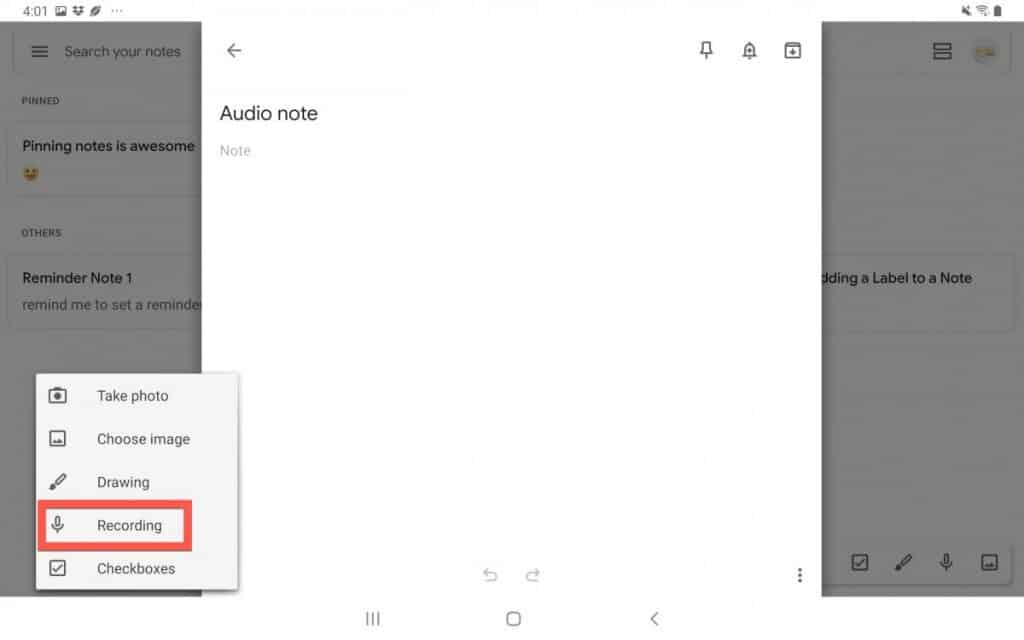
- A section called Recording will appear which will allow you to dictate your notes. Select this option.
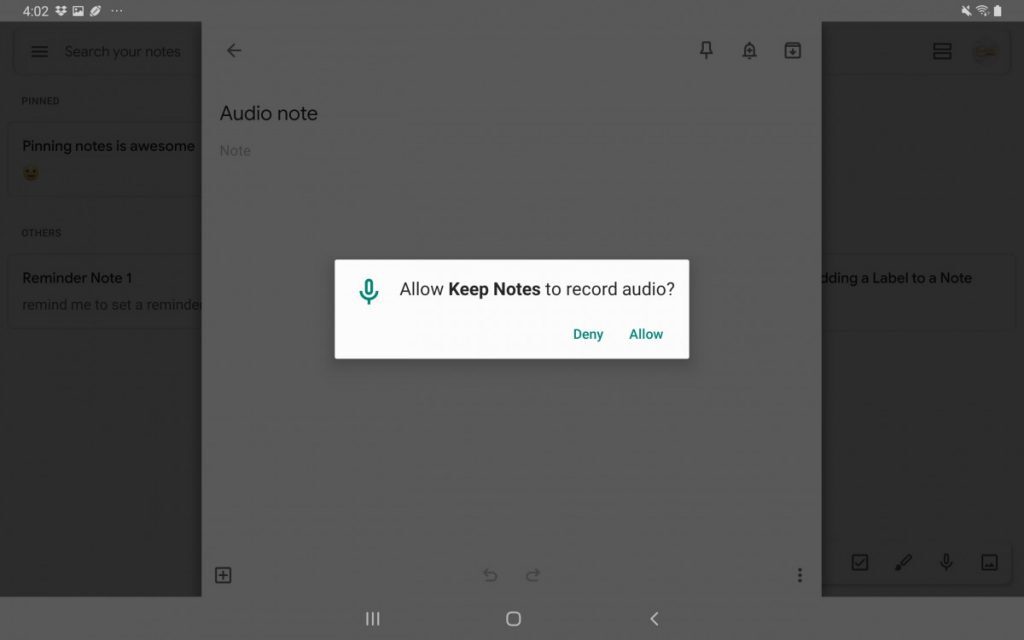
- You will be prompted to allow Google Keep to record audio. Click Accept to continue.
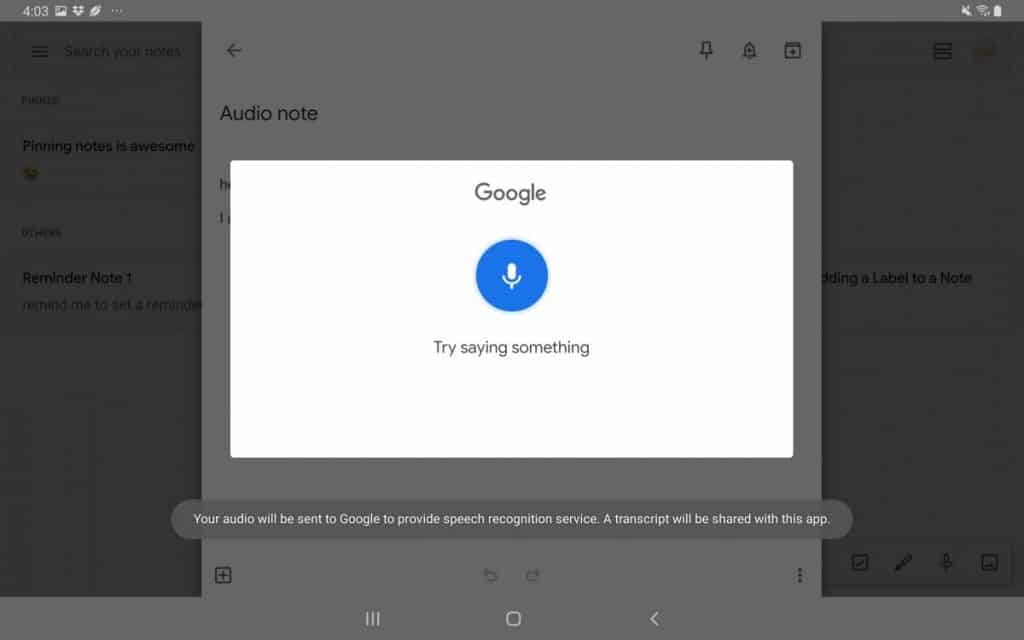
- Speak into your device. Google Keep will notice when you stop talking and will add the audio to your note.
- Google will provide a transcription of your audio as well as the audio file itself in the note.
Adding images to notes
In addition to adding audio notes in Google Keep, you can also add images to your notes.
To add images to your note follow the simple steps given below:
- Open the note to which you want to add an image or create a new note.
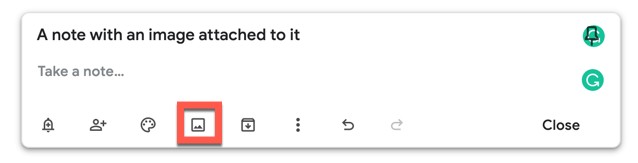
- Click on the “Add image” icon, present next to the left side of the archive icon.
- Select an image saved on your computer.
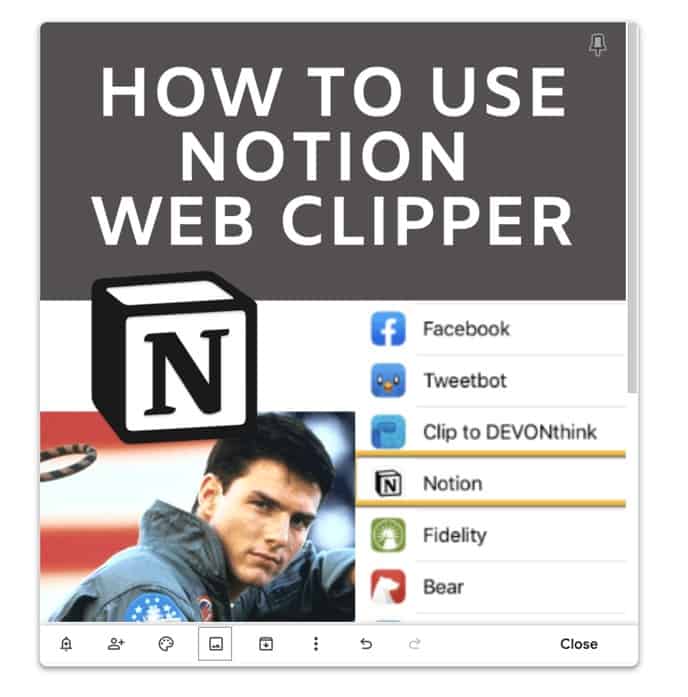
- Click done or outside of your note to save changes.
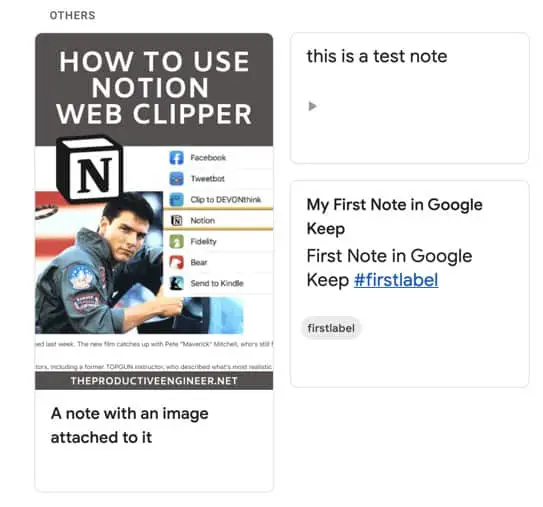
Tip: You can also add multiple images to a single note.
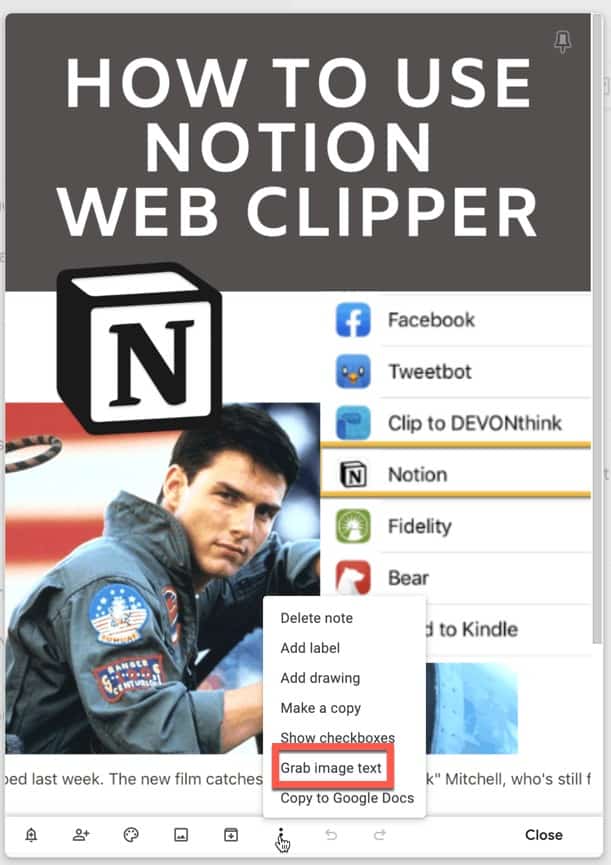
Tip: You can grab out the words from your image and can later use them for search. To do this, tap the three-dot menu and select “Grab image text” option.
Adding drawings to notes
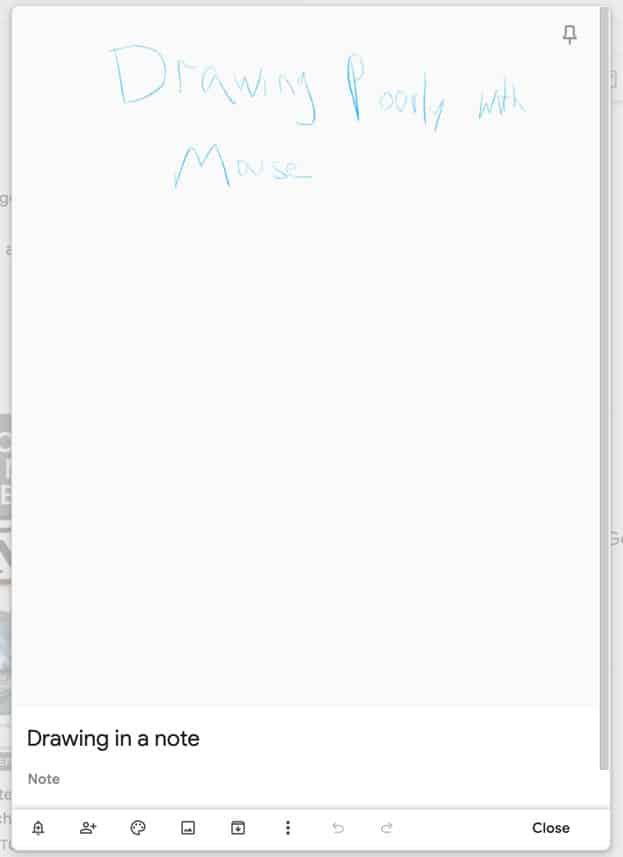
Google Keep not only allows you to add images to your notes, it also enables you to sketch your thoughts. In order to add a drawing to your notes in the web app, follow the steps given below:
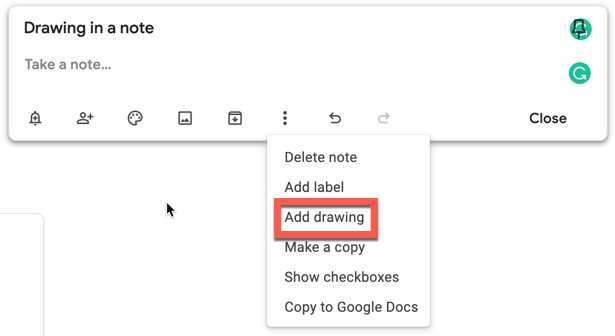
- While inside the new note, tap the vertical ellipsis icon present on the right side of the toolbar and select Add drawing.
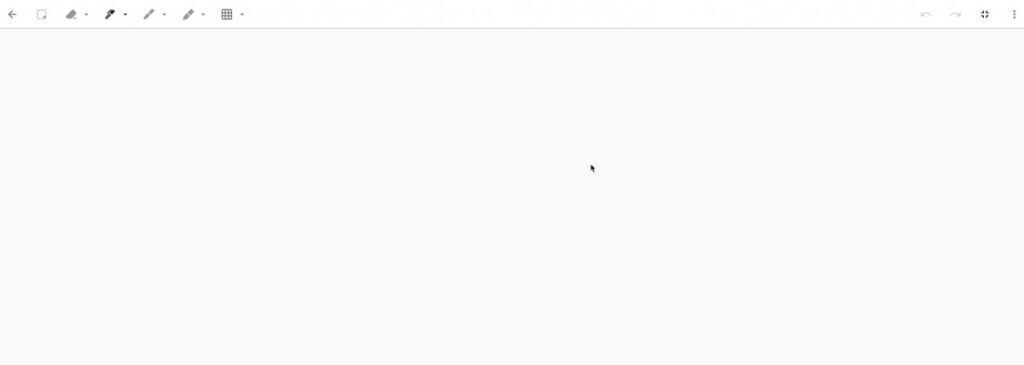
- You will be presented with a canvas screen. Select the tool you want to draw with.
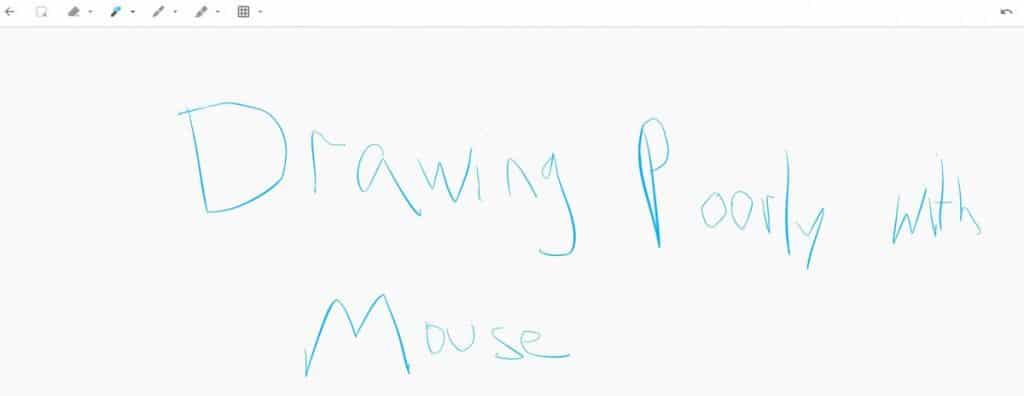
- Write or sketch your thoughts on the screen.
Tip: Just like images, you can also grab out the words from your drawings and turn them into searchable text. To do this, tap the three-dot menu and select Grab image text option.
Turning a note into a checklist
Google keep allows you to turn your unorganized note into a checklist. With the help of a checklist as a note, you can easily mark the certain checkboxes when they complete.
In order to turn your note into a checklist, follow the steps given below:
- Open the note which you want to turn into a checklist or create a new note.
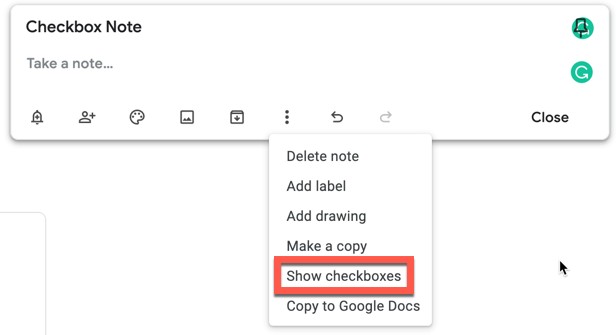
- Click the three-dot icon at the lower right of the toolbox.
- Select “Show checkboxes”.
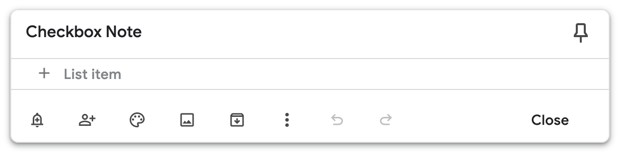
- A checkbox will appear before each item of your checklist.
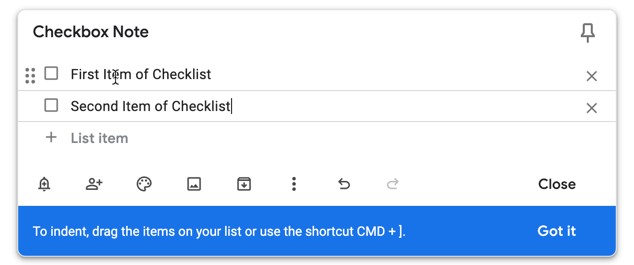
Tip: To indent, drag the items or simply use the shortcut Ctrl ] on Windows or Command ] on a Mac.
To add a checklist to a note in Google Keep for Android, do the following:
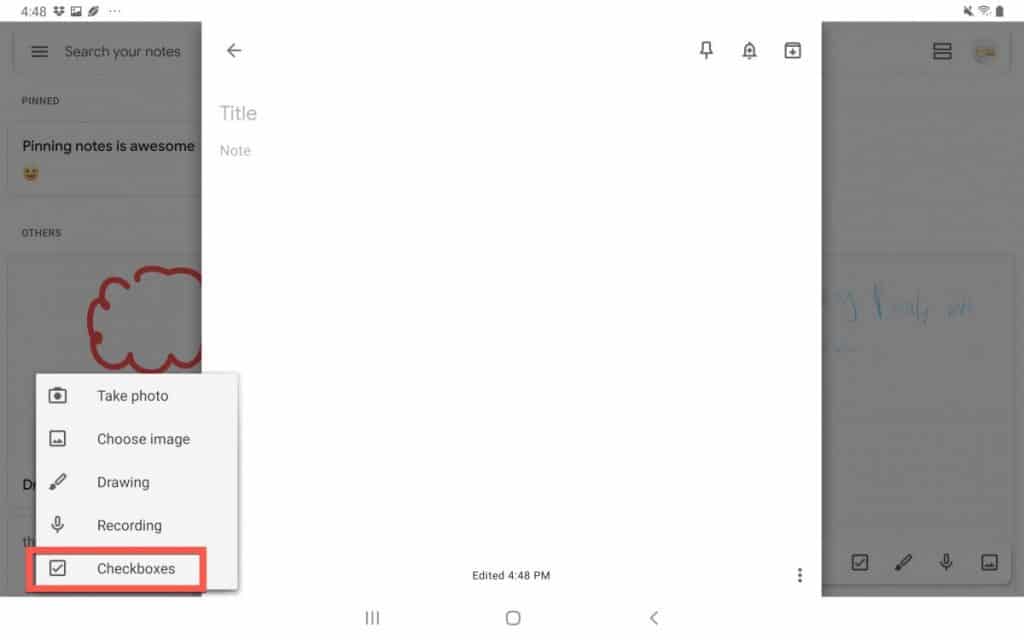
Open the Note, press the + button and select Checkboxes
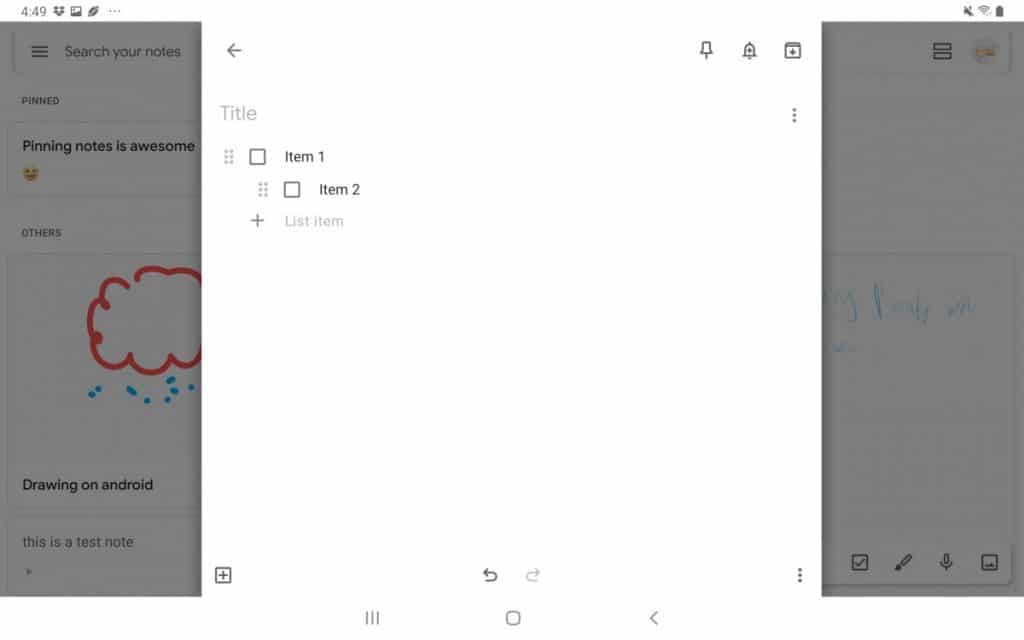
Add items to your checklist, you can indent them by dragging the item to the right.
Making a copy of a note
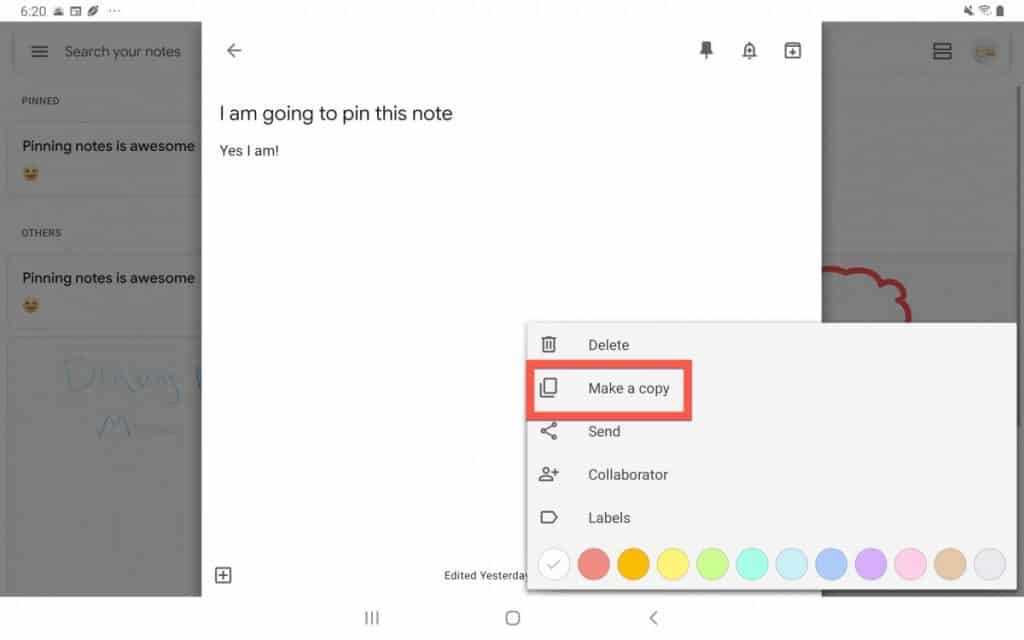
Google Keep supports the ability to make a copy of your original note. You can use that copy for editing or any temporary changes without affecting your original note. To make a copy of your original note, follow the steps given below:
- Open the note.
- Click the three-dot button.
- Select Make a copy option.
- An exact copy of that note will be opened, keeping your original note unaffected.
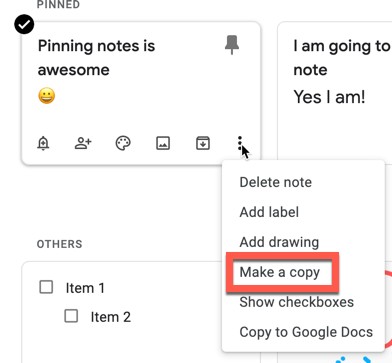
To copy a note in Google Keep for Android, do the following:
- Open the note, press the vertical ellipsis and select Make a copy
A copy of your note will appear in the window.
Undoing an action
Sometimes you unknowingly delete a text or perform any incautious change which you want to retrieve. Google Keep assists you to retrieve your data by providing you with an option to undo your action.
In order to undo an action follow the following steps.
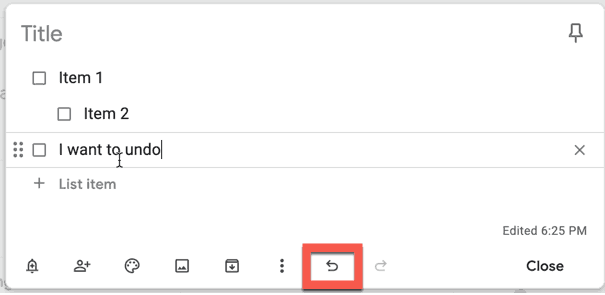
- Click the arrow icon that circles around to the left, present at the bottom right position.
- The action that you performed prior clicking the undo icon will be undone.
Tip: After undoing an action, you can also redo an action by clicking the arrow icon that circles around to the right at the bottom right position.
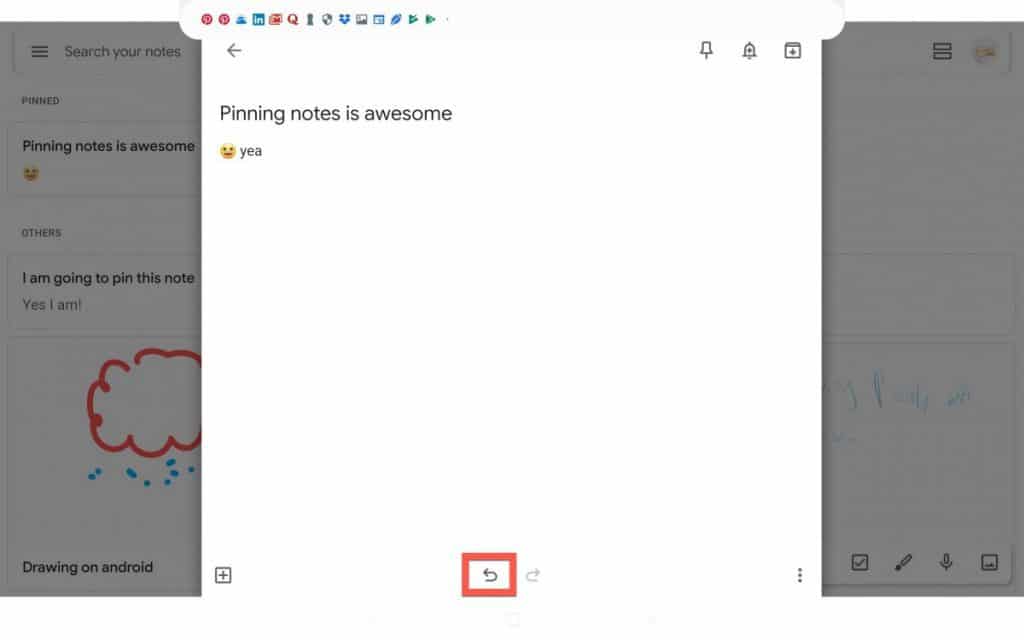
Performing an undo action is the same in Android as it is in the web app. Simply click on the arrow pointing to the right icon to undo the last thing you did.
Setting your favorite view
Google Keep offers two types of views for your notes. One is grid view and the other is list view. The default view of Google keep is grid view but you can change it to the list view as well.
To change the view from grid to a list view, follow the step given below:

- Click the two horizontal thick bar lines at the upper-right of your screen.
On clicking, the view will be changed from grid (multi-column) view to the list (single-column) view.
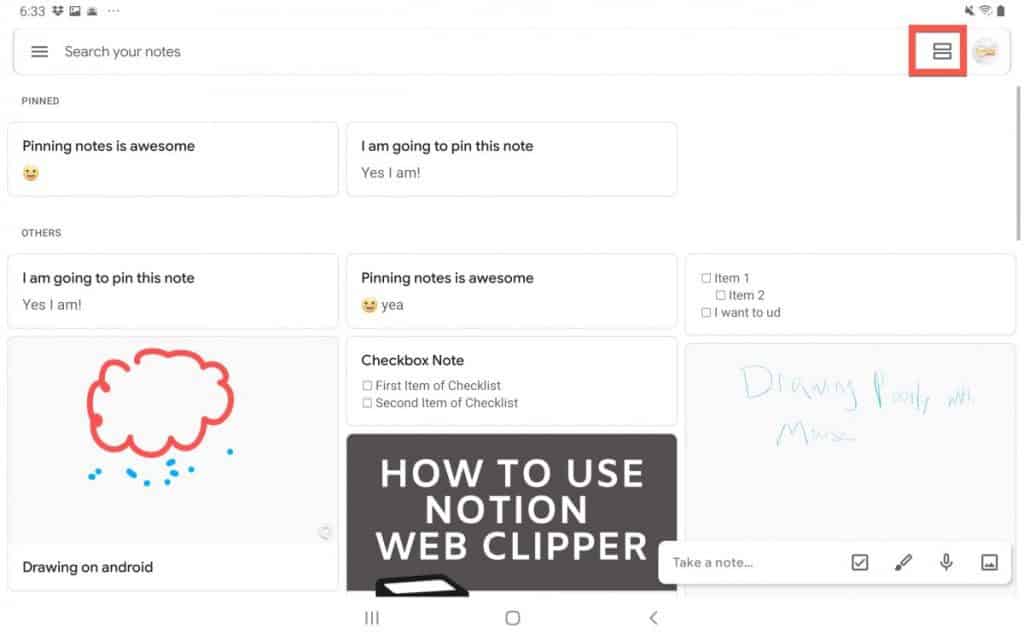
Switching views works the same way in Android. Simply press the list view icon in the upper-right hand corner of the Google Keep window to switch to list view.

Adding a link to a note
Google Keep allows you to add links of any website into your notes. To insert a link, follow the step given below:
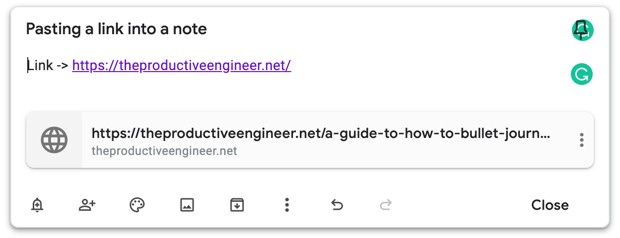
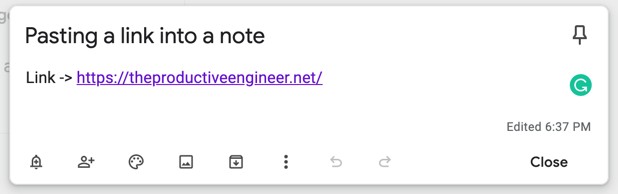
- Copy the URL address of the site you want to add to your note and paste it into the body of the note.
The URL address will become a link when you close the note. Google Keep will create a rich link preview for your link inside your note.
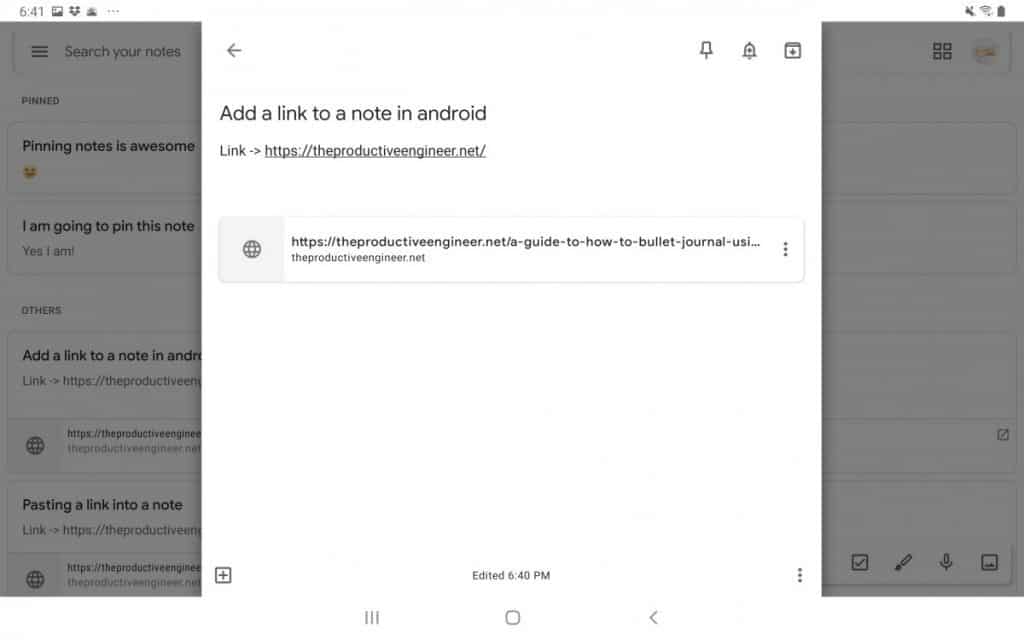
The Android app works the same way. Simply paste your link into the note and you will get a link and a rich link preview in your note.
Disabling rich link previews
Google Keep displays the rich link previews for rich web pages, saved in your notes. The preview boxes can be convenient to find the links easily but they can also make your notes a little messy.
To disable rich link preview in the web app, follow the steps given below:
- Click the gear icon, present at the top of your screen.
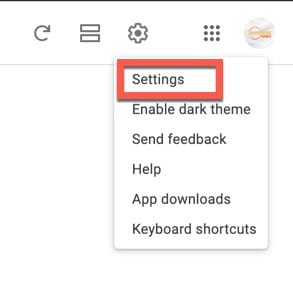
- Select Settings from the list.
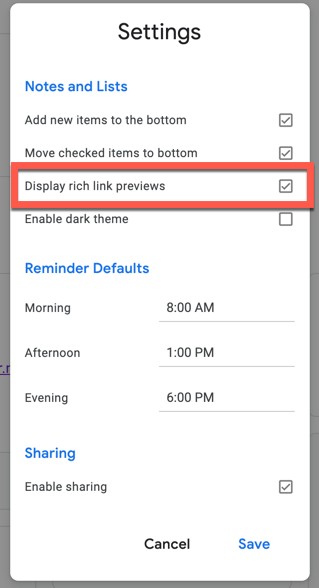
- Uncheck “Display rich link previews” box from the list.
The procedure is a little different with the Android client. To toggle the rich link preview settings in the Google Keep Android client, do the following:
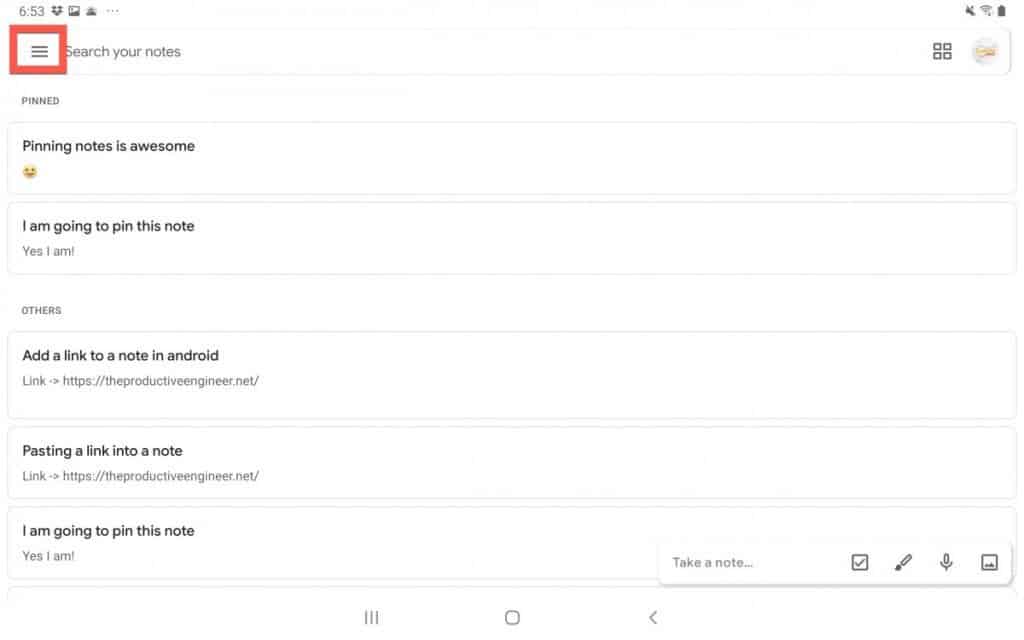
In the upper-left hand corner of the Google Keep window, press the triple line icon
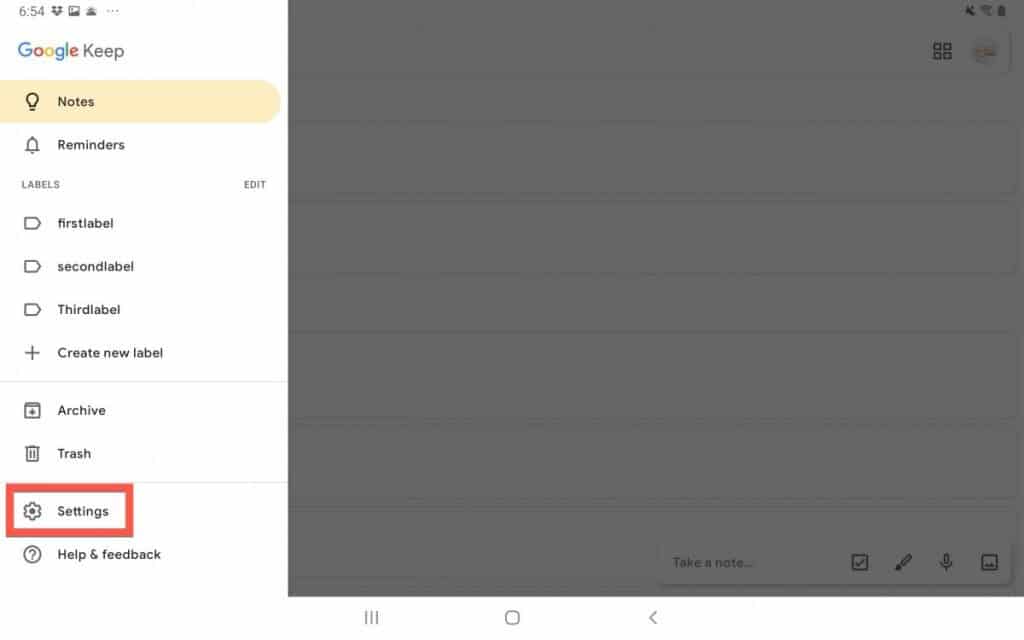
Select Settings from the drop-down menu
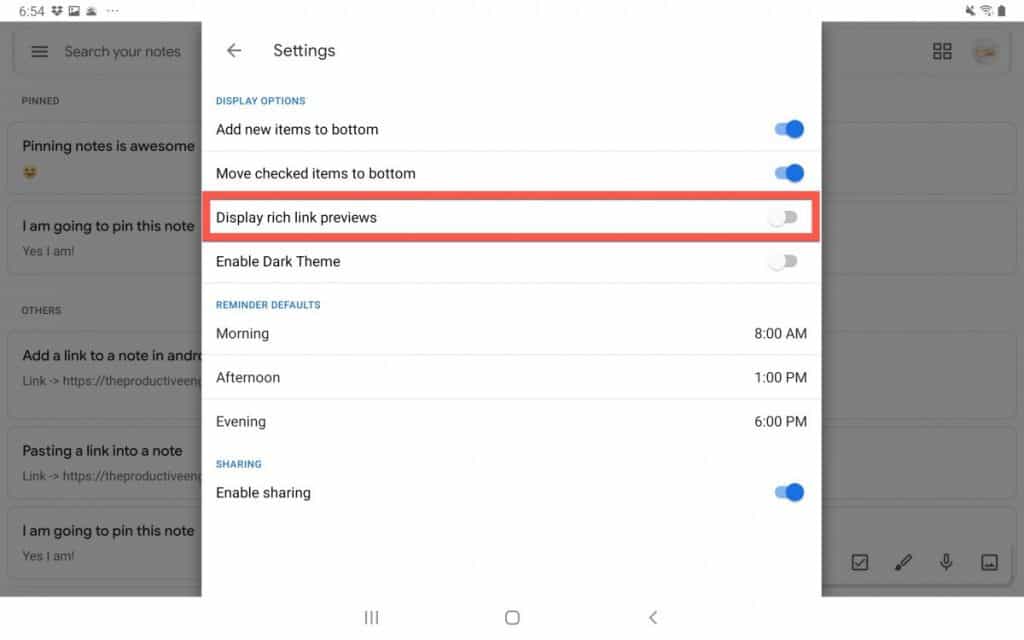
Press the switch next to Display rich link previews to toggle it on/off
Setting the default time of reminders
Google keep allows you to set the default time of reminder that suits you well. By default, it has times for morning, afternoon, and evening. To customize the default time of reminder for your notes in the Google Keep web app, follow the steps given below:
- Click the gear icon, present at the top of your screen.
- Select Settings from the list.
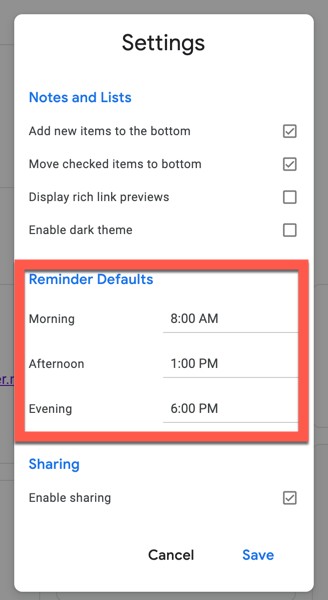
- Below the Reminder Defaults heading, set the time for morning, afternoon, and evening.
- Click Save when you’re done.
To set the default reminder time in the Android client, do the following:
- In the upper-left hand corner of the Google Keep window, press the triple line icon
- Select Settings
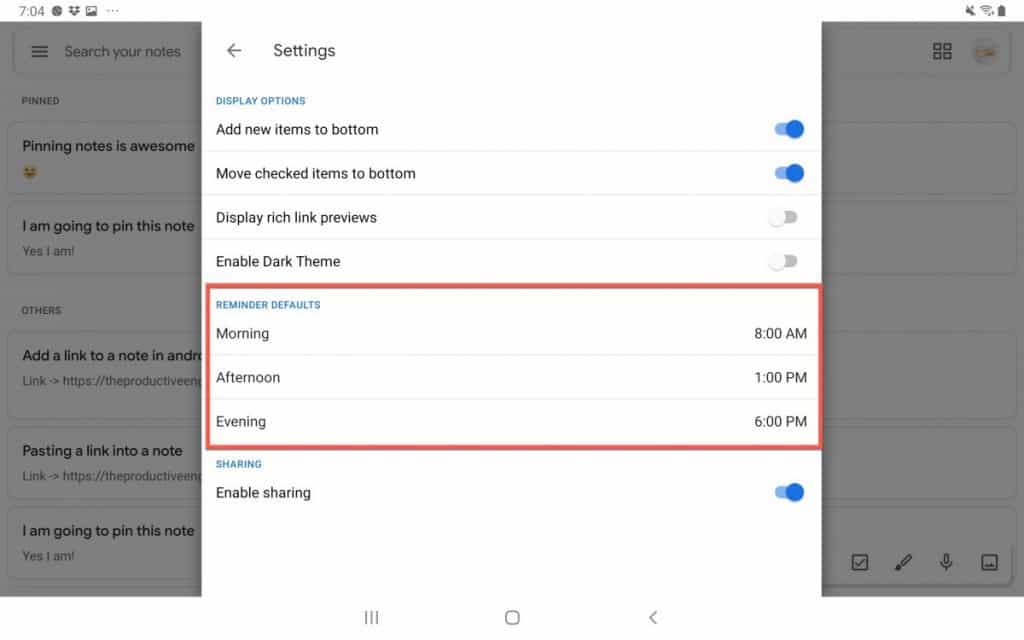
- Set your reminder settings in the Reminder Defaults section of the Settings menu
Collaborating with others
Google keep enables you to share your notes with other people that help you to collaborate with them. To share your note in the web app, follow the steps given below:
- Open the note you want to share
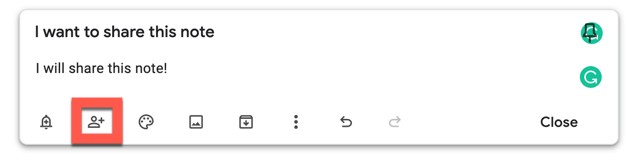
- Click the Collaborator icon, situated next to the bell icon at the bottom left.
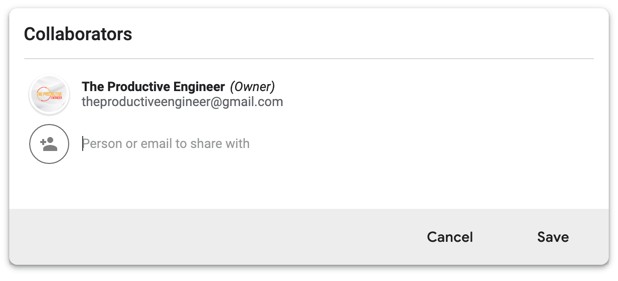
- Enter the email of the person to share the note with.

- Click Save to enable sharing for the user your added to the note. An avatar bubble will appear on the note to signify that you are sharing this note with that person.
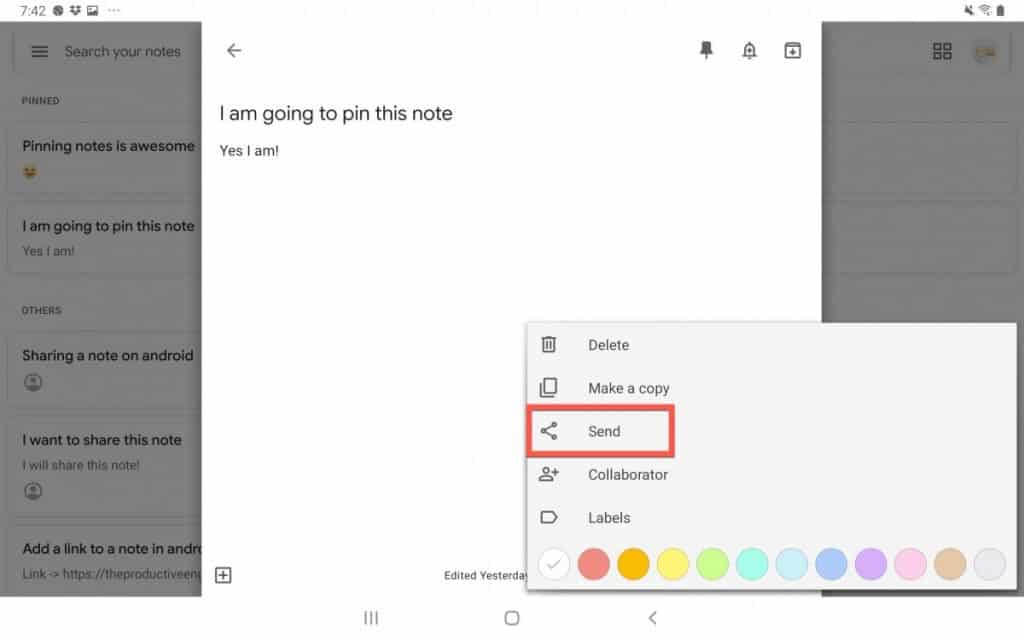
Sharing a note on Android is done in a similar way. To share a note with others in the Google Keep Android client, do the following:
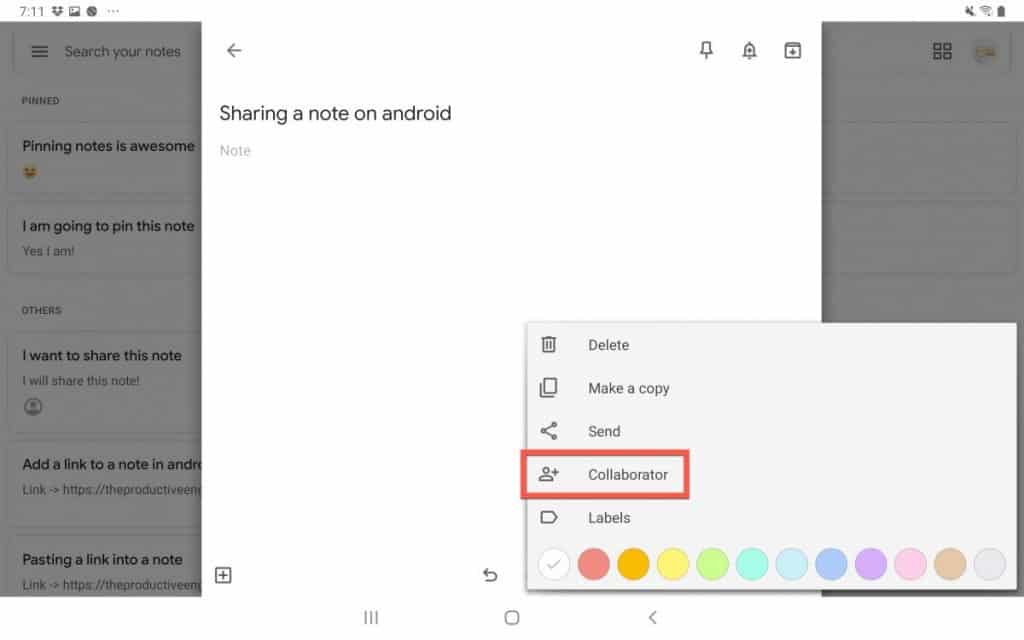
- Click on the vertical ellipsis and select Collaborator
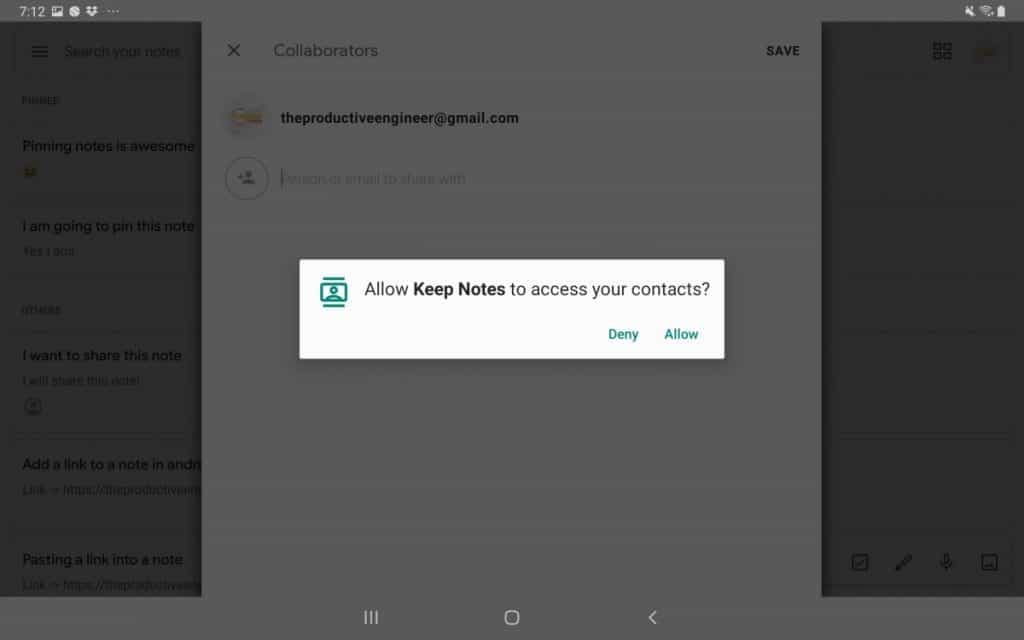
- Allow Google Keep to access your contacts
- Type in the name (if the user is in your contacts) or their email address and press Save
Your note will now be shared with the user.
Adding and switching Google accounts
If you use different two or more Google accounts for different purposes, Google Keep allows you to add those accounts and switch between them. To add and switch account, follow the steps given below:
- Click the circular profile icon at the upper right corner of the screen.
- For adding an account, click the “Add account” button.
- Click on the same icon to switch accounts.
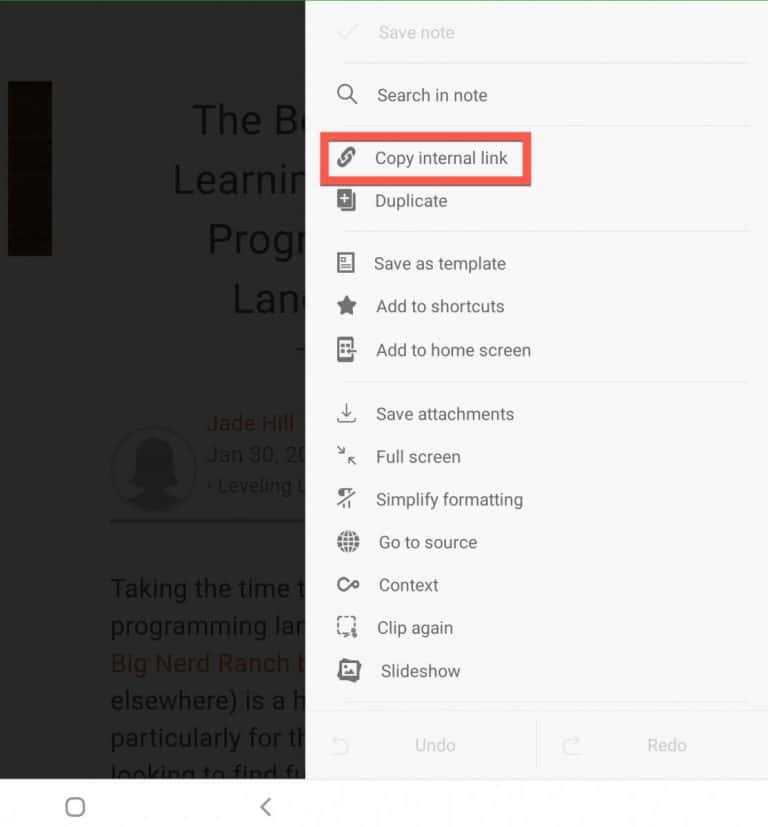
Copying notes to Google Docs
Sometimes your note contains so much text and information that it seems like a document. When such a situation happens, you need to have another platform where you can edit and maintain that note like a document. Google Keep makes it easy to copy your notes to Google Docs. To copy your notes from Google Keep to Google Docs in the web app, follow the steps given below:
- Open the note you want to copy.
- Click the vertical ellipsis icon at the bottom-right corner.
- Select the Copy to Google Docs option.
- A notification will appear at the bottom stating “Copied to Google Docs”.
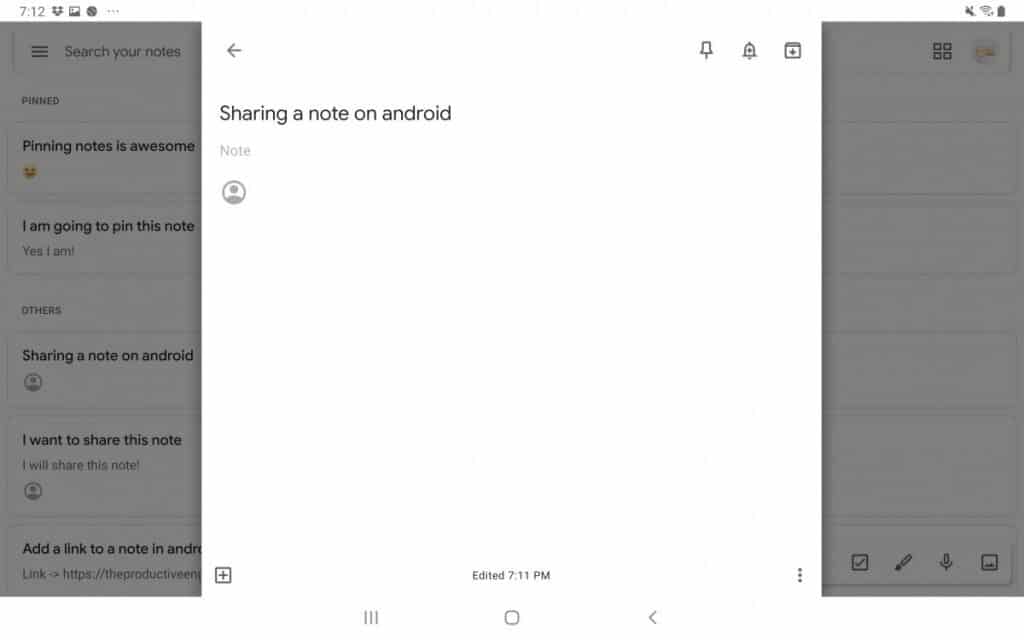
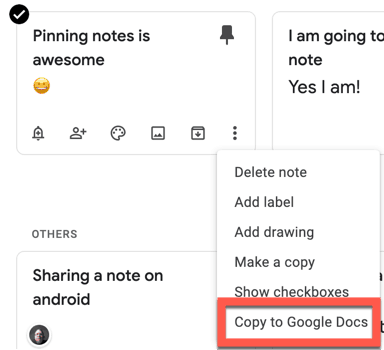
To copy a note to Google Docs from the Google Keep Android client, please do the following:
- Open the note, press the vertical ellipsis icon and select Send
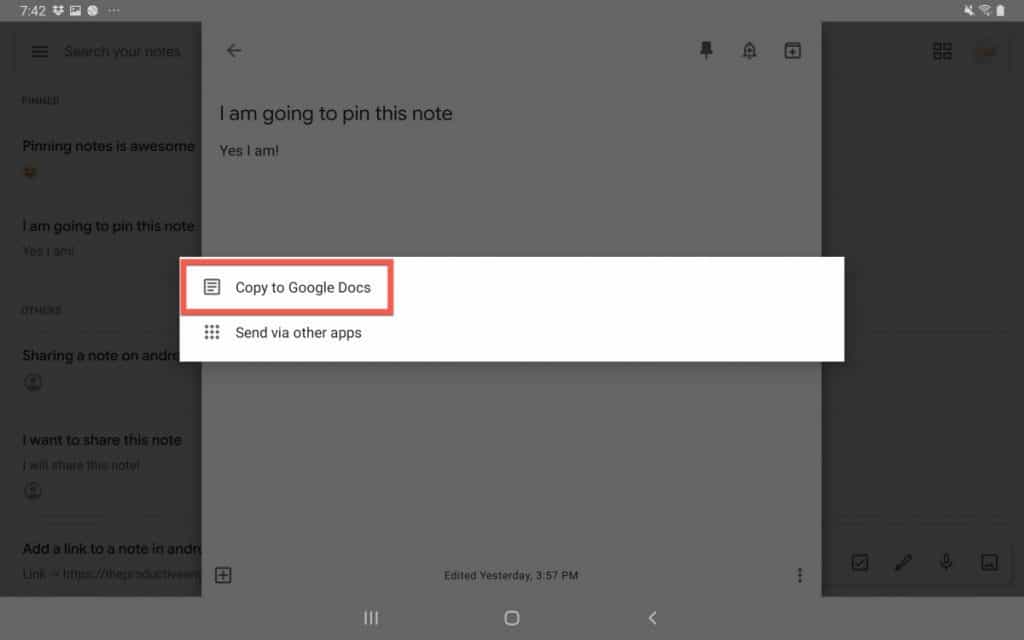
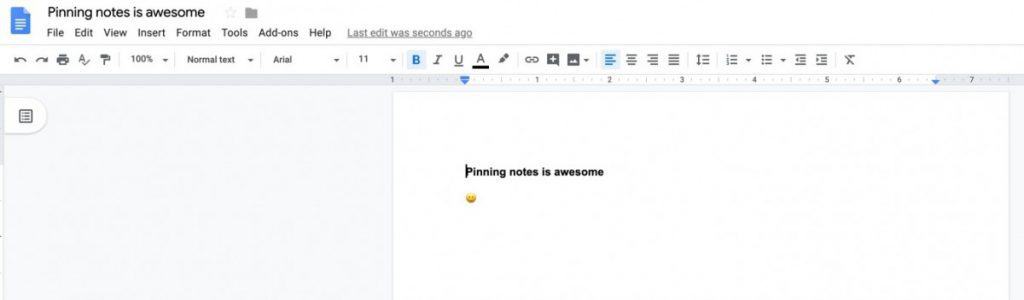
- Press Copy to Google Docs

- Your note has been copied to Google Docs.
Making a Quick Search
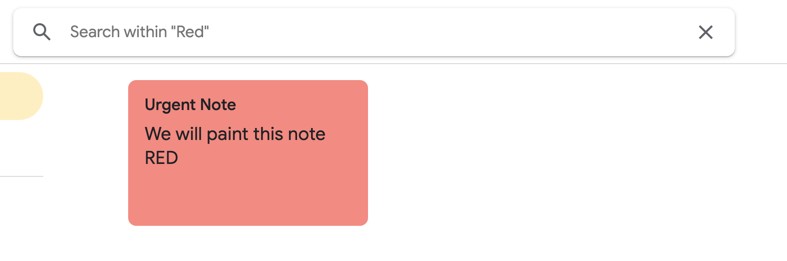
Google Keep provides you with a search function that is more advanced than a simple search. The search function filters out your notes into different categories. You can easily choose the category related to your search rather than going through all your notes to save your time.
To make a quick search in the web app, follow the steps given below:
- Click the search box present at the top of the application’s main screen.
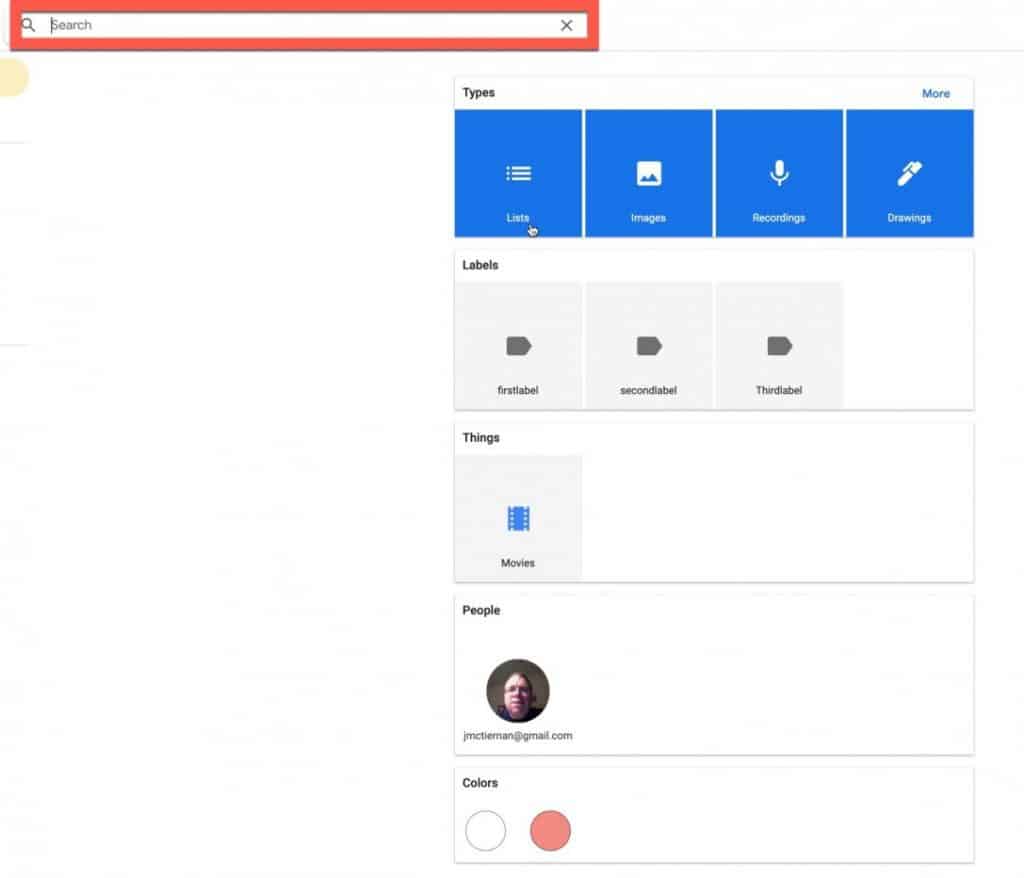
- Different tools will appear like reminders, labels, images, lists and URLs which will filter your notes to certain type.
- Click on any of the categories to open the specified note related to it.
To perform an advanced search in the Google Keep Android client, do the following:
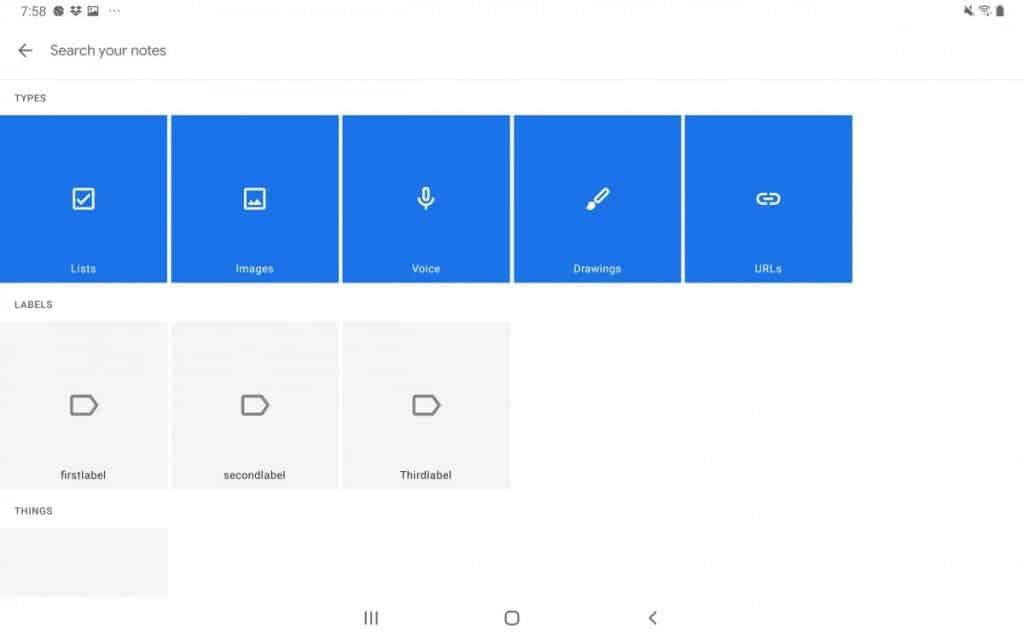
- Press the search box in the top part of the Google Keep window. It should show a bunch of options in the main window similar to the image above.
- Select the search criteria you want.
Want More Tips and Tricks? Subscribe to our Newsletter!
If you haven’t already subscribed, please subscribe to The Productive Engineer newsletter. It is filled with tips and tricks on how to get the most out of the productivity apps you use everyday. We hate spam as much as you do and promise only to send you stuff we think will help you get things done.
Check Out Our YouTube Channel!
We have a YouTube channel now and we are working hard to fill it with tips, tricks, how-tos and tutorials. Click the link below to check it out!
Check out our Resources page
Check out our resources page for the products and services we use everyday to get things done or make our lives a little easier at the link below:
Helpful Links
Google Keep
link to Google Keep
Google Keep App on Google Play Store
link to Google Keep app on Google Play Store
Other Articles You Might Be Interested In
The Pomodoro Technique – Why the Pomodoro Technique Works
link to Pomodoro Technique blog post
Beginner’s Guide to Google Keep
link to Beginner’s Guide to Google Keep
How to Create a Template in Todoist Guide
link to How to Create a Template in Todoist Guide
How to Organize Todoist Guide
link to How to Organize Todoist Guide