Beginner’s Guide to Evernote
Evernote has been around seemingly forever. Yet, it still is extremely popular for capturing ideas and acting as a thought repository. I have been a Premium subscriber since January 2010 and the Evernote service has been a staple of my productivity workflow.
But what if you are just getting started in Evernote? It can be pretty daunting to learn a new tool. Well, you can relax as you are in the right place to learn all about Evernote! This step-by-step tutorial will teach you everything you need to know.
Before we get started with the tutorial, if you are looking to learn more about apps like Notion, Todoist, Evernote, Google Docs, or just how to be more productive (like Keep Productive’s awesome Notion course), you should really check out SkillShare. Skillshare is an online learning platform with courses on pretty much anything you want to learn. To learn more about Skillshare and its vast library of courses and get 30% off, click the link below:
SkillShare – Online Learning Platform
If you are looking to learn how to harness the power of Evernote Home, check out our Ultimate Guide to Evernote Home.
Now let’s get started with the tutorial!
Evernote Structure

Evernote is a note-taking service where everything revolves around notes. Notes are the place you actually enter your notes, images, tables, etc. Evernote uses a very “pen and paper” structure that encompasses the following three structures:
- Notes
- Notebooks
- Stacks
The next sections below will describe each of these in detail.
Notes

Notes are the base structure of Evernote. As referenced earlier, notes are the place where your content goes. Some of the types of content that can be added to notes include:
- text
- images
- pdfs
- spreadsheets
- receipts
- presentations
- audio recording
If there is something you want to put into Evernote, you pretty much can. But how do you organize your notes in Evernote? That is where Notebooks come into play.
Notebooks
Notebooks are used in Evernote to store notes that have something in common. Some examples could include:
- Crafting Ideas
- Coding Notes
- Pictures I want to save
- Receipts Container
In fact, I am sure you can/will come up with a whole bunch of ideas for organizing your notes. Those categories you create will be your notebooks. We will cover how to create and manage Notebooks in Evernote later in the tutorial.
But what is you have a group of notebooks that fall under a general category and you want to group them together? This is where stacks come in.
Stacks
Stacks are a group of notebooks that relate to each other in some way. Stacks, like notebooks, are user-defined and you can create stacks of notebooks based on whatever criteria you wish.
We will cover how to create stacks later on in the tutorial.
Creating Notes in Evernote
So, let’s start getting our hands dirty with Evernote. The first thing to learn is how to create a note. There are a couple of ways to create a note in Evernote and we will cover each one.
Creating a Note via Keyboard Shortcut
Enclosed below are the keyboard shortcuts for creating a new note in Evernote for Mac and Windows:
| Platform | New Note Shortcut |
|---|---|
| Mac | ⌘+N |
| Windows | Ctrl+N |
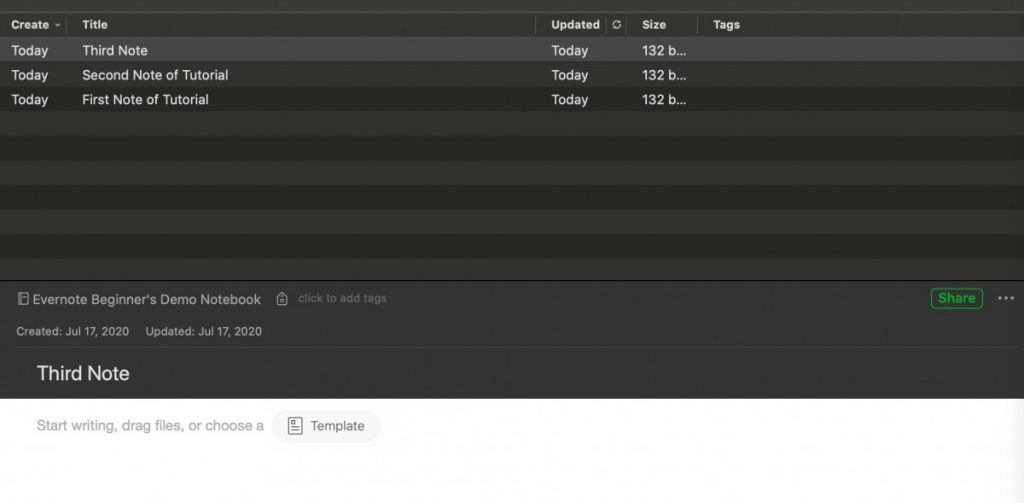
Let’s create a new note. Use the keyboard command for your platform (Mac or Windows).
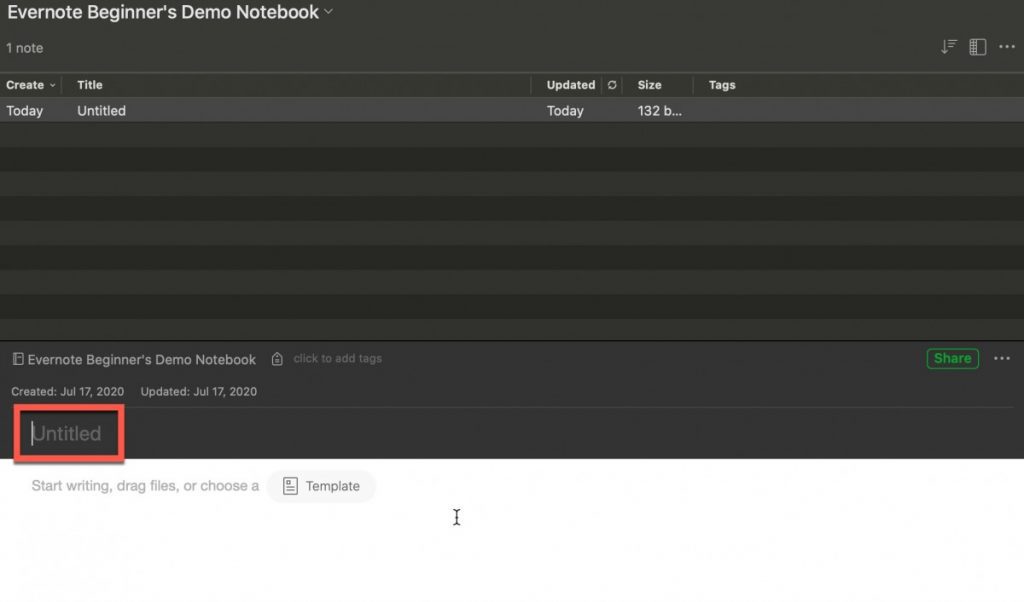
Your note should now appear in Evernote. Give your Note a Title by clicking on the “Untitled” area (I marked it with a red box in the screenshot above). Type in your new tile and press Enter.
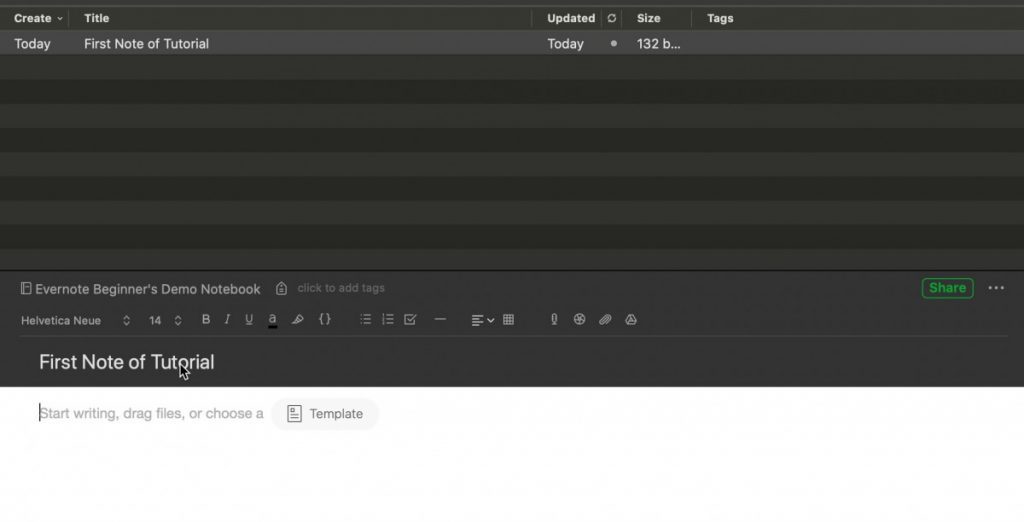
Your note should now have the title you set.
Creating a Note via “New Note” button
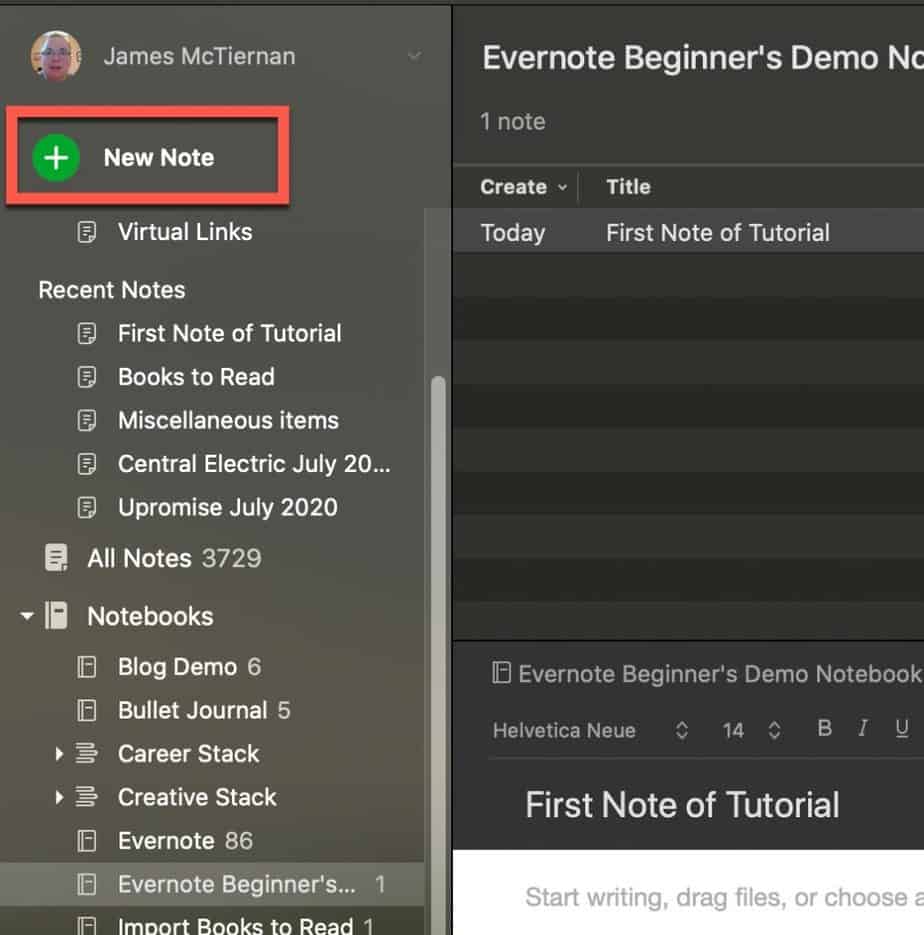
You can also create a note by simply clicking the “New Note” button in the upper part of the left panel as shown above. Try it now. Give your new note a title by clicking on the “Untitled” area of the note as we did earlier.
Your note should how have the title you gave it.
Creating a Note via Main Menu
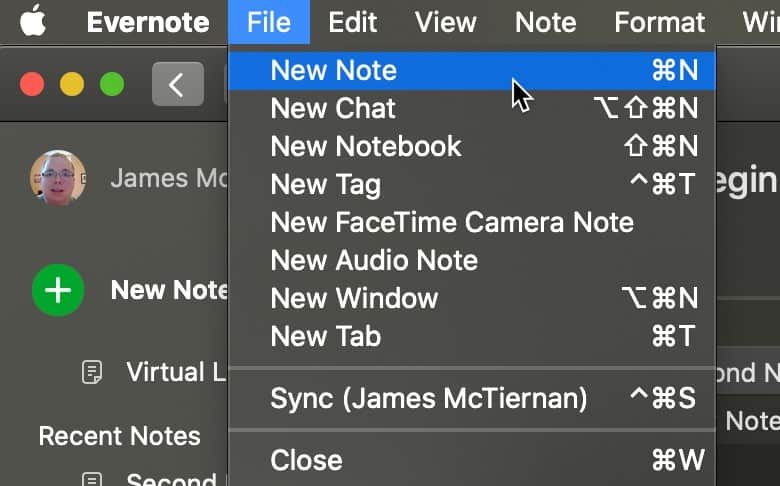
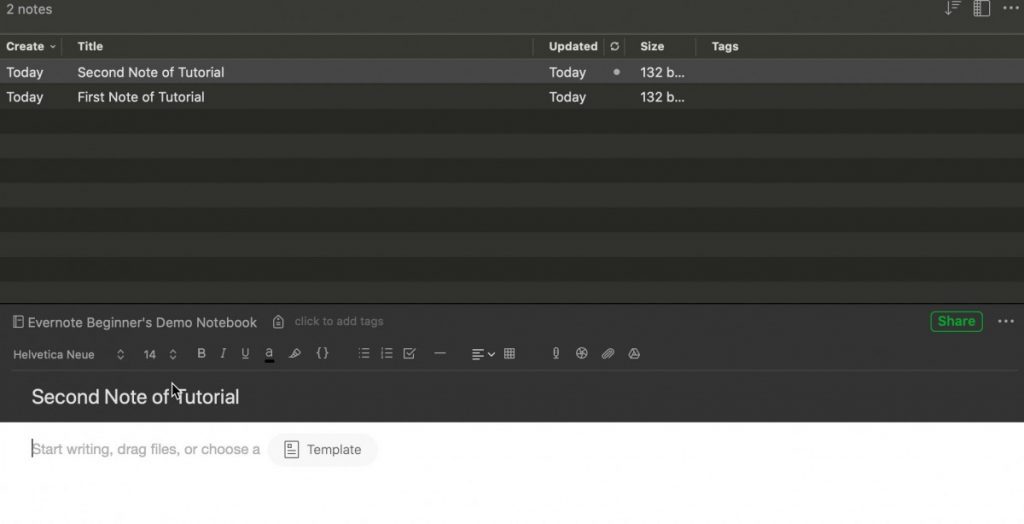
Lastly, you can create a note via the main menu. Go to File -> New Note and click on it. Your new note should appear. Give your new note a title.
Your new note should be setup with your title. Now lets puts some text into our notes and learn how to format text.
Formatting Text
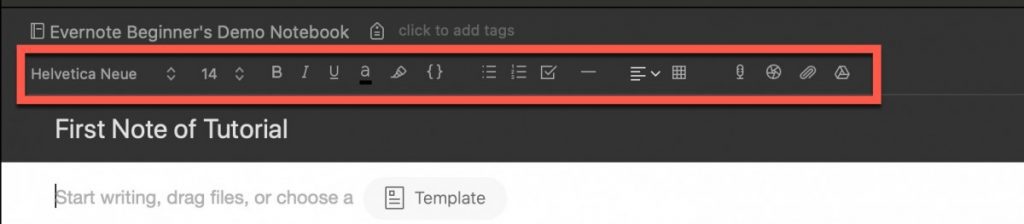
Evernote offers some rich text formatting options and we will explore each of them in this section. When you click inside the body of a note, the text formatting bar will appear at the top of the note.
Bolding Text in Evernote
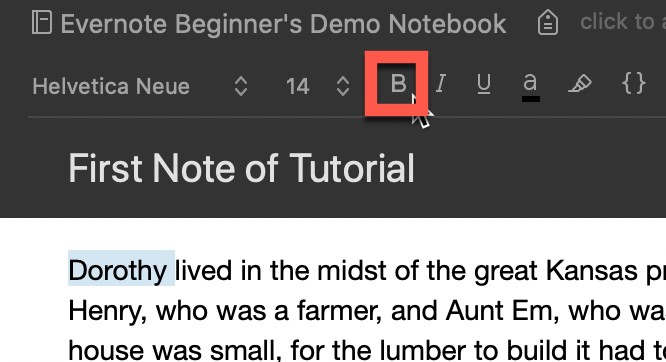
To bold text in Evernote, you can either use a keyboard shortcut (⌘+B on Mac, Ctrl-B on Windows) or click on the “B” in the text formatting toolbar as shown above. Select some in your note and use one of the bolding options to bold the text.
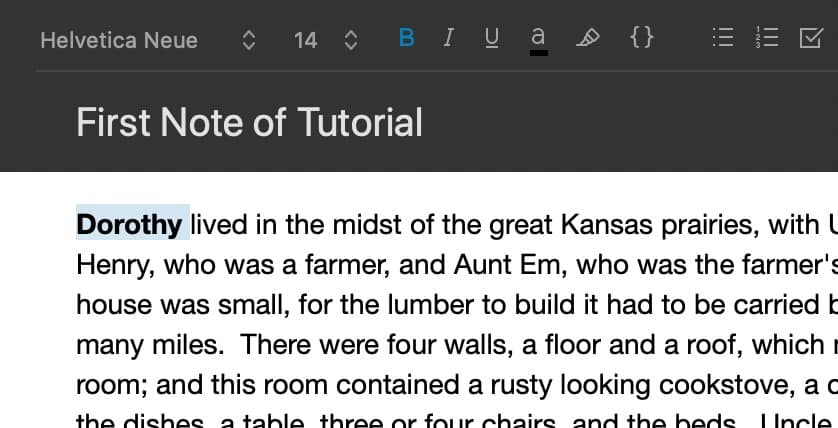
Your text should now be bolded. Additionally, notice that the bold button (B) is now in a different color as well.
Italicizing and Underlining Text in Evernote
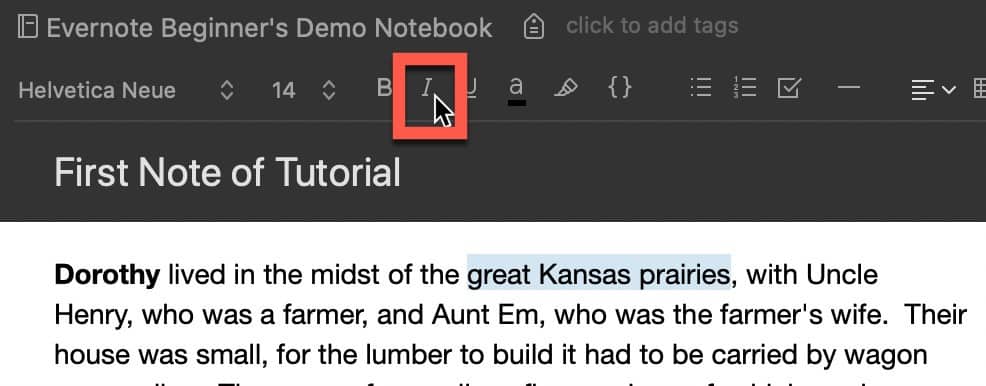
Similar to bolding text, italicizing and underlining text can be done in two different ways:
- Keyboard Shortcut
- The “I” and “U” buttons in text formatting bar
The keyboard shortcuts for italicize and underline in Evernote are enclosed below:
| Option | Windows | Mac |
|---|---|---|
| Italicize | Ctrl-i | ⌘+i |
| Underline | Ctrl-u | ⌘+u |
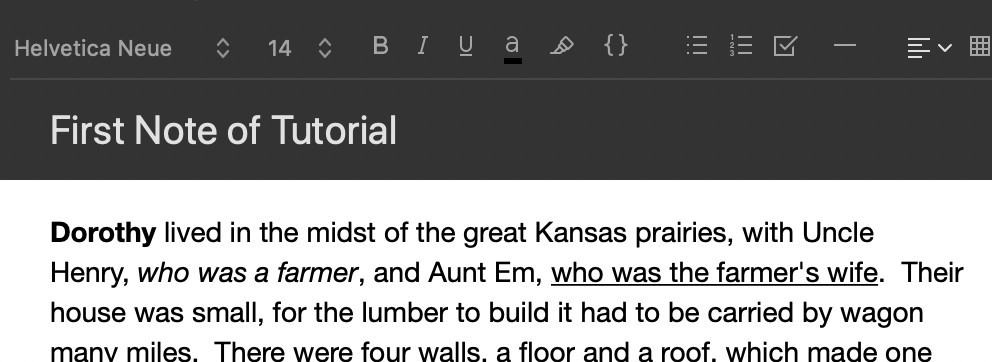
Highlight some text and italicize it. Then, highlight some more text and underline it.
Change Text Color and Highlighting Text in Evernote

The next two items in the text formatting menu bar are the text color and text highlighting options. First, let’s change the text color of some text.
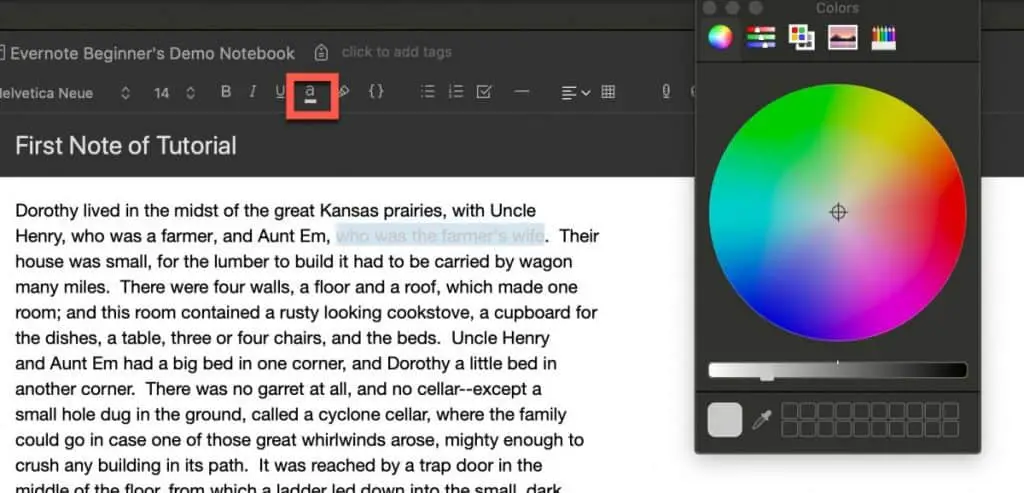
Highlight some text and click the highlight button (as shown in the screenshot above). The color palette window will appear.
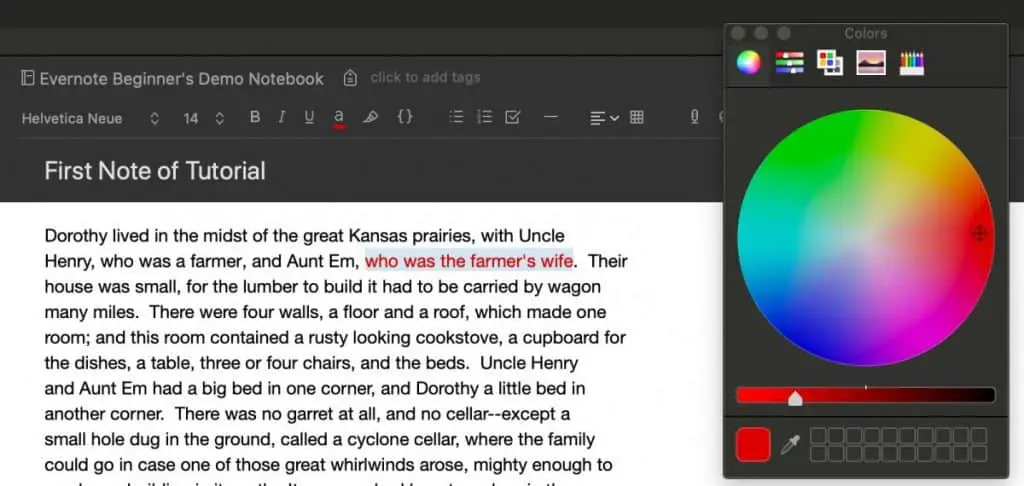
Select the color you want by click on the color you want.
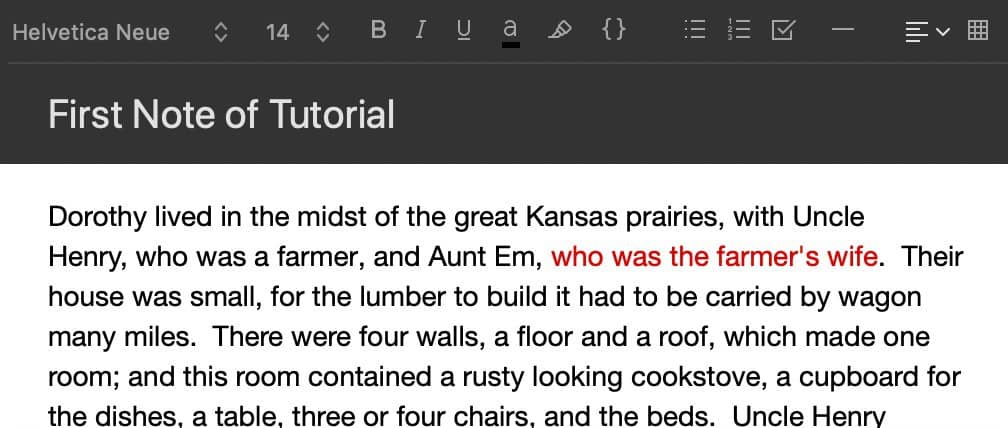
The text should now be the color you want. Now, lets highlight some text.
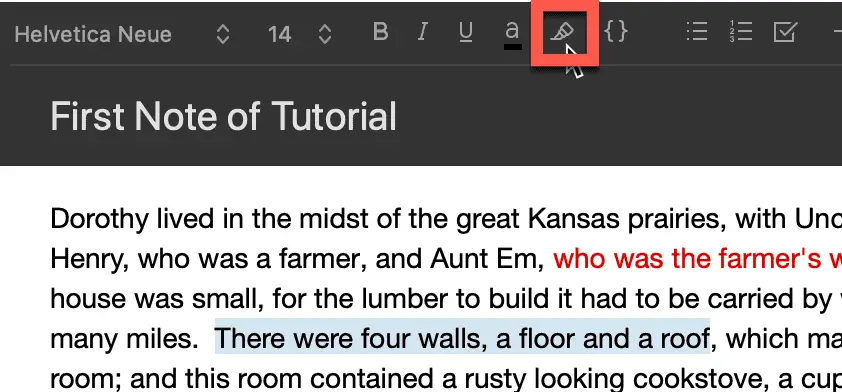
Select some text and press the highlight button.
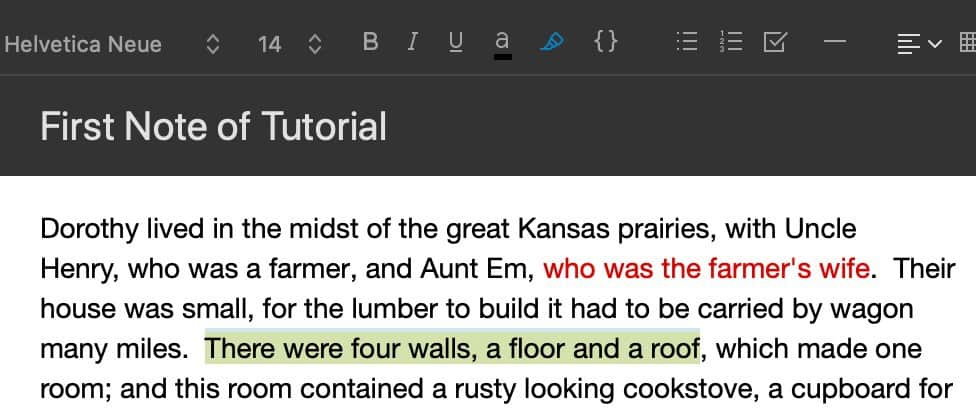
Your text should now be highlighted. Now that we have covered text, let’s look at how to make lists in Evernote.
Creating Lists in Evernote

Creating lists in Evernote is relatively straight-forward. You can create the following types of lists:
- Bulleted Lists
- Numbered Lists
- Checklists
Bulleted Lists in Evernote
Let’s create a bulleted list. There are several ways to create a bulleted list:
- Creating a bulleted list from existing text
- Selecting text, go to Format -> Lists -> Toggle Bulleted List
- Selecting text, use keyboard command
- Mac – ⇧⌘U
- Windows – Shift, Ctrl, U
- Create a new list
- Type asterisk and a space (* )
- Type a dash and a space (- )
- Press the bullet list button in the text formatting menu
The easiest way, in my opinion, is to simply type an asterisk and a space (* ). Create a bulleted list using one of the techniques described above. To finish your bulleted list, press Enter twice.
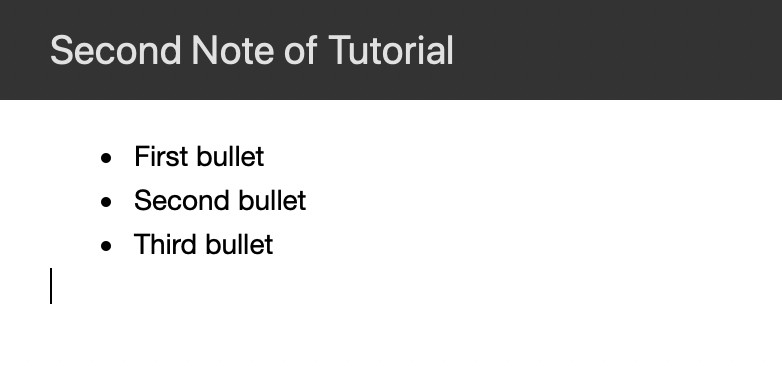
Your bulleted list should look similar to the one above.
You can also increase and decrease the indent level of the items in your lists. There are a couple of ways to do this:
- Go to Format -> Lists -> increase/decrease list level
- Pressing the Tab key on your keyboard to indent one level
- Pressing the Shift and Tab keys on your keyboard to un-indent one level
Create a bulleted list with multiple levels of indentation.
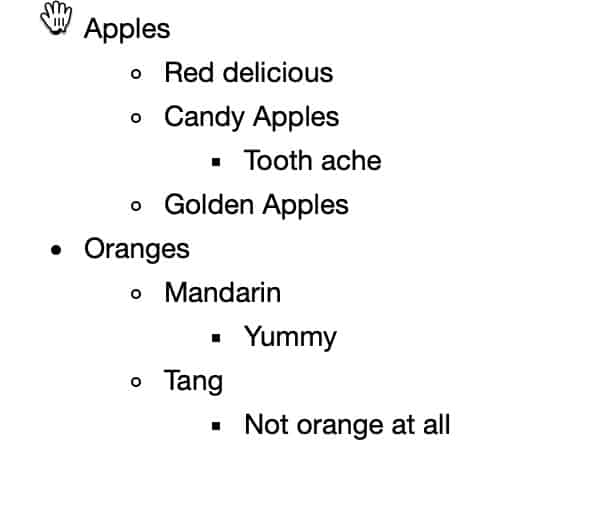
As you can see from the screenshot above, you can have multiple levels of indentation in your lists. Now let’s create a numbered list.
Numbered Lists in Evernote
There are three ways to create a numbered list in Evernote:
- Existing Text
- Select text and go to Format -> Lists -> Toggle Numbered List
- New list
- Type the number one, a period and a space (1. )
- Press the numbered list button in the text formatting menu
Create a numbered list using one of the techniques listed above. Use multiple levels of indentation that we learned with bulleted lists.
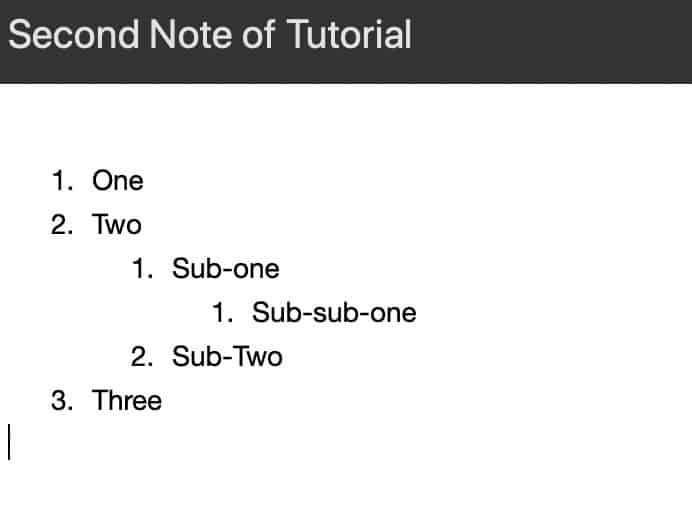
As you can see, you can have multiple levels of indentation with numbered lists as well.
Let’s learn about how to create tables in Evernote.
Creating Tables in Evernote
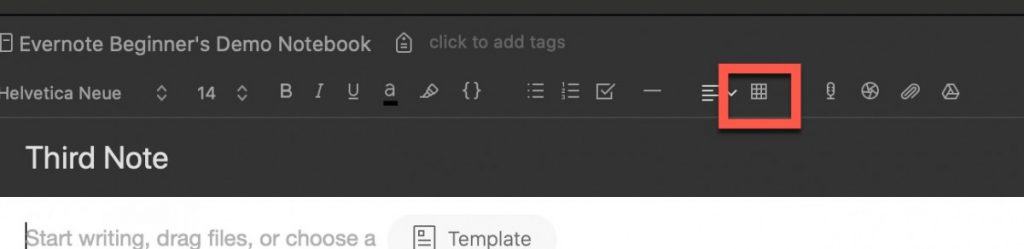
There are several ways to create a table in Evernote:
- Using the Table button in the text formatting bar (see above screenshot)
- Use the keyboard shortcut
- Mac – ⇧⌘L
- Go to Format -> Tables -> Insert Table
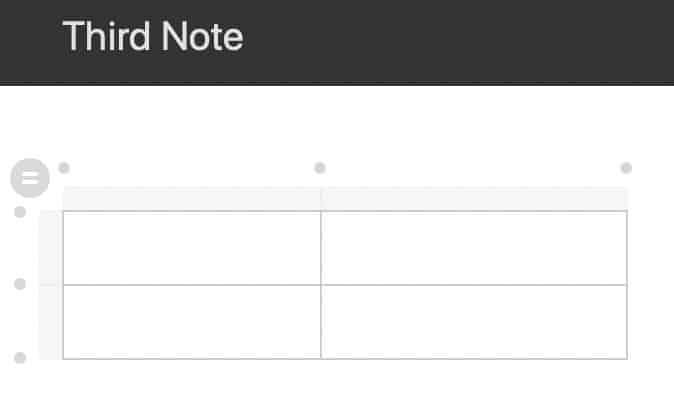
Use one of the options above to create a table.
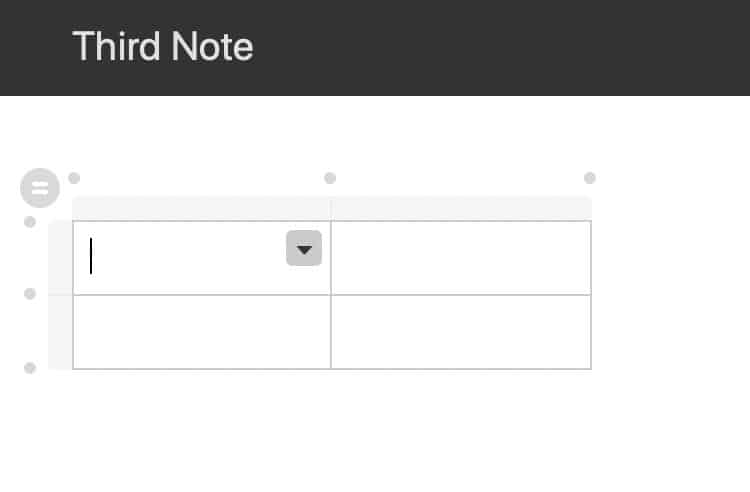
Your table should look something like the screenshot above.
Formatting Tables in Evernote
Let’s get started working with our table. The first thing you may notice is that our table is kind of small. It only has two rows and two columns. Lets change that.
Inserting a Row to a Table in Evernote
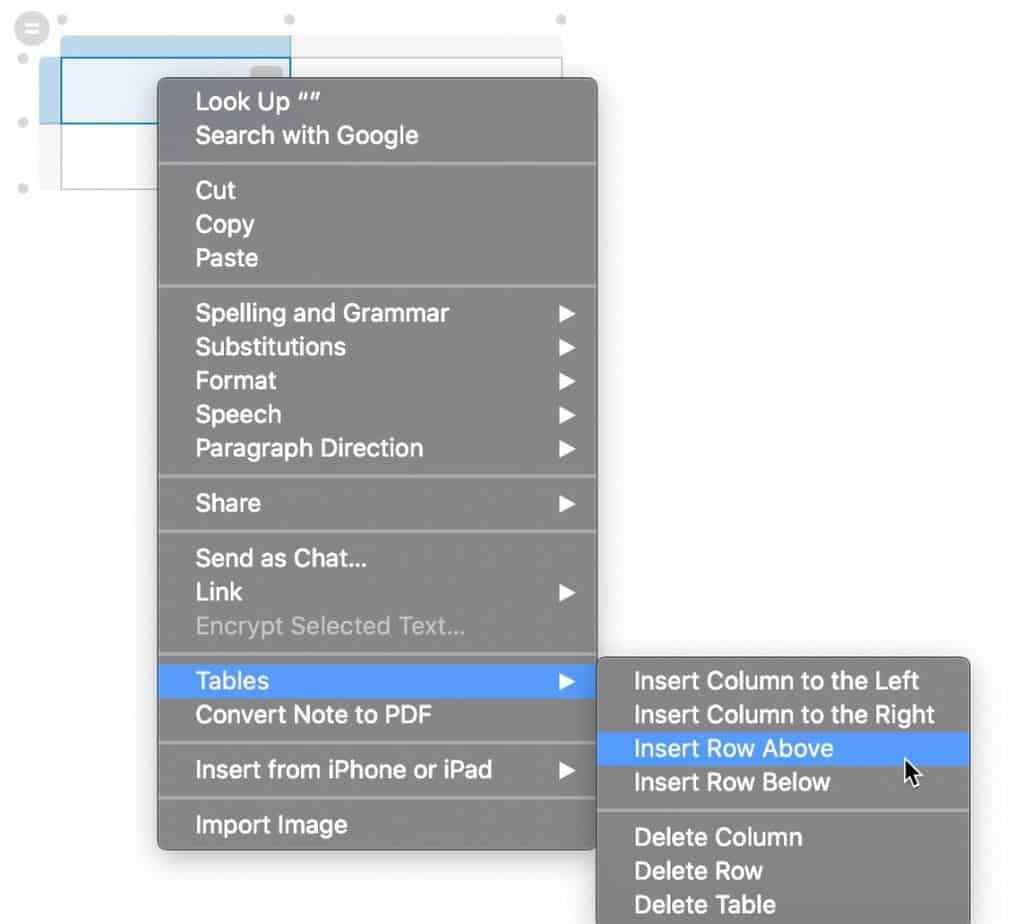
The easiest way to add a row to a table in Evernote is to:
- Right-click on a cell in your table
- Go to Tables->Insert Row Above/Below
Add a row to your table.
As you can see, a row was added to the table.
Deleting a Row from a Table in Evernote
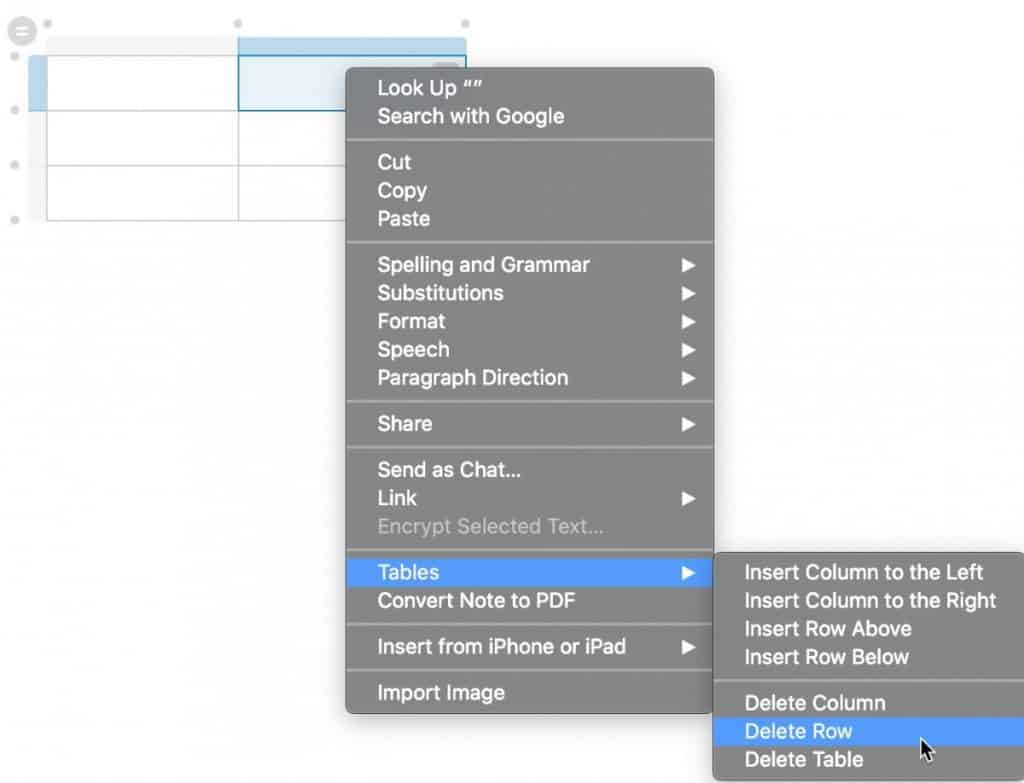
Deleting a row is easy in Evernote, simply:
- Right-click on a cell in the row that you want to delete
- Go to Tables -> Delete Row
Delete a row from your table using the steps above.
Your row should be deleted. Let’s add some columns to our table.
Inserting a Column to a Table in Evernote
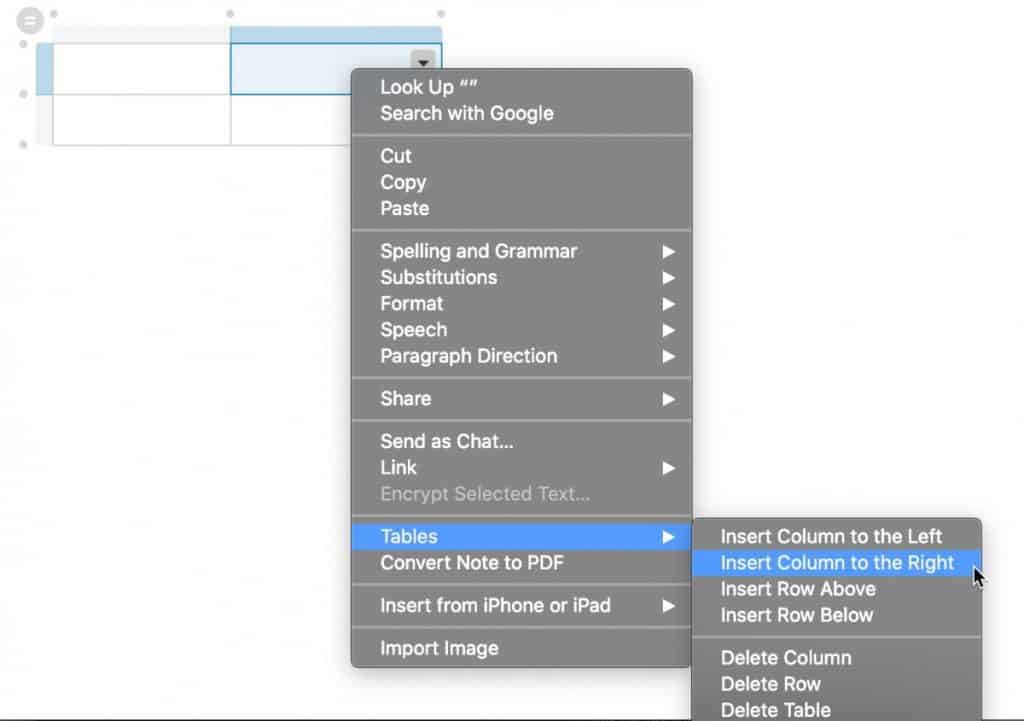
To insert a column to a table in Evernote, do the following:
- Click on a cell in your table
- Go to Tables -> Insert Column to the (Left/Right)
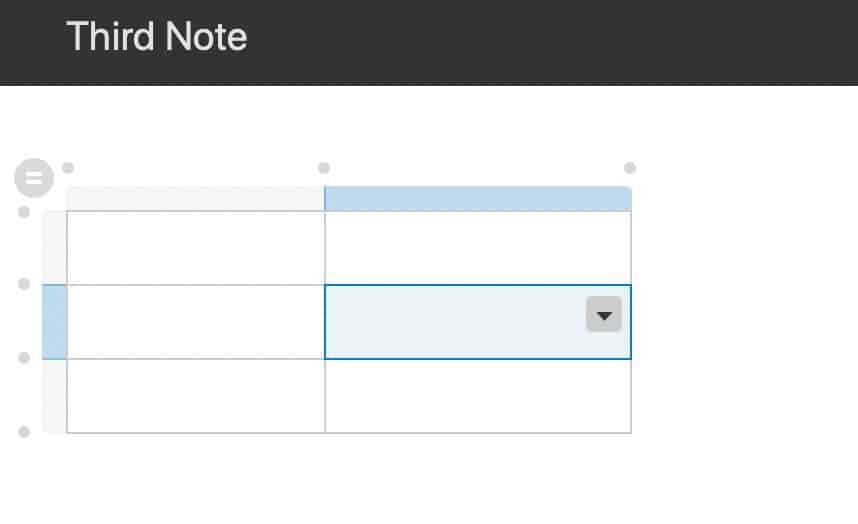
Changing the Background of a Cell in Evernote
You can make your tables more visually pleasing by add color to your cells in the table. For example, you might want to create a table that has the first row with a background color to distinguish it as the header row of the table.

Create a table with some rows and columns and fill it with some text as I have done above.
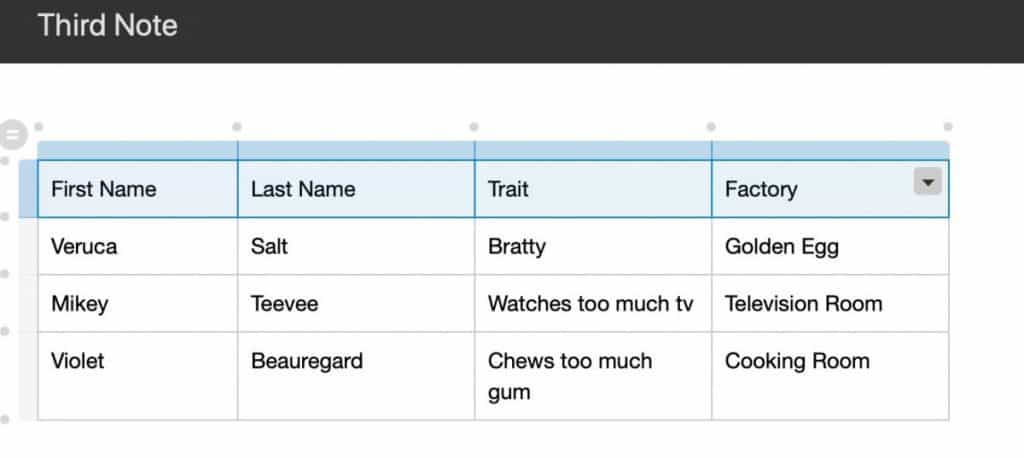
Select all of the cells in the first row by clicking on the top-left cell of the table and dragging your mouse across the top row until you have selected all of the cells in the first row.
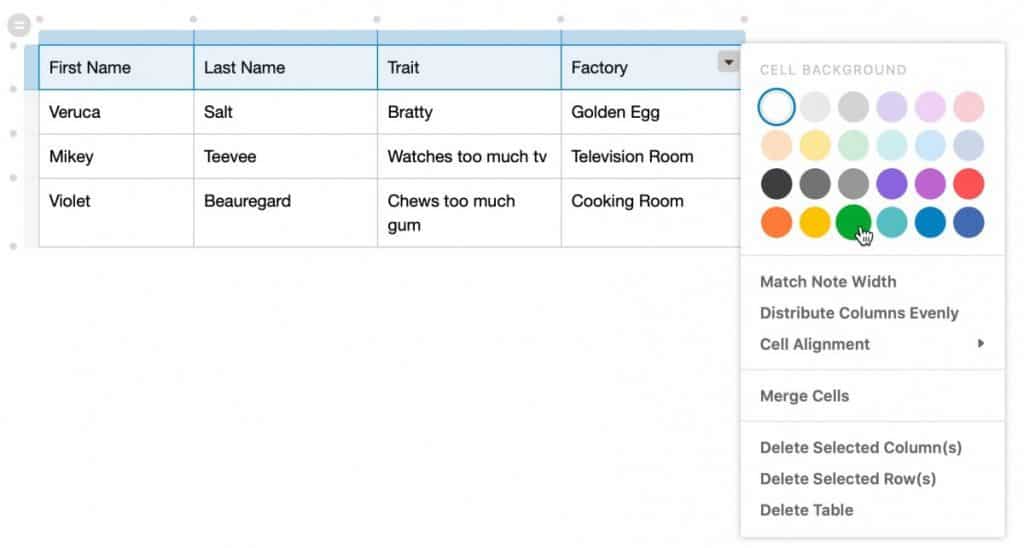
Click on the drop-down menu arrow and select the color you want in the “Cell Background” section of the menu as shown in the screenshot above.
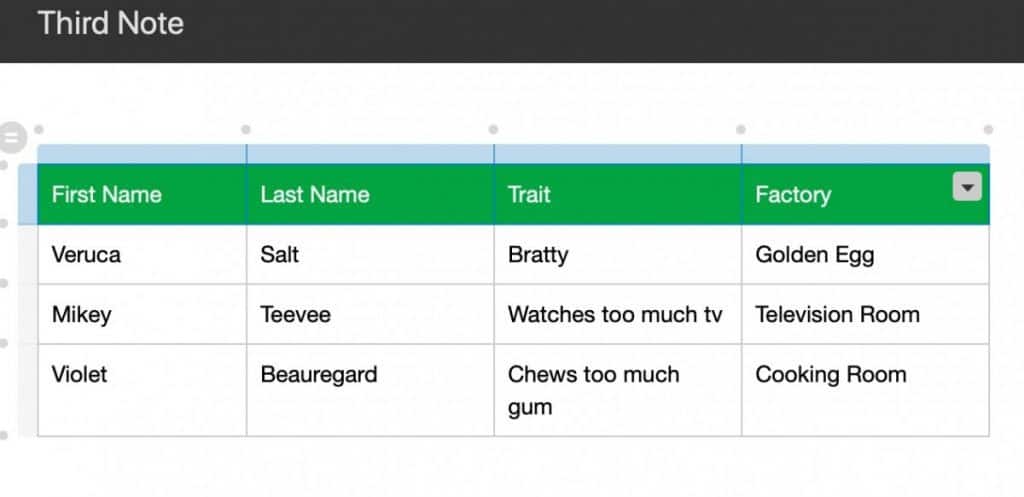
The top row of your table should now have the color you selected as the background color.
Now let’s learn how to merge table cells in Evernote.
Merging Cells in Evernote
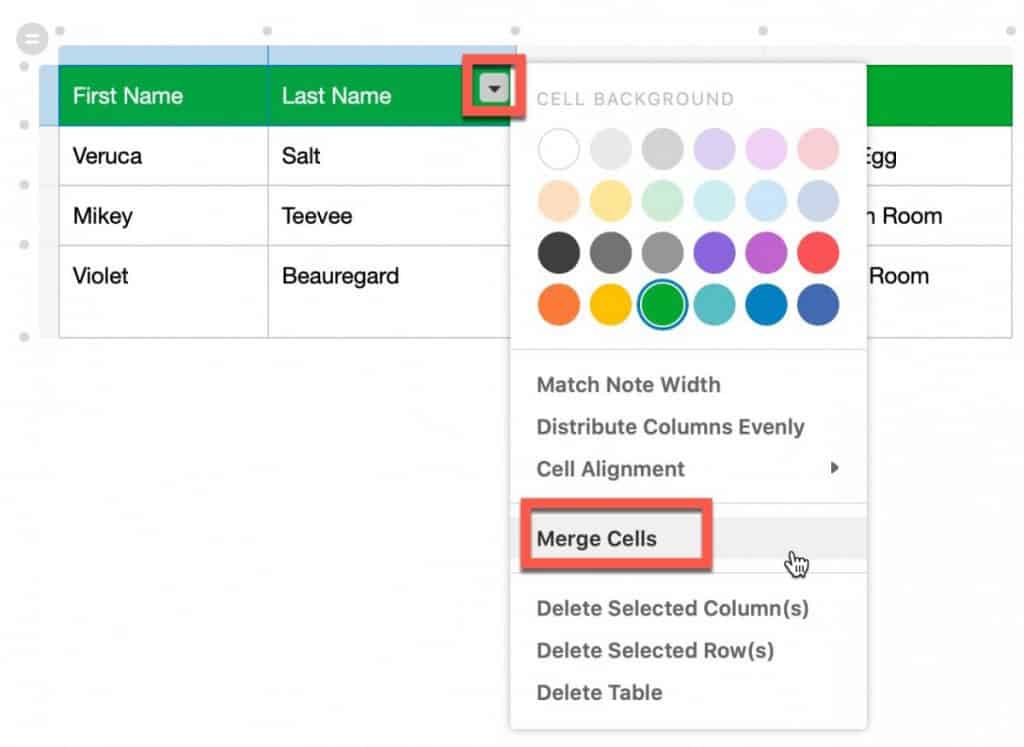
Merging cells in Evernote is easy. Simply select the cells you want to merge and click on the drop-down arrow button the bring up the menu. Select “Merge Cells” from the menu.
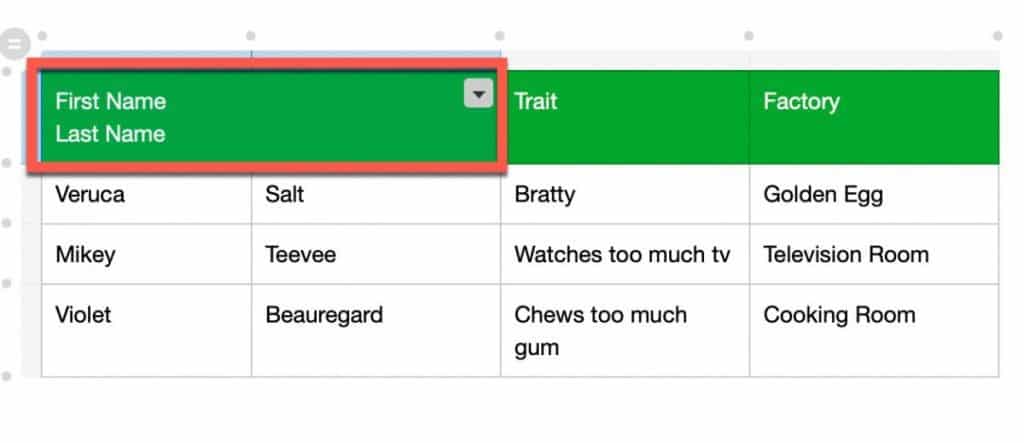
Your cells should now be one cell, like the example above. Try merging other cells in your table.
As you can see, merging cells in Evernote allows you to customize the look and feel of your table.
In the next section, we will cover how to use tags in Evernote.
Using Tags in Evernote

Tags are pieces of metadata that you can add to your notes that make them easier to search for and sort in Evernote. As your collection of notes grows, it becomes harder to find the exact thing you looking for.
Tags help make searching and sorting your notes easier as the number of notes you create increases. So how do you add a tag to a note in Evernote?
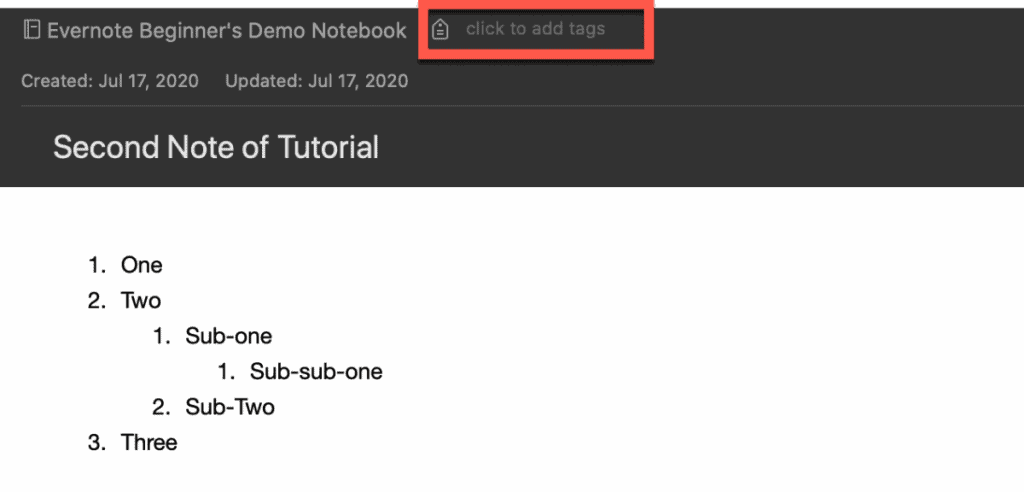
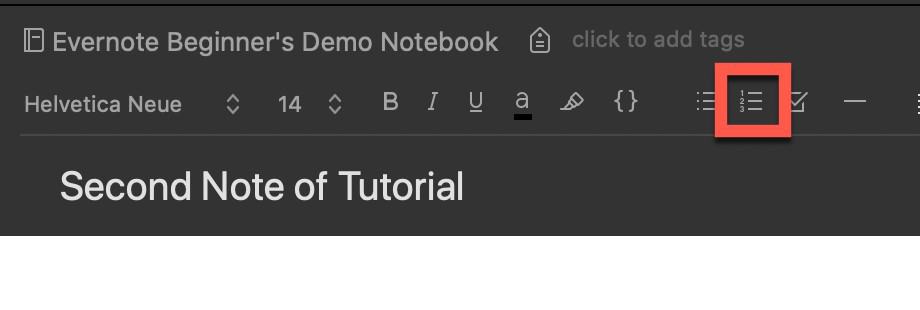
The easiest way is to select or open your note and click where it says “click to add tags” like in the image above.
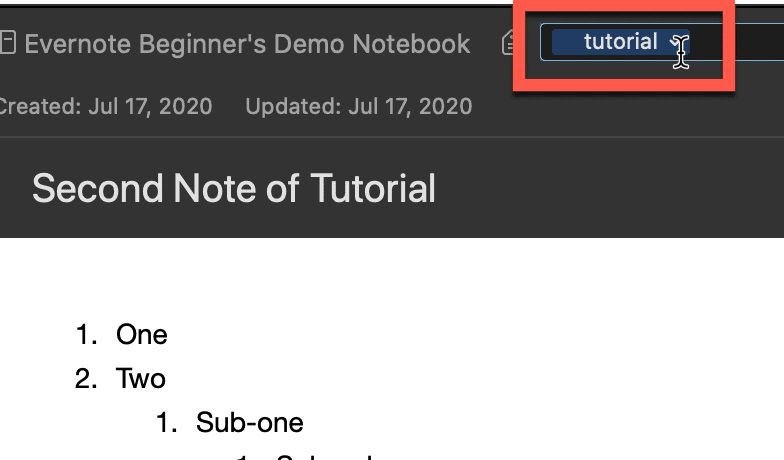
Type in the name of your tag and press “Enter“. Your tag will now be assigned to your note. You can use the same tag for multiple notes that share a common characteristic. So, for example, you can have a bunch of notes that are tutorials that you can tag “tutorial”. Then you can search for all notes with the tag “tutorial” and Evernote will return all of those notes.
Next, let’s cover how to create a notebook in Evernote.
Creating Notebooks in Evernote
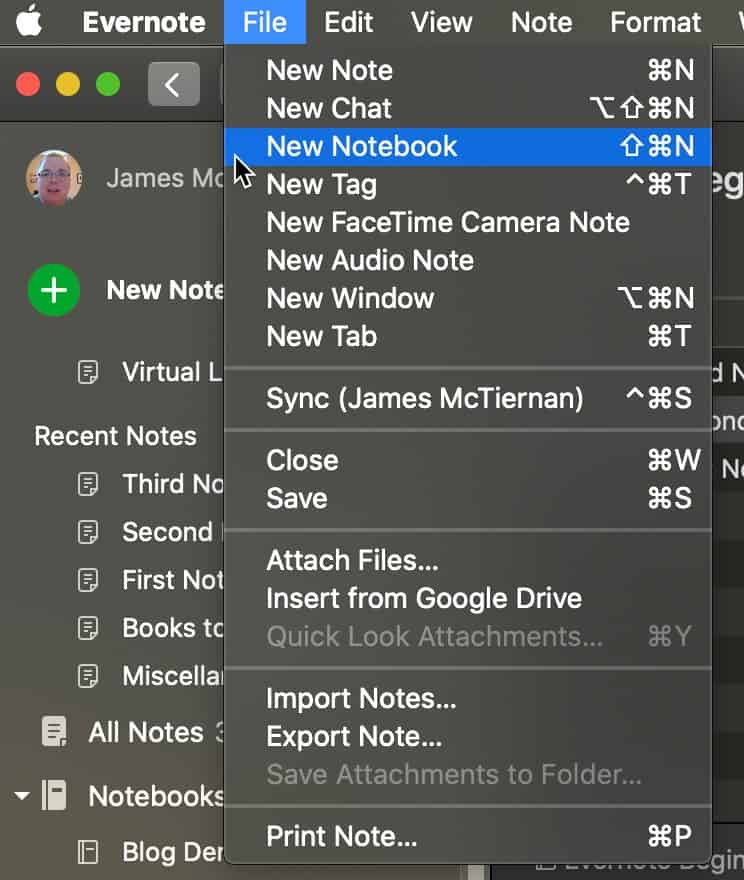
There are three ways to create a new notebook in Evernote:
- Go to File -> New Notebook
- Use the Keyboard Shortcut
- Mac -> ⇧⌘N
- Windows -> Shift, Ctrl, N
- Click on “Notebooks” in left panel to open Notebooks window and click on the “+ New Notebook” button.
Use of these options to create a new notebook.
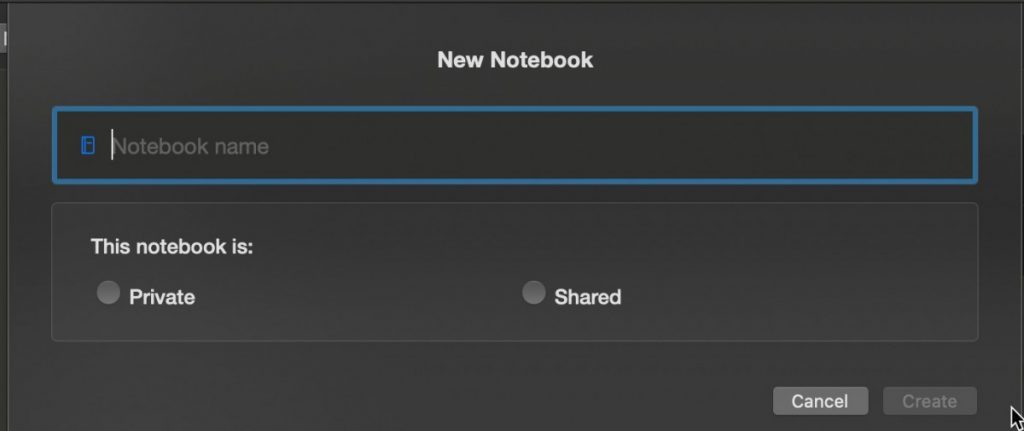
You should now see the screen above. Give your notebook a name by clicking the “Notebook name” text box and typing in the name.
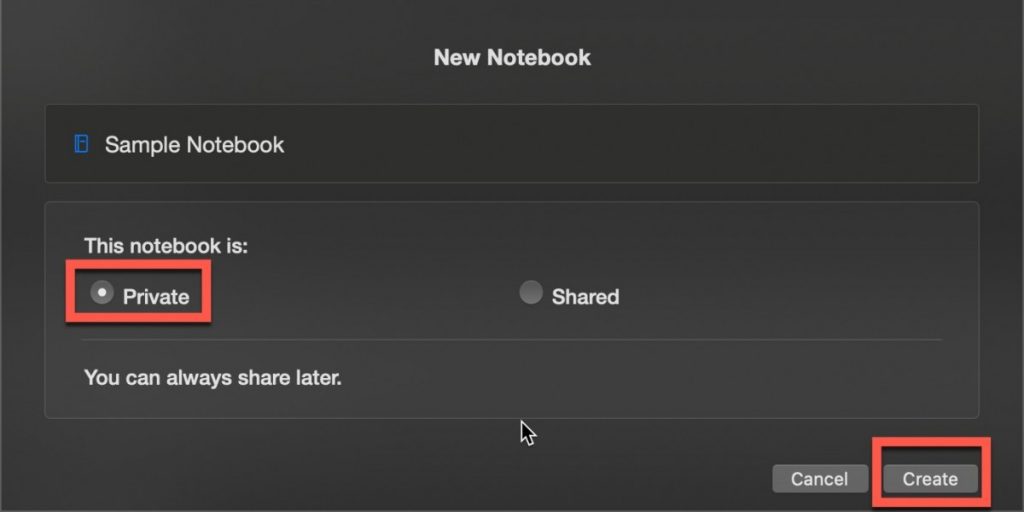
The next step is to determine whether you want to make this notebook sharable with others. Most of the time, you want your notebook to be viewable only by one so select “Private” unless you have someone(s) specific you need to share this notebook with. Click the “Create” button to create your notebook.

Your notebook should now be created.
Now, that we know how to create a notebook, let’s talk about how to create a stack of notebooks.
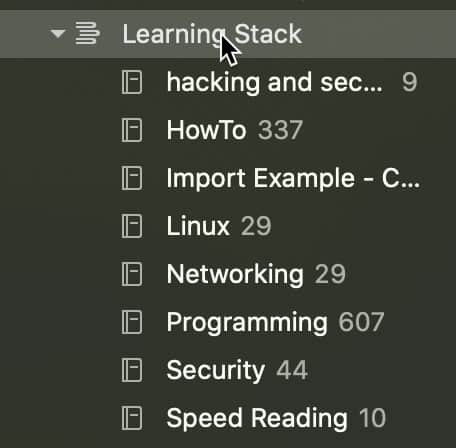
Creating Stacks in Evernote
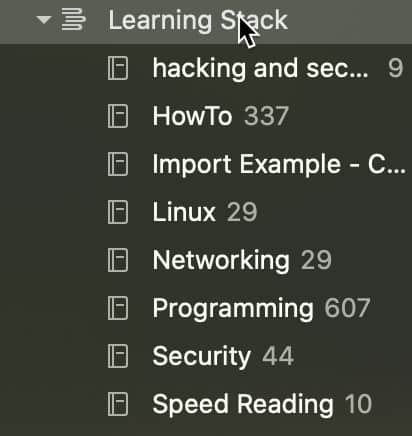
A stack is a collection of notebooks in Evernote that share a common general theme or characteristic. As you can see in the image above, I have a stack called “Learning Stack” that contains notebooks of things I want to learn.
To create a stack of notebooks in Evernote, do the following:
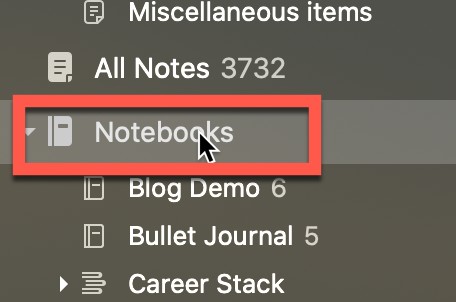
Click on “Notebooks” in the left panel to bring up the Notebook window.
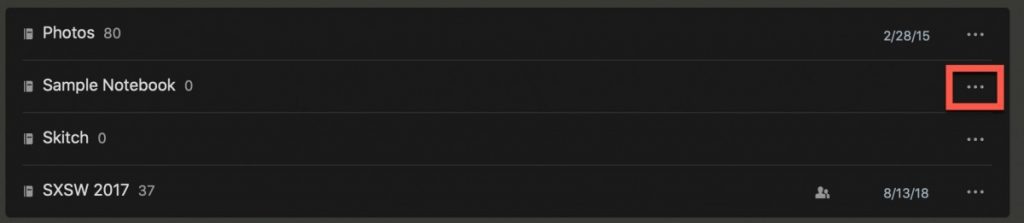
Scroll down until you see the notebook that you want to add to a stack. Click on the ellipsis (…) button.
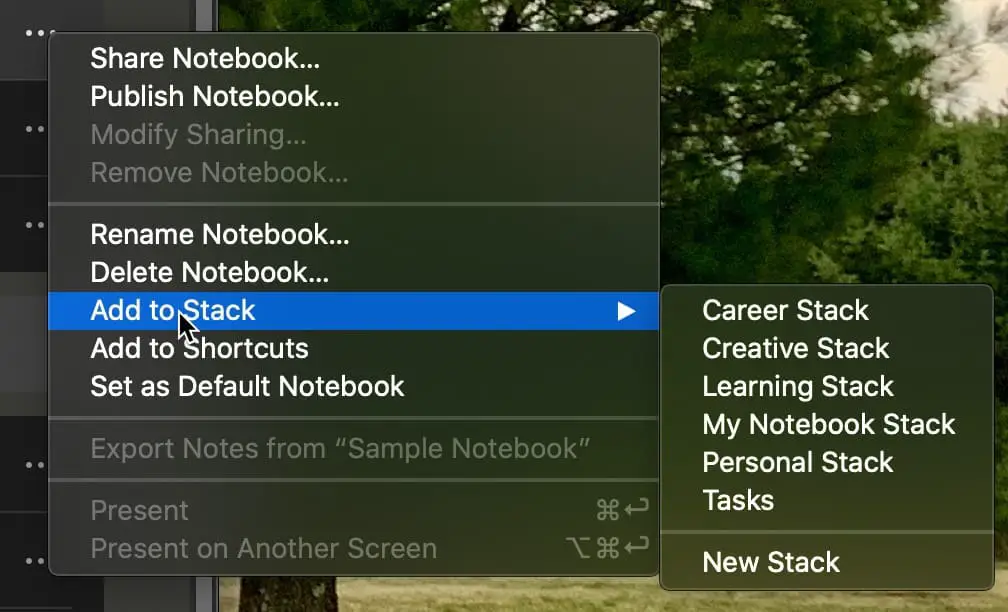
Go to Add to Stack -> New Stack to create a new stack. If you already have a stack that you want to add this notebook to, just select that option from the menu.

A new stack will be created. Let’s give it a new name.

Right-click where it says “Notebook Stack” in the image above. Select “Rename…” from the menu.

Type in the name you want to assign to the stack and click “Enter” to save it.
Next, let’s review how to search for specific content in Evernote.
Searching for Content in Evernote
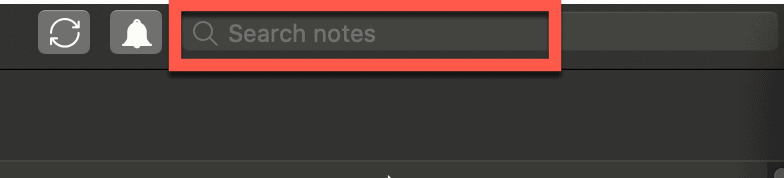
The easiest way to search for content in Evernote is to simply click in the “Search notes” text box in the upper-right-hand corner of the Evernote window.
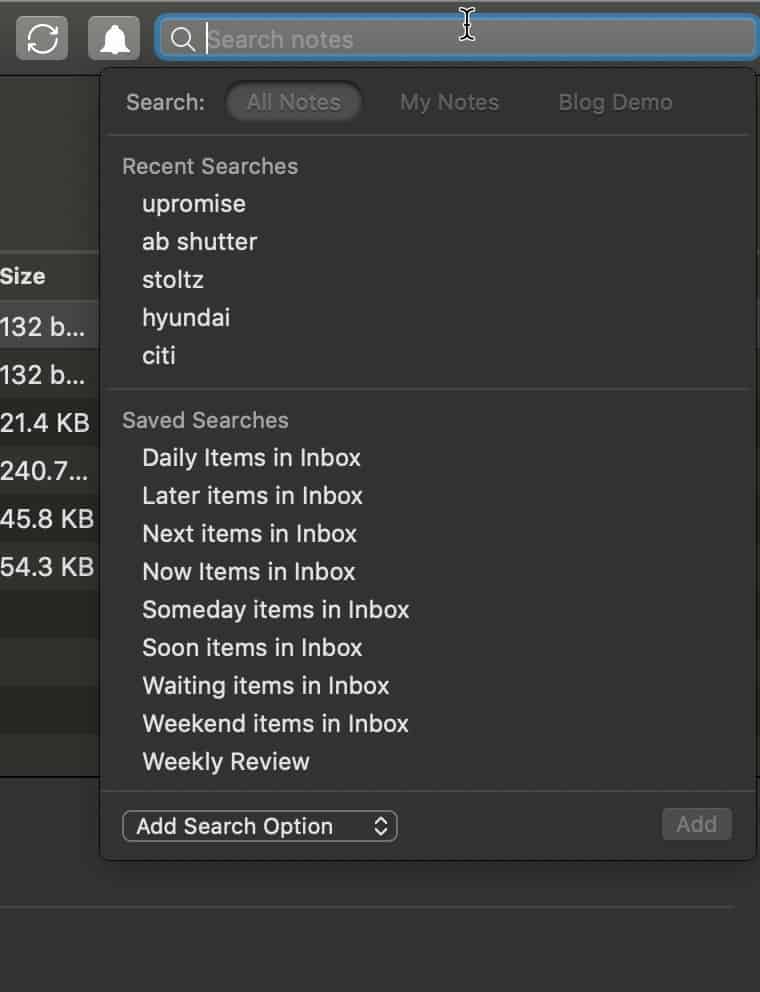
When you click on the “Search notes” text box, a drop-down menu will appear that will allow you to search:
- All Notes
- My Notes
- The currently selected notebook
The menu also lists the last handful of previous searches you did as well as any saved searches you have.
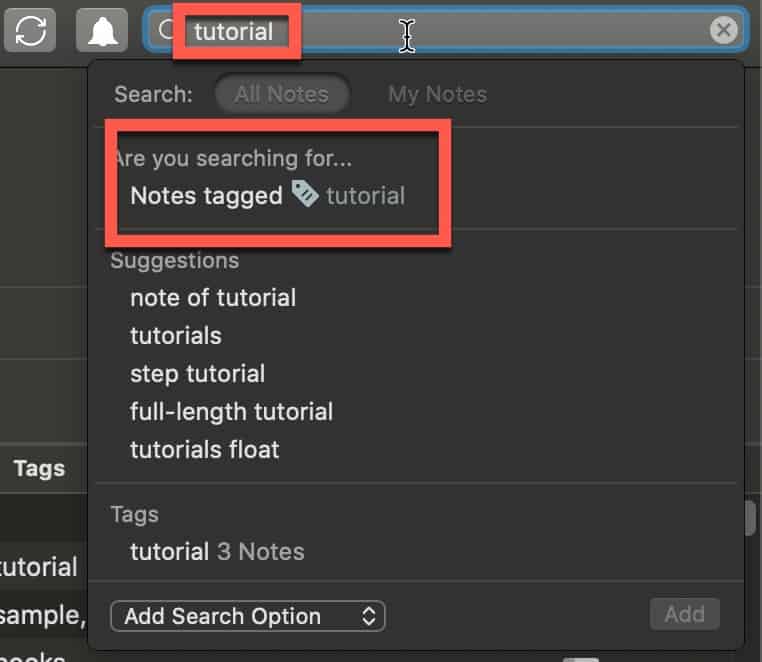
Type in a search term. In this example, I typed in “tutorial”. Notice in the screenshot above that Evernote recognizes that the term I typed in is also a tag I had set up. It also suggests other combinations that contain tutorials that would apply to notes I have in Evernote. There is also a “Tags” section that tells you how many notes you have that contain the tag.
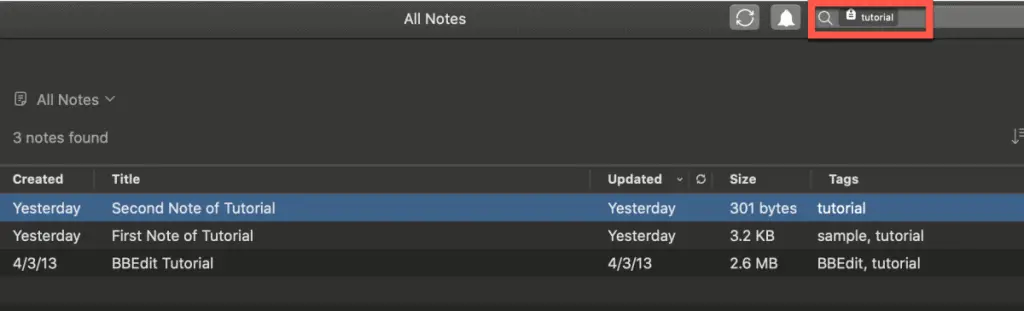
Press enter or select the “Notes tagged” option. I click the “Notes tagged” option. Evernote will return all the notes that fit the search criteria.
If you are looking to learn more about searching Evernote, I recommend you check out my article on searching Evernote at the link below:
How to Organize and Search Evernote – The Productive Engineer
The next lesson will go over how to clip web content to Evernote.
Clipping Web Content to Evernote
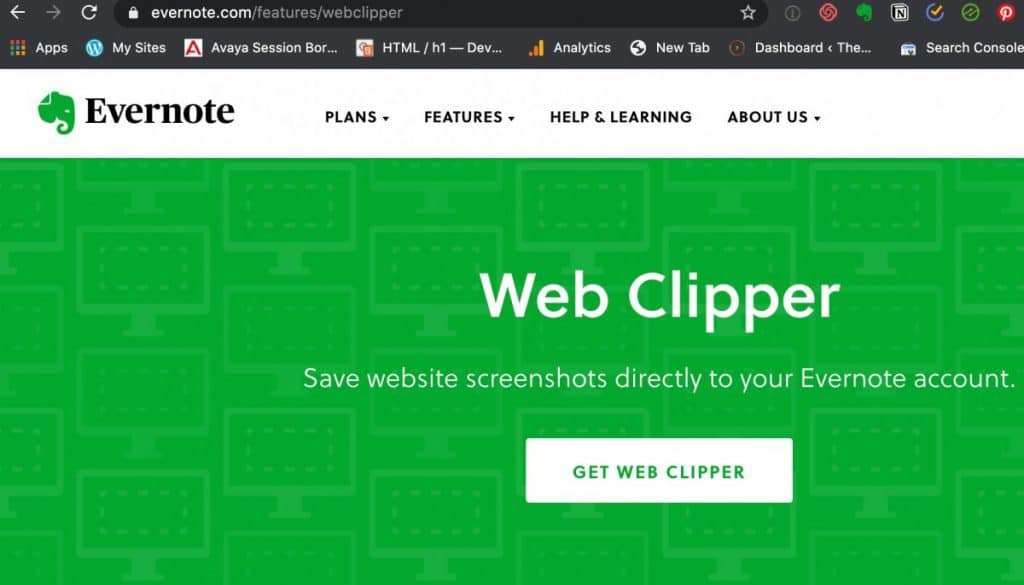
To clip web content into Evernote from your computer, you will need to install the Evernote Web Clipper. Click the link below to install the web clipper:
Evernote Web Clipper – Evernote

Once you have the web clipper installed, navigate to a web page you want to clip content from.

Click on the Evernote web clipper icon as shown above to bring up the web clipper.
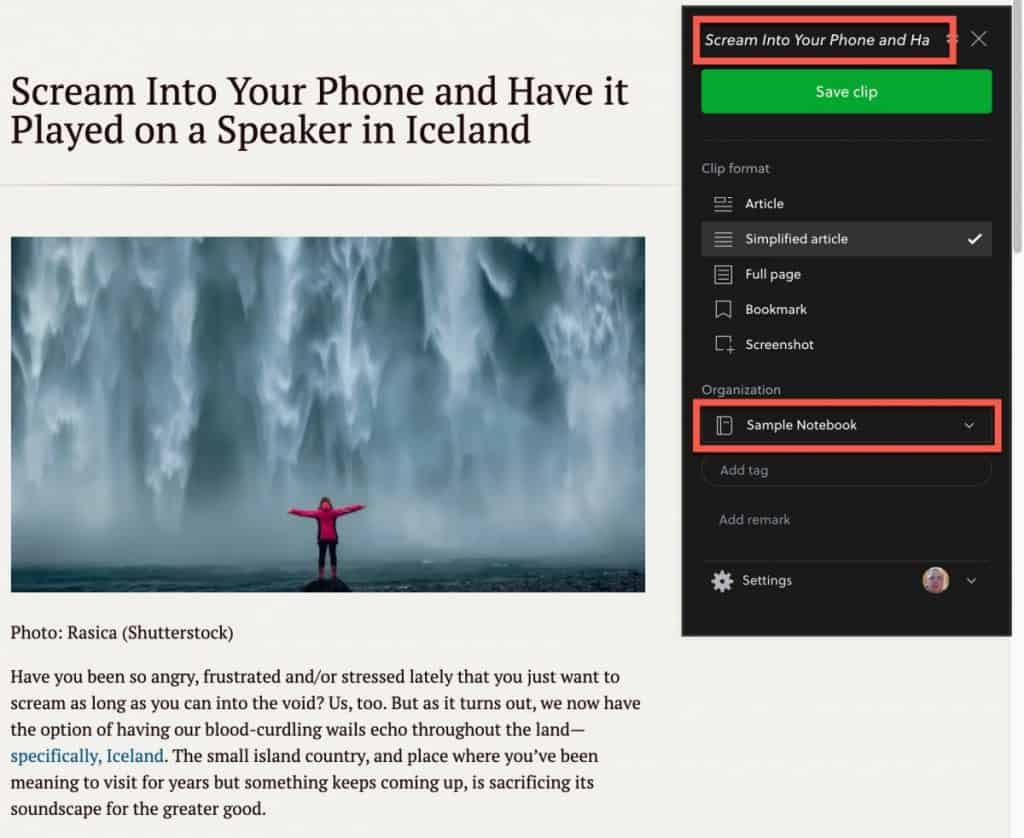
Configure your clipping by selecting the format you want and what notebook you want the clipping to appear in and click “Save clip” to save it to Evernote.

Your web clipping should now appear in the notebook you chose.
If you want to learn all the ins and outs of clipping web content into Evernote, check out my guide to the Evernote web clipper at the link below:
How to Use the Evernote Web Clipper Guide – The Productive Engineer
Next, let’s go over how to email content to Evernote.
Emailing Content to Evernote
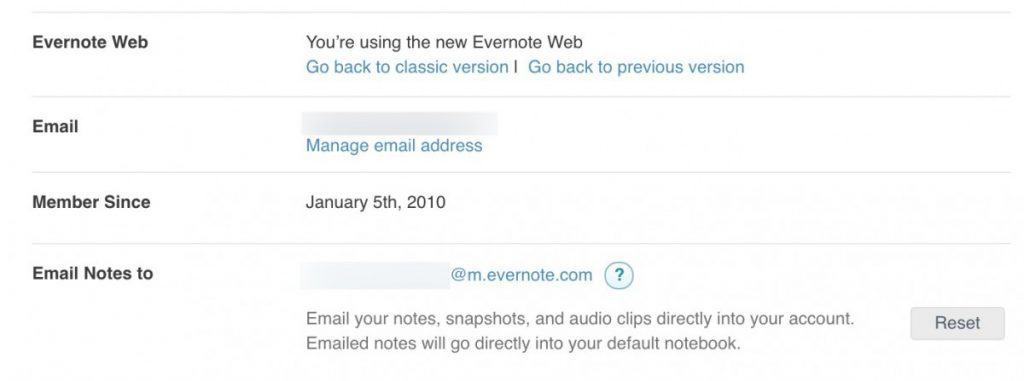
Each Evernote account is assigned a private email address that can be used to send email to Evernote. To find out your Evernote address. Open your web browser to the Evernote website and log into your account. Click on account summary in the left panel. Scroll down to the “Email Notes to” line and you will see your Evernote email account. Do not share this with anyone as anyone who has this address can send email to your Evernote account.
Copy this email address and add it to the address book of your email client of choice.
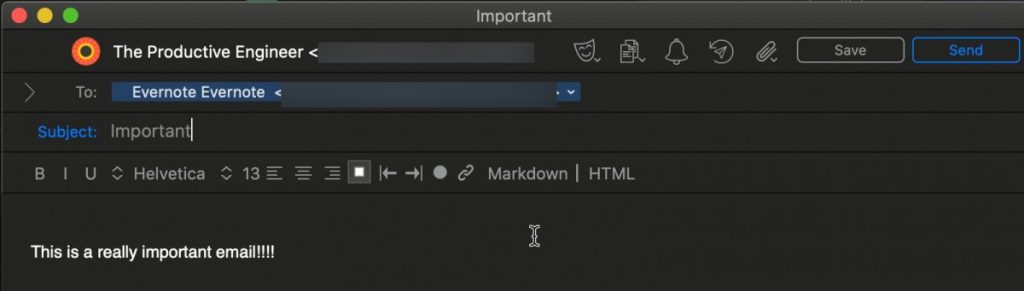
To test it out, create an email and send it to your Evernote account.
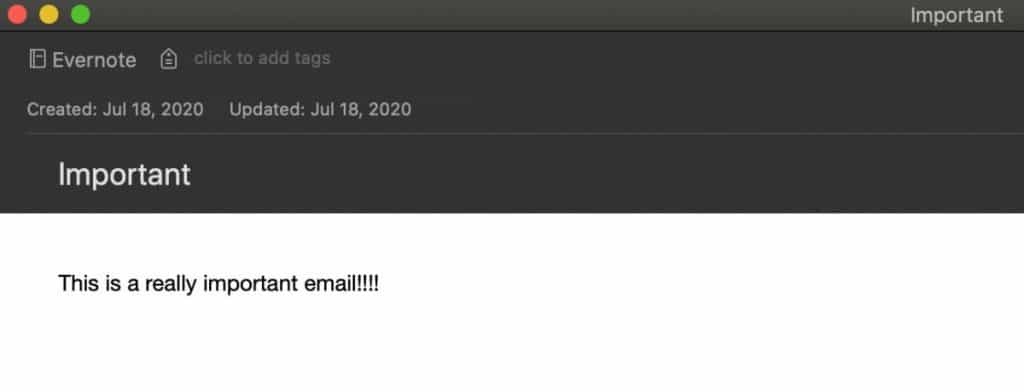
Your email should now appear in Evernote as a note.
I hope this tutorial was helpful to you. Good luck!
Want More Tips and Tricks? Subscribe to our Newsletter
If you haven’t already subscribed, please subscribe to The Productive Engineer newsletter. It is filled with tips and tricks on how to get the most out of the productivity apps you use every day. We hate spam as much as you do and promise only to send you stuff we think will help you get things done.
Check Out Our YouTube Channel!
We have a YouTube channel now and we are working hard to fill it with tips, tricks, how-tos, and tutorials. Click the link below to check it out!
Check out our Resources Page
Check out our resources page for the products and services we use every day to get things done or make our lives a little easier at the link below:
Looking to Get Started Blogging or on YouTube?
Getting started can seem daunting and scary (I know it was for me) but it doesn’t have to be. I was very lucky to find a program that that has helped me grow my blog to over 35,000 page views and a YouTube channel that is growing month-over-month.
Project 24 by Income School is the program that I have used. I have been a member for over a year now and just renewed my membership. I cannot recommend Project 24 enough! For more information on Income School, click the link below:
Project24 by Income School – Teaching You How to Create Passive Income from Blogs and YouTube