Ultimate Guide to Using Todoist for Android
Using Todoist to stay on top of your day to day tasks can really improve your ability to get things done consistently. Most people know how to use Todoist on the web or desktop but what about Android? How do you get the most out of using Todoist for Android? That is the purpose of this tutorial, to teach you everything you need to know to be productive in Todoist for Android.
Before we get started with the tutorial, if you are looking to learn more about apps like Notion, Todoist, Evernote, Google Docs, or just how to be more productive (like Keep Productive’s awesome Notion course), you should really check out SkillShare. Skillshare is an online learning platform with courses on pretty much anything you want to learn. To learn more about Skillshare and its vast library of courses and get 30% off, click the link below:
SkillShare – Online Learning Platform
If you are looking for Todoist tips and tricks, check out my top Todoist tips and tricks at the link below:
Ten Great Tips for Using Todoist
If you are a Google Calendar user, check out my guide to connecting Google Calendar to Todoist. This allows you to bi-directionally sync Todoist with Google Calendar and allows you to have your tasks and updates sync between Todoist and Google Calendar.
Now let’s get started with the tutorial!
Todoist on Android
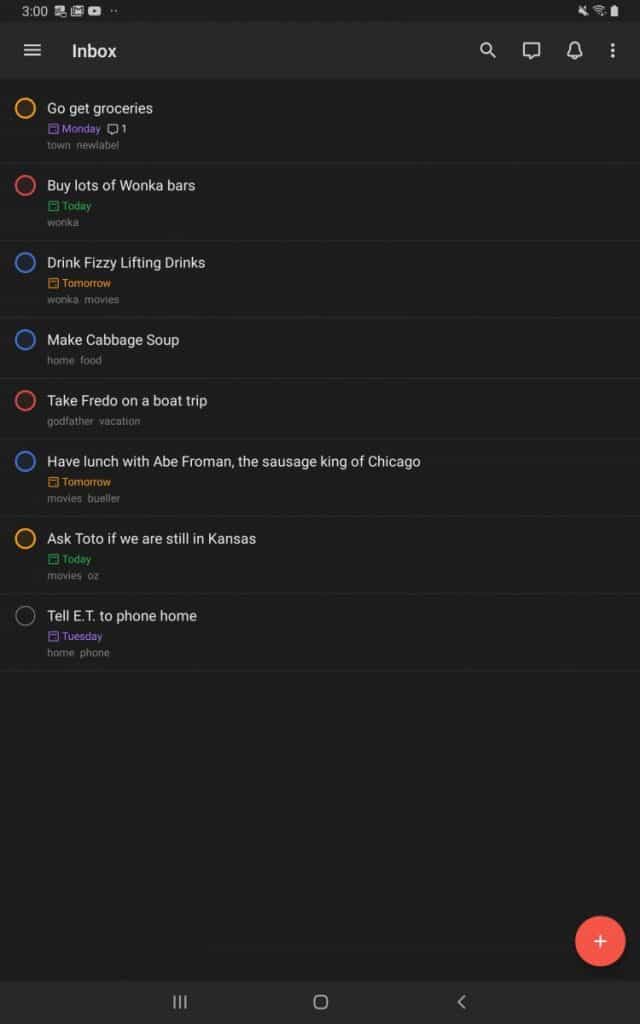
Open up Todoist in Android. You should see all of you existing tasks in the various projects you have created. Click on the “Hamburger” menu button in the upper-left hand corner of the screen (3 horizontal lines) as shown in the screenshot above.
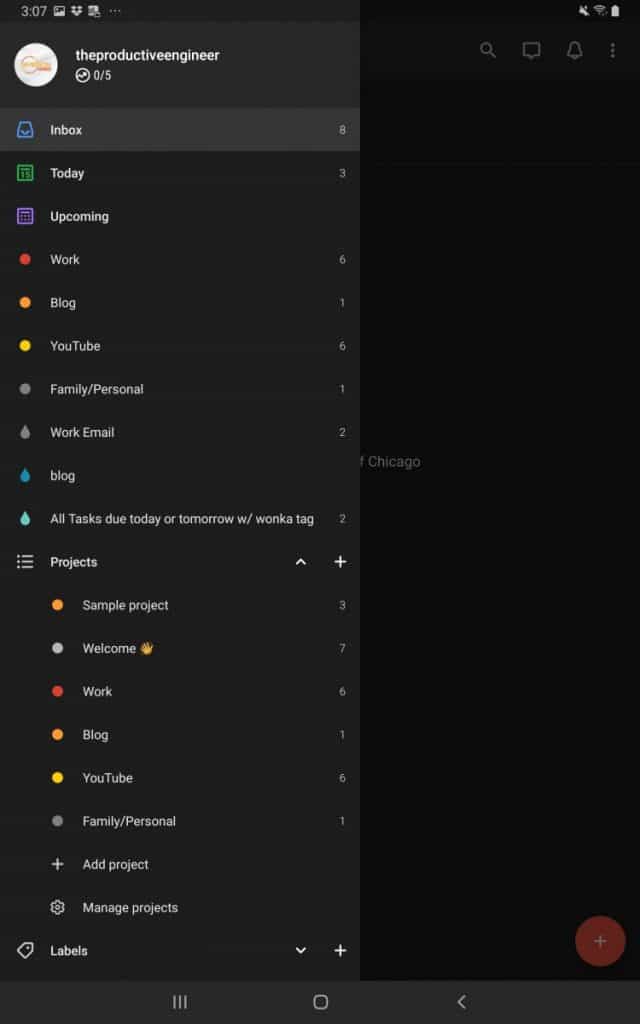
The side panel will appear, listing all of your views, projects, labels and filters. Press on the “Today” view to view all of the tasks with a due date of today.
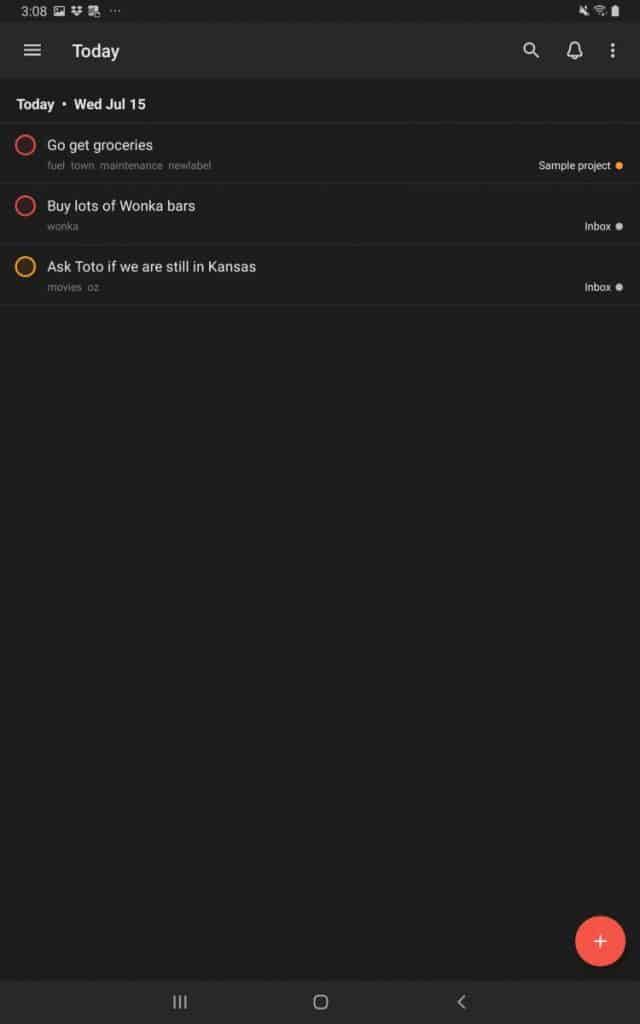
You should now see the “Today” view. The Today view is really just a pre-defined filter that only shows tasks with a due date of today. We will learn more about filters later on in this tutorial.
Now, click on the “Inbox” option in the side panel.
This inbox will appear. The inbox is really just a pre-defined project that all tasks get assigned by default if not assigned to a specific project.
Creating Tasks in Todoist for Android
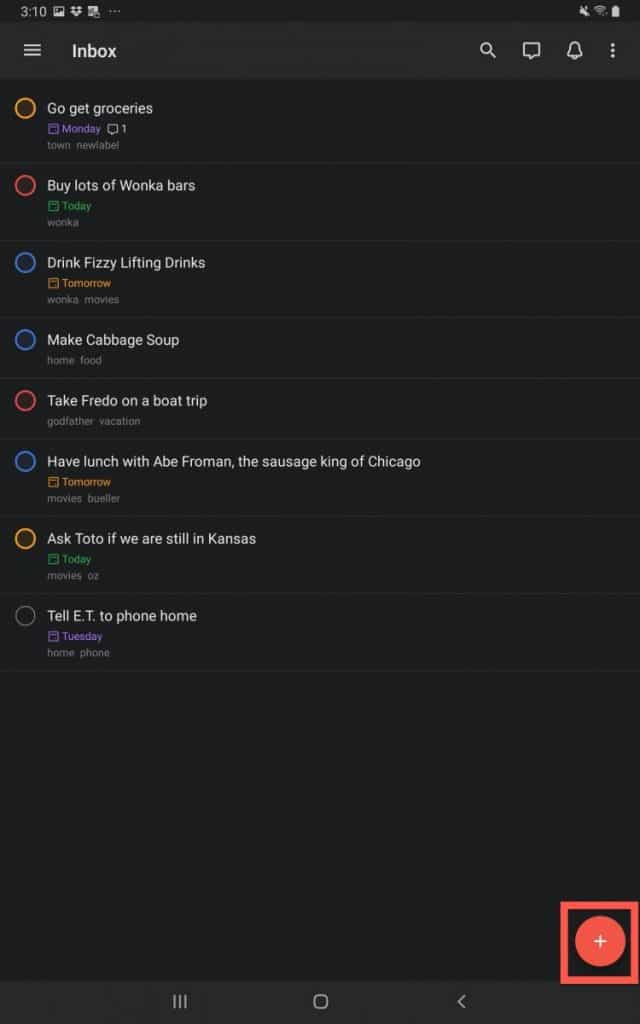
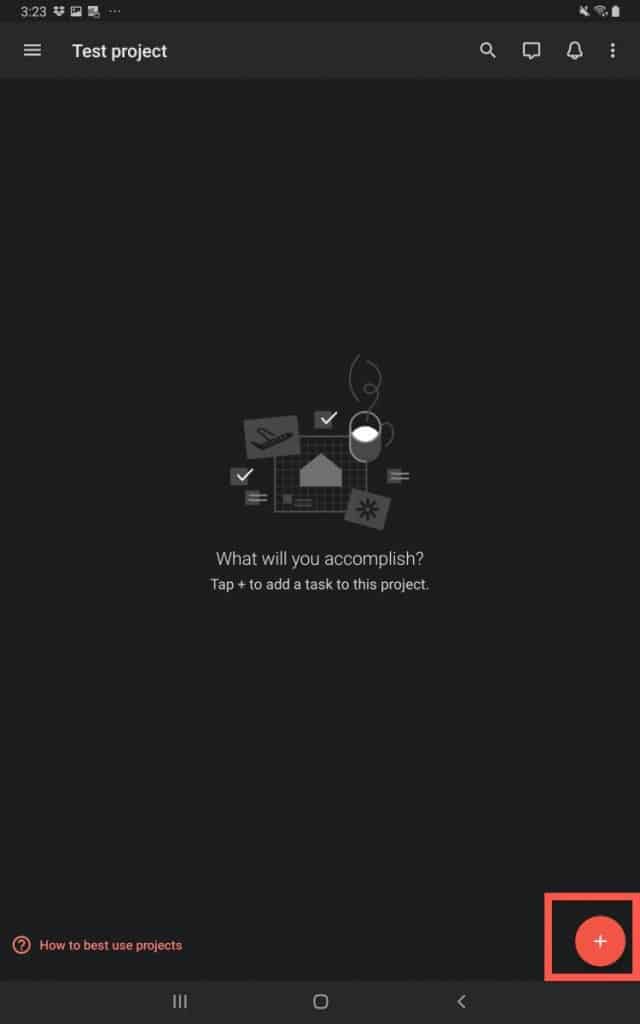
Let’s create a new task. To create a new task in Todoist for Android, simply click on the big red plus button as shown in the image above.
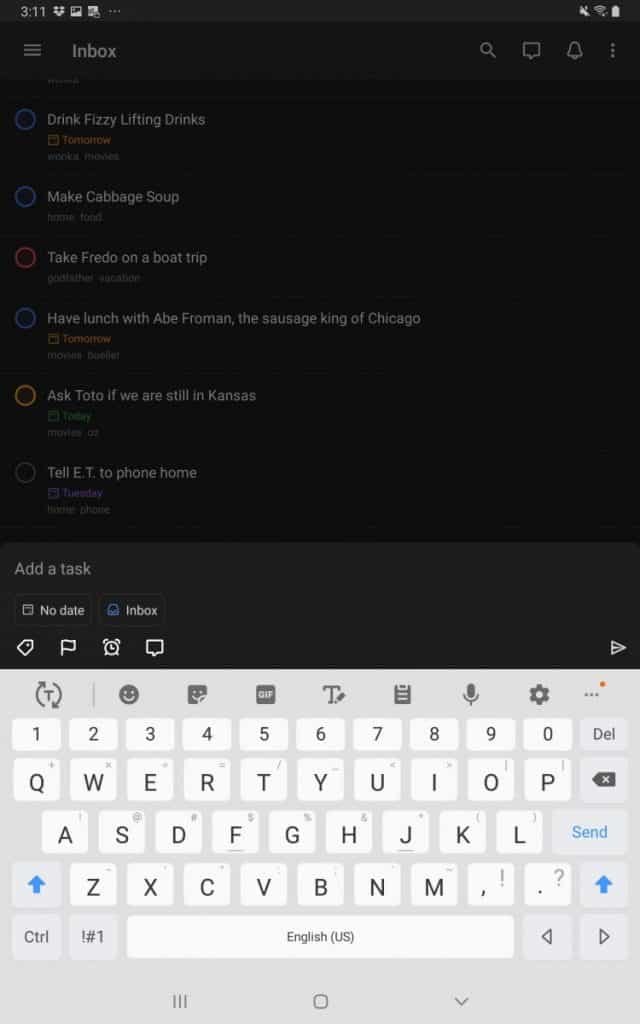
The add a task mode will be active.
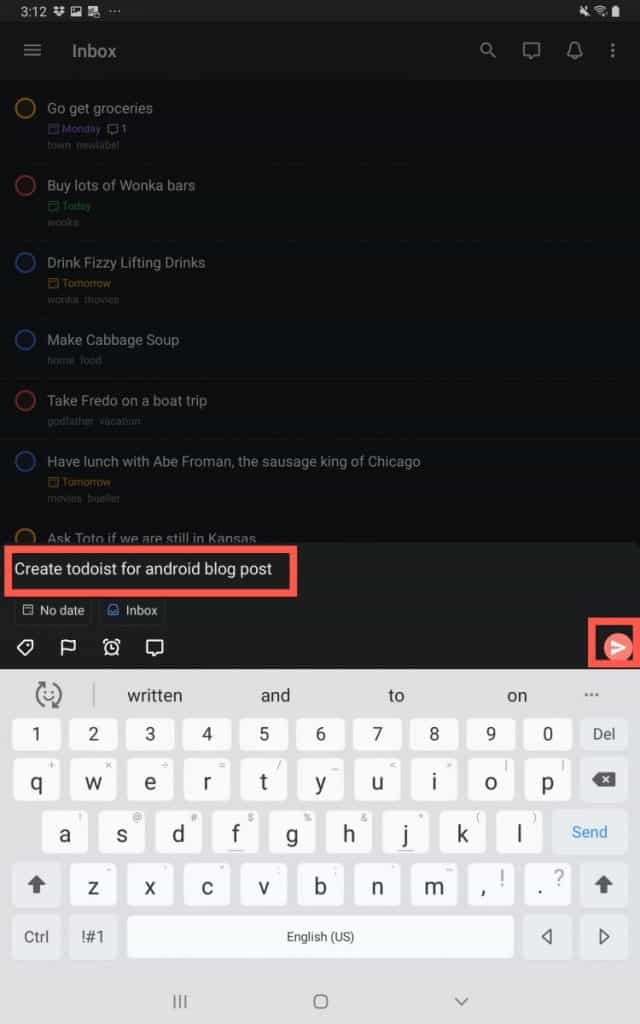
Start typing in the name of your task and press the “Send” button when done as shown in the image above.

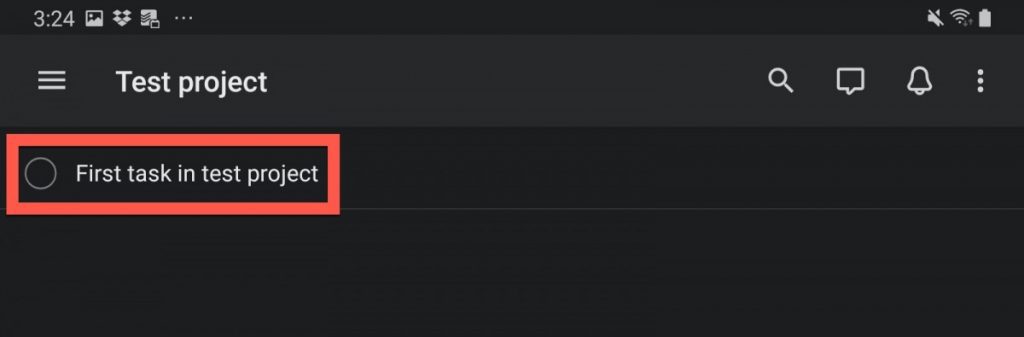
Your task will now appear in the inbox. Next, let’s assign a due date to our new task
Assigning a Due Date to a Task in Todoist for Android
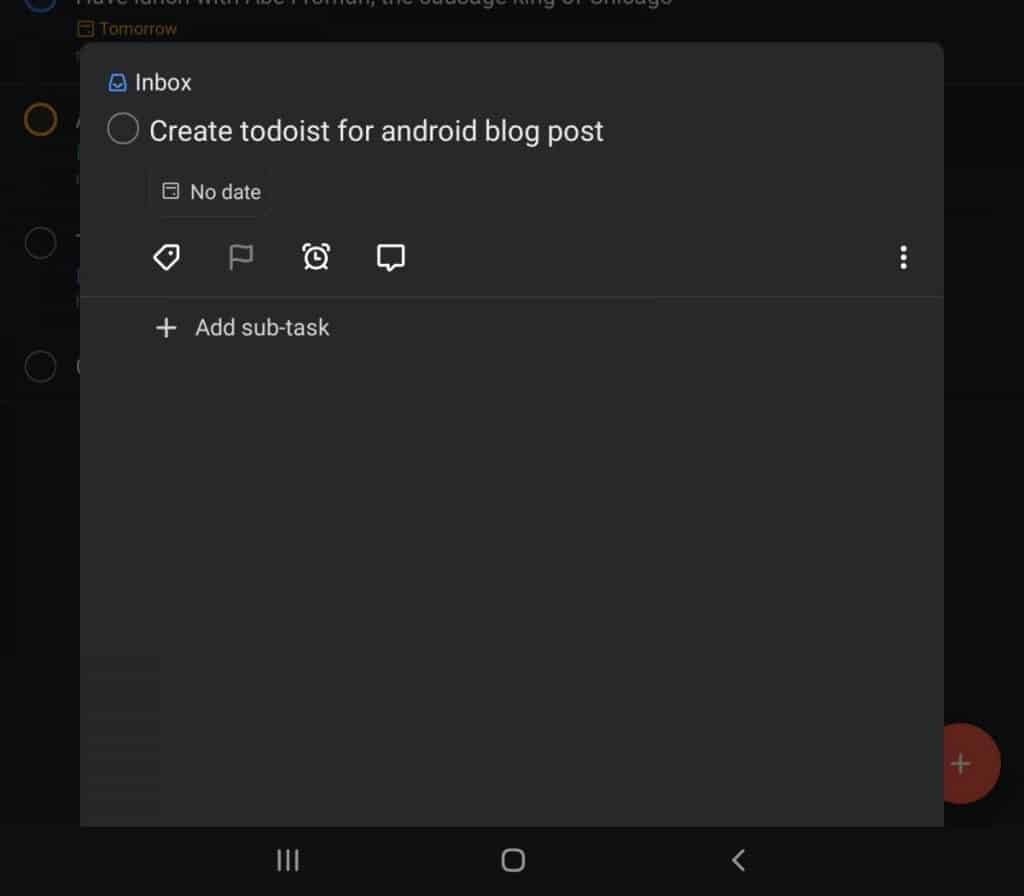
Press on your task to open it into edit mode. Press on the “No Date” button and then select “Today” from the menu.
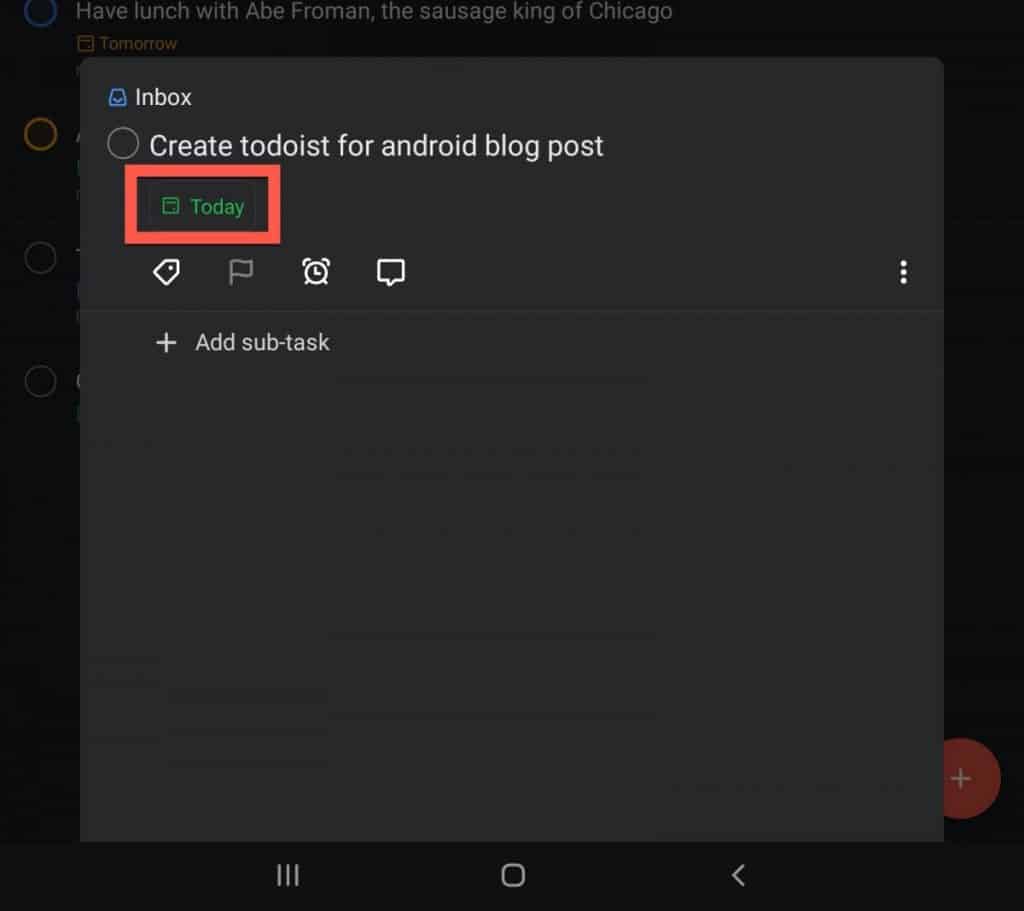
Your task should now have a due date of today and will appear in the Today view.
Next, let’s assign a label to our task.
Assigning Labels to Tasks in Todoist for Android
Labels in Todoist are pieces of metadata you can assign to your tasks to make them easier to search for and sort. Labels are Todoist’s term for tags.
To add a label to a task in Todoist for Android, do the following:
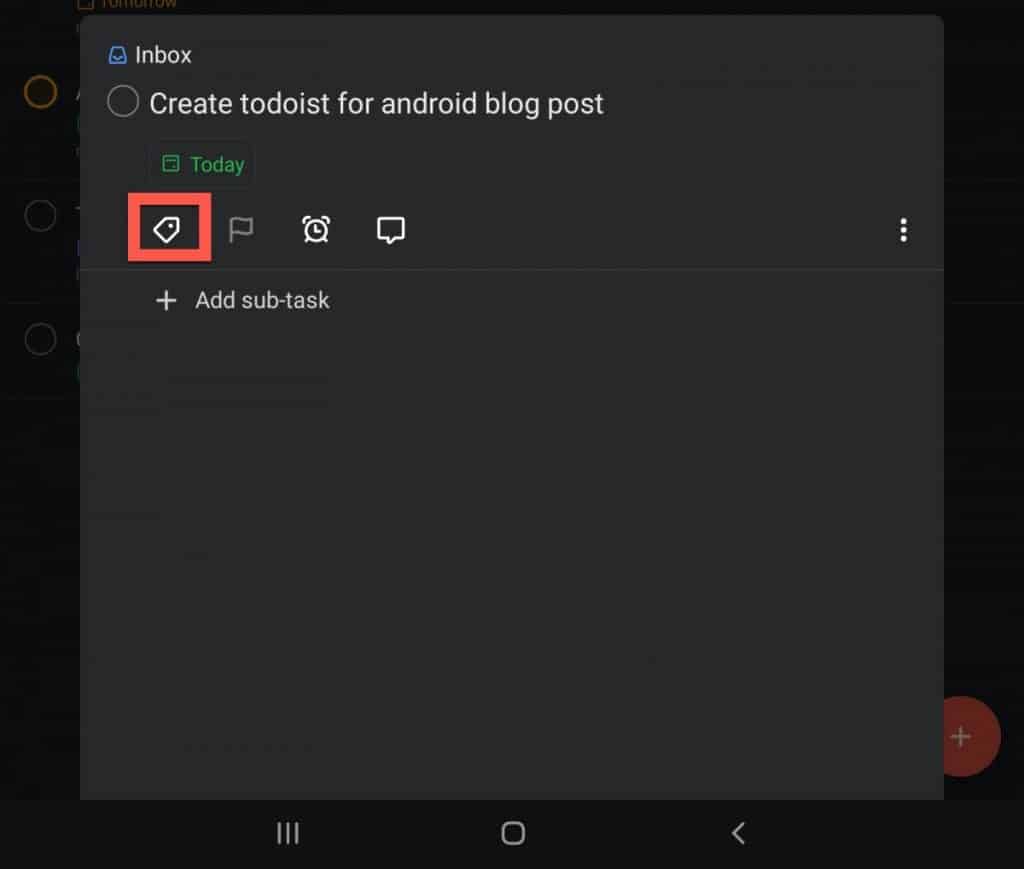
- Press on the task you want to add the label to. This will open the editing task window
- Press on the “Label” button to add your label
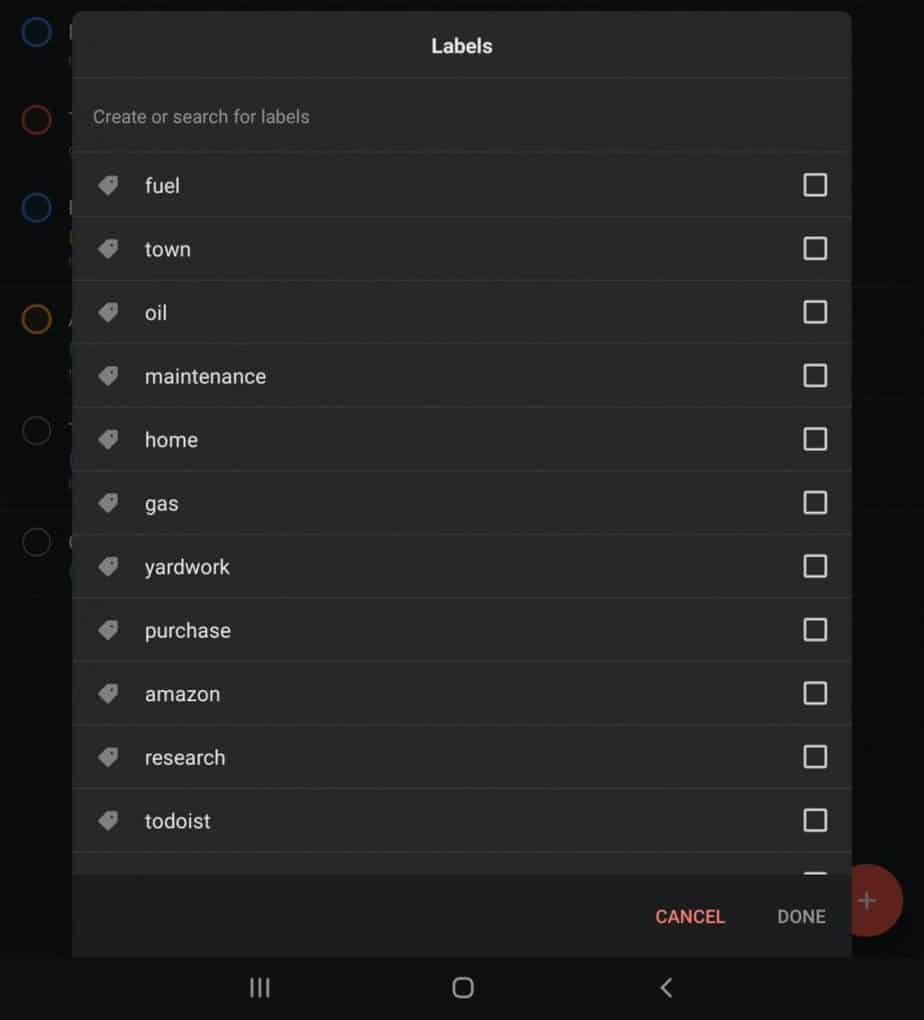
The Label dialog box will appear. Type in the name of your label.
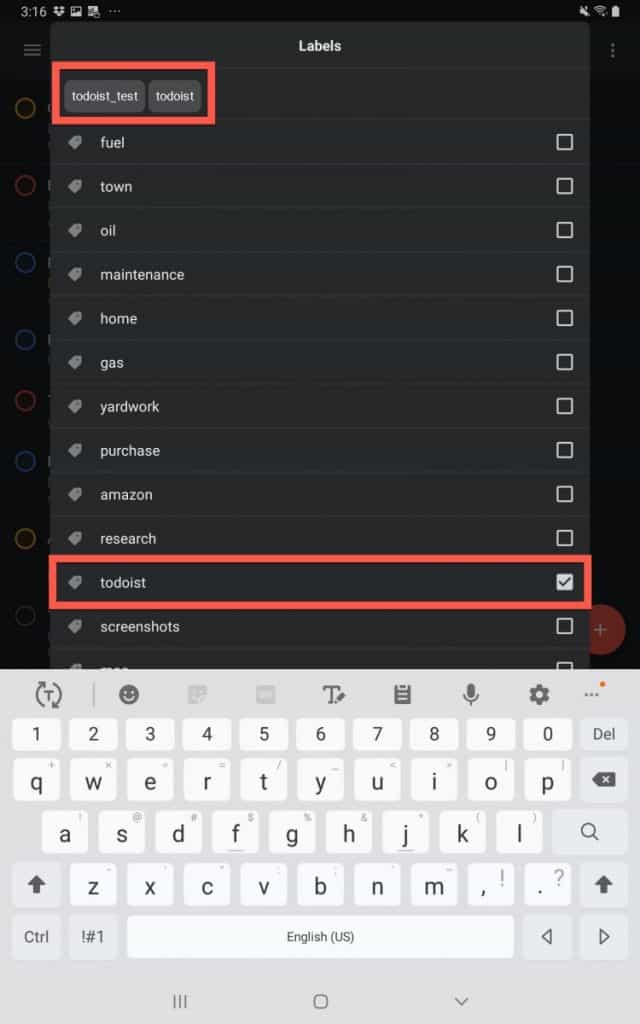
If it already exists, it will appear as an option in the menu. Check the box to the right of the label name to assign it to the task. If this a new label you are creating, press the Enter key to create the label, then press the checkbox next to it to assign that label to the task.
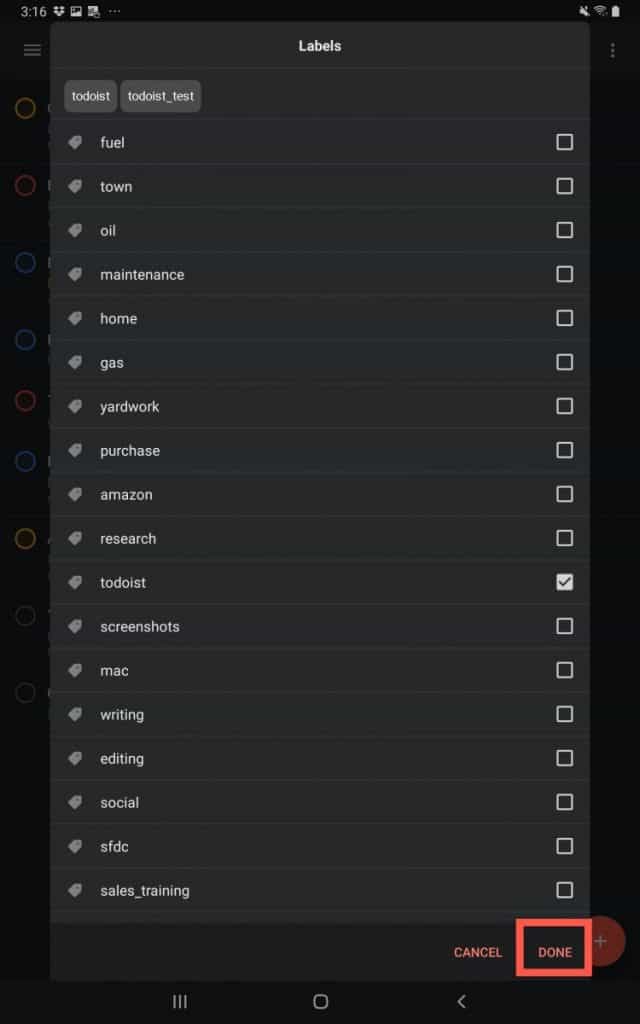
Press the “Done” button to save the labels to the task. Please note that if you do not press the “Done” button, the labels will not be assigned to the task.
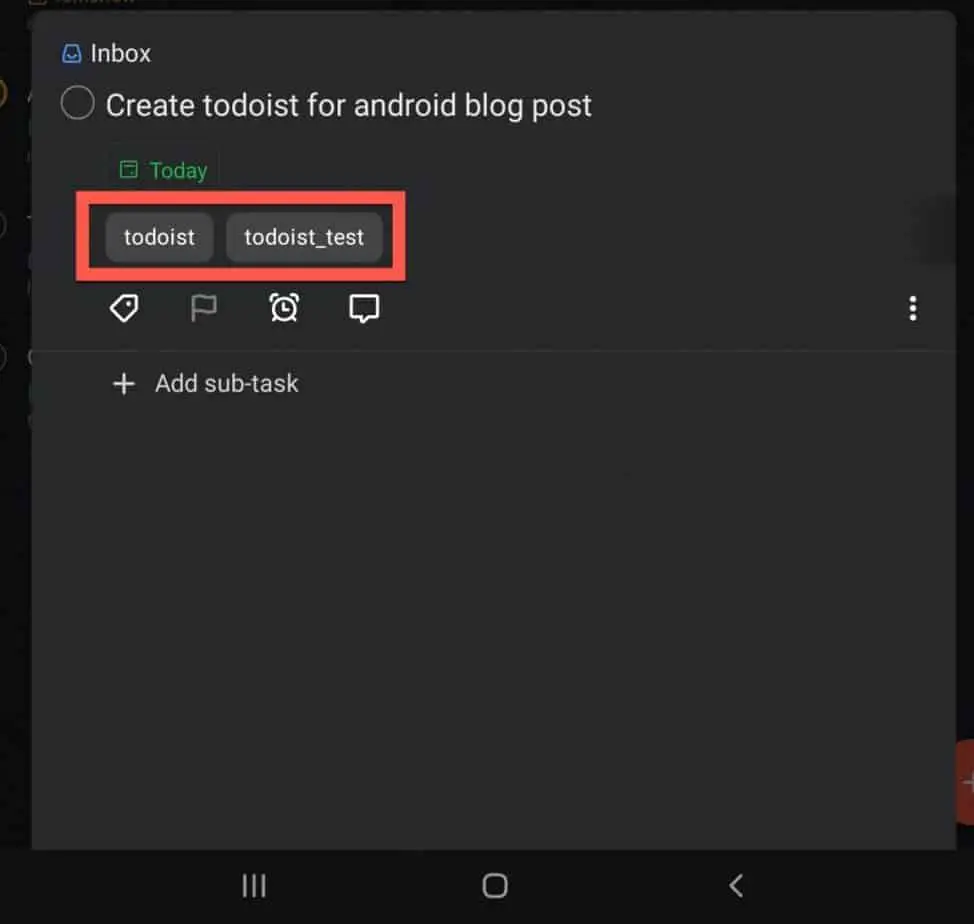
The labels should now be assigned to your task like the screenshot above.
If you want to learn more about labels and how to use them to their fullest in Todoist, check out our tutorial on using labels in Todoist at the link below:
Using Labels in Todoist – A Complete Guide with Screenshots
Now let’s assign a priority to our task.
Assigning Priority to Tasks in Todoist for Android
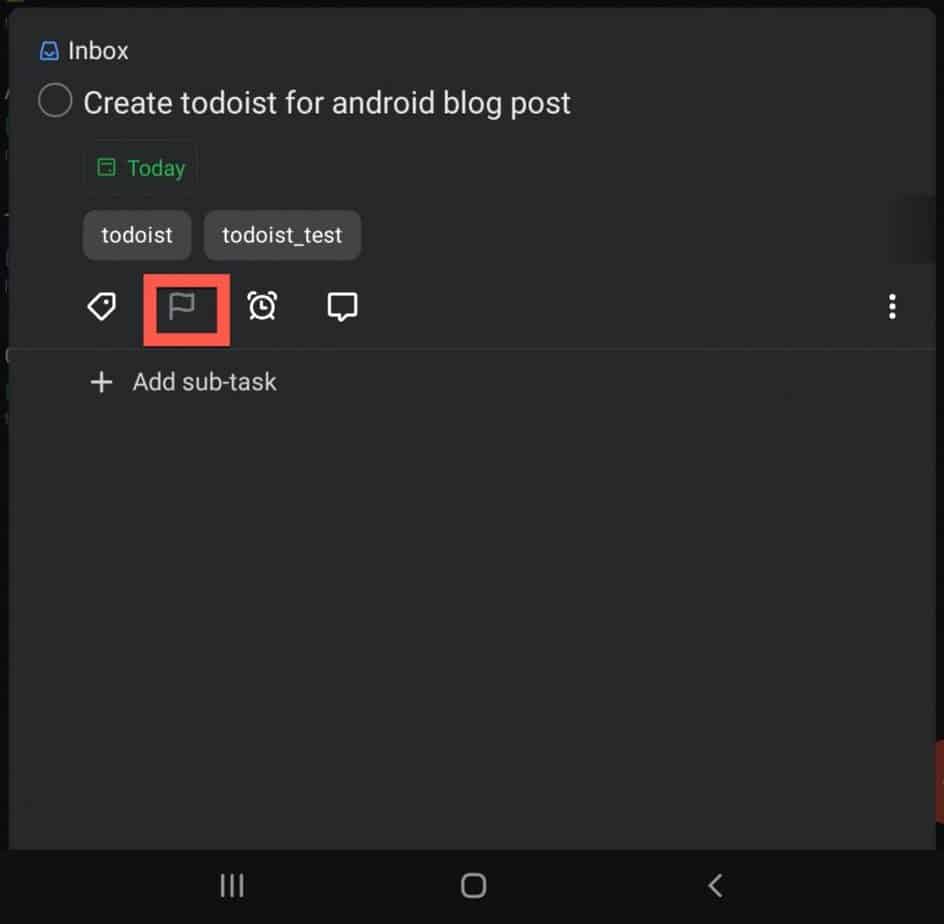
Press on your task to open it in edit mode. To assign a priority to a task in Todoist for Android, press the Flag icon as shown in the screenshot above.
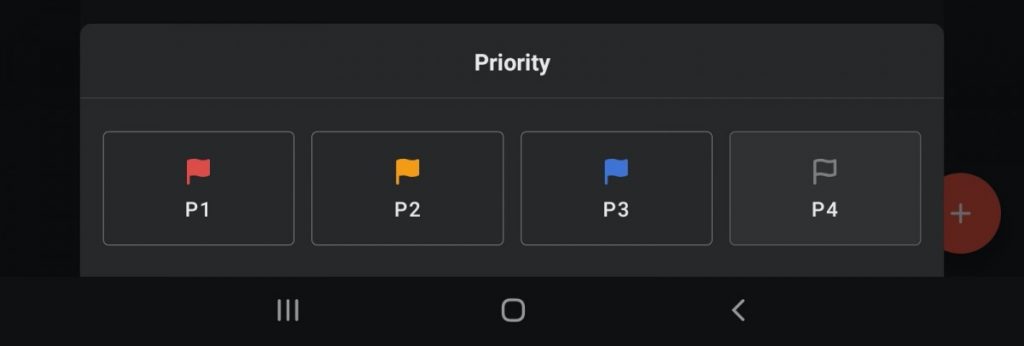
This will bring up the priority selection pop-up menu. There are four priority levels in Todoist:
| Priority Setting | Priority Color | Level of Priority |
|---|---|---|
| P1 | Red | Highest |
| P2 | Yellow | High |
| P3 | Blue | Medium |
| P4 | No Color | Low |
Select one of the priority levels for your task.
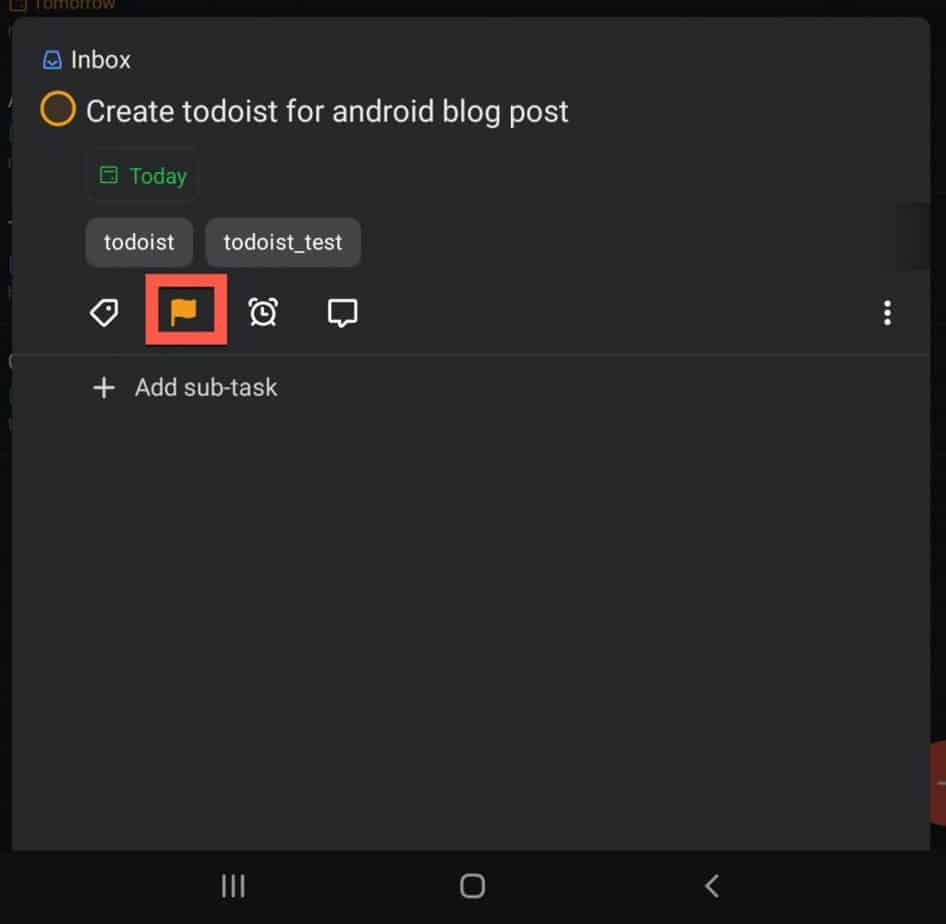
Your tasks should now have a priority level assign and the priority flag should be the color that matches that priority level.
Next, lets setup a reminder for our task.
Setting Reminders for Tasks in Todoist for Android
Press on the task that you want to add a reminder to in order to open the task edit window.
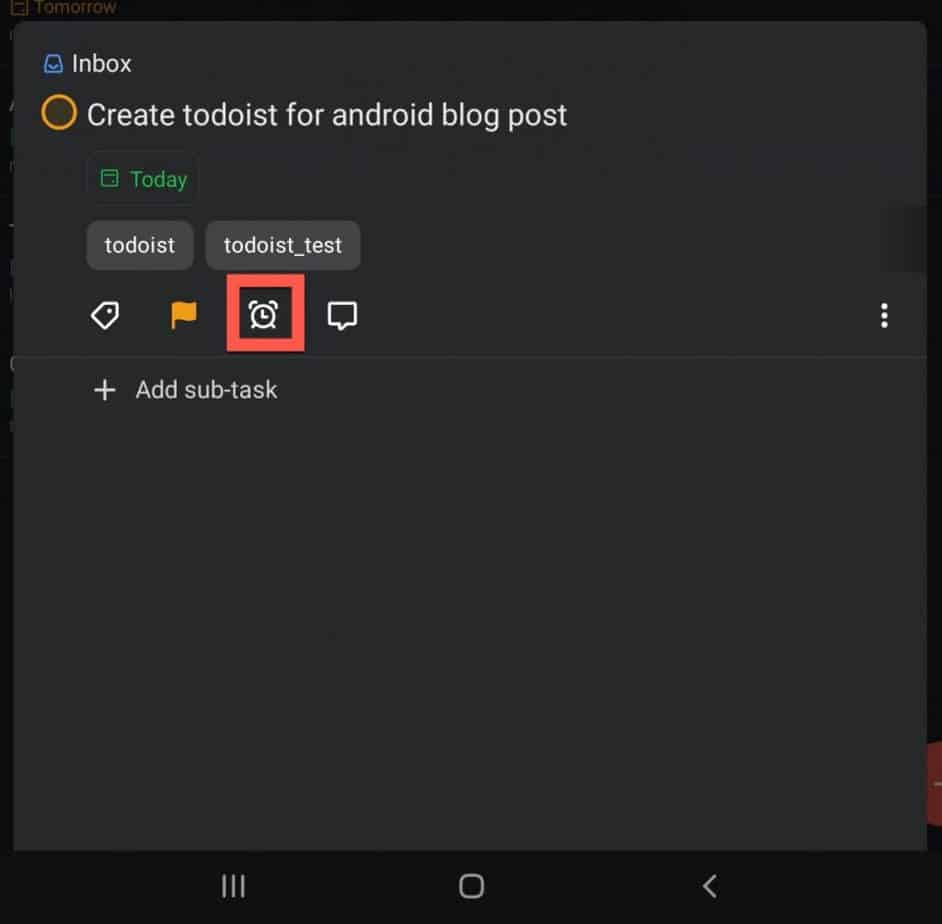
Press on the “alarm clock” icon as shown in the image above. This will bring up the Reminders configuration screen.
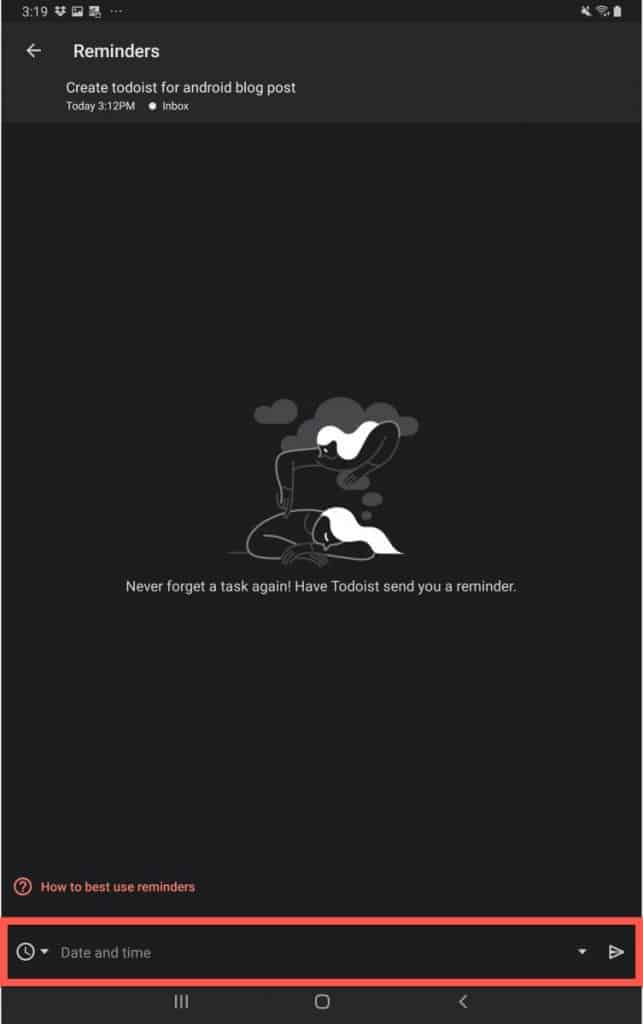
Press the area marked “Date and time” as shown in the image above.
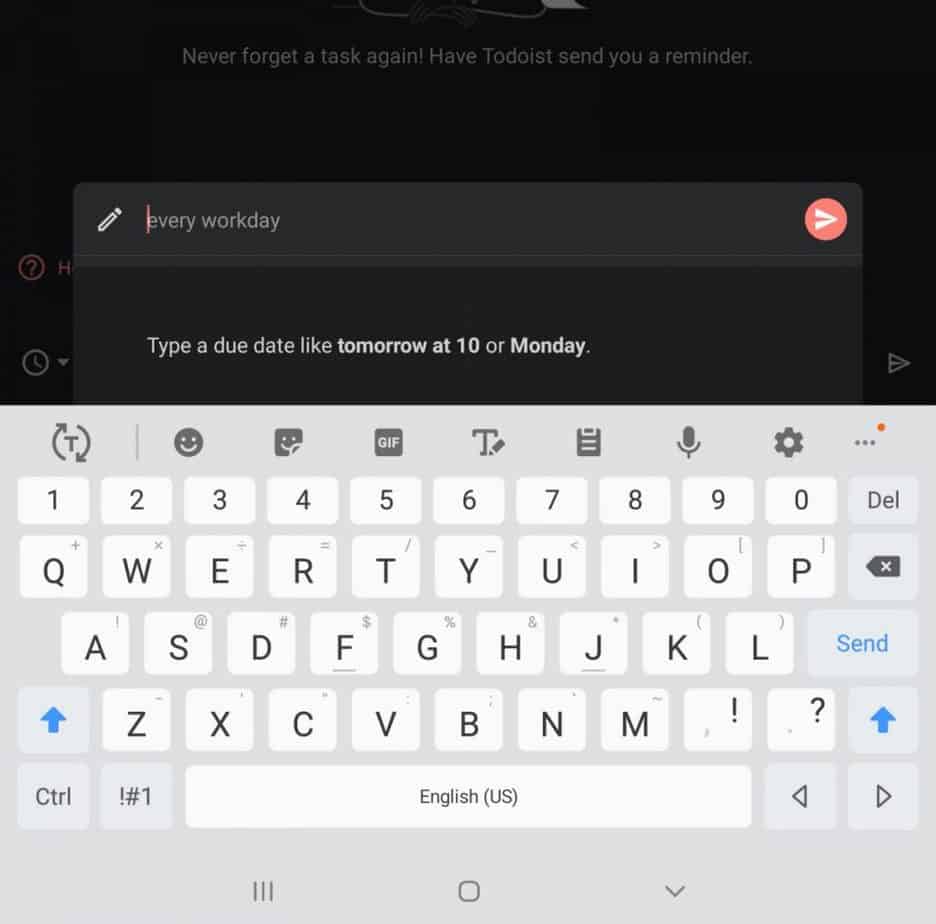
One of the great things about Todoist is that it understands natural language. This means you can type in “Today at 4pm” and Todoist understands what you mean.
In the example above, I typed in “Tomorrow at 11am“. As you can see, Todoist understood what I meant and created the reminder.
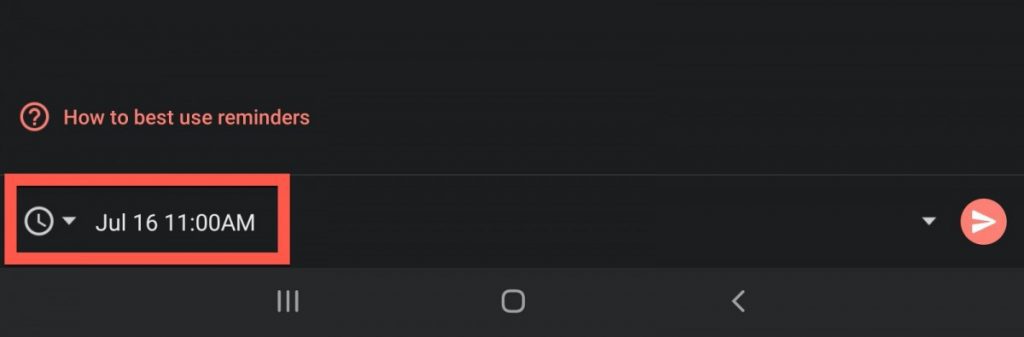
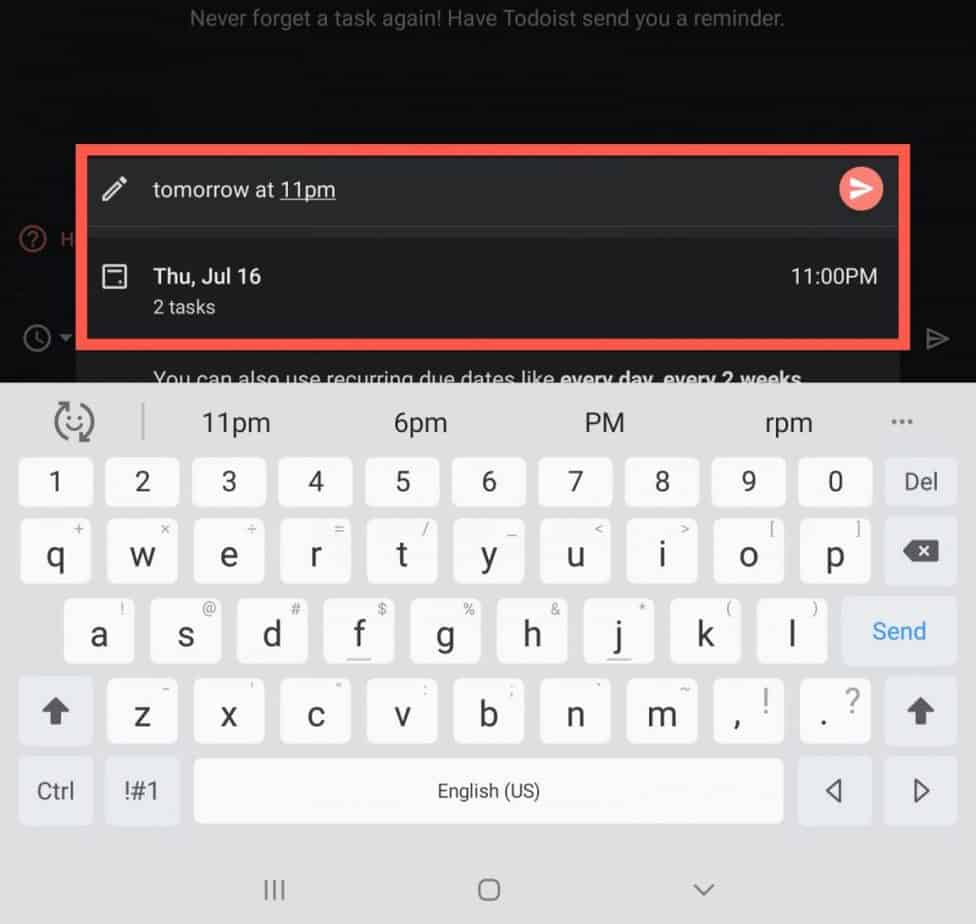
As you can see, Todoist has assigned the reminder for my task.Press the send button to save the reminder.

Notice the “alarm clock” button now has a “1” on it. This indicates that there is a reminder for this task.
Next, let’s add a comment to our task.
Adding Comments to a Task in Todoist for Android
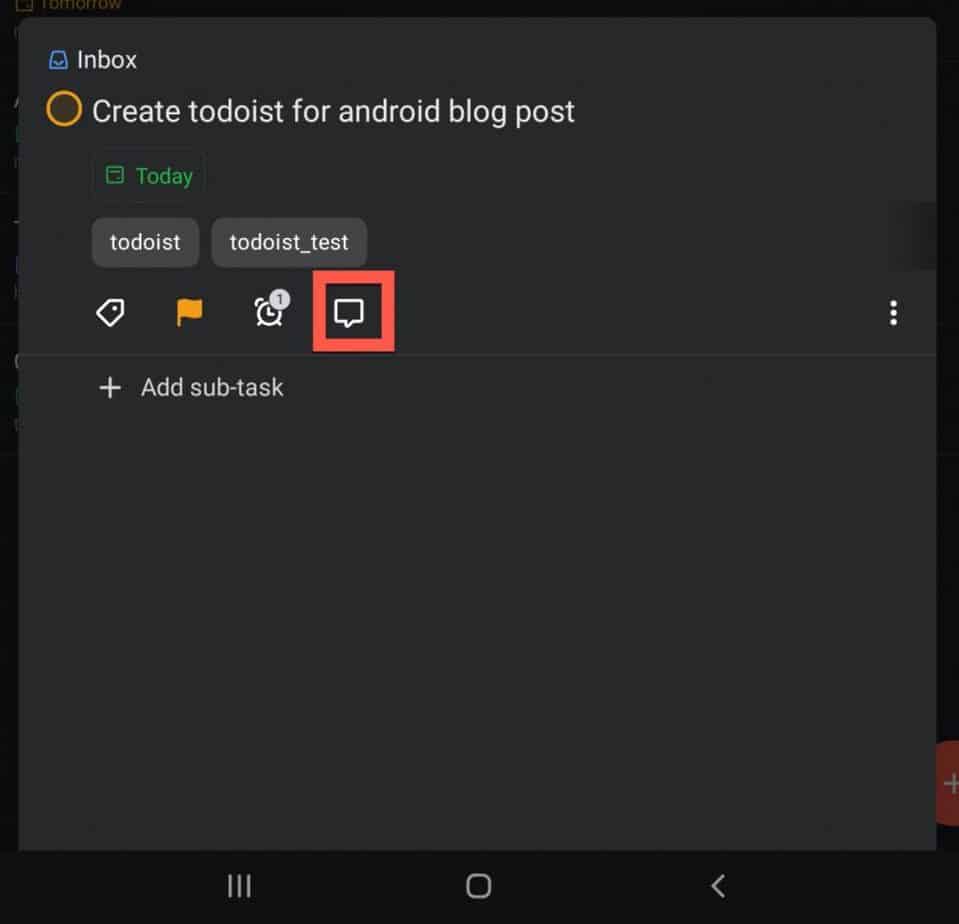
Press on the task you want to add a comment to. The task edit screen should appear. Press the talking bubble button as shown in the screenshot above to create a comment for this task.
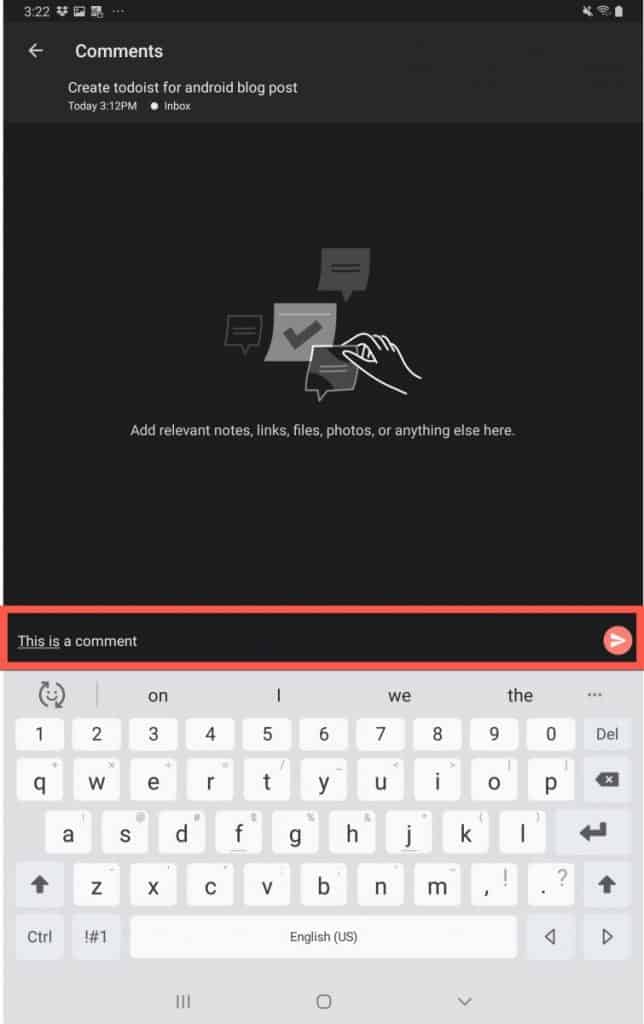
Type in the comment and press the Enter button on your keyboard or press the Send button as shown in the image above.
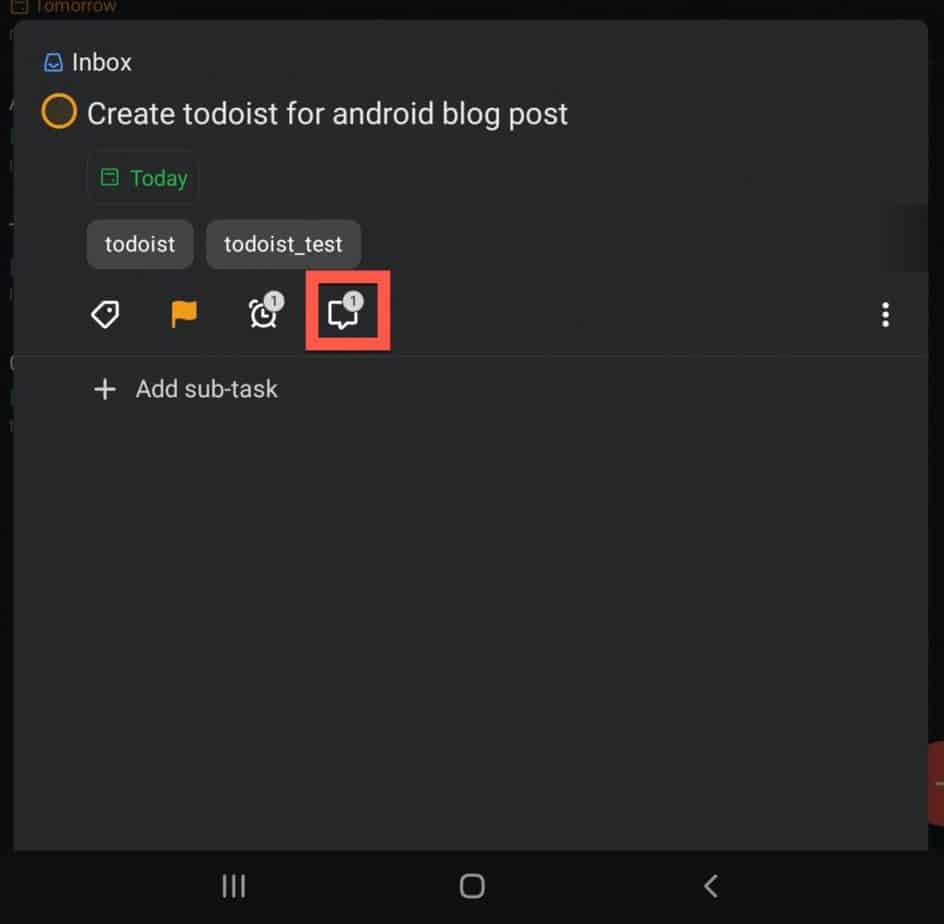
Just like with the reminder, your comment button should now have a “1” indicating that your task has a single comment assigned to it.
Now, let’s move on to projects and how to create and manage them in Todoist for Android.
Working with Projects in Todoist for Android
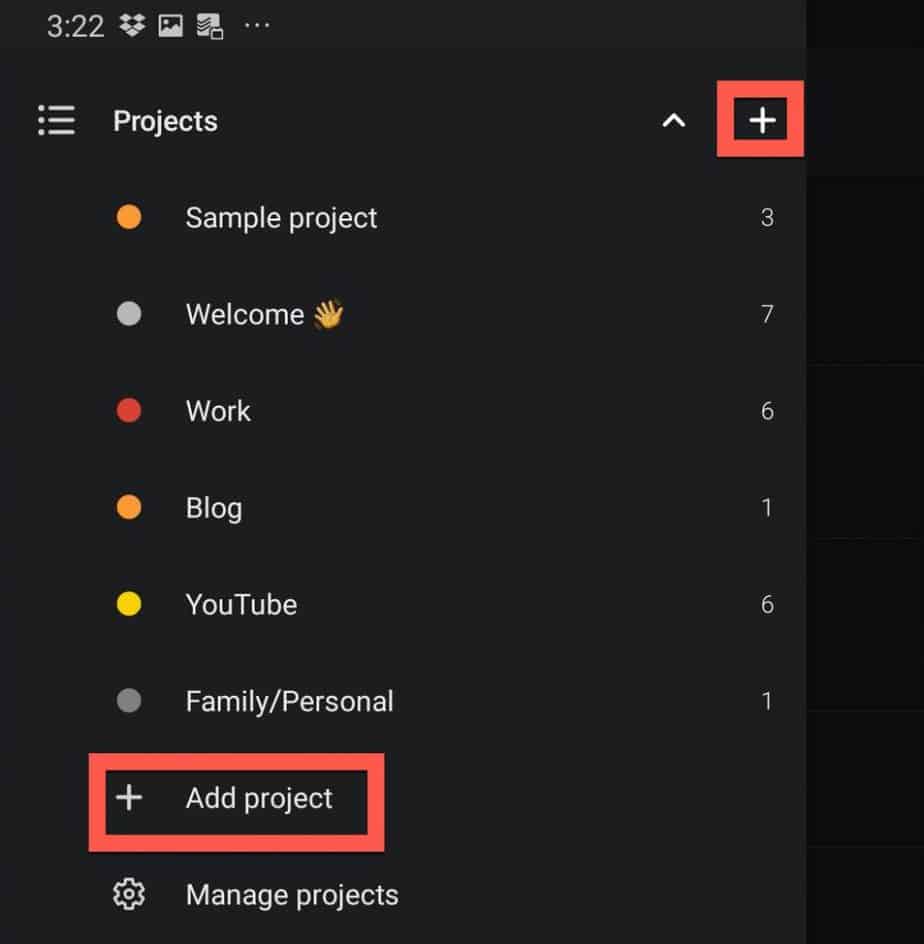
In the left panel of the Todoist window, scroll down to the “Projects” section as shown above. There are two ways to create a project:
- Press the + button on the title line of the “Projects” section
- Press the + Add project button at the bottom of the “Projects” section
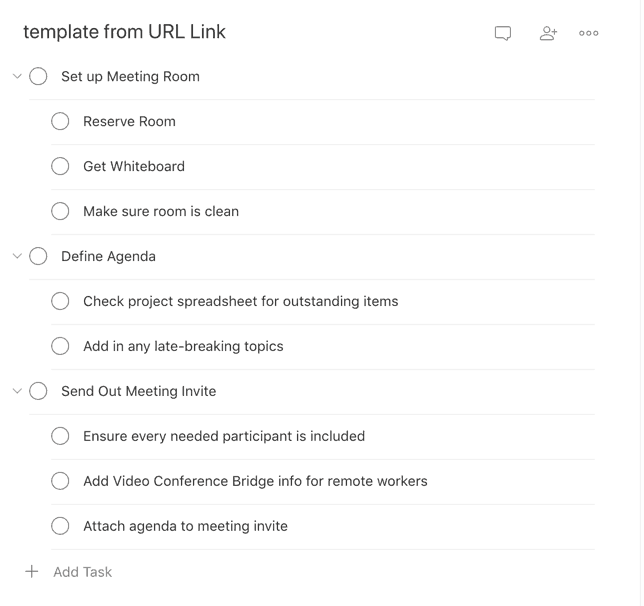
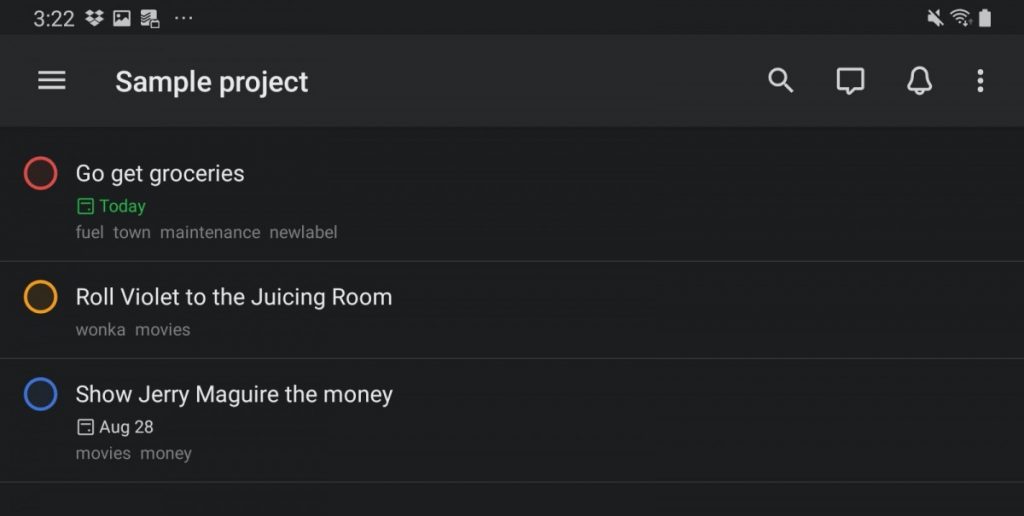
Enclosed below is what a project with tasks looks like in Todoist for Android.
Now, let’s create a new project. Use of the techniques described earlier (+ button or + Add project button) to bring up the “Add project” screen.
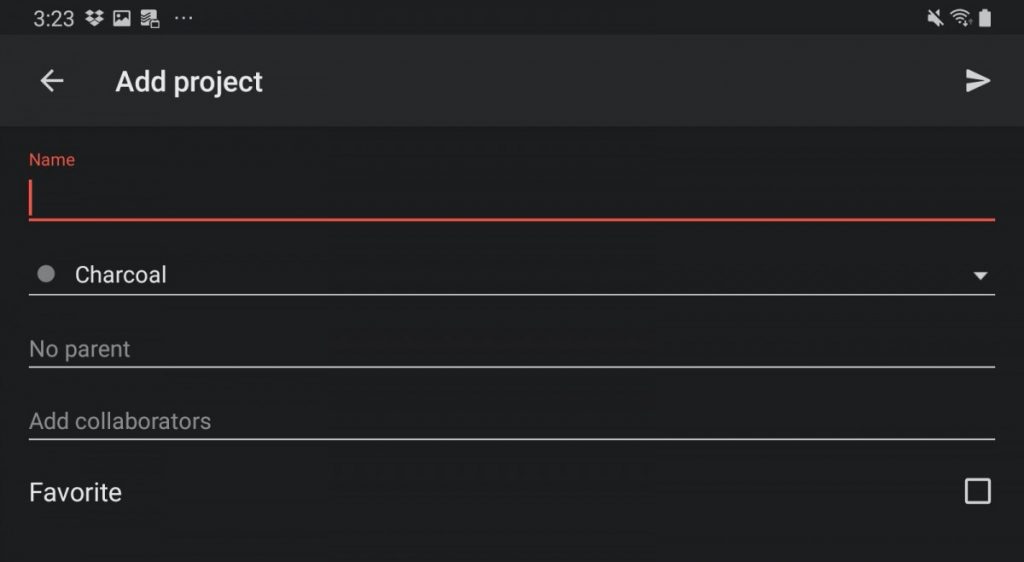
The “Add project” screen should now be visible as shown above.
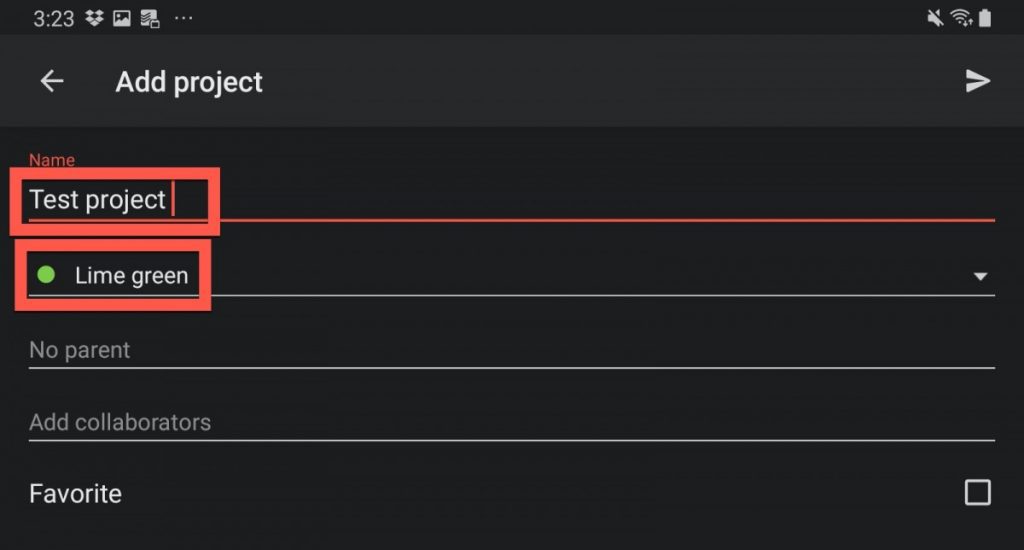
Fill in a title for your project and, optionally, assign it a color as shown in the above screenshot. Press the “Send” button in the top-right corner of the screen to save your project.
You now should have an empty project. Let’s add a new task to this project by clicking the red “Add task” button in the lower-right hand corner of the window as shown above.
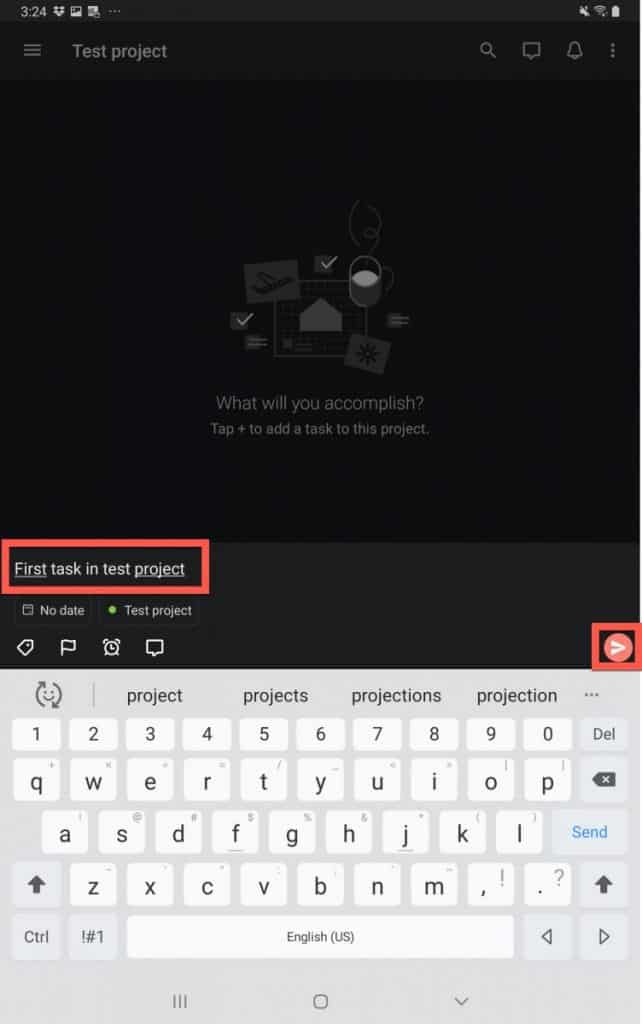
Type in your task and configure it to your liking. Notice that the task already has the project assignment (located underneath where you typed in your task). Press the “Send” button to save your task as shown above.
Congratulations! Your project now has a task assigned to it. Now scroll down to the “Projects” section. Notice anything?
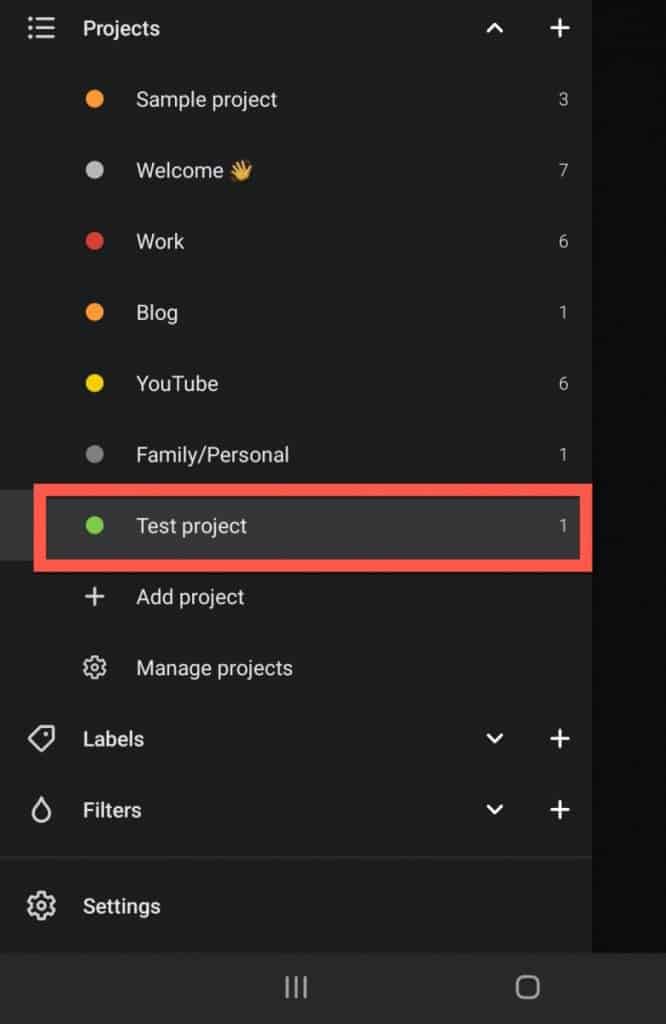
You should see your project listed in the “Projects” section.
Now let’s look at using and creating filters in Todoist for Android.
Filters in Todoist for Android
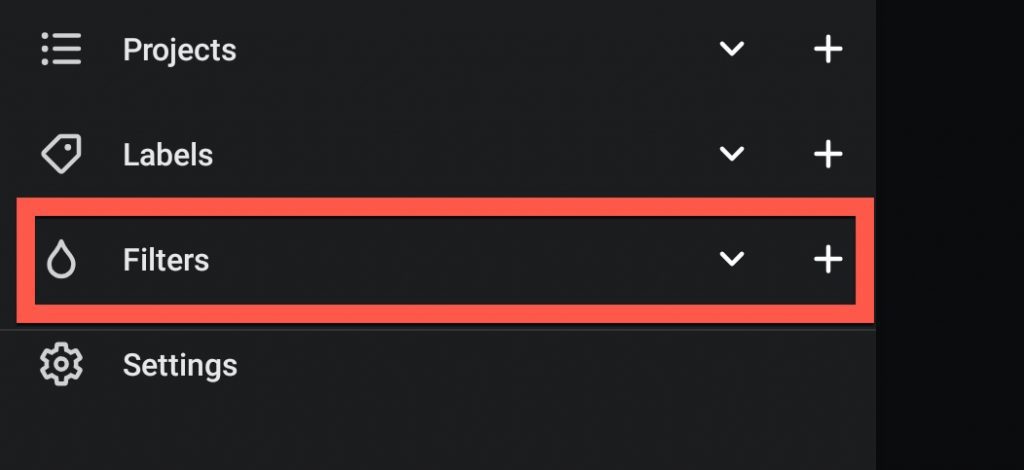
In the left panel, scroll down to the “Filters” section. Press the + button as shown in the screenshot above to display the “Add filter” screen.
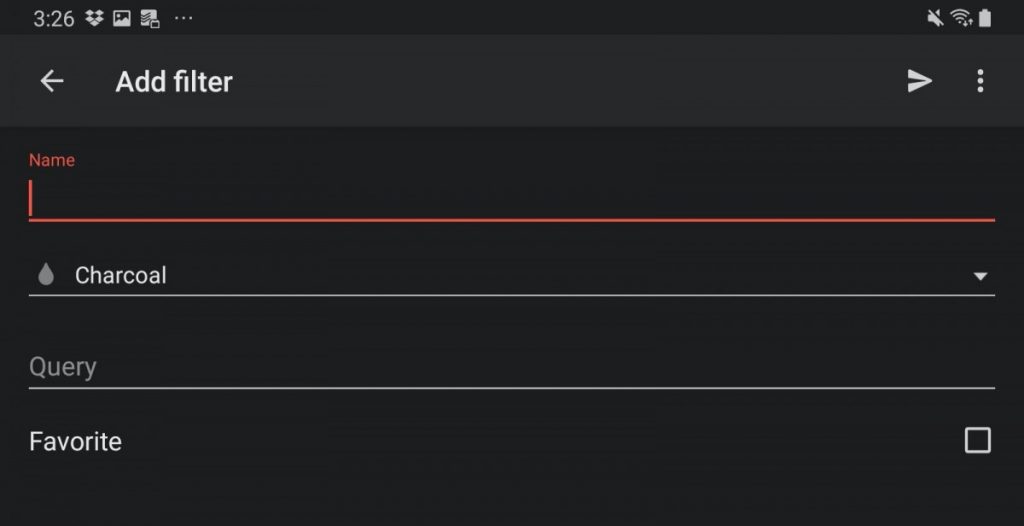
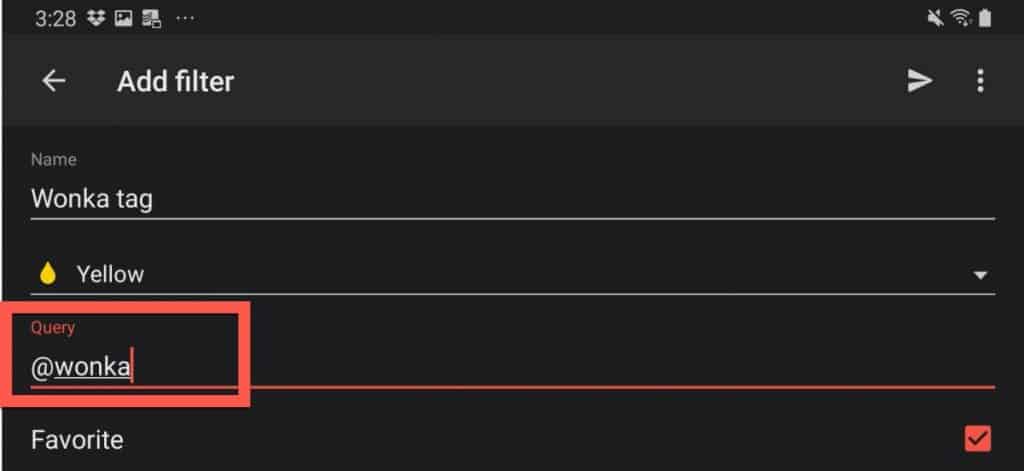
The “Add filter” screen should now be visible. Type in a name for your filter that is descriptive to what the filter is doing.
Next, click in the “Query” section and type in a filter. If you are not familiar with how to create and use filters in Todoist, check out my all-inclusive guide to filters in Todoist at the link below:
Ultimate Guide to Filters in Todoist – The Productive Engineer
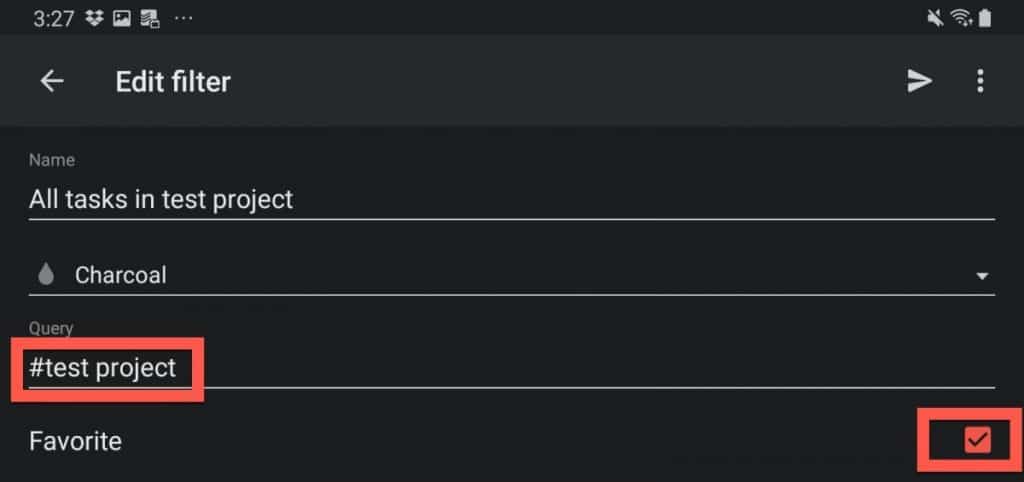
But, for the purposes of this example, we will be filtering for all tasks assigned to a specific project. The way you specify that you are referring to a project in Todoist is the using the hashtag (#) followed by the project name.

Type in the # followed by the name of the project and press the Send button.
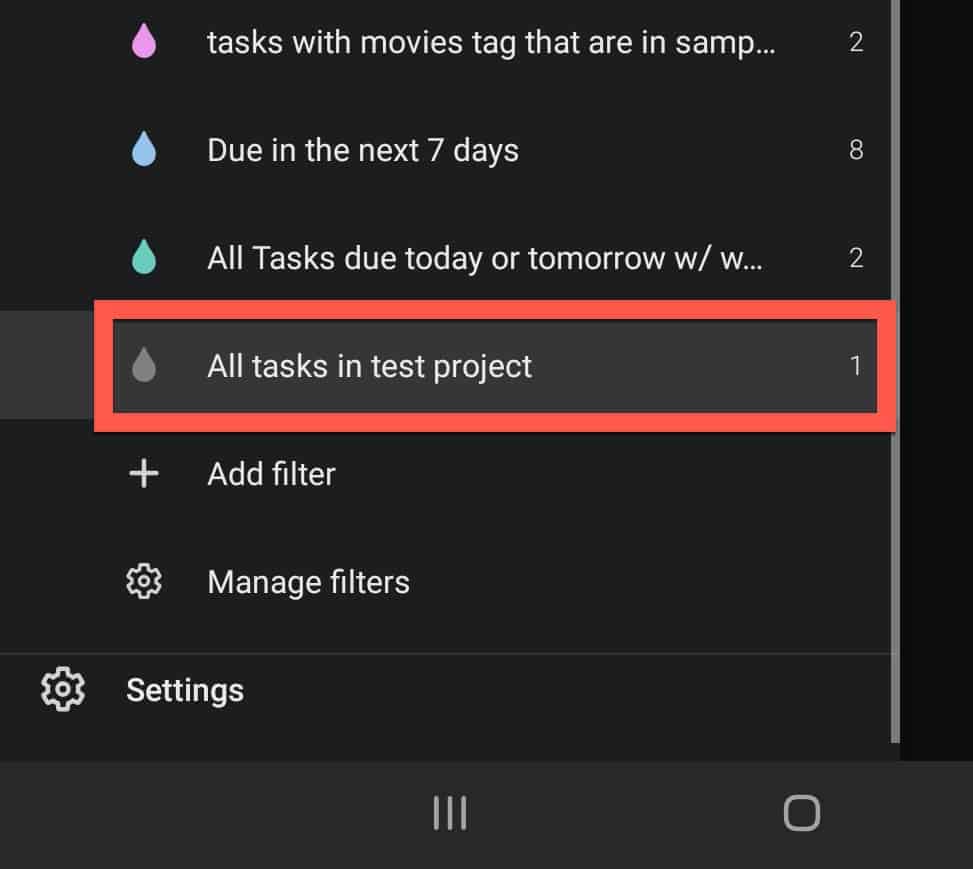
Your filter should now appear in the “Filters” section of the Todoist panel.
Let’s create another filter, this time the filter will only show tasks with a specific label. Create a new filter by press the + button in the “Filters” section.
Give your filter a descriptive name and, in the query section, type in the @ symbol followed by the name of your label. The @ symbol tells Todoist that you are referring to a label.
Press the “Send” button to save your filter.
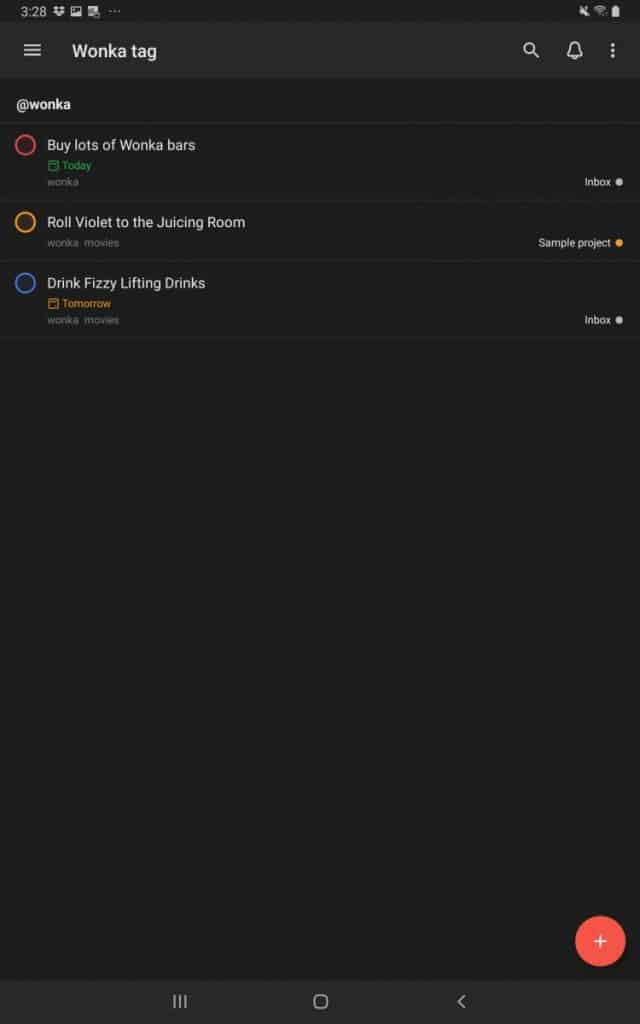
You should now see your filter with a list of all the tasks that contain that label.
I hope this tutorial was helpful to you in learning how to use Todoist for Android.
Want More Tips and Tricks? Subscribe to our Newsletter!
If you haven’t already subscribed, please subscribe to The Productive Engineer newsletter. It is filled with tips and tricks on how to get the most out of the productivity apps you use every day. We hate spam as much as you do and promise only to send you stuff we think will help you get things done.
Check Out Our YouTube Channel!
We have a YouTube channel now and we are working hard to fill it with tips, tricks, how-tos, and tutorials. Click the link below to check it out!
Check out our Resources Page
Check out our resources page for the products and services we use every day to get things done or make our lives a little easier at the link below:
Looking to Get Started Blogging or on YouTube?
Getting started can seem daunting and scary (I know it was for me) but it doesn’t have to be. I was very lucky to find a program that that has helped me grow my blog to over 35,000 page views and a YouTube channel that is growing month-over-month.
Project 24 by Income School is the program that I have used. I have been a member for over a year now and just renewed my membership. I cannot recommend Project 24 enough! For more information on Income School, click the link below:
Project 24 by Income School – Teaching You How to Create Passive Income from Blogs and YouTube