Ultimate Guide to Using Filters in Todoist
Todoist is an excellent task management service due to a variety of factors: cross-platform support, customization options, and third-party automation support as examples. However, one of the core strengths of Todoist is it’s robust support for filtering tasks. Filters allow you to create custom views of your tasks based on several different pieces of data.
So how do you create a filter in Todoist? Enclosed below are an ordered list of steps required to create a filter in Todoist:
- In the left panel, scroll down to the Filters section
- Press the “+” button to bring up the Filter configuration screen
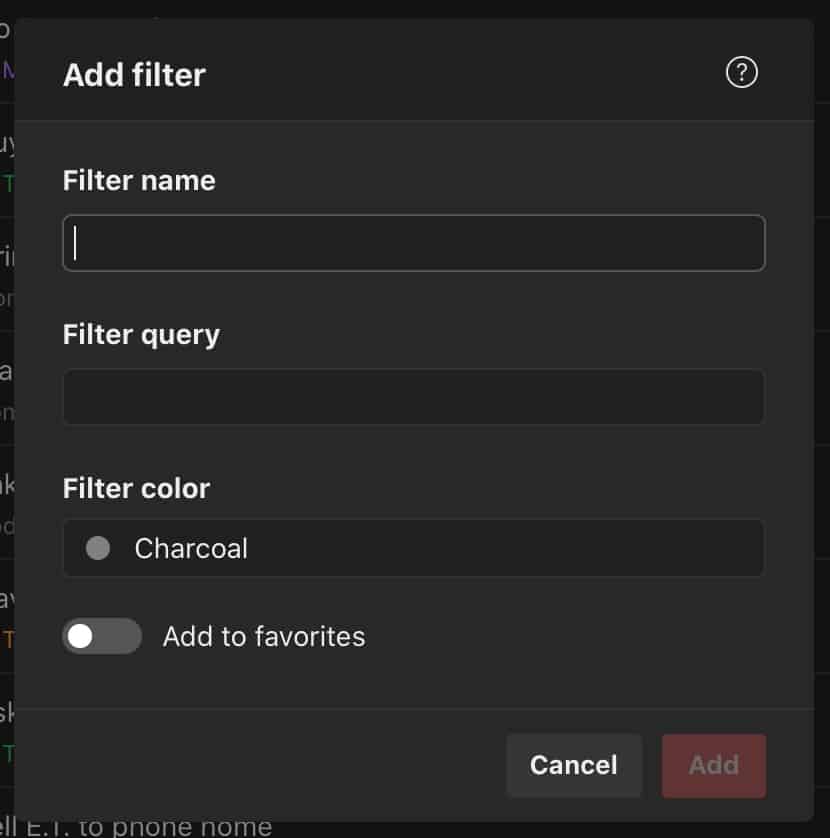
- Enter a name for your filter in the Filter name text box
- Create a filter string using the “@” symbol to denote a label and the “#” symbol to denote a project.
- Use the AND (&) and OR (|) operators to add conditional logic to your filter (example: @town & #kitchen_reno will filter for all tasks that contain the tag town and are part of the kitchen_reno project)
- Optionally add a filter color to your filter
- Optionally click or press the “Add to favorites” button to add this filter to your favorites
- Click or Press “Add” to complete the configuration of your filter
Before we get started with the tutorial, if you are looking to learn more about apps like Notion, Todoist, Evernote, Google Docs, or just how to be more productive (like Keep Productive’s awesome Notion course), you should really check out SkillShare. Skillshare is an online learning platform with courses on pretty much anything you want to learn. To learn more about Skillshare and its vast library of courses and get 30% off, click the link below:
SkillShare – Online Learning Platform
If you are looking for Todoist tips and tricks, check out my top Todoist tips and tricks at the link below:
Ten Great Tips for Using Todoist
If you are a Google Calendar user, check out my guide to connecting Google Calendar to Todoist. This allows you to bi-directionally sync Todoist with Google Calendar and allows you to have your tasks and updates sync between Todoist and Google Calendar.
Now let’s get started with the tutorial!
Getting Started

Open up Todoist. You should see all of your tasks you had added to Todoist.
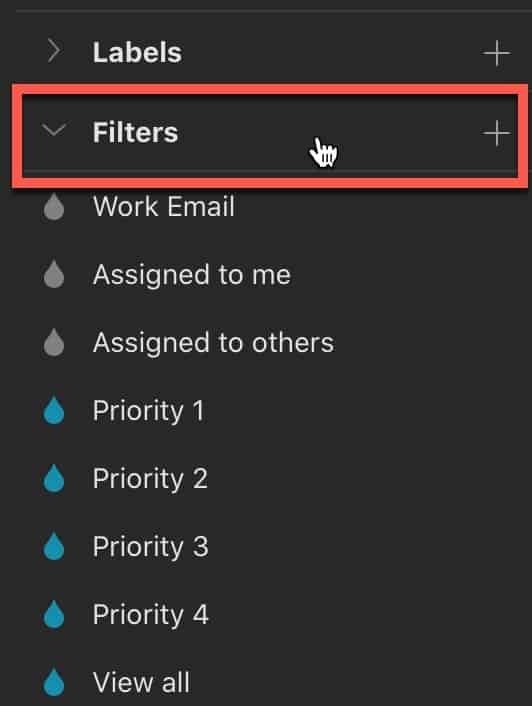
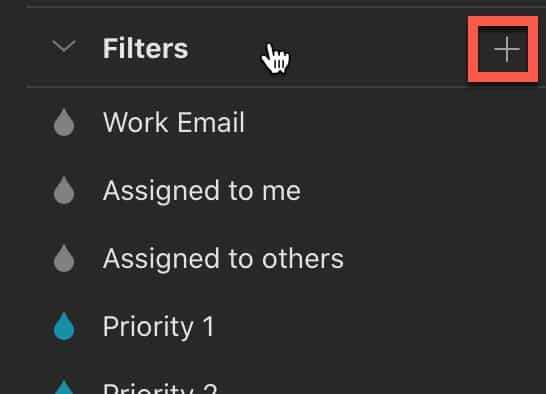
In the left-hand panel of the Todoist window, scroll down to the Filters section. Click the carrot icon to view all or hide all of your existing filters.
To create a new filter, click or press the “+” button. This will bring up the filter configuration window as shown in the screenshot above.

There are three fields you can configure in the filter configuration window:
| Configuration Option | Description of Option |
|---|---|
| Filter name | Allows you to define a name for your filter |
| Filter query | The logic of your filter. This is where you define your filter. |
| Filter color | Allows you to pick a colored circle from a list of options to assign to the filter |
The main option we need to focus on is the Filter query. The Filter query is the core of your filter as it contains the filter logic. The criteria you can filter on in Todoist are the following:
- Date
- Specific Date
- Date within a specific time period (like next 7 days or tomorrow)
- Label(s)
- Project
In the example above, I created a filter query to show all of the notes that have the label movies. You denote a label by using the “@” symbol before the name of your label (no space in between the @ symbol and the label name).
Click or Press the “Add” button to save your filter to Todoist.
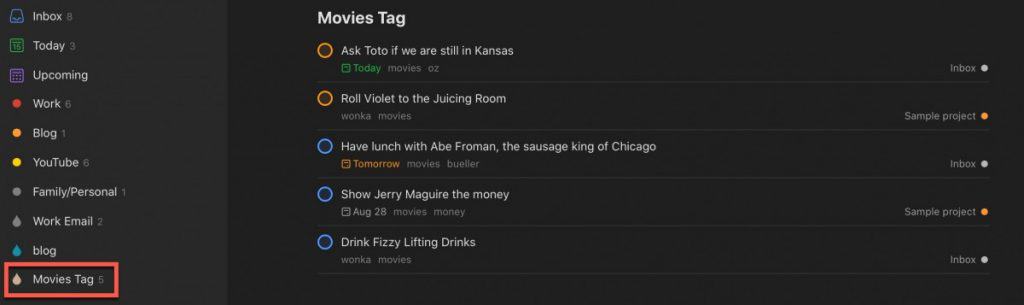
As you can see from the screenshot above, the filter window appears showing only the tasks that have the movies label. If you look at the filters section in the left-hand panel, you should see your new filter (like mine does in the screenshot above).
Let’s create another filter, this time filtering on a specific project. To create a new filter, click or press the “+” button in the filters section in the left-hand panel of the Todoist window.
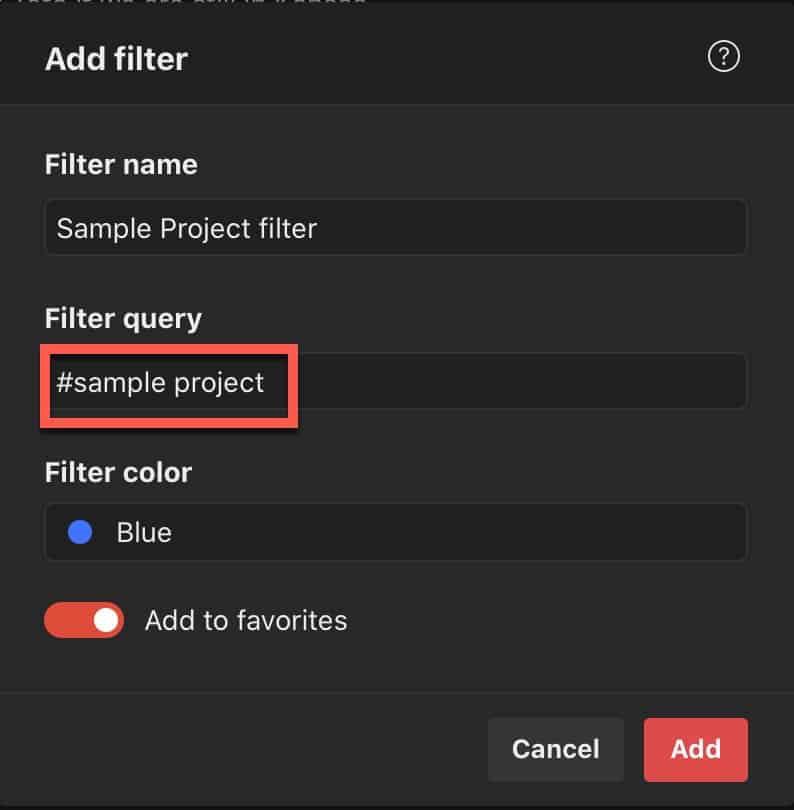
You should now see the filter configuration window. Give your filter a name then go to the Filter query section. Use the “#” symbol to tell Todoist that you want to filter on a project and then type the project name. In my example above, my filter displays all tasks that are assigned to the sample project.
Click or Press the “Add” button to save the filter to Todoist.

The filter screens out all other tasks except for tasks that are assigned to the “Sample Project”.
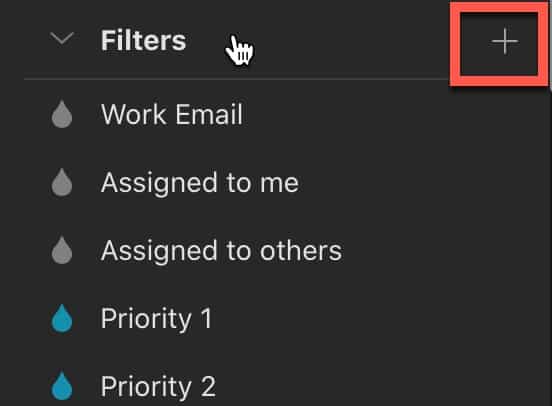
Let’s create another filter, this time one that combines both labels and projects. Go the Filters section and click or press the “+” button.
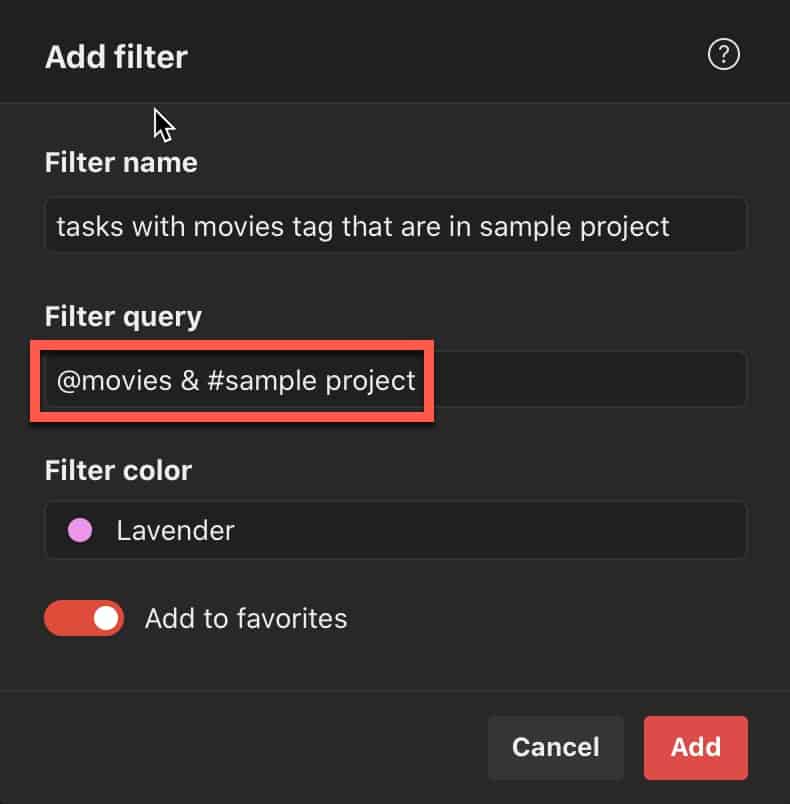
Give your filter a name and create your Filter query. You will need to include the conditional operator AND (&) as part of your compound query. Enclosed below is a table that defines the AND and OR operators:
| Conditional | Symbol | Example of Use |
|---|---|---|
| AND | & | @movies & #projectx only shows results where both conditions are true |
| OR | | | @movies | #projectx shows all tasks that fit either one of the conditions |
In our example, the query filters for tasks that contain the label movies and are part of the sample project. Click or press “Add” to save your filter to Todoist.
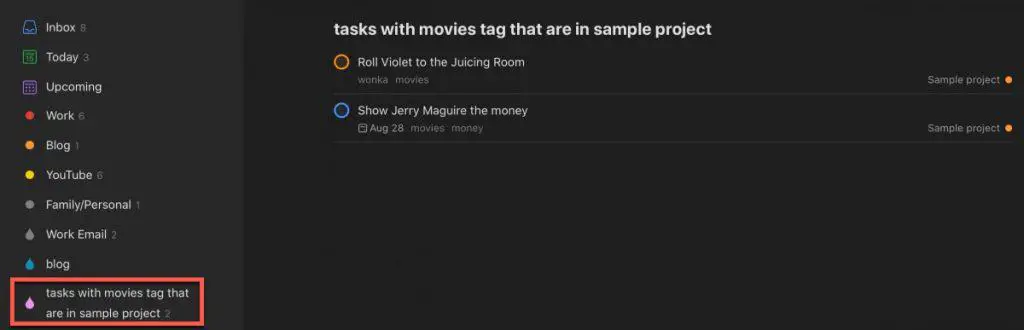
As you can see, the filter will only show you tasks that meet both conditions, in our case, that have the label movies and are part of the Sample project.

We have created filters for both labels and projects but what about dates? One of the cool things about defining date filters in Todoist is that Todoist supports natural language processing. This means you can type “Tomorrow” and Todoist will understand that and will filter for tasks with a due date of tomorrow.
You can also indicated date ranges in Todoist using natural language. Let’s create a filter that shows us all the tasks due in the next 7 days.
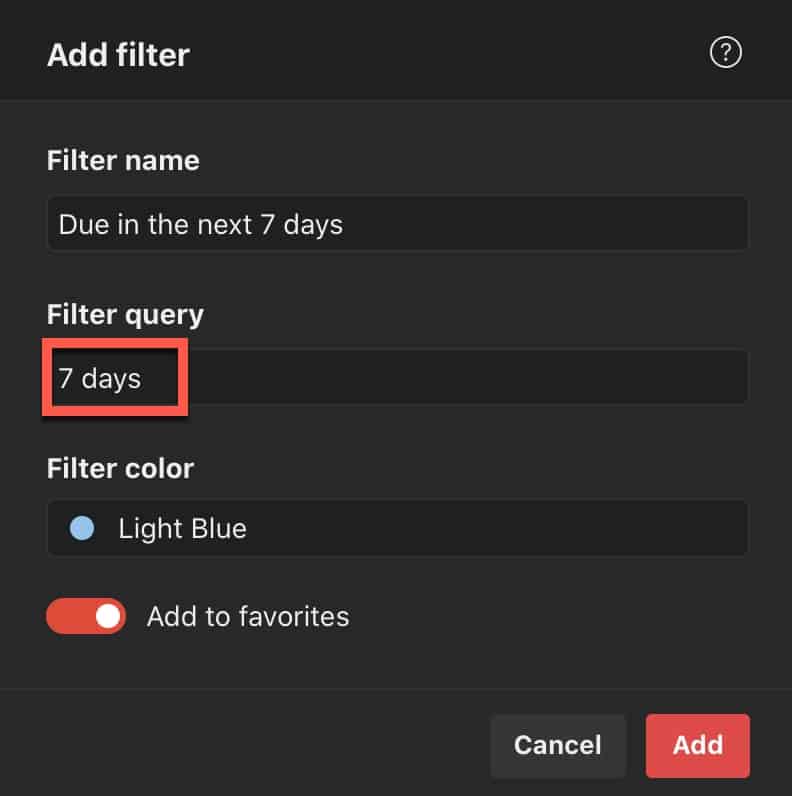
Go to the Filters section and click or press the “+” button to bring up the filter configuration window. Give your filter a name and go to the Filter query section. Type in “7 days” and click the “Add” button to save your filter to Todoist.
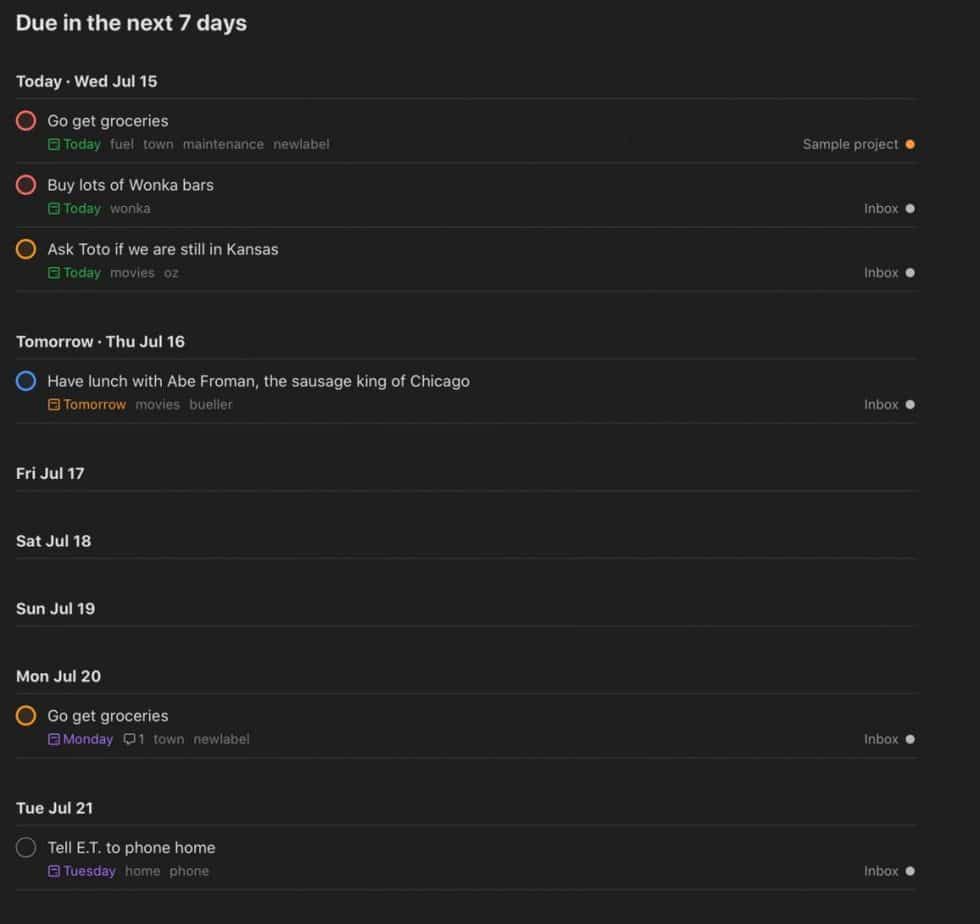
As you can see in the screenshot above, Todoist displays all of the tasks for the next 7 days in chronological order. Let’s create a more complex filter to show off how to have multiple conditions in a single Filter query.

Create a new filter but scrolling to the Filter section and clicking or pressing the “+” button to bring up the filter configuration window.
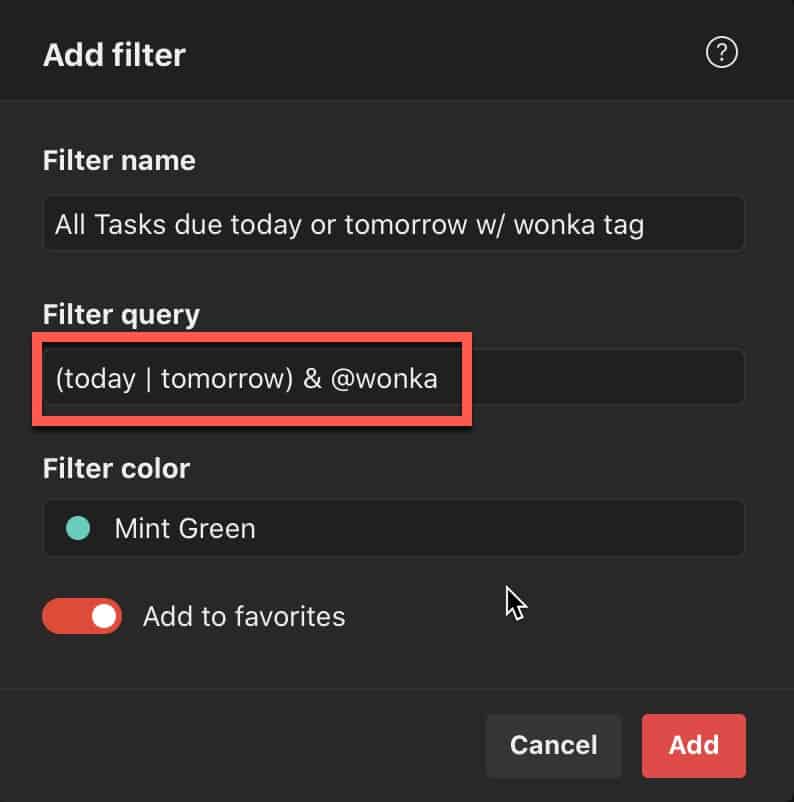
The way you write multiple conditionals in Todoist is to use the parenthesis “()”. Parenthesis tell Todoist which part of the query to evaluate first. In our example above, the parenthesis tell Todoist to evaluate all tasks that are due today or tomorrow. Once that evaluation is done, Todoist looks at all of the tasks that were due today or tomorrow and finds all of the ones that have the label wonka.
Click or Press “Add” to save the filter to Todoist.
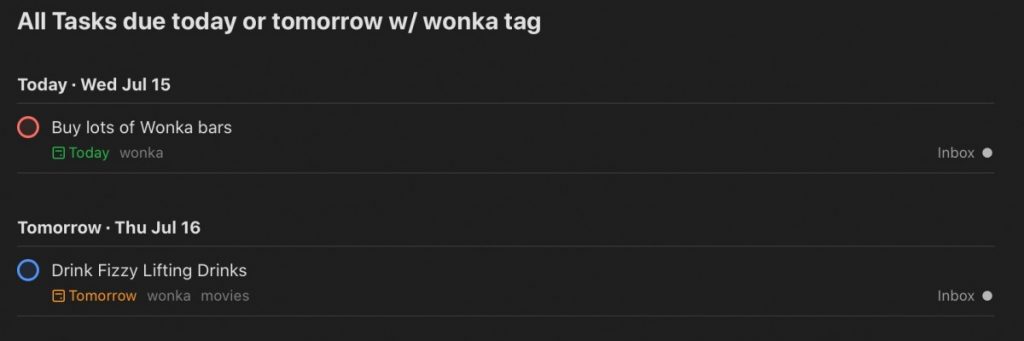
Todoist screens all the tasks and only shows tasks that are due today or tomorrow and contain the label wonka, as you can see in the screenshot above.
Are You New to Todoist?
If you are new to Todoist or simply looking for a step-by-step tutorial, check out my Beginner’s guide to Todoist video below:
Want More Tips and Tricks? Subscribe to our Newsletter!
If you haven’t already subscribed, please subscribe to The Productive Engineer newsletter. It is filled with tips and tricks on how to get the most out of the productivity apps you use every day. We hate spam as much as you do and promise only to send you stuff we think will help you get things done.
Check Out Our YouTube Channel!
We have a YouTube channel now and we are working hard to fill it with tips, tricks, how-tos, and tutorials. Click the link below to check it out!
Check out our Resources Page
Check out our resources page for the products and services we use every day to get things done or make our lives a little easier at the link below:
Looking to Get Started Blogging or on YouTube?
Getting started can seem daunting and scary (I know it was for me) but it doesn’t have to be. I was very lucky to find a program that that has helped me grow my blog to over 35,000 page views and a YouTube channel that is growing month-over-month.
Project 24 by Income School is the program that I have used. I have been a member for over a year now and just renewed my membership. I cannot recommend Project 24 enough! For more information on Income School, click the link below:
Project 24 by Income School – Teaching You How to Create Passive Income from Blogs and YouTube