How to Create and Use Boards in Todoist Guide with Video and Screenshots
Todoist is my go-to task management application. It is great for helping me manage all the tasks for each of my projects. However, sometimes I want to view my tasks in a board view, like a Kanban board. Recently, Todoist introduced this functionality into Todoist and this tutorial will teach you how to create and view your tasks as a board.
But how to do view your project tasks as a board? Enclosed below are the steps to view your project tasks as a board in Todoist:
- Open up Todoist to your project
- Ensure that your project contains sections
- Click on the ellipsis (…) to the right of the project title
- Select “View as Board” from the menu
- Your project will appear as a board
Before we get started with the tutorial, if you are looking to learn more about apps like Notion, Todoist, Evernote, Google Docs, or just how to be more productive (like Keep Productive’s awesome Notion course), you should really check out SkillShare. Skillshare is an online learning platform with courses on pretty much anything you want to learn. To learn more about Skillshare and its vast library of courses and get 30% off, click the link below:
SkillShare – Online Learning Platform
If you are looking for Todoist tips and tricks, check out my top Todoist tips and tricks at the link below:
Ten Great Tips for Using Todoist
Do you use the same password for multiple sites? Do you have trouble remembering all your passwords? You should try 1Password! 1Password is secure and allows you to log in to sites and fill forms securely with a single click. I use 1Password for all my passwords and it really makes managing all my passwords simple.
For more information on 1Password and to get a 30-day free trial, go to 1Password at the link below:
1Password – The world’s most-loved password manager
Now let’s get started with the tutorial!
Open up Todoist to your Project
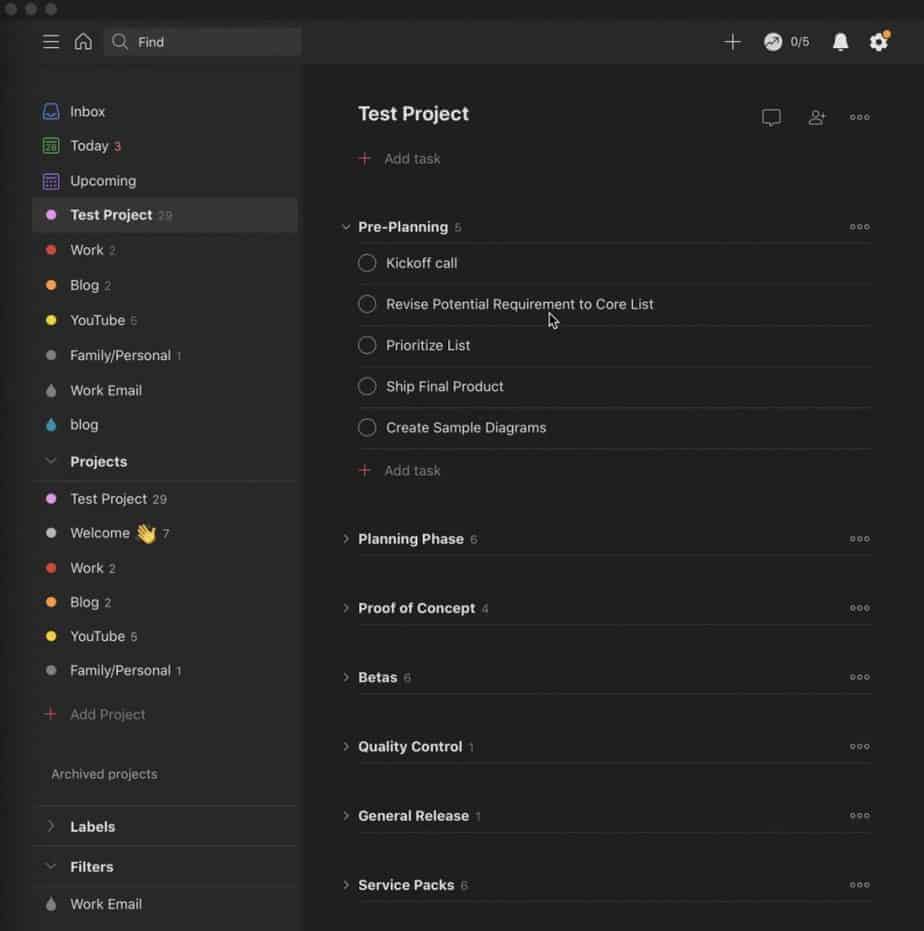
Open up Todoist and navigate to the project you want to work with. Your screen show look a lot like the screenshot above.
Ensure that your Project contains Sections
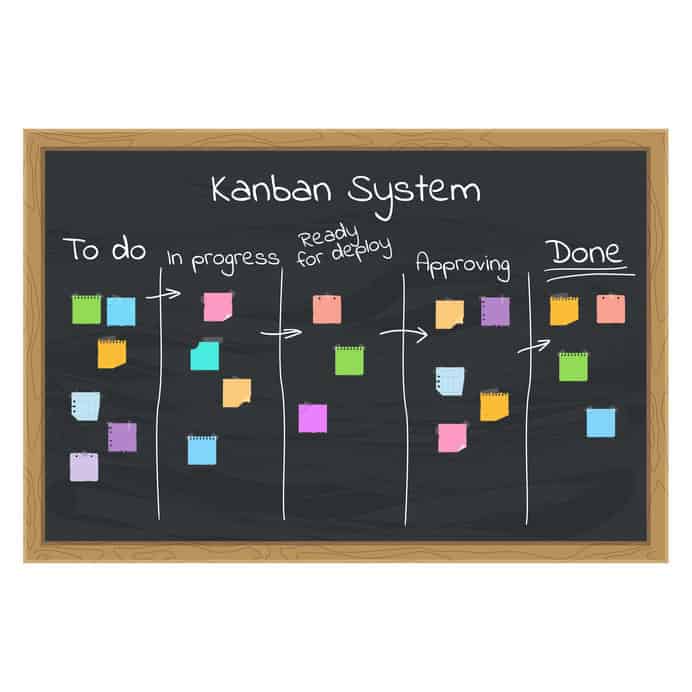
In order to view your project tasks in a board view, you must have at least one section defined for your project. Ideally, your project will contain multiple sections based on phases of your project.
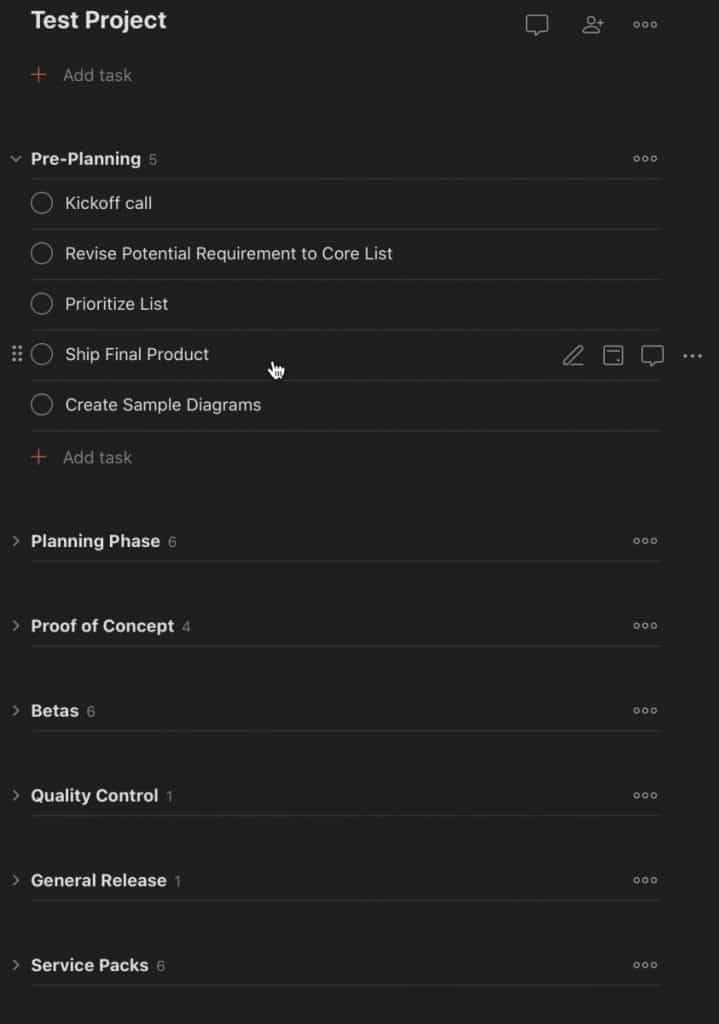
As you can see from the screenshot above, our test project has 7 different sections, each containing the tasks required to complete that phase of the project. It is good form to use sections to sub-divide your projects into several sections to make your project easier to manage in Todoist.
Click on the Ellipsis (…) to the right of the Project Title

Navigate to the top of your project. Click on the ellipsis (…) to the right of the project title to bring up the menu.
Select “View as Board” from the Menu
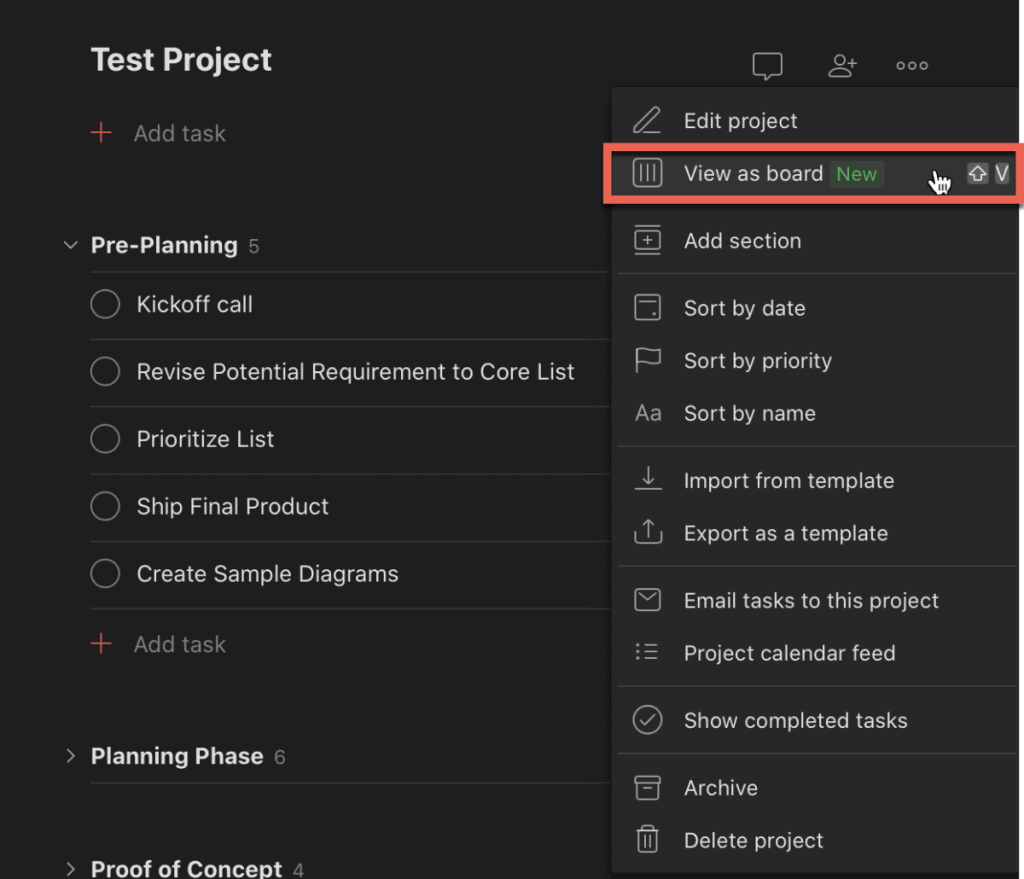
A menu of options should appear once you click the ellipsis (…). Select “View as board” from the menu.
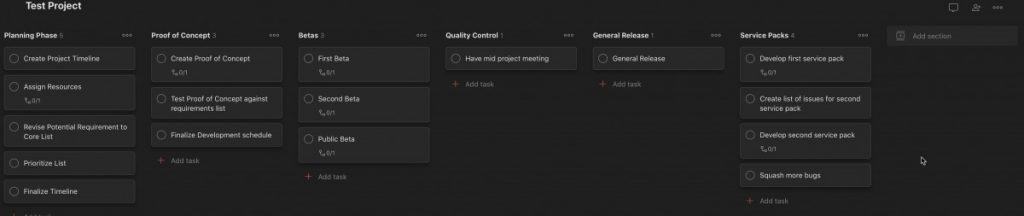
Your project should now be laid out in a board format.
If you are a Google Calendar user, check out my guide to connecting Google Calendar to Todoist. This allows you to bi-directionally sync Todoist with Google Calendar and allows you to have your tasks and updates sync between Todoist and Google Calendar.
Rearranging Sections in Todoist Board View

Re-arranging sections in Todoist when in board view is easy. Simply click on the section you want to move and drag it to where you want it to be and release the mouse button.
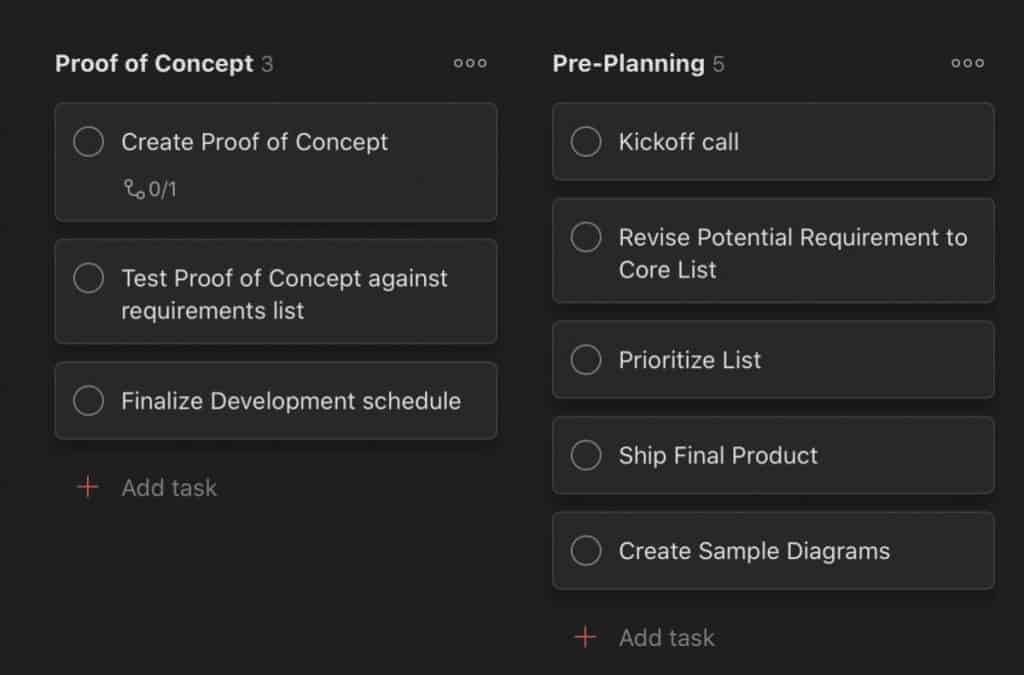
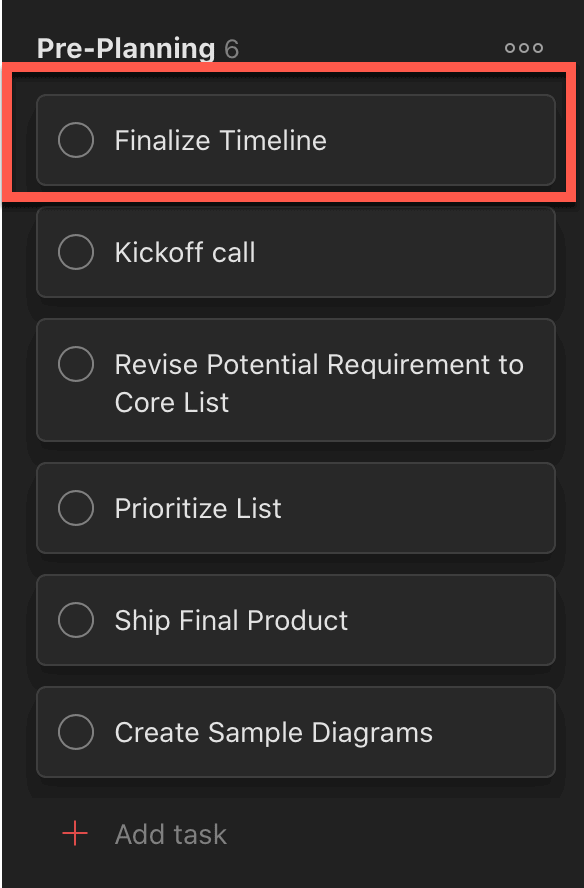
Your section will now be in the place you want it.
Moving Tasks from One Section to Another in Todoist Board View
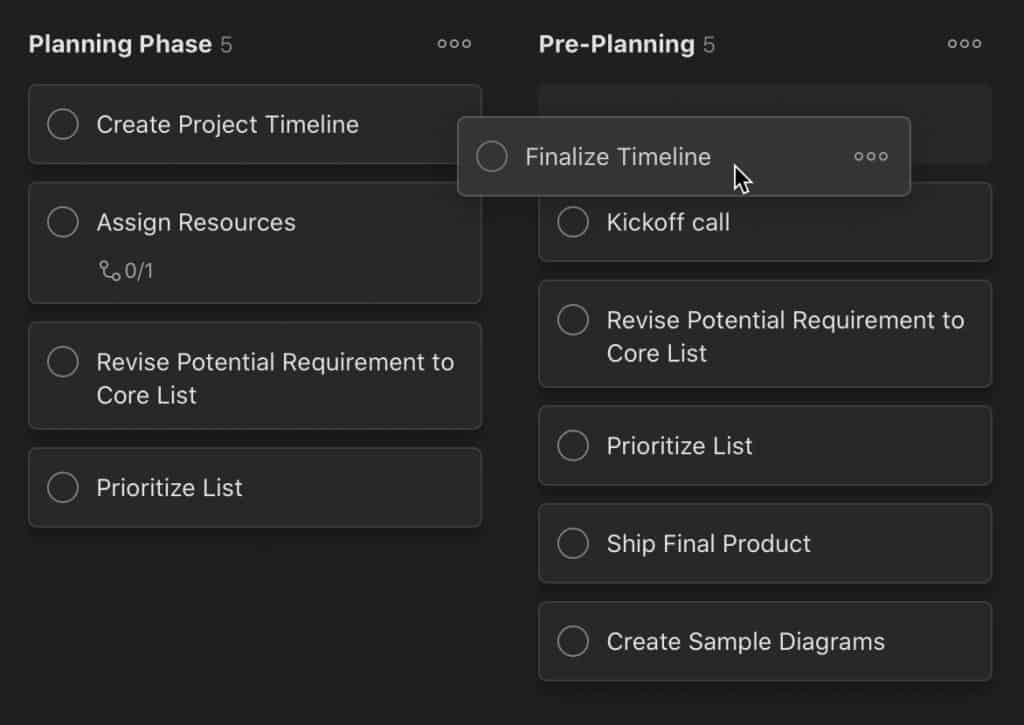
Moving tasks from one section to another when in board view in Todoist is also simple. Simply click on the task you want to move to another section and drag it to that section. You can even place it in what order you want it to be in the destination section. Release the mouse to add the task to the section.
Your task should now be in the section you want in the order you want it to be in.
Adding a New Section to a Project in Todoist Board View

To create a new section to a Todoist project while in board view, click the ellipsis (…) to the right of the project title. Select “Add section” from the menu.
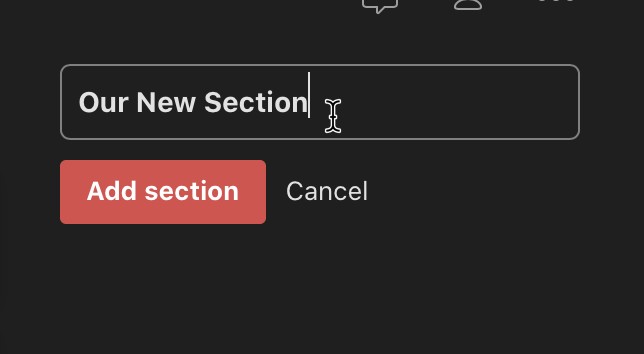
A new section will be added to the right of the last existing section in your project. Give your new project section a title and click “Add section”.
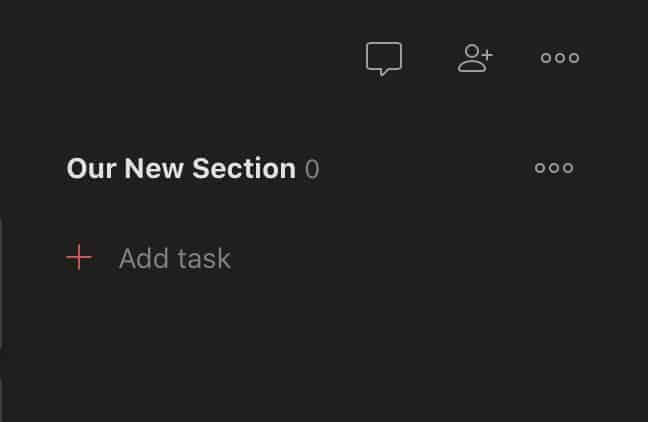
Your new section will be added to your project.
I hope this tutorial was helpful to you. Good luck!
Want More Tips and Tricks? Subscribe to our Newsletter!
If you haven’t already subscribed, please subscribe to The Productive Engineer newsletter. It is filled with tips and tricks on how to get the most out of the productivity apps you use every day. We hate spam as much as you do and promise only to send you stuff we think will help you get things done.
Check Out Our YouTube Channel!
We have a YouTube channel now and we are working hard to fill it with tips, tricks, how-tos, and tutorials. Click the link below to check it out!
Check out our Resources Page
Check out our resources page for the products and services we use every day to get things done or make our lives a little easier at the link below:
Looking to Get Started Blogging or on YouTube?
Getting started can seem daunting and scary (I know it was for me) but it doesn’t have to be. I was very lucky to find a program that that has helped me grow my blog to over 35,000 page views and a YouTube channel that is growing month-over-month.
Project 24 by Income School is the program that I have used. I have been a member for over a year now and just renewed my membership. I cannot recommend Project 24 enough! For more information on Income School, click the link below:
Project 24 byIncome School – Teaching You How to Create Passive Income from Blogs and YouTube