Notion for iPad – The Definitive Guide with Video and Screenshots
Notion is a great service. I spend hours using it on my iMac or MacBook Pro. But what about the iPad? The iPad increasingly is blurring the line between laptop and mobile device. So how does the Notion experience on iPad compare to its desktop version?
Well, the quick answer is pretty well. The Notion client is very functional and there are very few times where I wish I were using the desktop version. The purpose of this tutorial is to teach you how to get the most out of the iPad version of Notion.
Before we get started with the tutorial, if you are looking to learn more about apps like Notion, Todoist, Evernote, Google Docs, or just how to be more productive (like Keep Productive’s awesome Notion course), you should really check out SkillShare. Skillshare is an online learning platform with courses on pretty much anything you want to learn. To learn more about Skillshare and its vast library of courses and get 30% off, click the link below:
SkillShare – Online Learning Platform
If you are looking to keep your mac running at it’s best, check out CleanMyMac X by MacPaw. I have been using CleanMyMac for years it keeps my Mac running optimally by:

- Removing unnecessary files and junk from my mac
- Running optimizations to improve performance
- Easy to use app uninstaller to remove apps cleanly
- Malware removal
For more information on CleanMyMac X, click the link below:
CleanMyMac X – The Ultimate Cleaner for Your Mac
If you are just starting out with Notion and aren’t sure where to get started, you really need to check out my comprehensive beginner’s guide to Notion. It goes through all things you need to know to get started the right way. Enclosed below is the link to the guide:
Link to Beginner’s Guide to Using Notion With Screenshots
Looking for some information on the power of Notion? Check out our article containing tips to help you become a power user of Notion at the link below:
Let’s get started with the tutorial 😀.
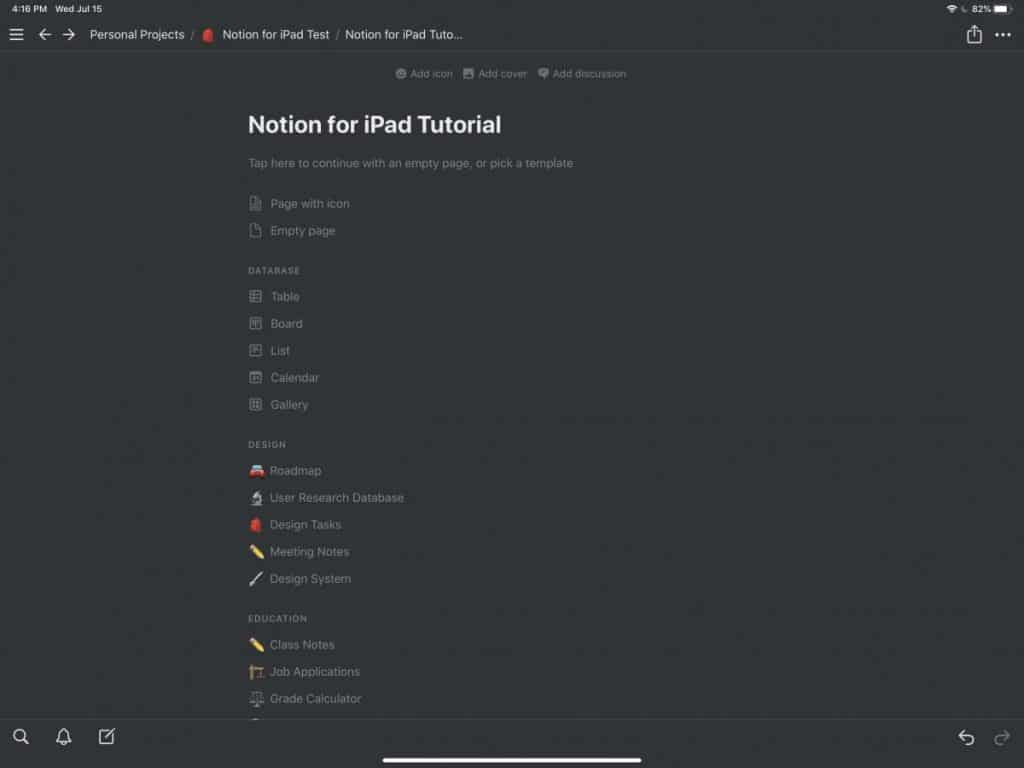
Getting Started with Notion for iPad

The screenshot above is what a new page looks like in Notion for iPad. As you can see, the page looks very similar to how a page looks in the desktop version of Notion. Let’s start editing our page in Notion for iPad to see what is the same and what is different.
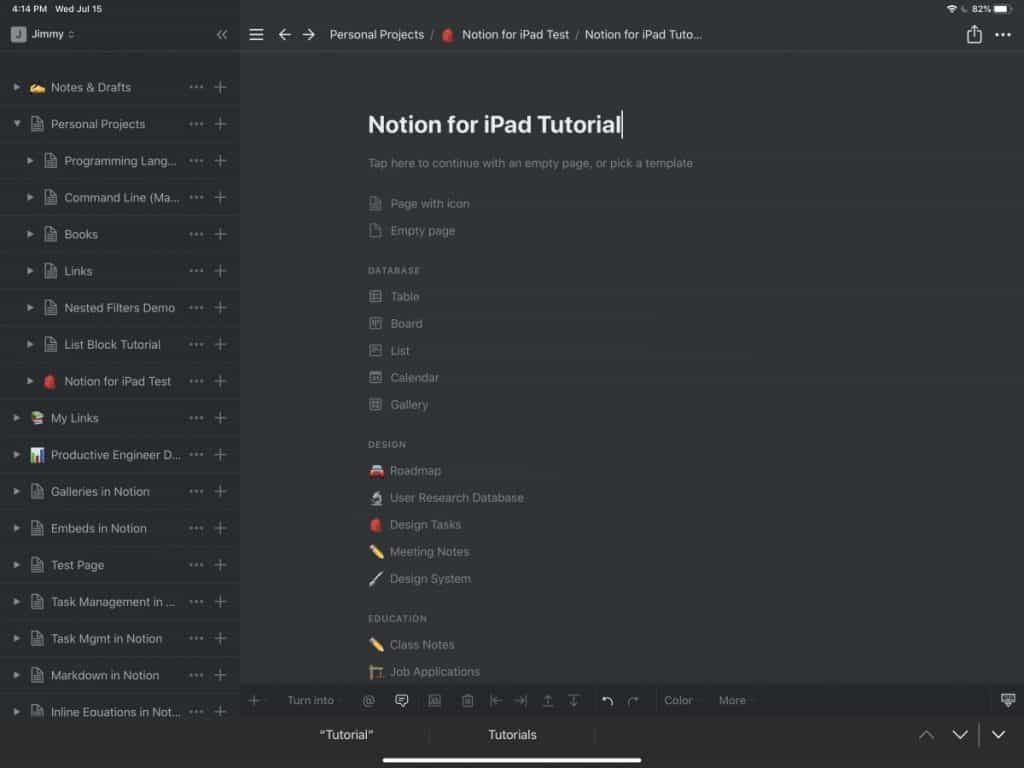
Let’s add a title to our page. To add a title to the page, simply click where it says “Untitled” in greyed out text. Type in the title of your page (in our example, I used “Notion for iPad tutorial”. Press the enter key on your keyboard (either external or the iPad software keyboard) or simply press anywhere on the Notion page.
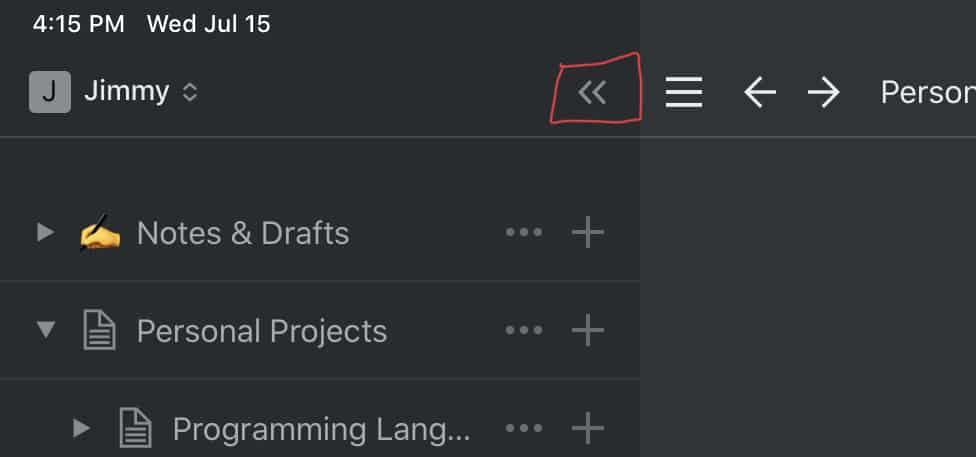
The Notion window has two areas:
- The Main Window
- The Side Panel
The side panel is visible by default but you can hide it by pressing the double-left arrow button (<<) at the top of the left panel. Press the double-left arrow button to hide the panel now.
As you can see from the screenshot above, the panel disappears and you are left with the main window. Now, let’s add some blocks to our page, starting with the Heading block.
Adding a Heading to a Page
To add a heading block to your Notion page, there are two ways you can do it:
- Using the slash “/” and typing the name of the block you want
- Pressing the plus “+” button at the bottom of the window and selecting the block you want
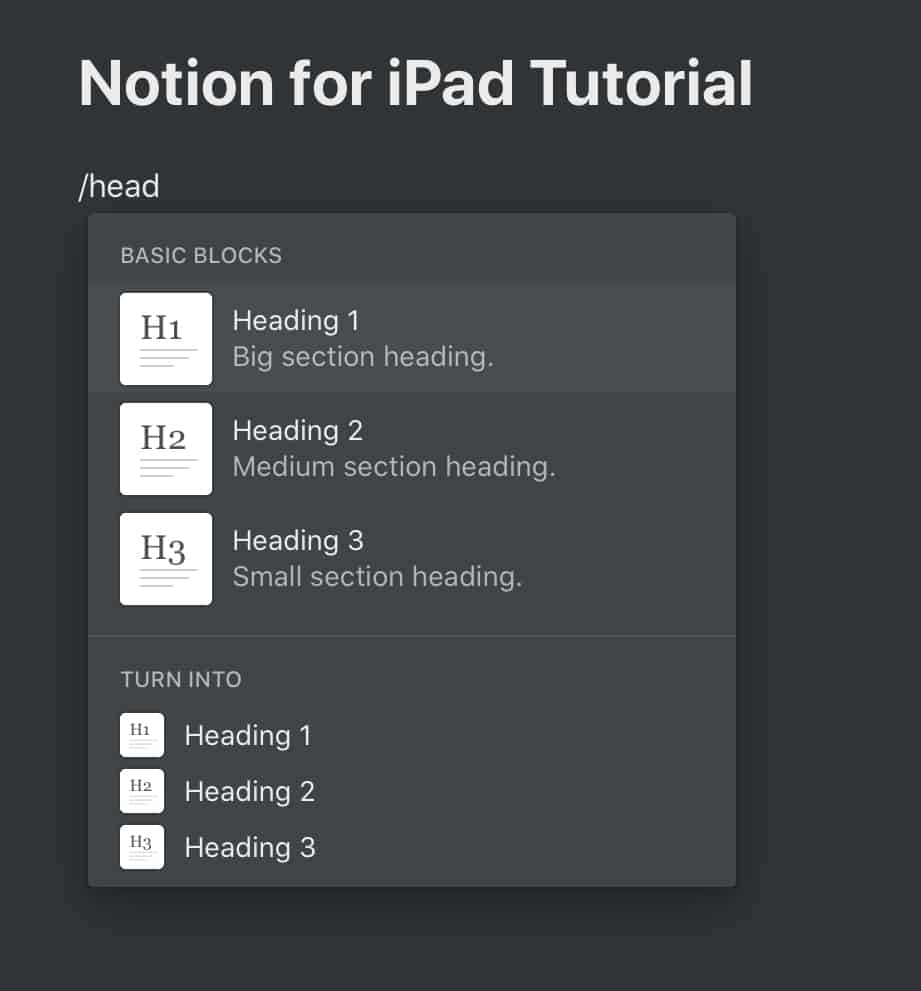
For this example, we will use the slash option. Press on the area of the page you want to add your header block. Type “/heading” and select one of the following heading types:
- Heading 1
- Heading 2
- Heading 3
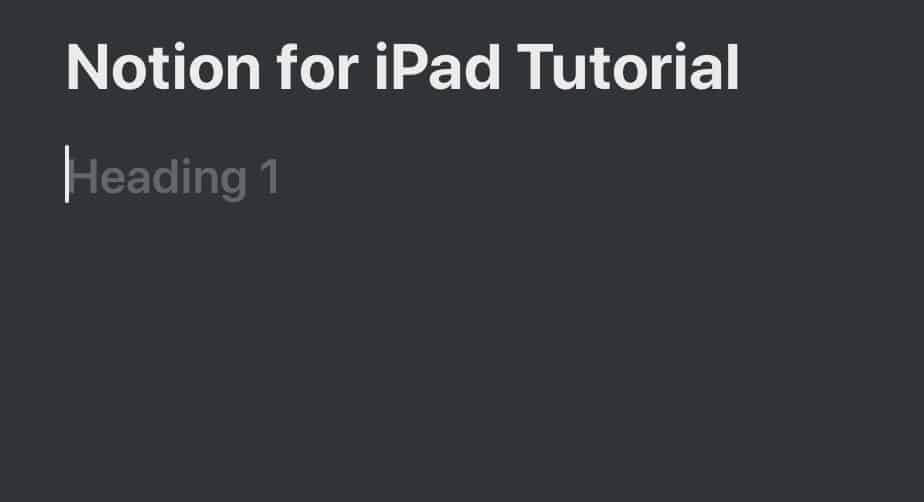
Your screen should look like the one above, with the heading option you chose earlier in greyed out text. Click on that text and type in your heading. Press Enter or press somewhere else on the page to leave text-edit mode.
Editing Text in Notion for iPad
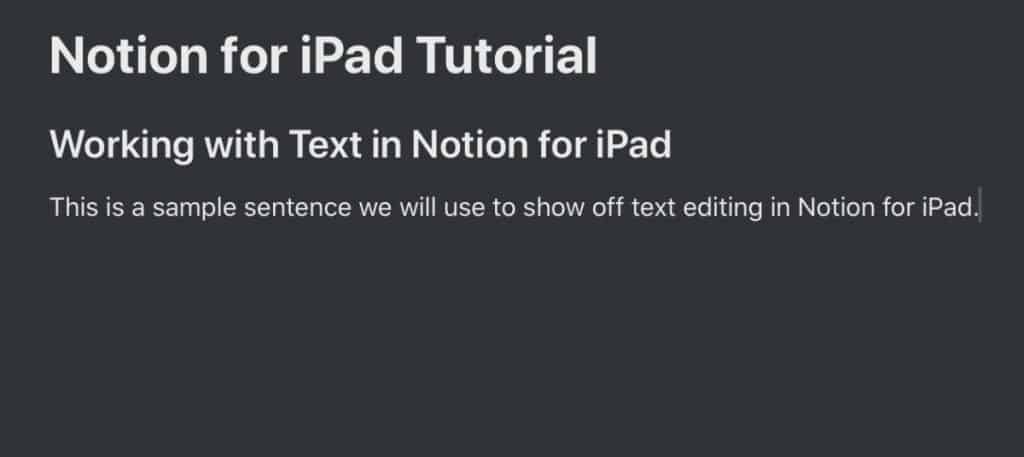
Next, let’s check out the text editing options. Type in some words. By default, Notion sets the text as paragraph text. Deep press on one of the words to bring up the text edit options.
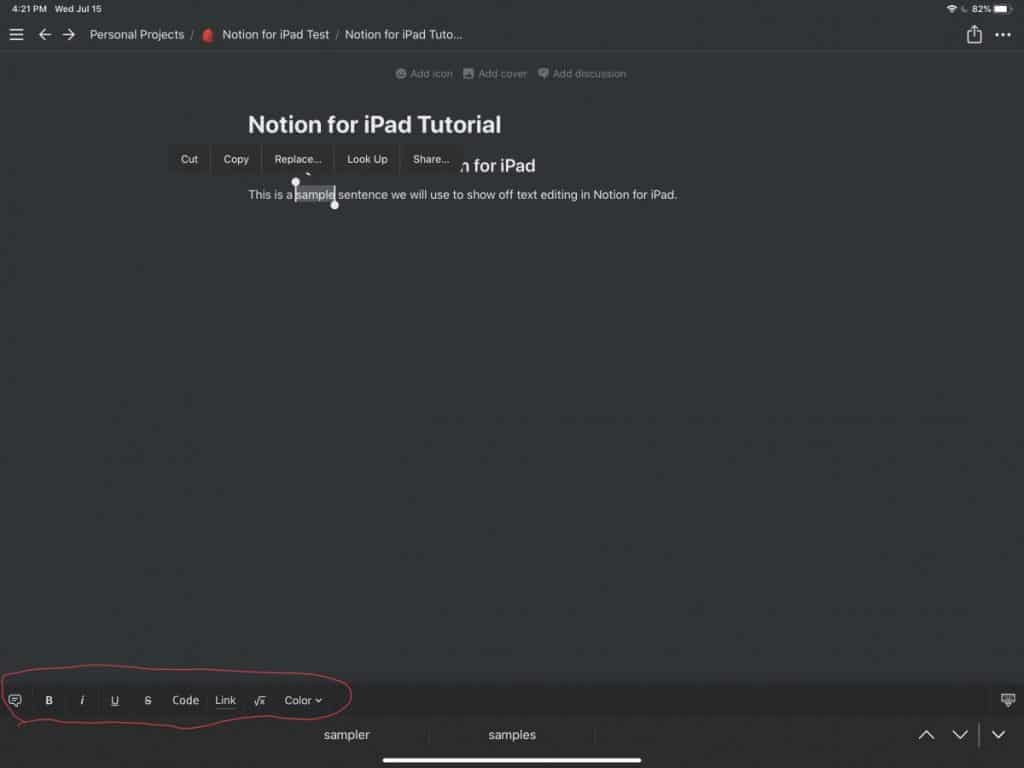
Adjust the selection slider handles until you have your word selected. You should notice the text editing bar appear at the bottom of the Notion (I circled the text editing bar in the screenshot above).
The text editing bar contains the following options:
- Comments
- Bold
- Italic
- Underline
- Strikethrough
- Code
- Link
- Equation
- Color
- Text Color
- Background Color
Experiment with each of these options to see the results of each one.

As you can see from the screenshot above, you have a great deal of text editing ability and it essentially mirrors the text editing capabilities of the Notion desktop client.
Next, let’s look at text transformation.
Transforming Text in Notion for iPad
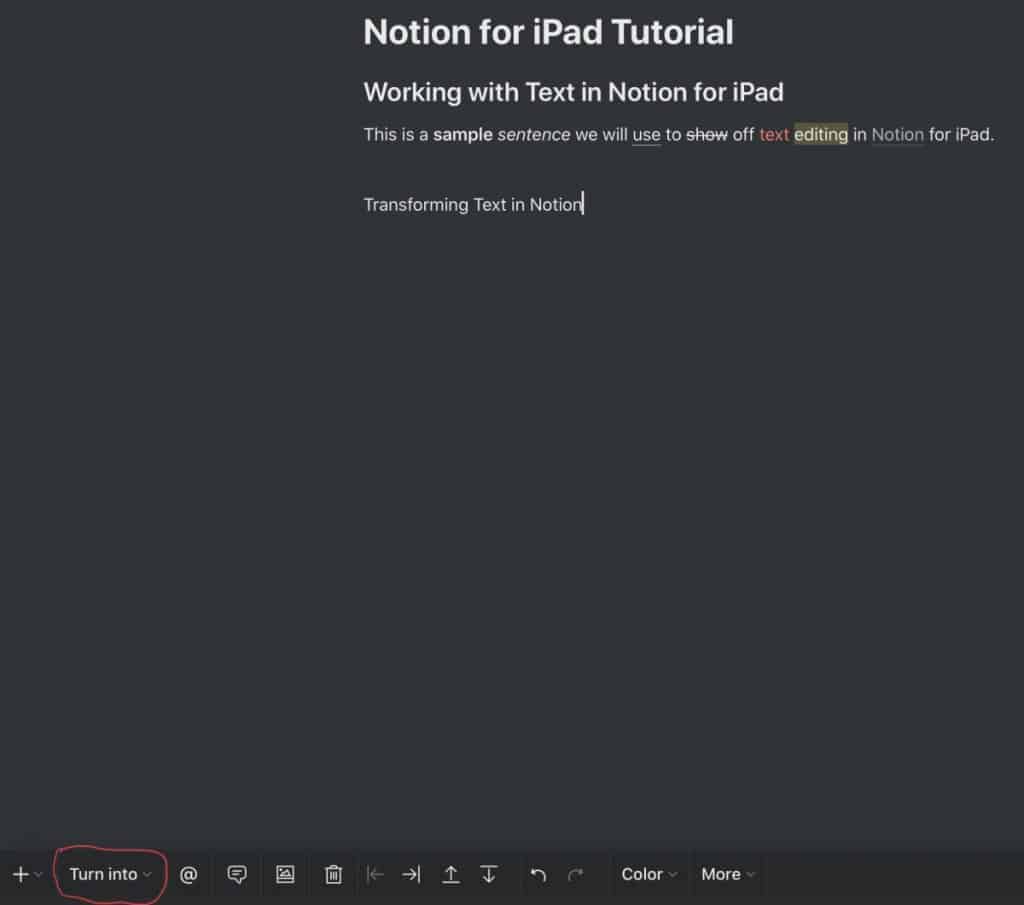
Let’s say you have some text that is paragraph text and you want to change it to be a heading. The way you do that in Notion for iPad is to press anywhere on the text. Then, at the bottom of the screen, press the “Turn into” button to bring up the transformation options menu. I circled the button in the screenshot above to help you locate it.
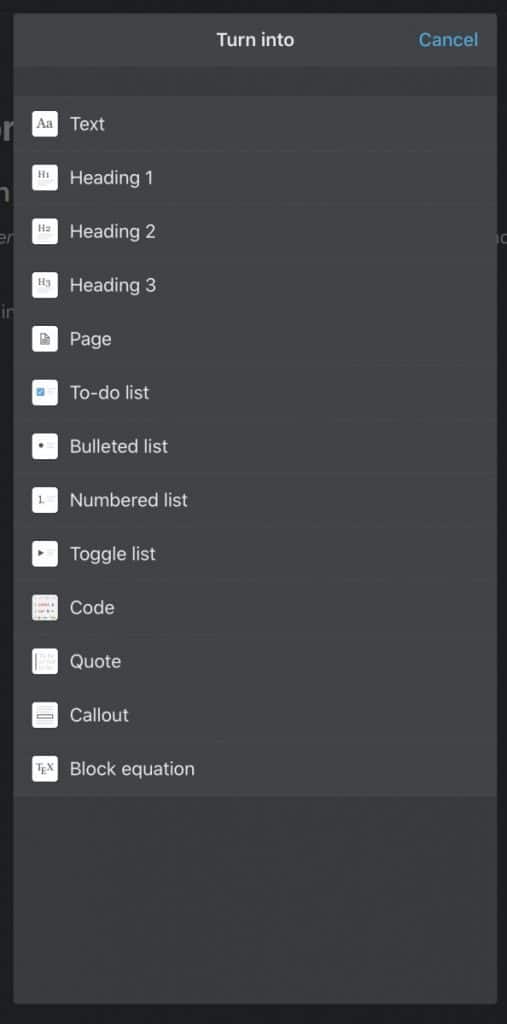
You should now see the transformation menu. Press on the option you want to transform the text (I chose heading 2 in the example).

The text should now be in the format you selected.
Now, let’s look at how to create lists in Notion for iPad.
Creating Lists in Notion for iPad
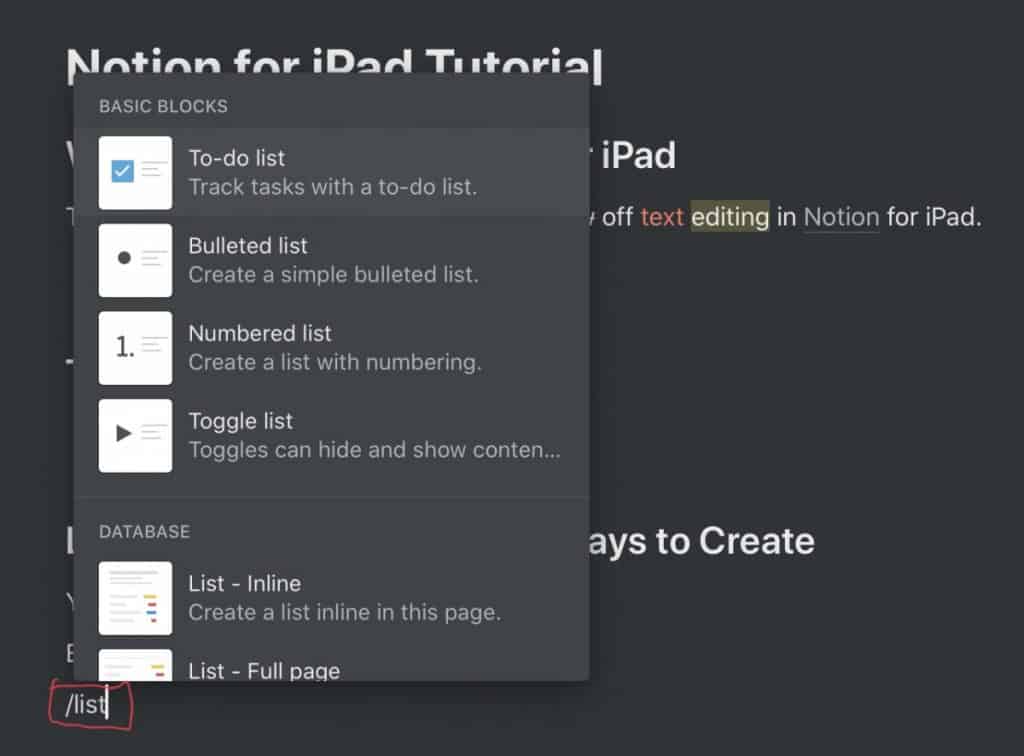
Like the heading block, you can create list blocks by using either the slash (/) option or the plus “+” button at the bottom of the window. If you want to use the slash option, type “/list” to bring up the block menu.
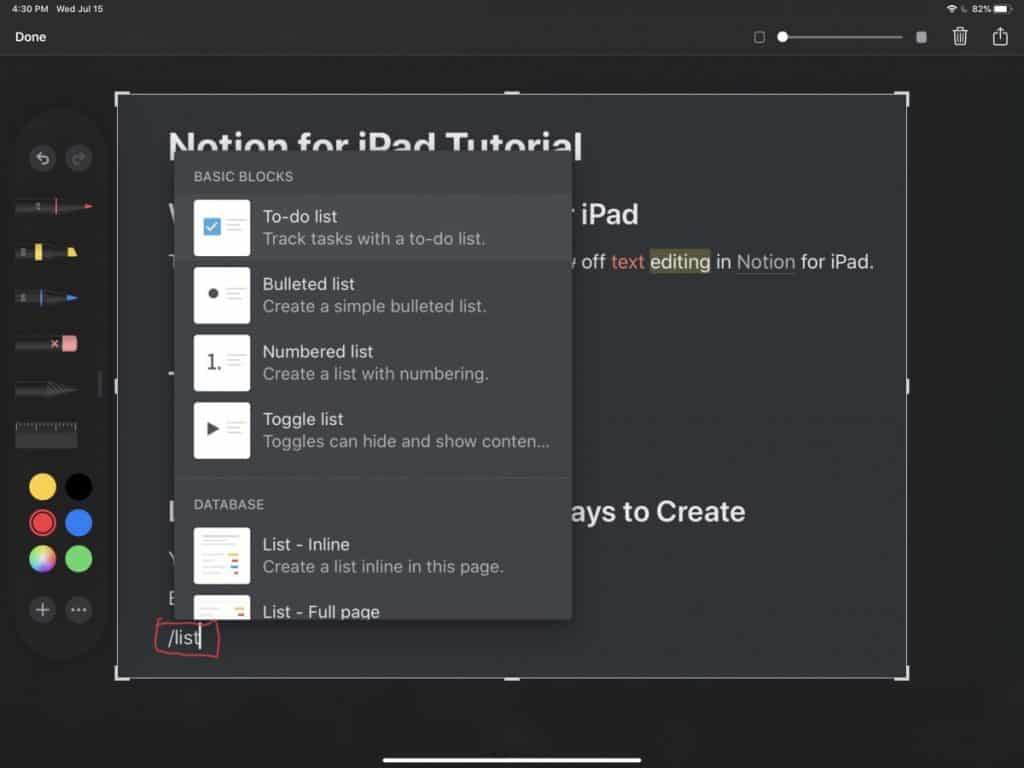
The block menu should be visible. Select the list type you want by pressing it in the menu. For our example, we will choose the To-do list option.
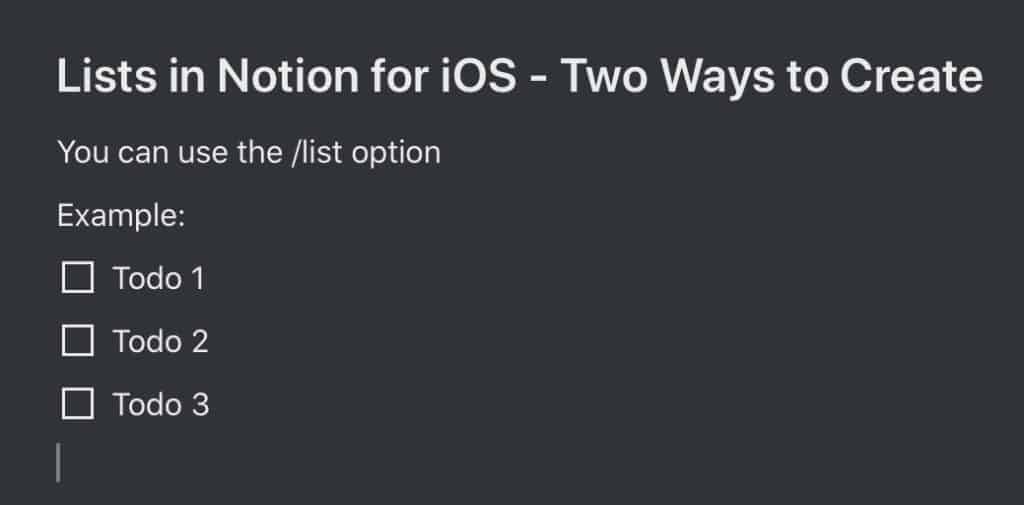
You can edit your list by pressing on it and editing the text. Let’s create another list block, this time by using the plus “+” button at the bottom of the Notion window.

Press in the area of the page where you want your list block to appear. Press the plus button (+) at the bottom of the page as shown in the screenshot above. This will bring up the block menu.
The block menu should now be visible. Select the list type you want from the menu. Your list should now appear.
For simple lists like bulleted and numbered lists, you can actually use markdown formatting to create your list.
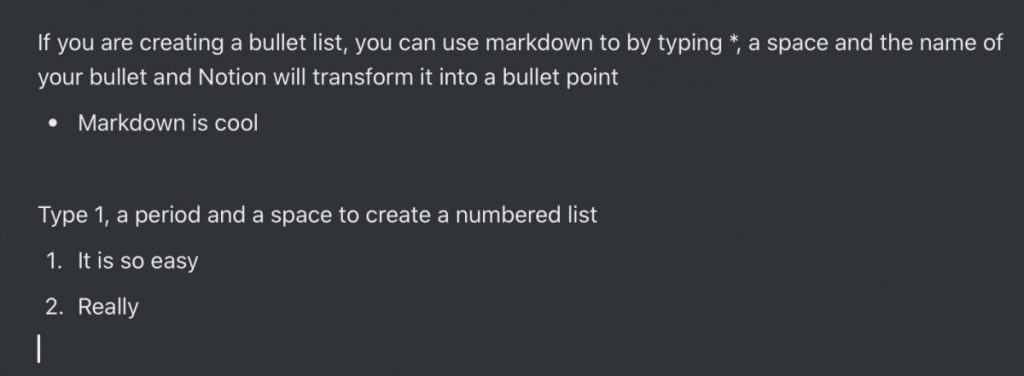
As you can see from the screenshot above, you can make a bulleted list by typing an asterisk (*) followed by a space. This tells Notion you want a bulleted list.
To create a numbered list using markdown by typing the number one following by a period and then a space (1. ). For more information on how to use markdown in Notion, check out my comprehensive tutorial at the link below:
How to Use Markdown in Notion – The Productive Engineer
Next, we will cover how to create a table in Notion for iPad.
Databases (Tables) in Notion for iPad
Databases (tables) in Notion are extremely powerful. I love using them to store and keep track of the various things I am working on. Fortunately, using them on the iPad is just as good as it is on the desktop.
Before we get started reviewing how to create a table in Notion for iPad, if you are looking to learn more about using databases and tables in Notion, check out my Notion tables tutorial at the link below:
Definitive Guide to Using Tables in Notion – The Productive Engineer
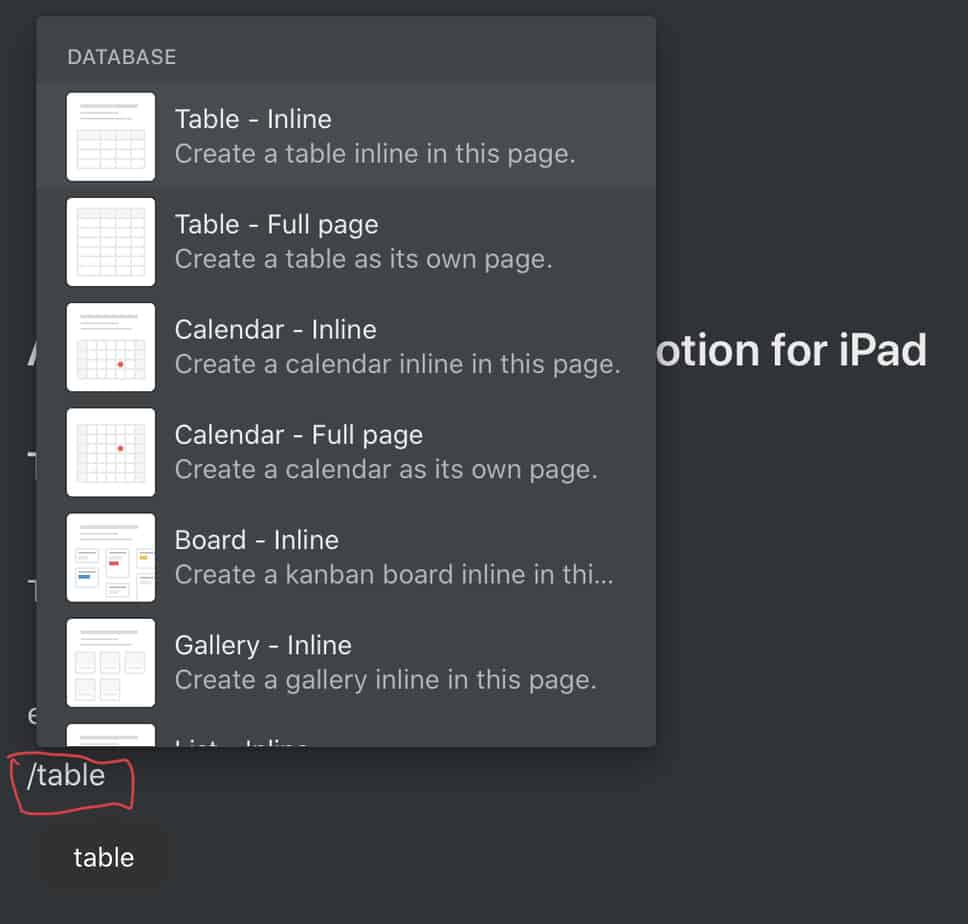
Let’s create a table using the slash method. Press on the page where you want your table to appear and type “/table“. The block selection menu will appear.

Select the table type you want by pressing on it. In our example, I chose an inline table.
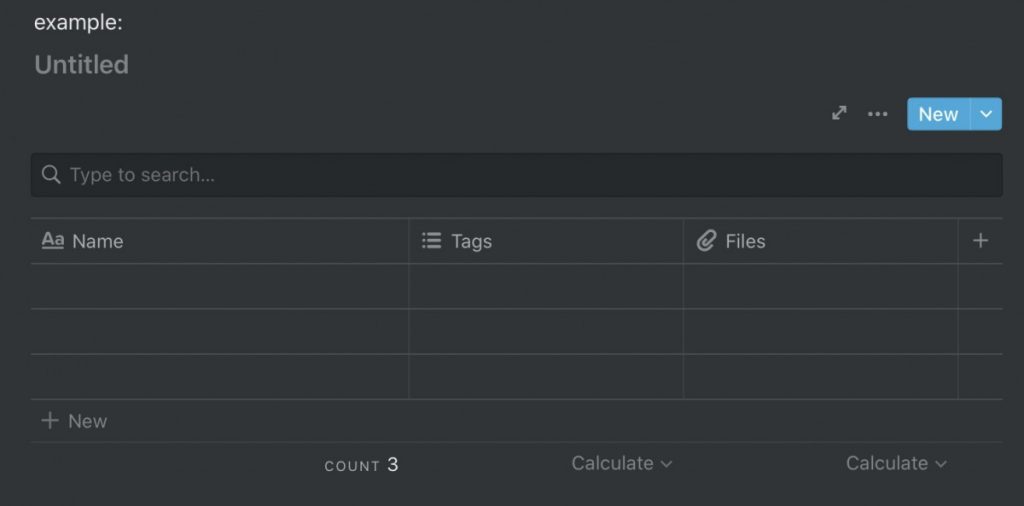
Your table should now appear on the page. Give your table a name by pressing where it says “Untitled” and typing in your table title. As with the blocks we created earlier, you can also use the plus “+” button to bring up the block menu.

Let’s make another table, this time using the plus button. Press where on your page you want your new table and press the plus button “+” at the bottom of the Notion window as shown in the screenshot above.
The block selection menu will appear. Press on the table type you want to create that table on your page.
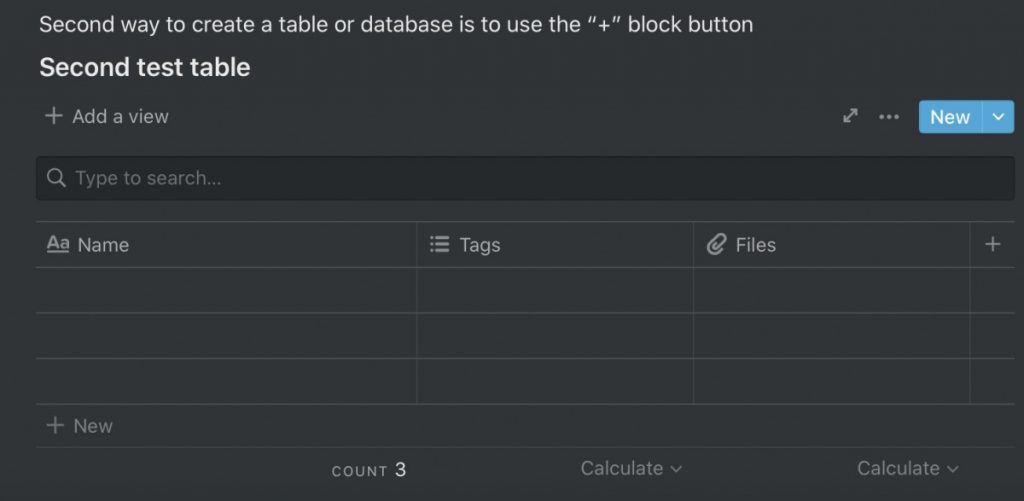
Your new table should appear on the page.
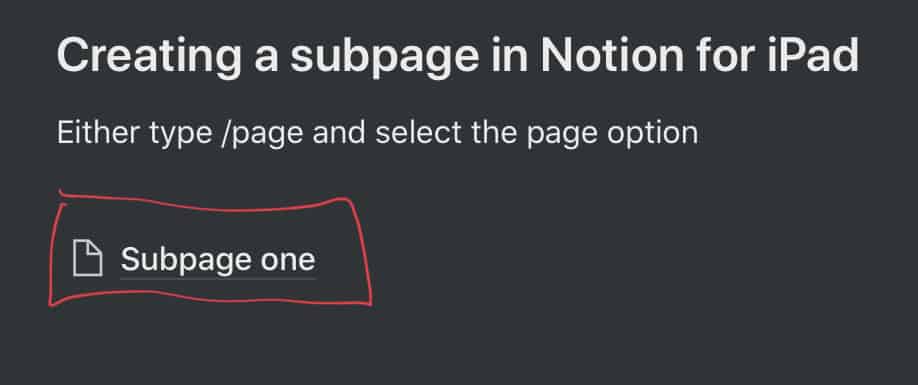
Now let’s create a subpage using the slash method.
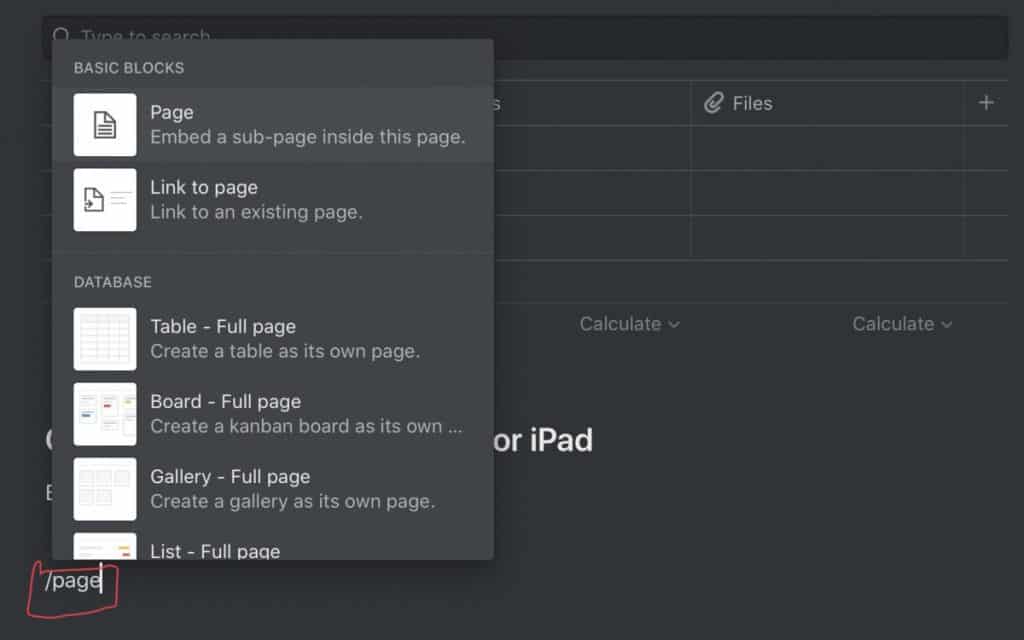
Press on the body of your Notion page and type “/page” and select the Page option.
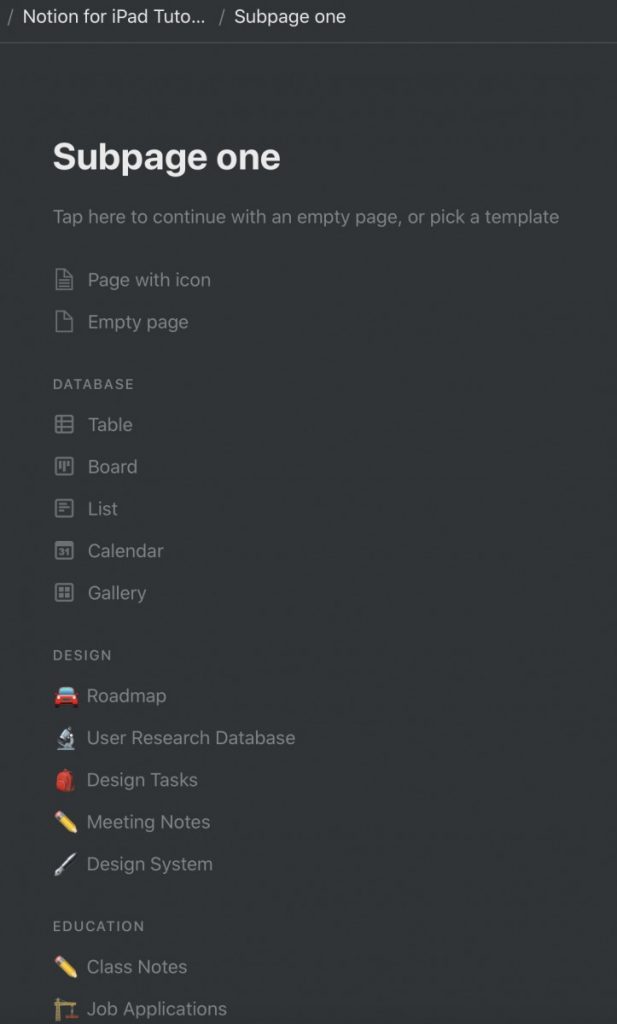
Your subpage will appear in the main Notion window. Give your new page a name by pressing where it says “Untitled” and type in your new page title.
Go back to your original page. You should see a link to your subpage. Now let’s create another subpage, but this time using the plus button.
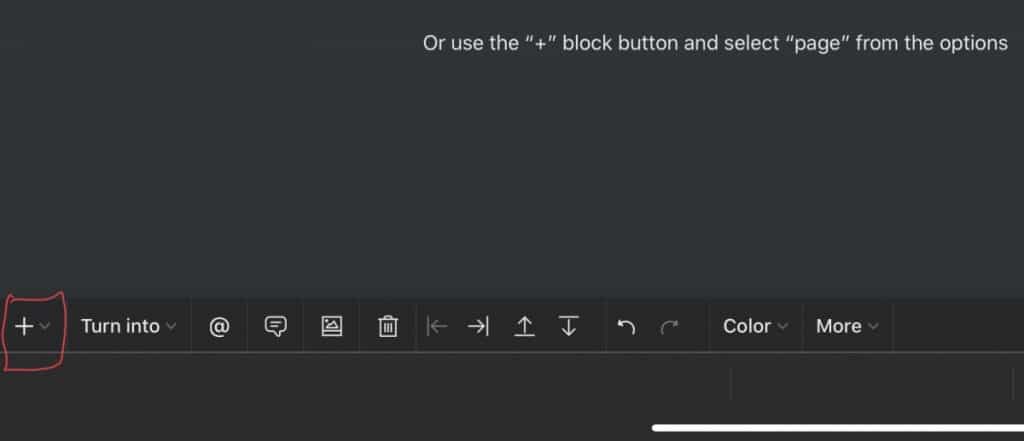
Press where you want your new subpage to be listed on the current page. Press the plus “+” button at the bottom of the Notion window as shown above to bring up the block selection menu.
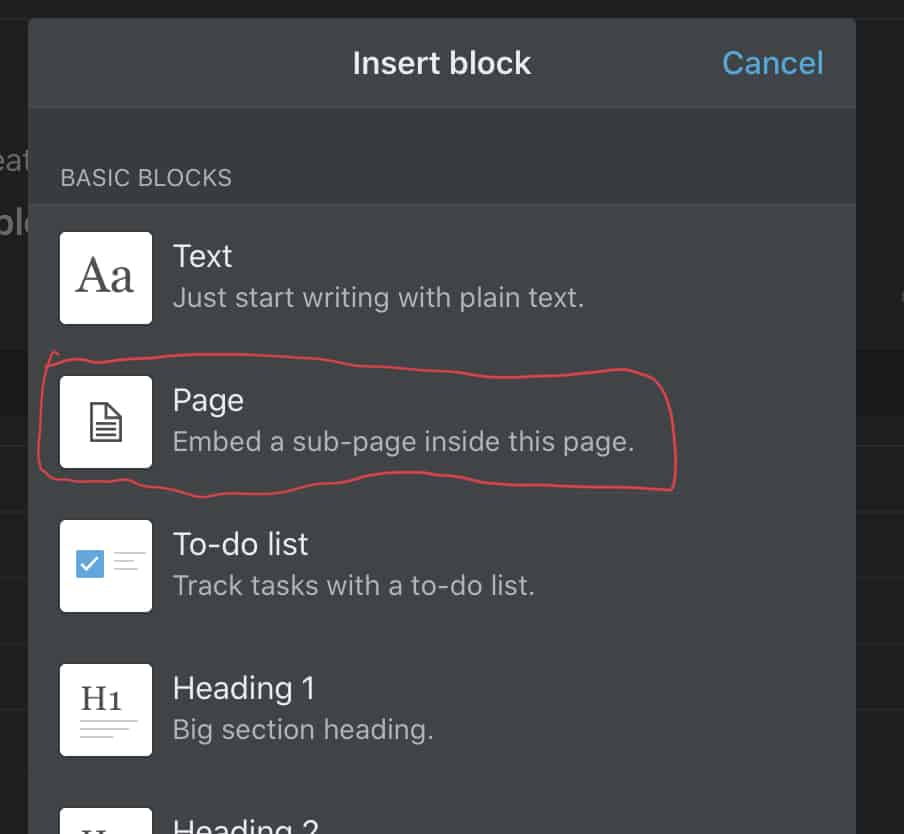
Select “Page” from the block selection menu.
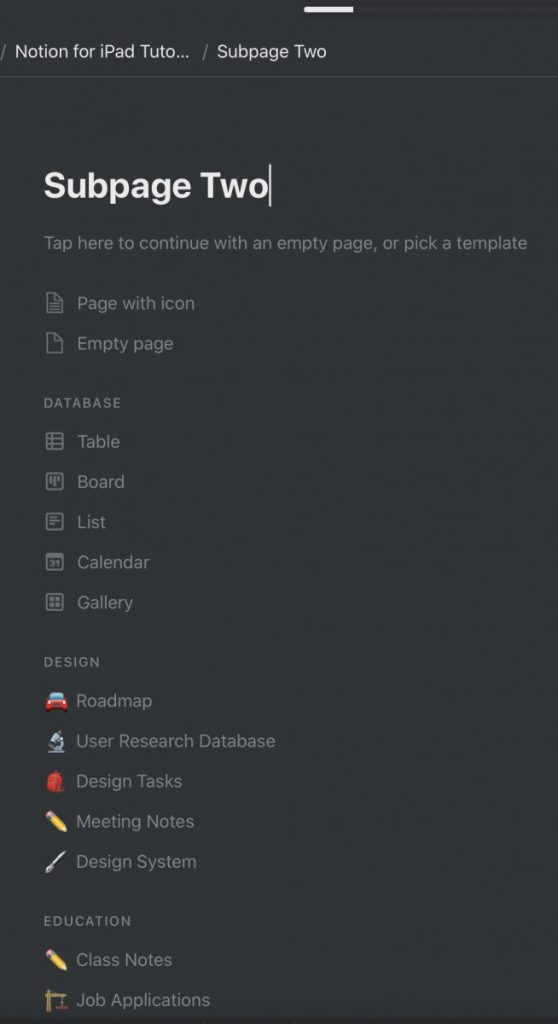
Your subpage should appear in the main Notion window. Give your new page a name.
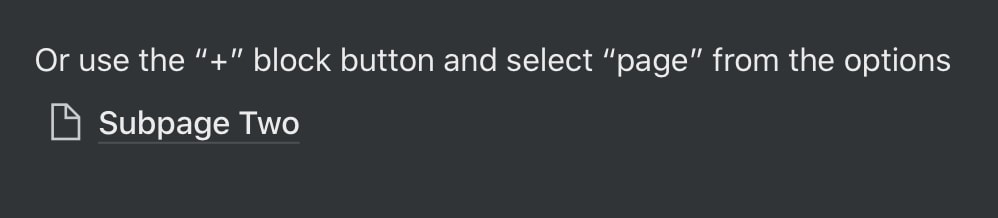
Go back to your original page by either pressing the back button or clicking the breadcrumb at the top of the Notion window. A link to your new subpage should appear on your original Notion page.
If you are looking for a more detailed primer on how to work with pages in Notion, check out my tutorial on how to work with pages in Notion at the link below:
How to Create and Manage Pages in Notion – The Productive Engineer
Next, let’s review how to clip web content into Notion for iPad. If you are looking for how to clip web content into Notion while using your computer, check out my detailed tutorial below:
How to Use the Notion Web Clipper – The Productive Engineer
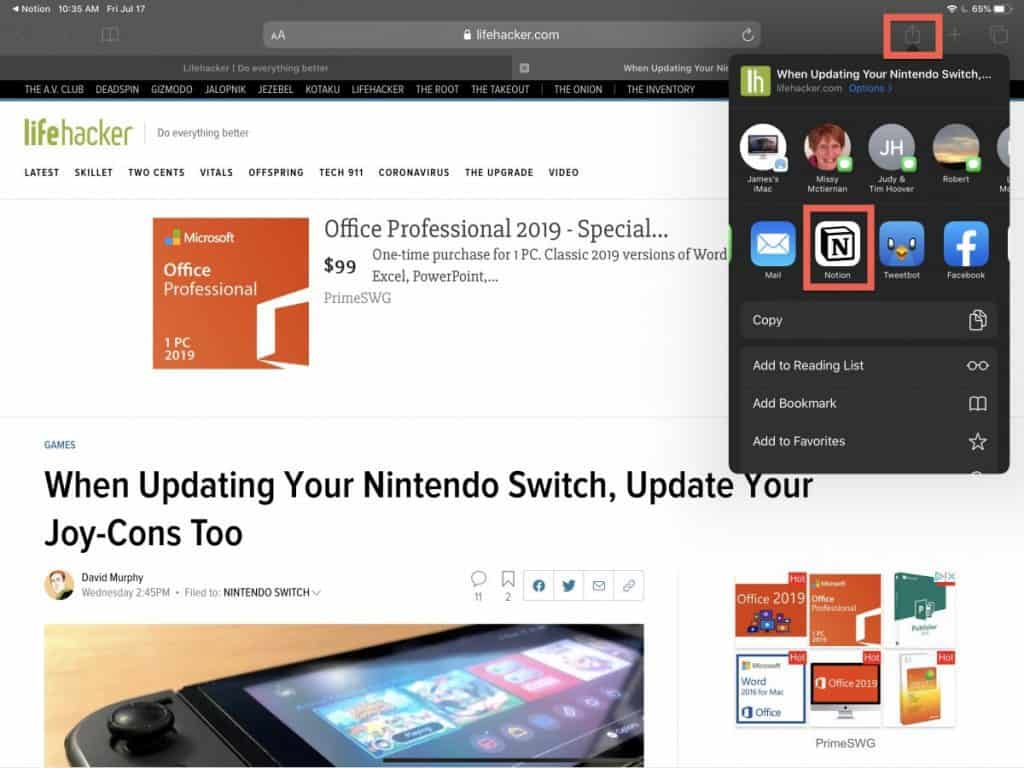
Open up to Safari and navigate to a page you want to save to Notion. Press the “Share” button at the top of the Safari window and select “Notion“.
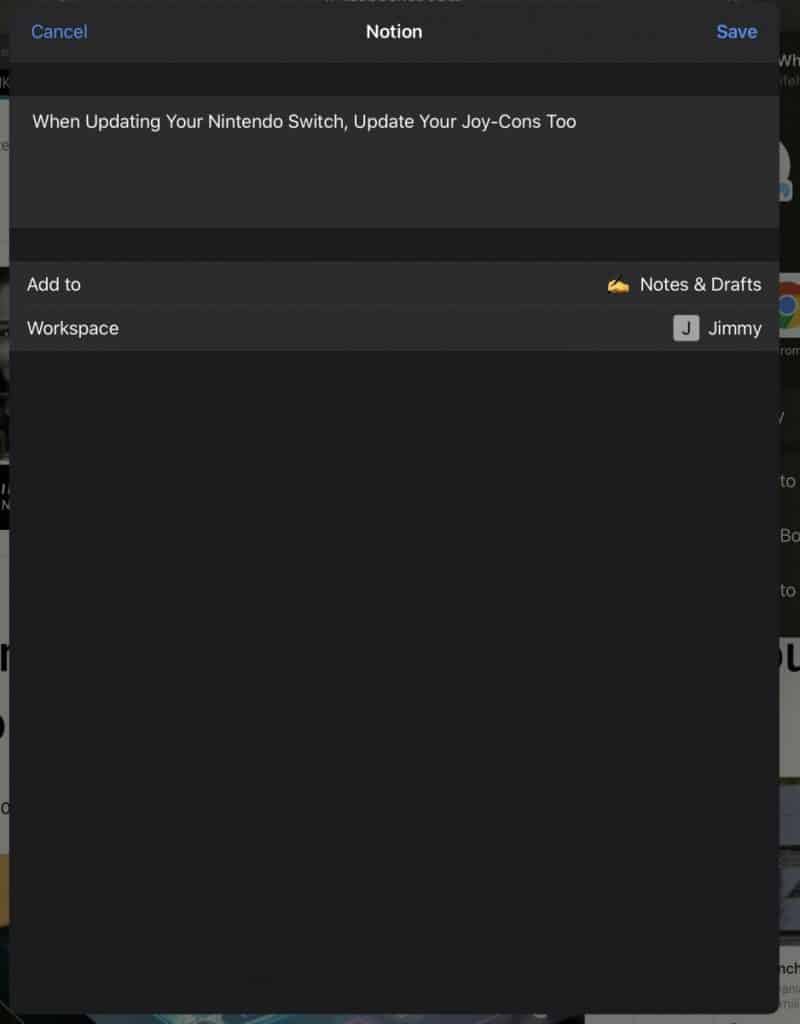
The clipping window will appear. You can edit the text, and select the page and workspace you want the page to be clipped to.
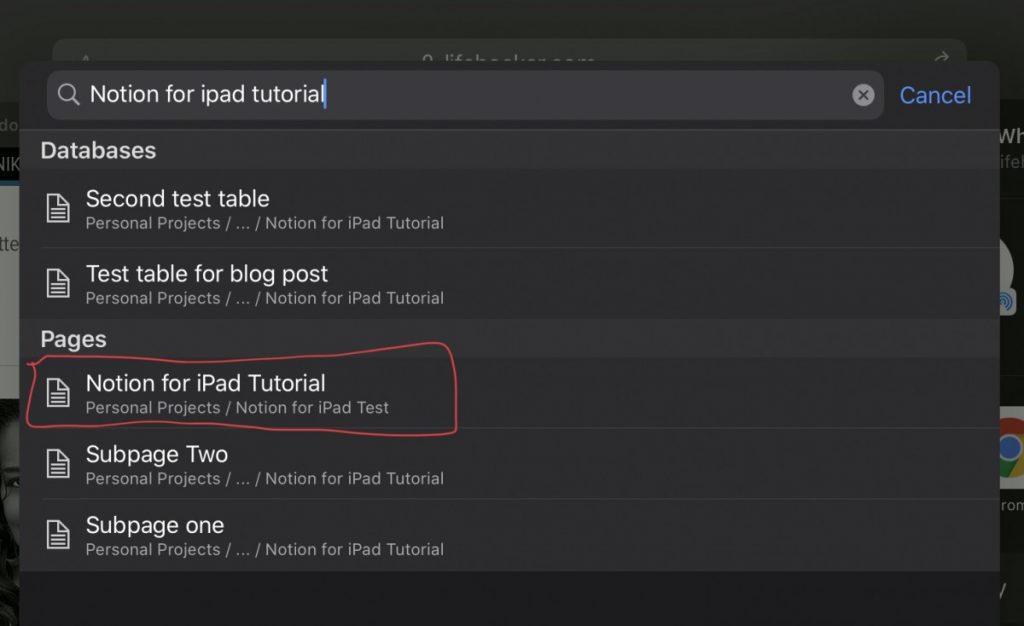
Selecting the Notion page is easy. Just press the Add to option to bring up the page selection dialog. Start typing in the name of the Notion page you want to clip the web content to until you see the Notion page as an option in the drop down menu. Press on the Notion page to select it as the destination Notion page for your clipping.
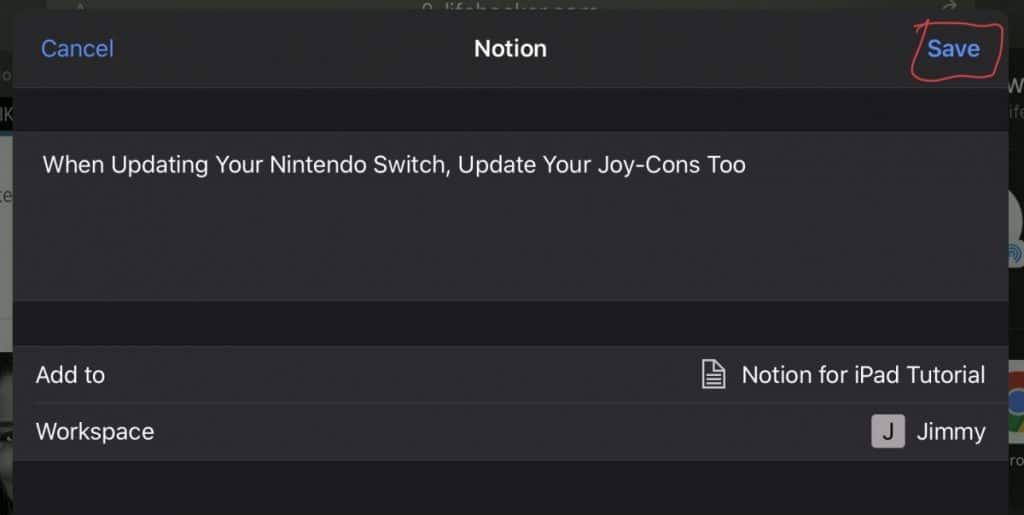
Once you have everything setup the way you want it, press the “Save” button to clip the web content to Notion.

Navigate to the Notion page where you clipped your web content to. You should see a link representing your clipped content. Press on the link.
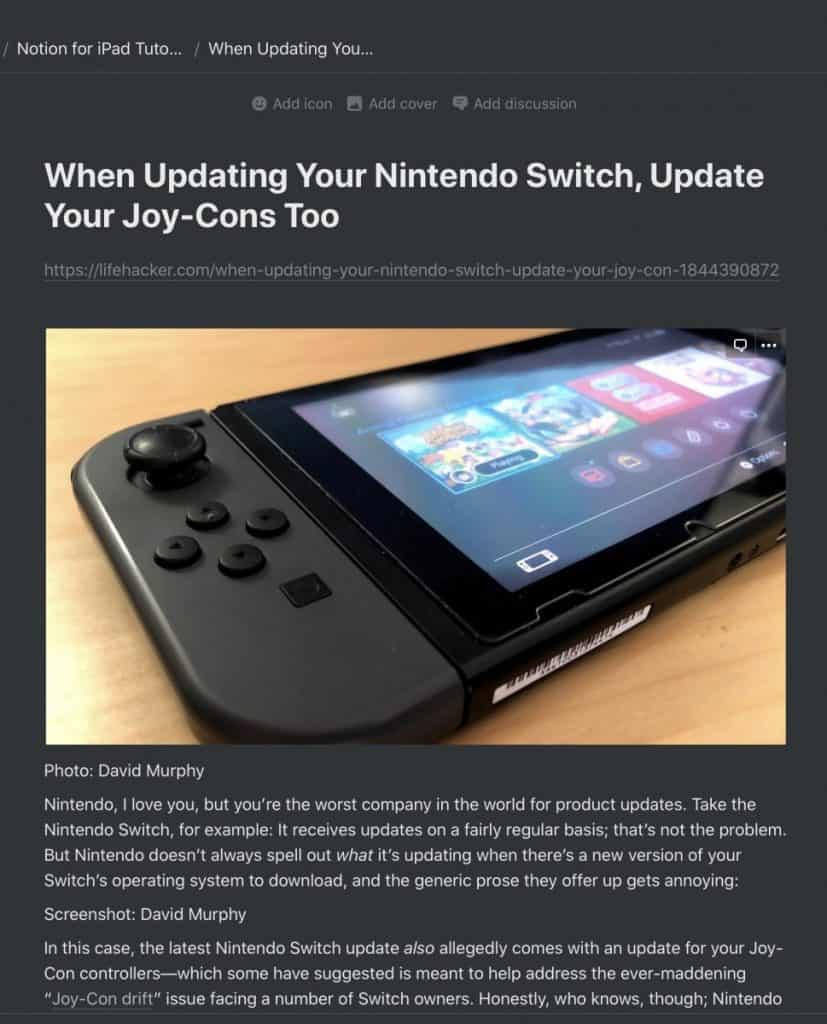
You should see the clipped version of the web page you clipped.
Let’s test out one of the embed options for Notion. In our example, we will embed a Google Map into Notion for iPad. If you are looking for a detailed tutorial on how to embed Google Maps inside of Notion, check out my tutorial at the link below:
How to Embed a Google Map into Notion – The Productive Engineer
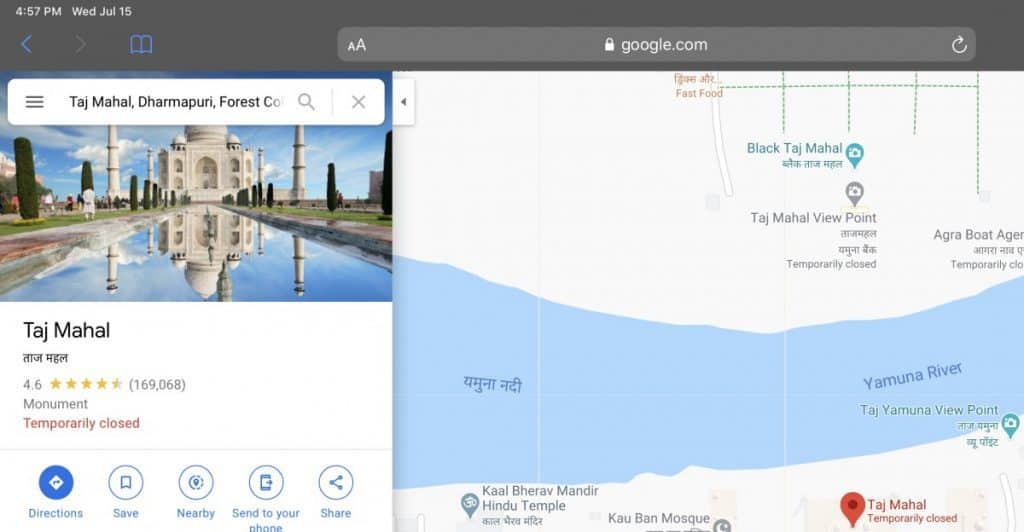

First go the Google Maps in Safari. Enter the location you want the map to in the Google Maps text box and press Enter. Once Google Maps takes you to the map, select the URL in the Safari address bar as shown above and copy it.
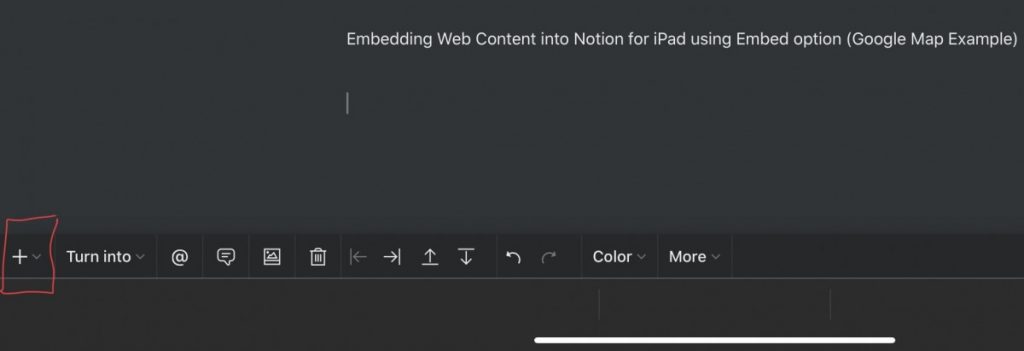
Go back into Notion and type “/embed” where you want your map to appear. This will bring up the block menu.
Scroll down and select the “Google Maps” option from the menu.
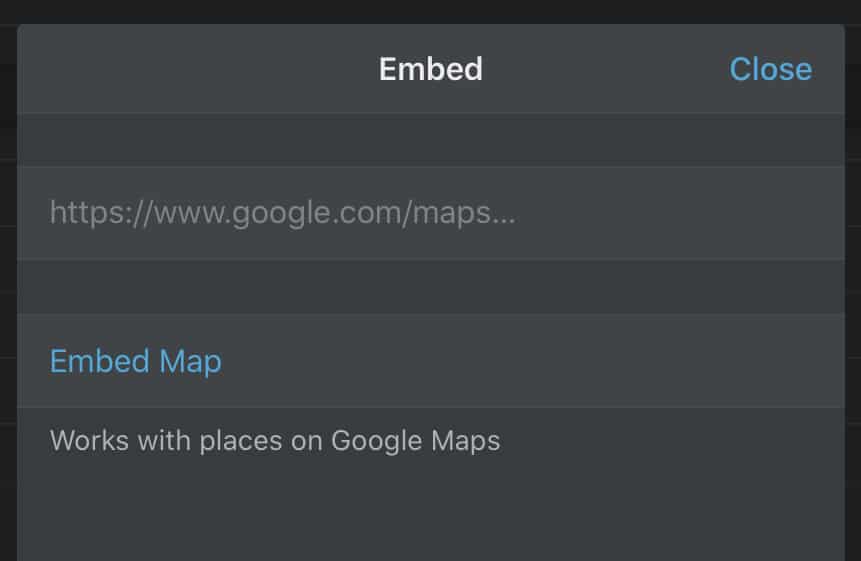
The Embed configuration menu will appear. Click where you see the greyed out URL and paste your URL.
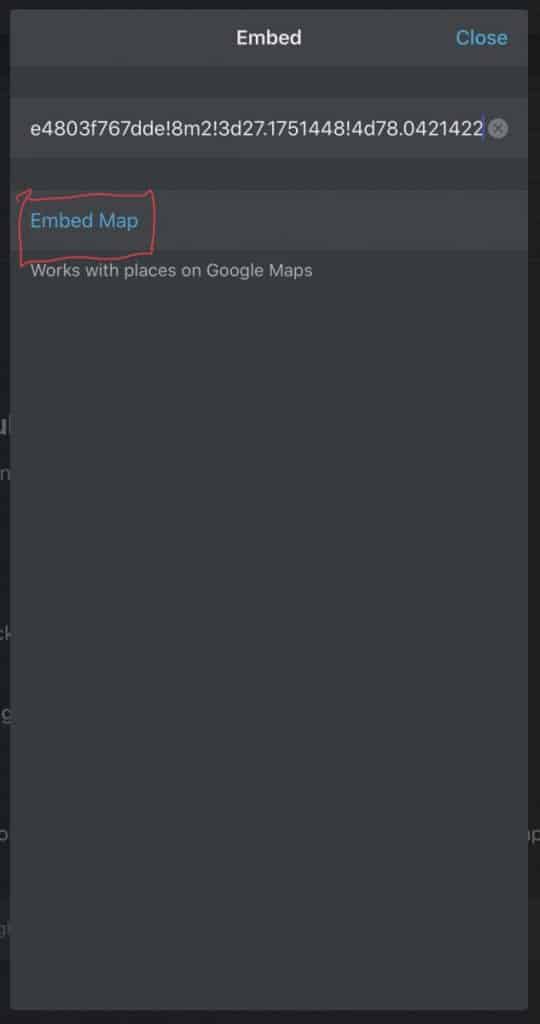
Next, press the “Embed Map” button to embed the map into your Notion page.
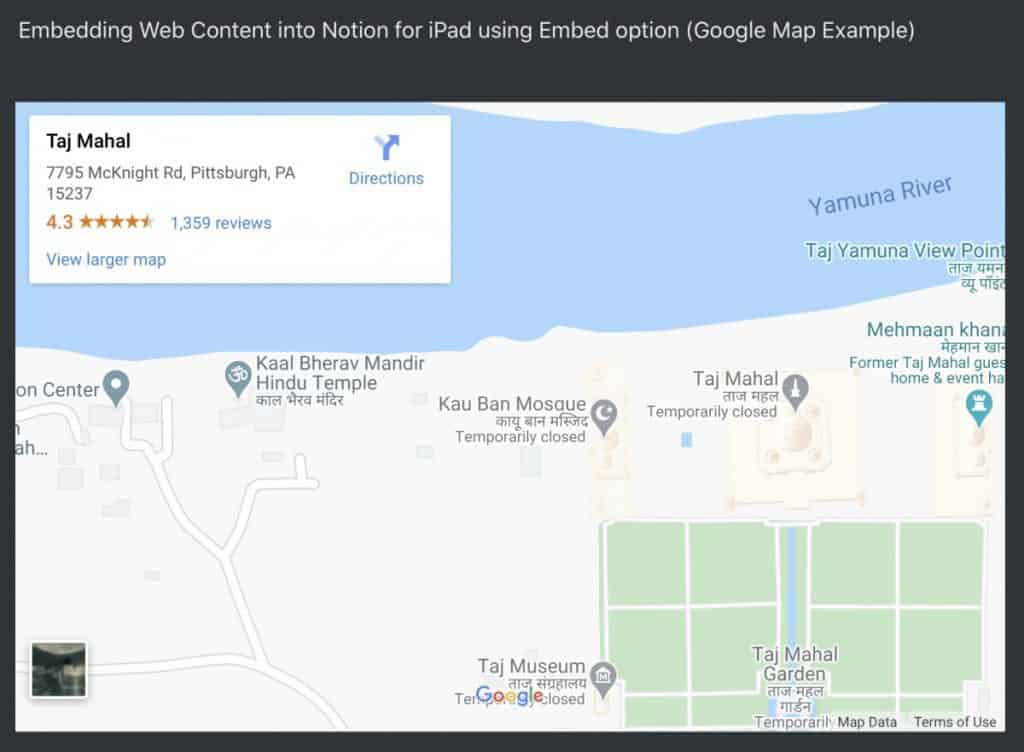
Your map should now be embedded inside of your Notion page as shown above.
I hope this tutorial was helpful to you. Good luck!
Subscribe to Our Newsletter
If you like this article, subscribe to our newsletter. It contains tips and tricks to help you get things done.
Check out our Resources page
Check out our resources page for the products and services we use everyday to get things done or make our lives a little easier at the link below:
Check Out Our YouTube Channel!
We have a YouTube channel now and we are working hard to fill it with tips, tricks, how-tos, and tutorials. Click the link below to check it out!
Looking to Get Started Blogging or on YouTube?
Getting started can seem daunting and scary (I know it was for me) but it doesn’t have to be. I was very lucky to find a program that that has helped me grow my blog to over 35,000 page views and a YouTube channel that is growing month-over-month.
Project 24 by Income School is the program that I have used. I have been a member for over a year now and just renewed my membership. I cannot recommend Project 24 enough! For more information on Income School, click the link below:
Project 24 by Income School – Teaching You How to Create Passive Income from Blogs and YouTube