How to Share Notes in Bear
Bear is a great note-taking application for iOS and MacOS. It is a clean, exquisitely designed application that allows the user to focus on the task at hand: writing. While it is a note-taking application, Bear can also be used for long-form writing such as web content like blog posts. This is due, in part, to Bear’s support for a variety of export formats that allow you to export notes out of Bear. Some would say this isn’t sharing the note as much as exporting a note to something else, which is accurate. But that doesn’t mean that exporting is a bad option.
Currently, Bear does not support collaboration. A Bear note cannot be shared with another Bear user such that they can both collaborate on the same instance of that note. Instead, the original owner of the note can export the note and send it to the other user (or export it to a different format to work with in another application). The focus of this blog post will be on how to export notes out of Bear as well as how to import them back into Bear.
The high level steps to export notes out of Bear for Mac are:
- Select the note(s) you want to export
- Go to File -> Export Notes
- Select where on your computer to store the file
- Select the export format (Use Bear Note if you are going to send to another Bear user)
- Press Export note to export. Check Export attachments if you want any attachments in the note to be exported as well.
The high level steps to export a note out of Bear for iOS are:
- Open the note you want to export in Bear
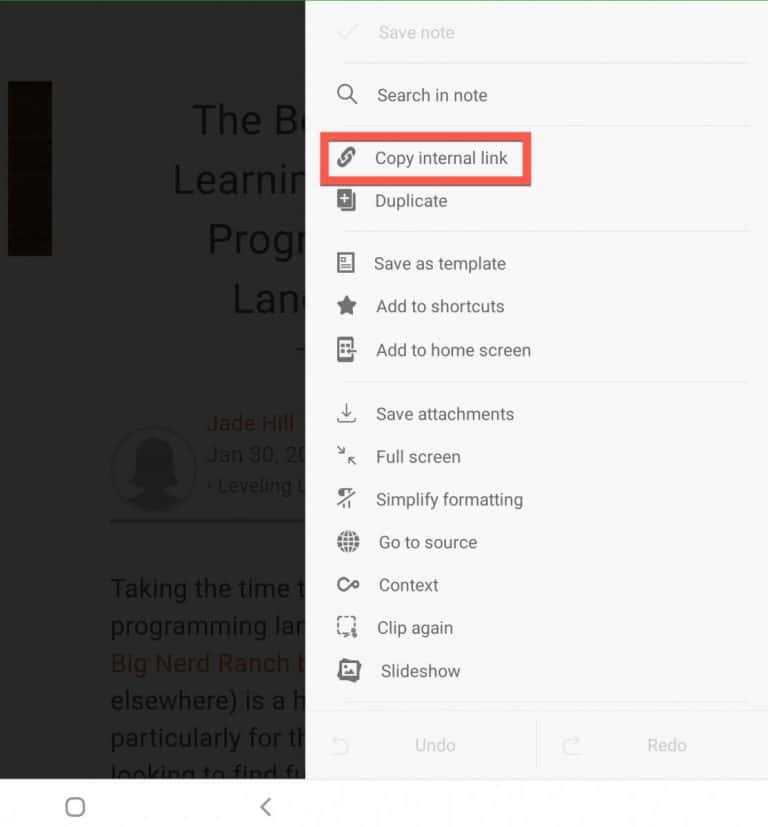
- Press the information button in the upper-right hand corner of the note
- In the Information SlideOver menu, select one of the export options at the bottom of the menu. The export options slide so make sure you slide the options to see all the possible options available to you based on your subscription level.
- A document window will roll-up onto the screen. Click the share button to select where you want to export the note to.
Before we get started with the tutorial, if you are looking to learn more about apps like Notion, Todoist, Evernote, Google Docs, or just how to be more productive (like Keep Productive’s awesome Notion course), you should really check out SkillShare. Skillshare is an online learning platform with courses on pretty much anything you want to learn. To learn more about Skillshare and its vast library of courses and get 30% off, click the link below:
SkillShare – Online Learning Platform
The rest of this post will be a step-by-step guide on how to both export notes out of Bear as well as how to import them back in.
Export Bear Notes on a Mac
Exporting Bear notes on a Mac is pretty simple to do. Bear supports a variety of the most common formats plus a few you may not have heard of.
To export a note out of Bear in Bear note format, do the following:
Select the Note You Want to Export

Open up Bear for Mac and find the note you want to export. Select that note. If you want to select multiple notes, hold down the Shift key and drag across the notes you want to select. If the notes you want to export are not contiguous, hold the Command key instead and, while holding it down, click on each note you want to export.
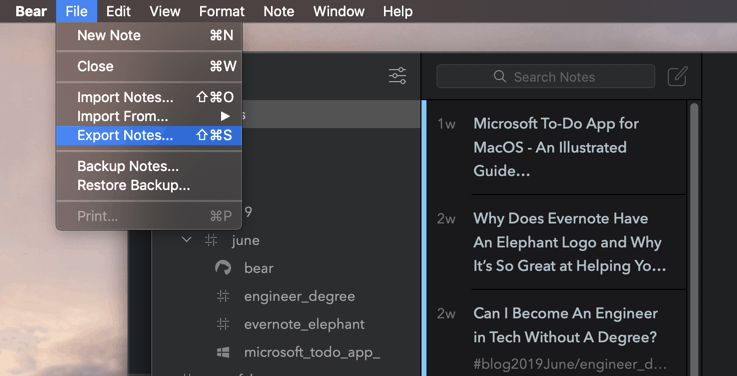
Go to File -> Export Notes
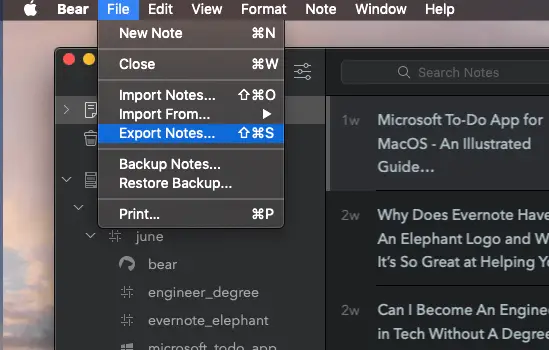
In the main menu, go the File -> Export Notes or use the keyboard shortcut Shift Command S. This will bring up the export options menu.
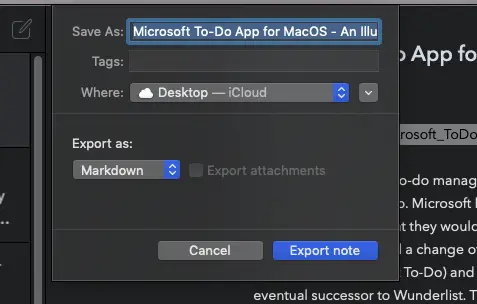
Select Where You Want to Save your Note on Your Mac
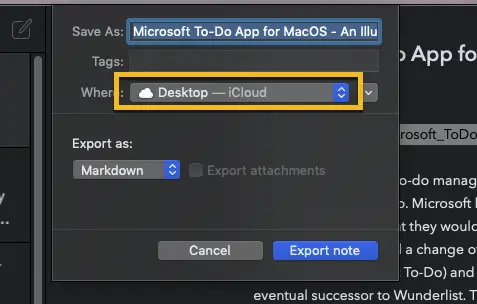
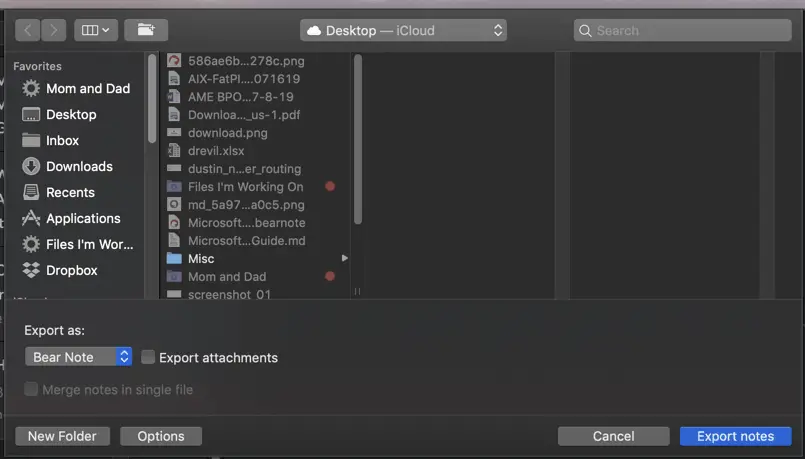
Once the export options pop-up window is displayed, select where on your Mac you want to save the exported note by click on the drop-down menu box to the right of the Where: label.
There is a quick drop-down box of the most common options on your Mac as well as a down arrowhead button to the right of the drop-down box as you can see in the image below:
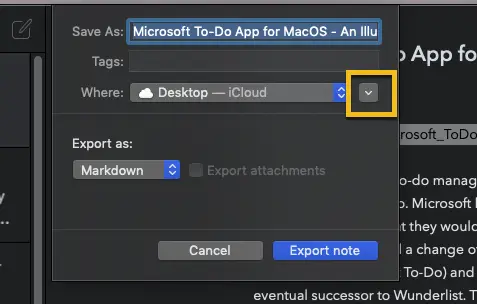
Click on the down arrowhead button will bring up an expanded filesystem dialog box. Select where you want to download the file.
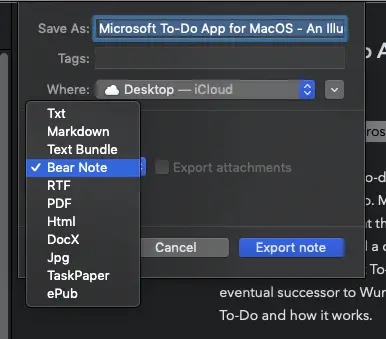
Next, select the export format, in this case, Bear Note from the drop-down menu under the label Export as:.
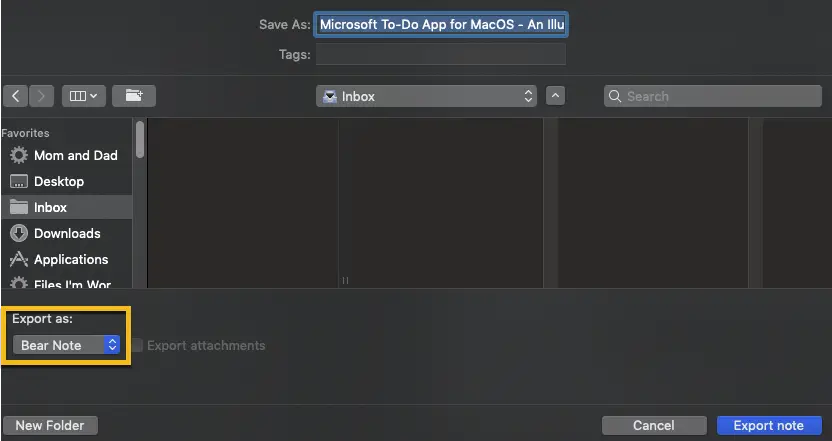
Export the Note
If you want to export all the attachments in the Bear Note as part of your export, check the Export attachments checkbox. Once you have the file export location, export file type and the Export attachments set the way you want, press the Export note button to export the file.

If you want Bear to export or not export tags during the export process, you can control that behavior by doing the following:
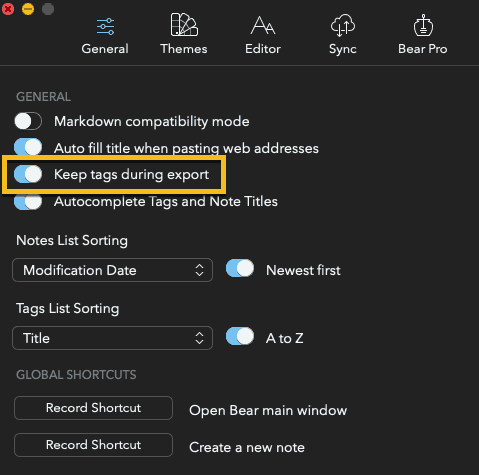
- Go to Bear -> Preferences in the main menu bar
- Go to the General Tab in the Preferences window
- Toggle the Keep tags during export toggle on to export tags or off not to export tags and close window
How to Export All of Your Notes at Once
The process described above is great for exporting a note or two at a time but what if you want to export all of your notes at once? Fortunately, Bear supports this functionality. To export all of your notes at once, do the following:
Select All of Your Notes in Bear
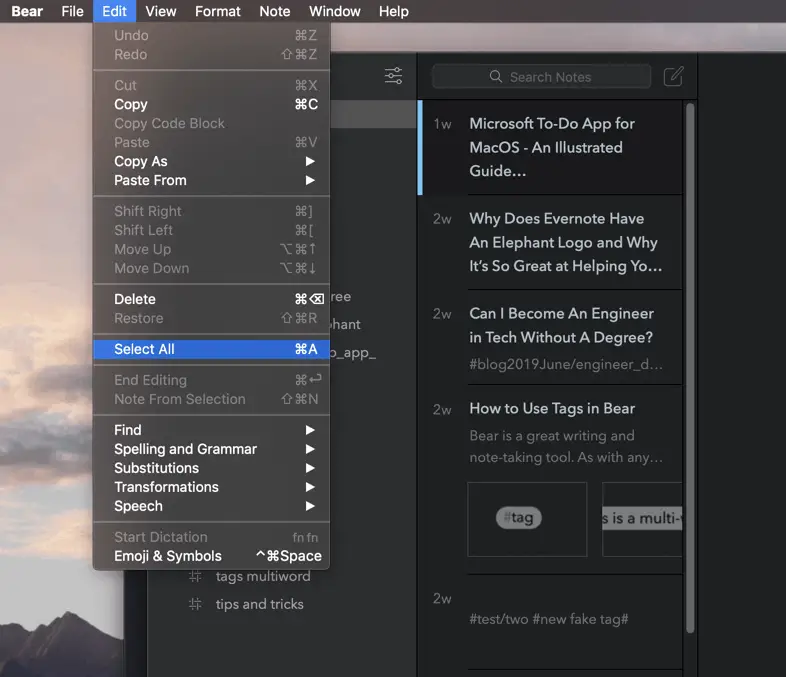
In the further left panel, Click on the Notes entry. In the middle panel, there should be each individual note. Click on the first note. Then either go to Edit -> Select All or use the keyboard shortcut Command A to select all of the notes.
Select Export Notes
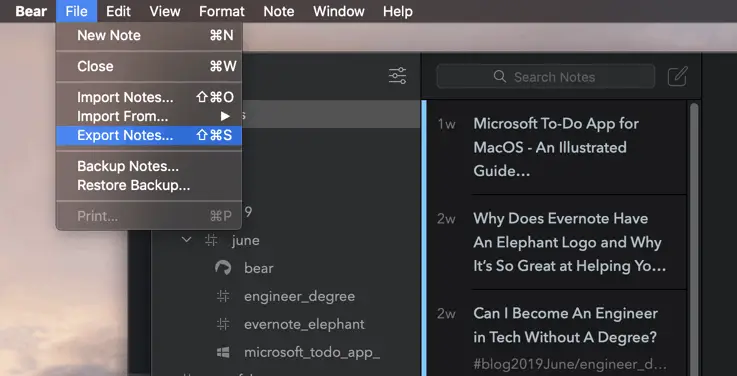
You can either go to File -> Export notes… or use the keyboard shortcut Shift Command S to bring up the export option display.
Select Export Location and Options
With the export options display now showing, select the file location you want to save the exported notes to. Notice you don’t get to name the exported file like you get to when you export a single note. Next, select the export format and whether you want to export the attachments just like we did with the single note earlier.

There is a new checkbox option that appears when you attempt to export more than one note. It is the Merge notes in single file option and it does exactly what the name implies. If you leave it unchecked, each note will be exported as individual files. If you check the box, all of your notes will export into one file in the format that you selected.
Press Export notes
Once you have everything the way you want it, press the Export notes button to export your notes onto your Mac.
Sharing Notes on iOS
Exporting notes out of Bear for iOS is very similar to how you do it on the Mac.
Exporting a Note out of Bear for iOS
To export a note out of Bear in iOS, do the following:
Open the Note You Want to Export
Go into the Bear app and open the note you want to export out of Bear.
Press the Share button

In the top-left corner of the of the note, click the Share button to bring up the Bear iOS share sheet.
Select the Application To Export To
Once the share sheet is displayed, select the application that you want to send the exported note to. In our example I will send it to the files app via the Save to Files option.

If you send it to the Files app or Dropbox or another storage application, select the folder you want to send the file to. In the case of using the Files apps, after you select the file, press the Add button to export the file to that folder.
Your file will now be exported in the format you selected where you wanted it to go.
Exporting All of Your Notes out of Bear for iOS
Much like the Mac client, you can also export all of the notes out of the Bear iOS client. To export all of the notes out of Bear for iOS, do the following:
Press the Preferences button

In Bear, on the bottom-left hand side of the Bear window, press the Preferences button to bring up settings.
Select Import & Export

Once the SETTINGS window is open, press the Import & Export button.
Toggle Export Settings and Export Notes

Scroll down until you see the EXPORT section of the Import & Export menu. You will be presented with several export options. Set the options to your choosing. Go to the Export all notes line and press start export.
Select The Application to Export the Notes To

Once you have pressed start export, the Bear iOS share sheet should appear. Press the application you want to export to.

In our example, I again have chosen to share to the Files app. Select the folder and press Add to export to the folder.
Available Export Options in Bear
Bear offers a variety of export formats in it’s free subscription package including:
- .txt -> Plain Text
- .md -> Markdown
- .textbundle -> textbundle V2 (Markdown)
- .bearnote -> Bear Note
- .rtf -> Rich Text Format
- .taskpaper -> TaskPaper File Format
- .ePub -> Open Ebook Publication format
If you subscribe to Bear Pro, you also get the following options:
- .html -> HyperText Markup Language
- .docx -> Microsoft Word document format
- .pdf -> Portable Document Format
- .jpg -> the JPEG image file format
There is a good page on the Bear website that covers the export options:
Export your notes page on Bear website
Please Subscribe to our Newsletter
If you like the content on this site, please subscribe to our newsletter. It will have a recap of the posts for the week plus any happenings with our favorite apps. We promise not to be spammy!
Check out our Resources page
Check out our resources page for the products and services we use everyday to get things done or make our lives a little easier at the link below:
Summary
The export options in Bear allow you to get your notes out of Bear in a variety of formats. The free subscription tier gives you text, markdown, the native bearnote format and even ePub amongst other options. If you need pdf, Microsoft Word or HTML, you will need to be a Bear Pro user. I hope this tutorial was helpful to you.
Helpful Links
Export Your Notes – Bear
link to Export your notes page on Bear website
Bear Pricing Page
link to Bear Pricing Page
Bear Tips: How to export one, some, or all notes to a variety of formats
link to Bear Tips: How to export one, some, or all notes to a variety of formats on Bear website
Other Articles You May Be Interested In
How to Use Tags in Bear
link to How to Use Tags in Bear
What iOS To-Do App Should I Use?
link to What iOS To-Do App Should I Use?
How to Import An Excel Spreadsheet into Notion
link to How to Import An Excel Spreadsheet into Notion