Definitive Guide to Using Tables in Notion
Building and using tables in Notion is both simple to do and powerful to use. Tables (also known as databases in Notion) allow you to store and filter a wide variety of data types inside one table. Being able to competently use tables is the key to unlocking and harnessing the power of Notion.
So how do you create a table in Notion? While this guide will teach you all you need to know about tables, to quickly create a table in Notion, do the following:
- Open Notion to the page where you want to add a table
- Click in the body of the table and type “/table”
- Select either inline or full-page table
- Add columns and property types as needed
This tutorial will teach you all you need to know about how to use tables in Notion.
Before we get started with the tutorial, if you are looking to learn more about apps like Notion, Todoist, Evernote, Google Docs, or just how to be more productive (like Keep Productive’s awesome Notion course), you should really check out SkillShare. Skillshare is an online learning platform with courses on pretty much anything you want to learn. To learn more about Skillshare and its vast library of courses and get 30% off, click the link below:
SkillShare – Online Learning Platform
If you are looking to learn on the go, Audible is for you. Audible has a huge library of audiobooks on a variety of topics and listening to audiobooks is a great way to learn on the go. Audible includes podcasts and Audible Originals as well. For more information on Audible, click the link below to get your first 30 days on Audible for free:
Audible – Your First Audiobook is On Us
If you are just starting out with Notion and aren’t sure where to get started, you really need to check out my comprehensive beginner’s guide to Notion. It goes through all things you need to know to get started the right way. Enclosed below is the link to the guide:
Link to Beginner’s Guide to Using Notion With Screenshots
Looking for some information on the power of Notion? Check out our article containing tips to help you become a power user of Notion at the link below:
Let’s get started with the tutorial 😀.
Tables in Notion
There are two types of tables you can create in Notion:
| Table Type | Description |
|---|---|
| inline | a table that is created inside the current page |
| full-page | a table that is created as a subpage of the current page |
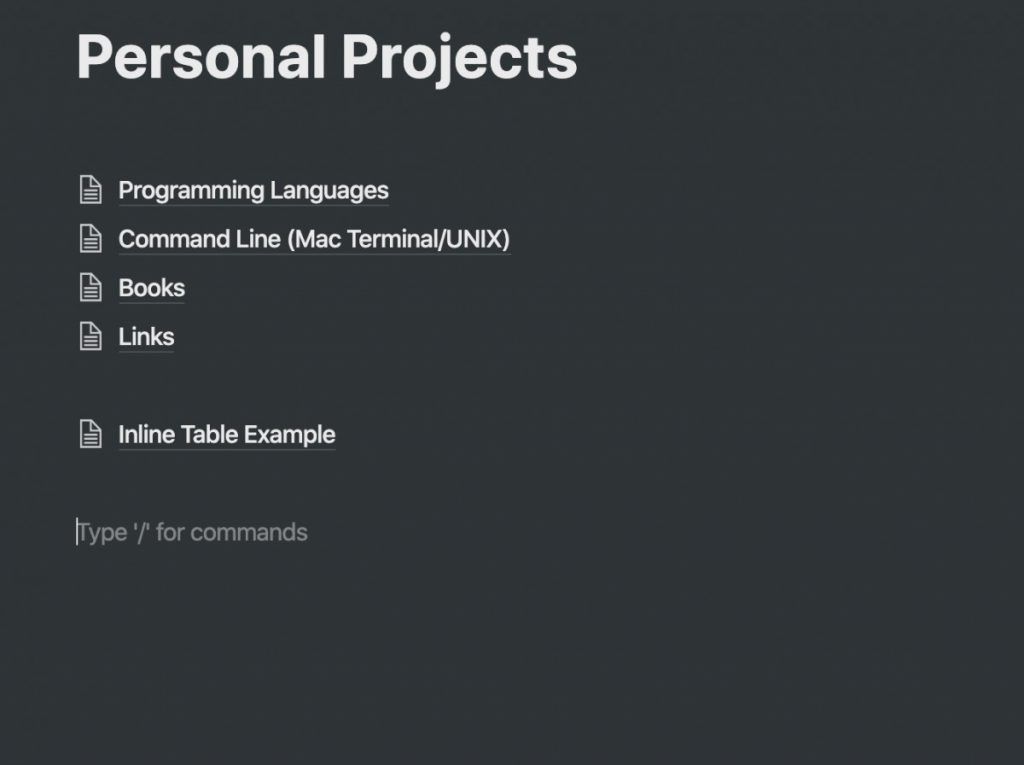
Creating a Simple Inline Table in Notion
Creating a simple inline table in Notion is very straight-forward. An inline-table is one that is added to the currently selected Notion page. To create an inline table in Notion, do the following:
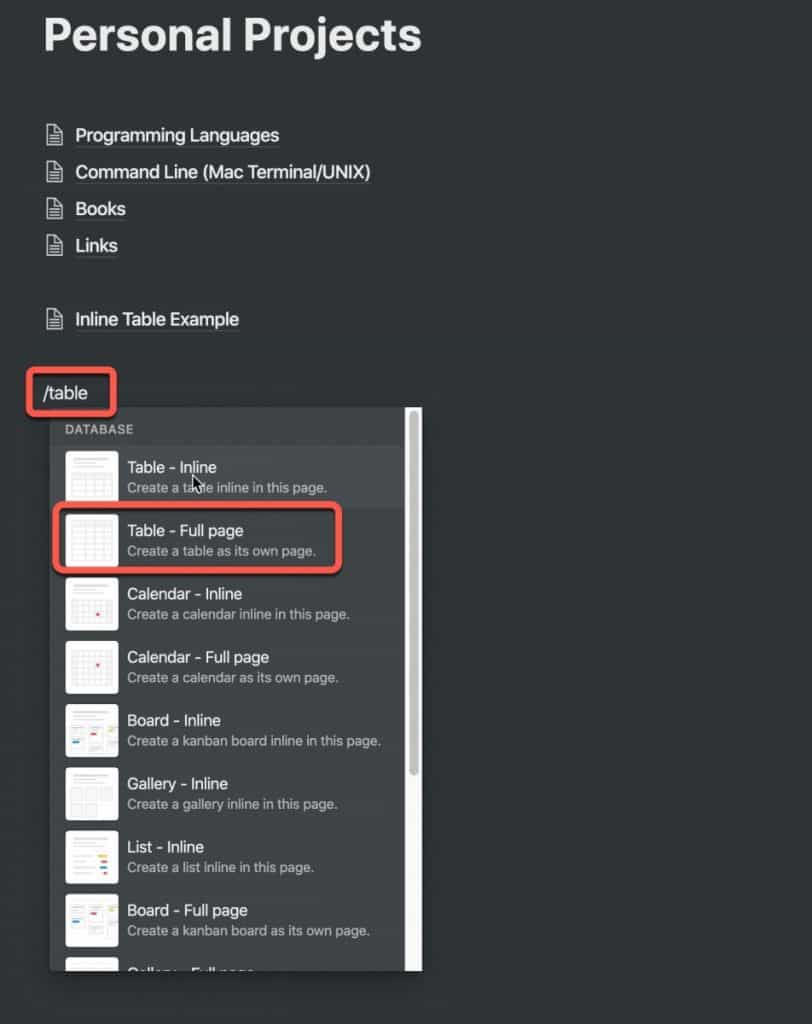
Open Notion to the page where you want to add the table.
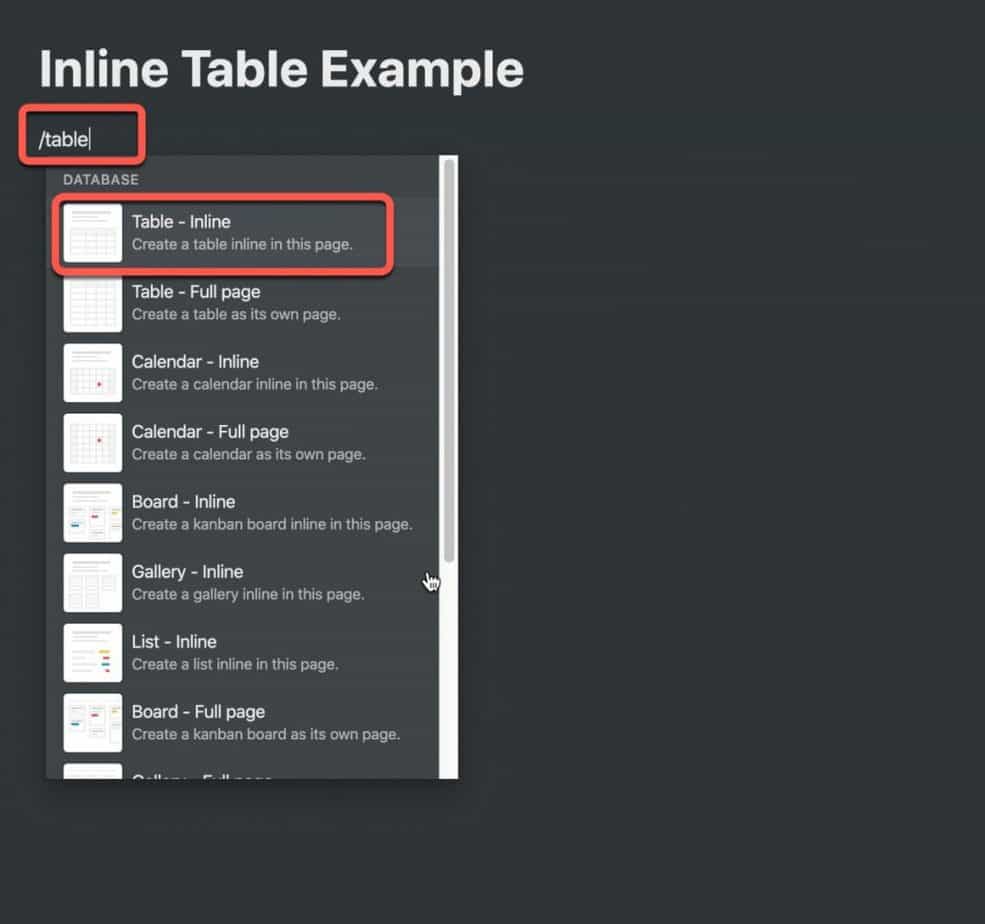
Click in the body of the Notion page. Type “/table” and select “Table – Inline” from the contextual menu.
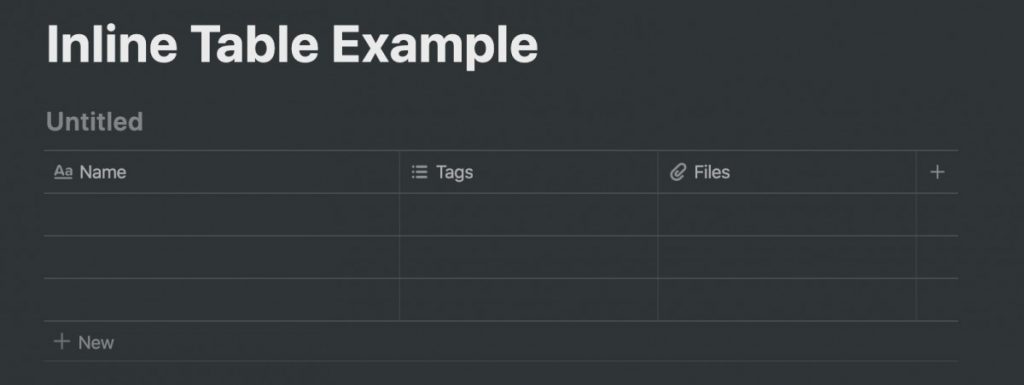
An empty inline table will appear on your Notion page.
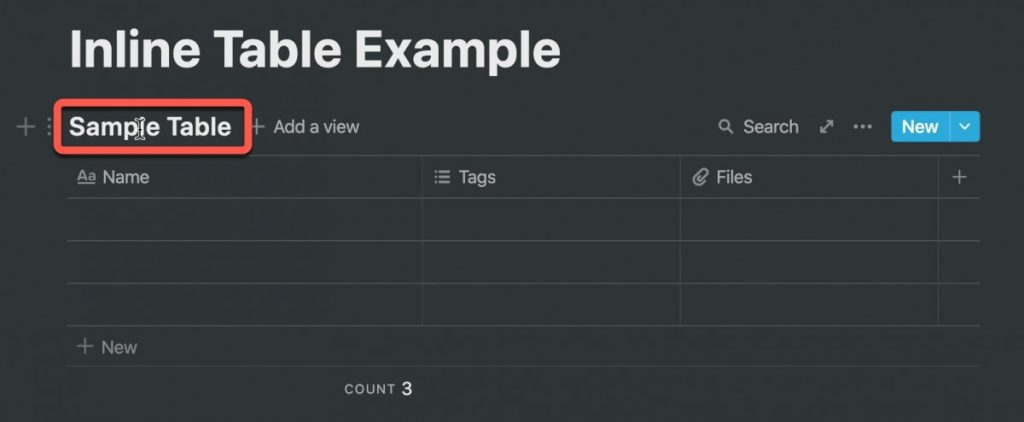
Give your new table a name by clicking on the title text box and typing in the name of your new table as shown in the screenshot above.
Looking to learn more about synced blocks in Notion? Check out our Ultimate Guide to Synced Blocks in Notion!
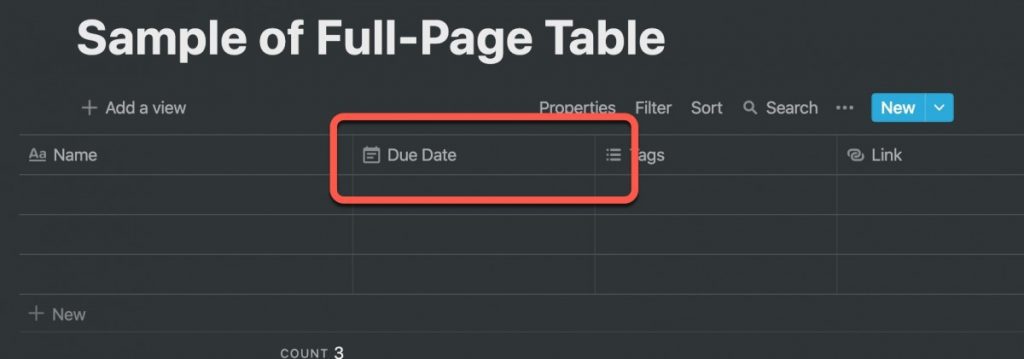
Creating a Full-Page Table in Notion
In addition to inline tables, you can also create full-page tables. Full-page tables are tables that are created as subpages of the current page you are on in Notion.
To create a full-page table in Notion, do the following:
Open up Notion and navigate to the page that you want to add a full-page table to as a subpage.
Click in the body of the page and type “/table“. Select “Table – Full page” from the contextual menu.
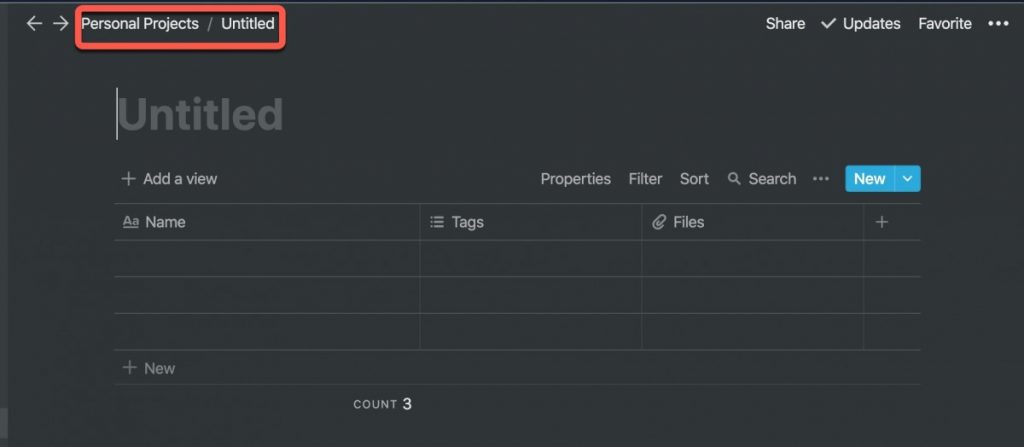
A new table will be created on a subpage of the page you were on. As you can see from the screenshot above, the table was created as subpage of the prior page.
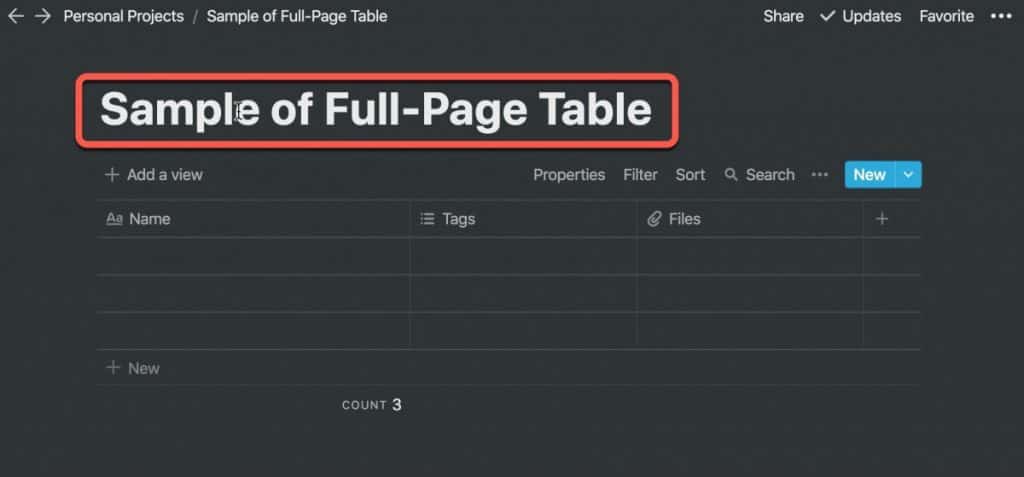
Give you table a name by clicking on the title text box and typing it in.
Property Types in Notion Tables
When building tables in Notion, you create columns to hold your values. The data types of values are defined in Notion as property types. Each column in a Notion table is assigned a property type that defines the type of data the column can contain.
Enclosed below is a table containing all of the property types available in a Notion table:
| Property Type | Description |
|---|---|
| Text | Holds text |
| Number | Holds numeric values. Can be used for calculations |
| Select | Holds values where only one can be active |
| Multi-Select | Holds values where more than one value can be selected |
| Date | Hold a date or a range of dates |
| Person | Holds a person entry. Person must be enabled for workspace |
| Files & media | Holds a file that can be added either via upload or by embedding a link to the file |
| Checkbox | Places a checkbox that can be checked or unchecked |
| URL | Hold a web page address (URL) |
| Holds an email address | |
| Phone | Holds a phone number |
| Formula | Allows you to do calculations on or based on values of other cells using properties, constants, operators and functions |
| Relation | Can hold a reference to data that resides in another table |
| Rollup | Allows you to summarize data derived from a relation |
| Created Time | Displays the date and time a page was created |
| Created By | The person who created the page |
| Last Edited Time | Shows the last date and time a page was edited |
| Last Edited By | Shows the last person to edit a page |
Add Columns to Tables in Notion
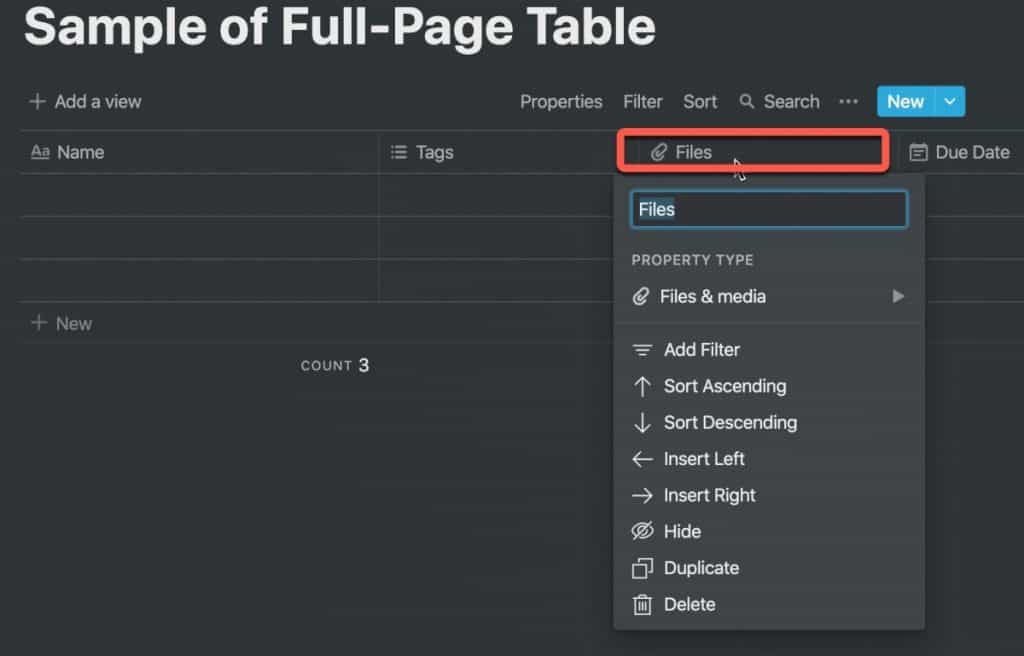
By default, a table is created with three columns:
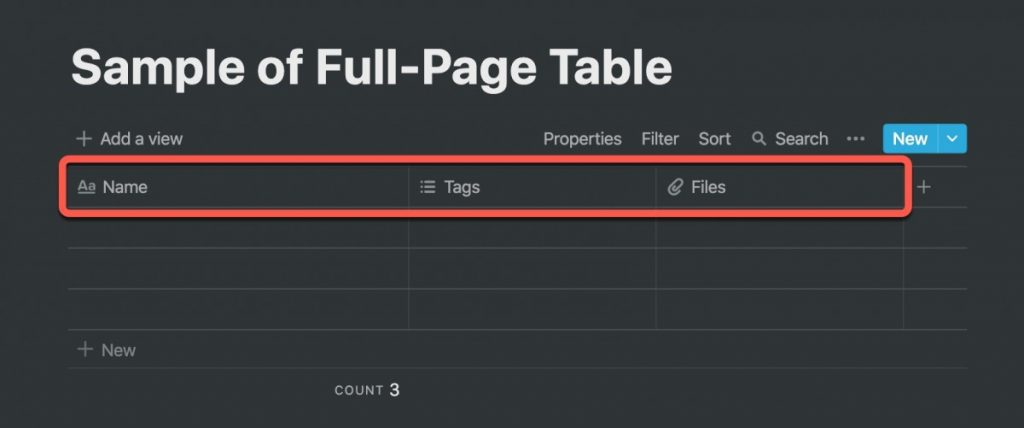
- Name (property type: Title)
- Tags (property type: Multi-Select)
- Files (property type: Files & media)
But what if you want to add a new column? Adding a new column to a table in Notion is easy.
To add a new column to a table in Notion, do the following:
Open Notion and navigate to the page containing your table.
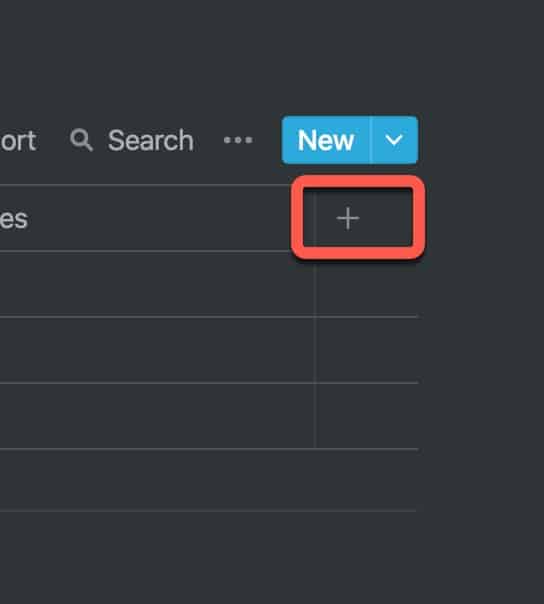
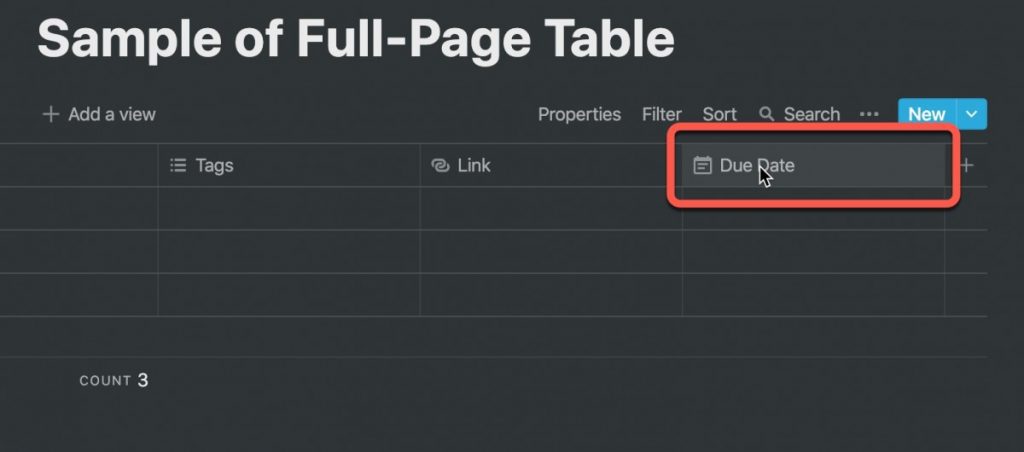
In the last column to the right of the table, there will be a plus (+) button. Press the plus (+) button.
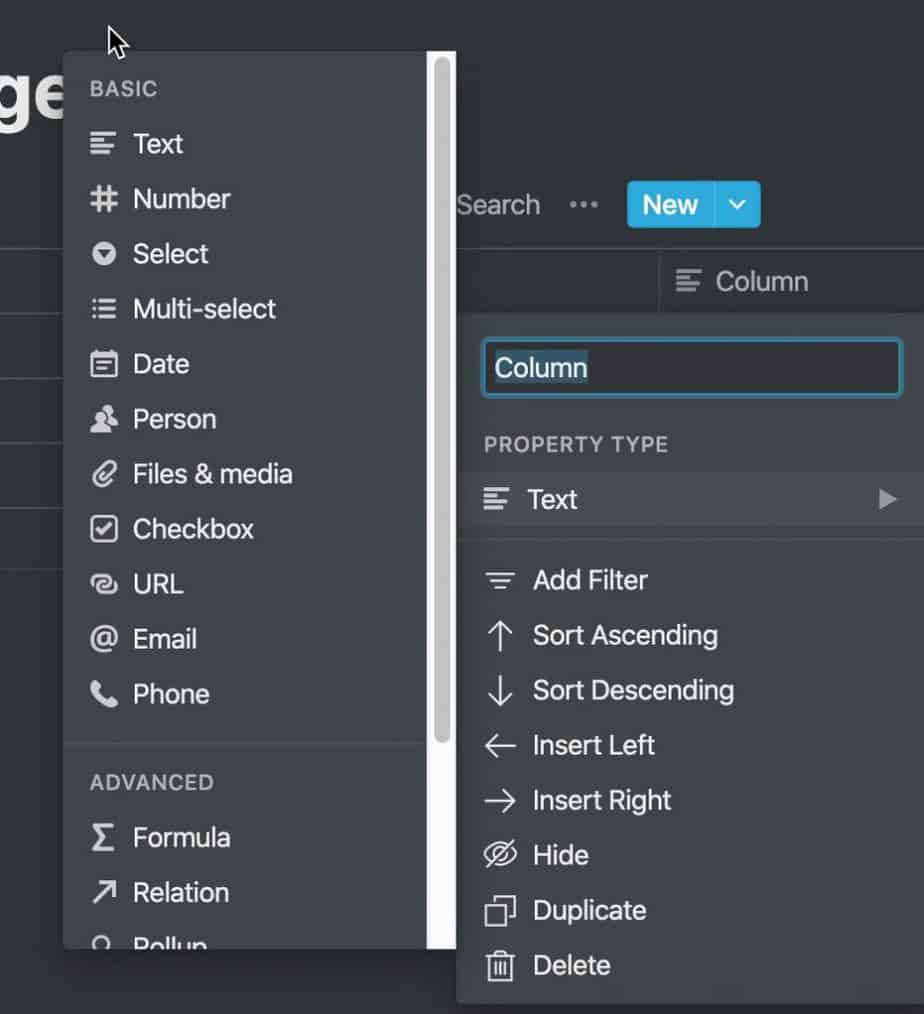
A menu will appear. Give you column a name in the text box and select the property type of the column from the menu.
For our example, I chose a Date property type and named the column “Date“.

Your table will now contain your new column with its title and property type as shown in the screenshot above.
Editing the Property Type of an Existing Column in Notion
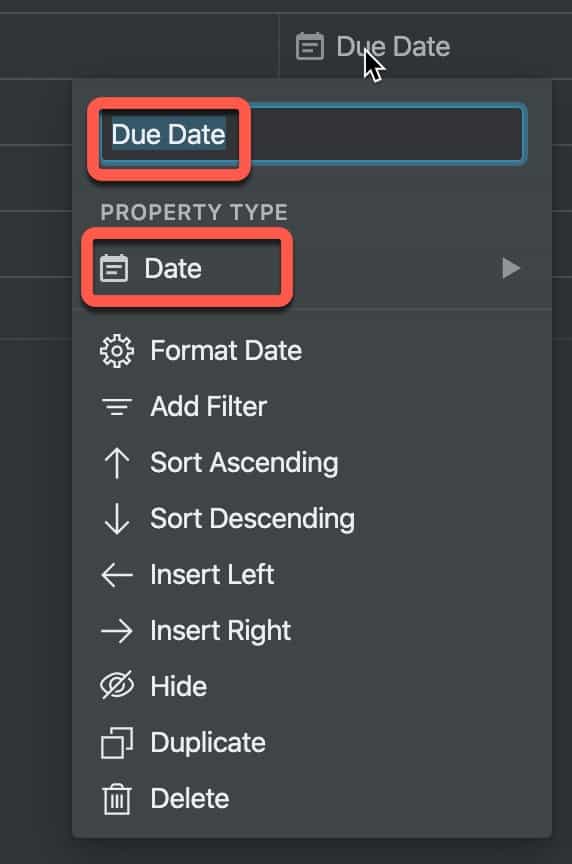
We have covered how to add new columns to a table but what if you want to change a column? Changing a column is very similar to creating a new one.
To change a column of a table in Notion, do the following:
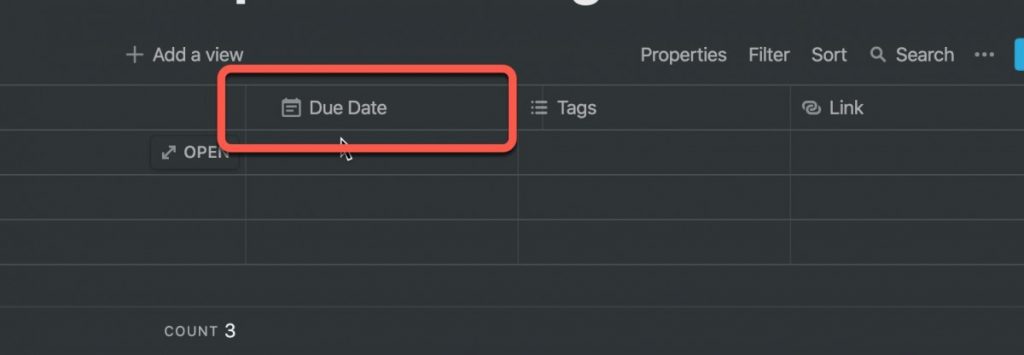
Click on the column header. This will bring up the menu.
Click on the column header text box to change the title of the column. Select the property type you want the column to hold (in our example, we chose the URL property type and set the column title to “Link“.)
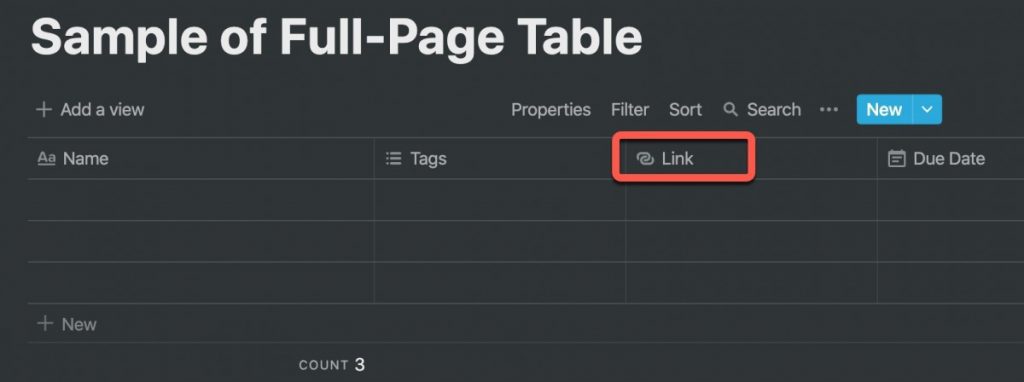
Your column should now reflect your new column name and property type.
Moving Columns in Notion
The columns in a Notion table can be re-arranged in any order you choose. To move a column in Notion, do the following:
Click and hold on the header of the column you want to move.
Drag the column to the spot you want it to be and release the mouse button.
Your column will now be in the position you dragged it to.
Sorting Tables in Notion
Once you have a table full of data, you will likely want to sort it. There are two ways to access the sort functionality of a table:
- By clicking the “Sort” button at the top of the table
- By clicking on the header of the column you want to sort by
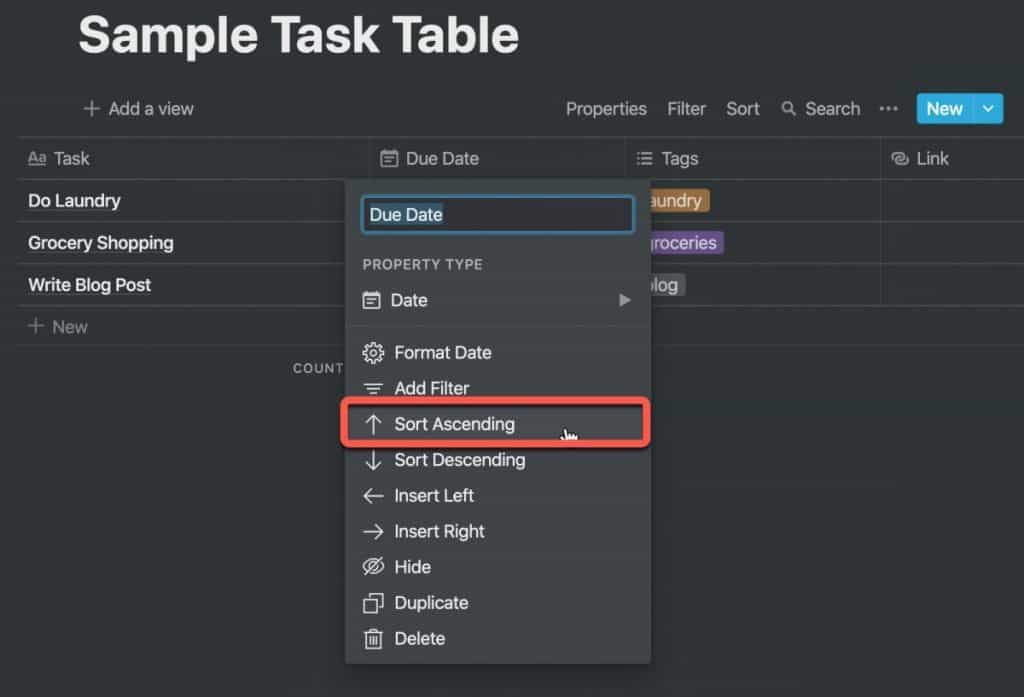
If you are doing a simple sort based solely on the values of a single column (like sorting by date as an example), simply click on the column header and select either “Sort Ascending” or “Sort Descending” from the menu.
If, however you want to sort on one column and then sub-sort on a second column, use the Sort button instead.
To setup a multi-column sort of a table in Notion, do the following:
Open up Notion to the table you want to sort.
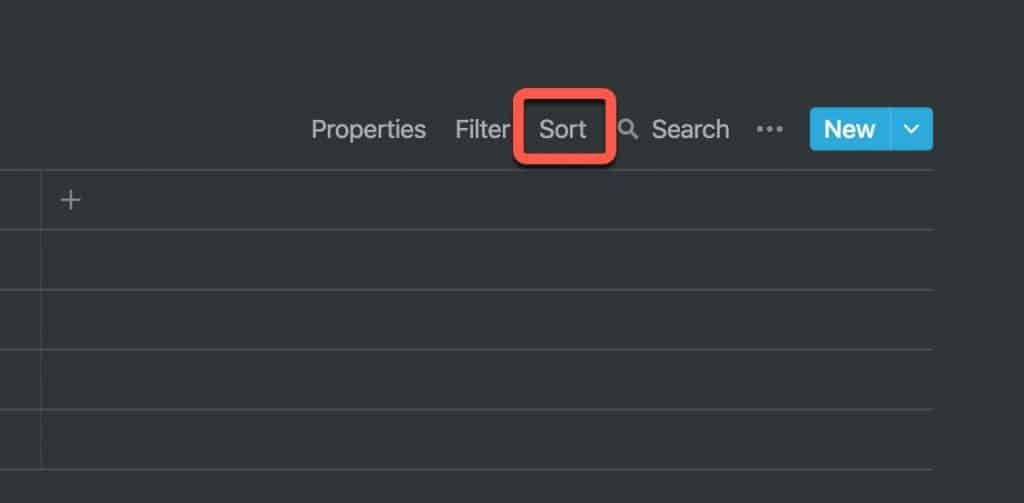
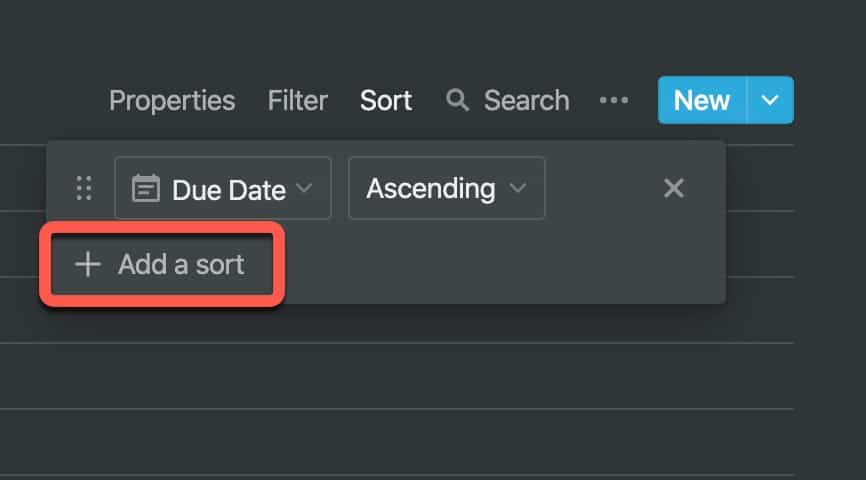
Click on the “Sort” button above the table.
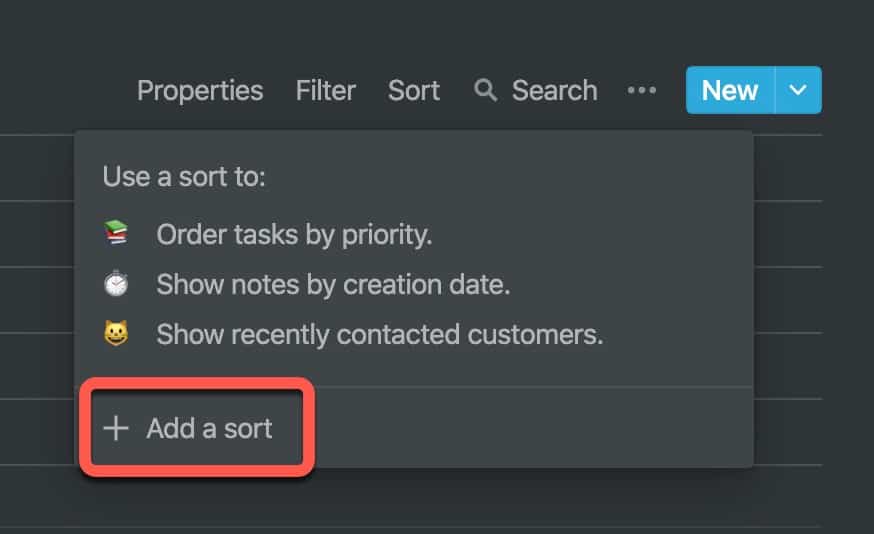
A menu pop-up will appear. Click on the “+ Add a sort” button.
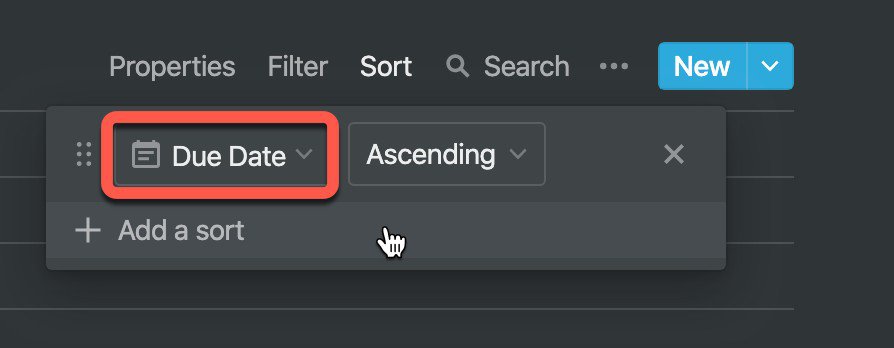
The sort criteria window will appear. Click on the column drop-down and select the column you want to sort on. Then select the sort type (in our case, “Ascending“. This sorts the table by the due date in ascending order (i.e. earliest to latest).
Now, we will add our sub-sort (or secondary sort) by clicking on the “+Add a sort” button.
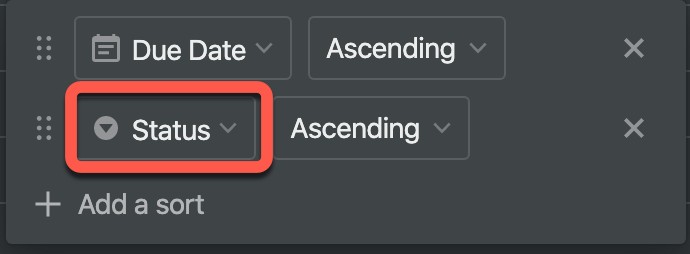
A second sort criteria is added. Click on the column drop-down and select the column you want to use for your secondary sort (in our case, I chose the “Status” column.

As you can see from the screenshot above, our table is now primarily sorted on due date. For entries that have the same due date, those dates are sorted on their status.
Filtering Tables in Notion
Sometimes you only want to see certain rows of your table. This is where filters come into play. Filters allow you to only see or exclude certain rows of table. Let’s create a simple filter to see how it works.
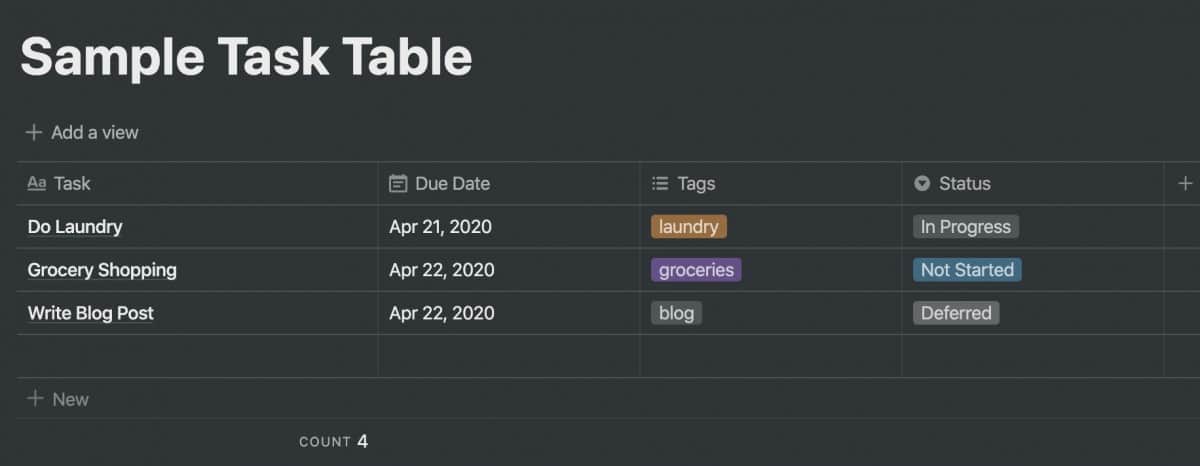
Let’s say I only want to see the tasks that are due on April 21st. We can create a filter to only show us those tasks.
To create a filter for a table in Notion, do the following:
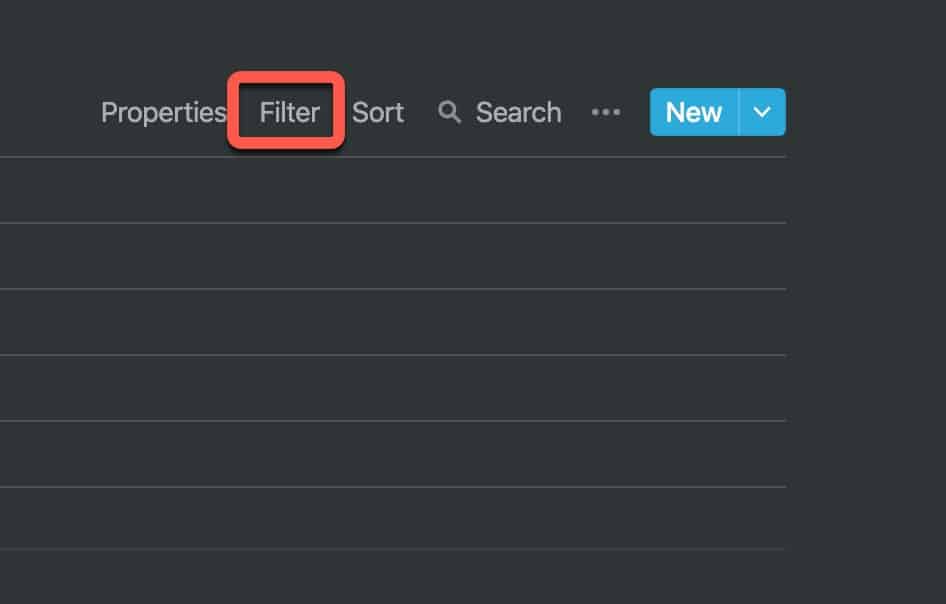
Click on the “Filter” button to bring up the filter menu.
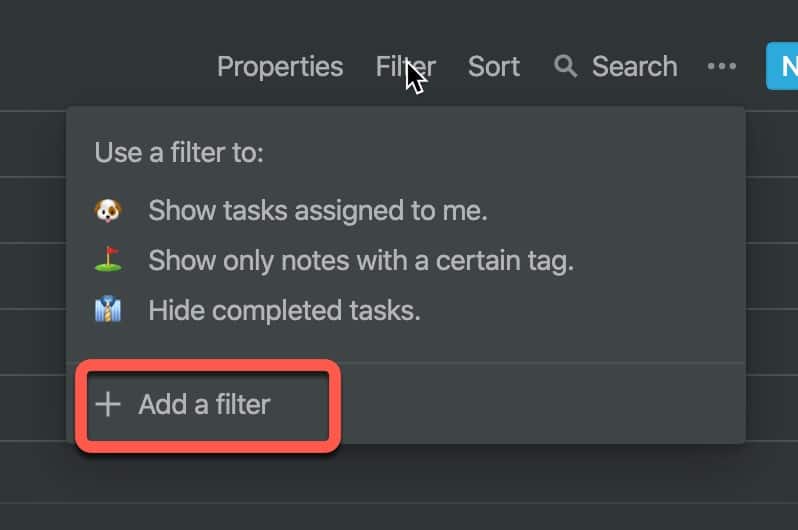
The filter menu will appear. Click on the “+ Add a filter” button to bring up the filter criteria.
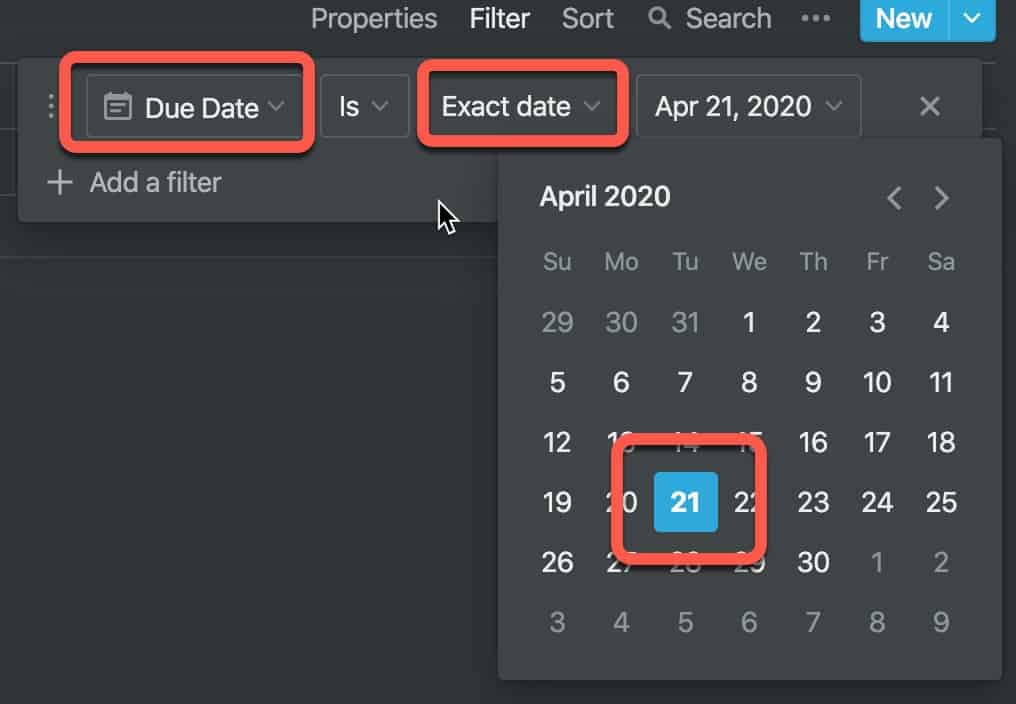
Select your filter criteria. In our case, we selected “Due Date“, “Is“, “Exact date” and April 21, 2020.
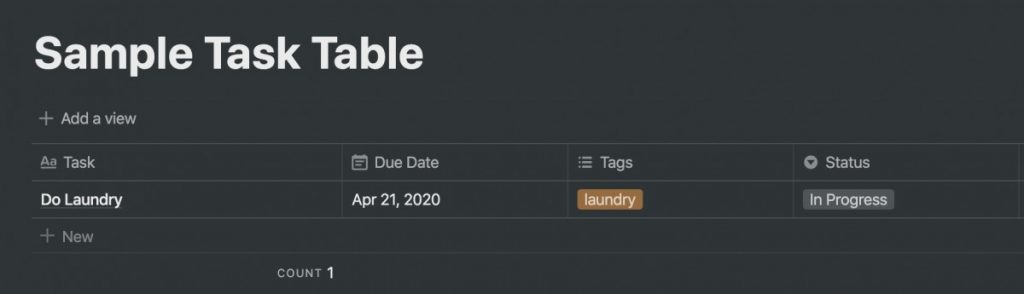
You should only see entries that match your filter criteria in your table.
Summary
Want More Tips and Tricks? Subscribe to our Newsletter!
If you haven’t already subscribed, please subscribe to The Productive Engineer newsletter. It is filled with tips and tricks on how to get the most out of the productivity apps you use every day. We hate spam as much as you do and promise only to send you stuff we think will help you get things done.
Check Out Our YouTube Channel!
We have a YouTube channel now and we are working hard to fill it with tips, tricks, how-tos, and tutorials. Click the link below to check it out!
Check out our Resources Page
Check out our resources page for the products and services we use every day to get things done or make our lives a little easier at the link below: