Synced Blocks in Notion – The Ultimate Guide
For those looking for a flexible workspace for teams and businesses to work collaboratively, Notion is a great application for notes, reminders, and Kanban boards.
One of the least well-known but handy features of Notion is synced blocks. By adding synced blocks to your workspace, you can create elements that are linked together and change in real-time when edited. (In other words, they are synced!).
If you are looking to master Notion, William Nutt of Notion.vip is creating a new course: Notion A-to-Z. Notion A-to-Z is a masterclass on all things Notion and is a must if you want to truly master Notion. Notion is actually coming out with a Notion certification for everyday users and William is the person developing it for Notion. What better way to prepare than to take William’s course? For more information about the course, please visit the link below:
Notion A-to-Z – From the creator of Notion VIP and Notion’s expanding certification programs
If you are just starting out with Notion and aren’t sure where to get started, you really need to check out my comprehensive beginner’s guide to Notion. It goes through all things you need to know to get started the right way. Enclosed below is the link to the guide:
Link to Beginner’s Guide to Using Notion With Screenshots
If you are looking for some Notion tips, check out our article containing tips to help you become a power user of Notion at the link below:
Here’s all you need to know about Notion Synced Blocks.
What is a Synced Block in Notion?
A synced block in Notion is the ability to effectively replicate a block on one page of Notion in another and have them bi-directionally sync when edited. In other words, you can:
- Create a synced block in Notion
- Add a reference to that block in other Notion pages
- Edit either the original block or any of the references and have all the blocks be updated across all the pages containing references to that synced block
The Notion implementation of synced blocks is built on the system theory of computer pioneer Ted Nelson. He set out the theory behind modern computer interfaces and information workflows and coined the term transclusion. This is the idea that in hypertext, a portion of a document can be referenced and replicated seamlessly and updated automatically across multiple destination documents.
That’s where the idea for synced blocks comes from. When creating a synced block, users can use containers of text and information that are seamlessly copied and replicated in other workspaces and documents.
The original synced blocks, therefore, act as reference text.
Whenever these reference blocks are edited, the sections where you have pasted a sync block will also be updated.
What are the advantages of Synced Blocks?
Enabling information to be cross-referenced using synced blocks allows publishers to dynamically update tens or even hundreds of public documents with key ever-changing details.
This is a huge time saver as users won’t have to update each document and workspace with the latest information manually. Clever use of synced blocks eliminates timed obsolescence for documents and removes the need for users to update their publications periodically.
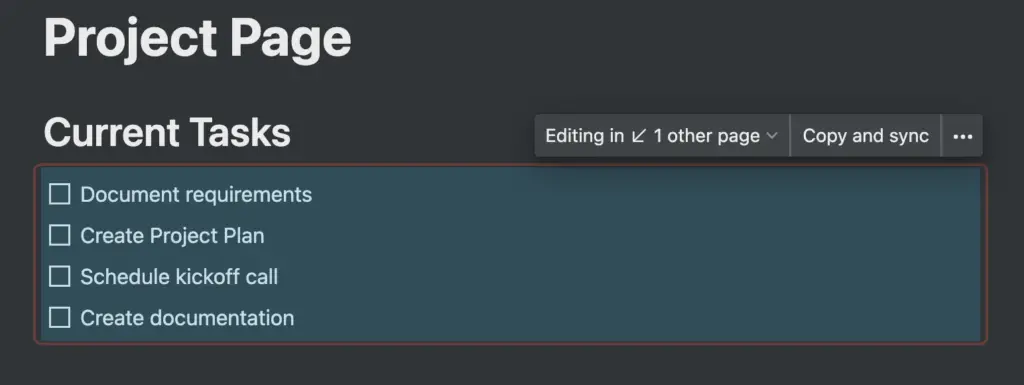
Another key feature of synced blocks is their traceability. When a synced block has been inserted into a destination document, users can hover over the block and be linked to the block’s origin document. By hovering your mouse over a synced block, users can see all the other places that block is being used. This helps you understand which documents will be affected by editing a synced block.
Synced blocks can act as a breadcrumb facilitating links and backlinks to other documents.
What can I use Synced Blocks for?
Synced blocks open new possibilities for referencing information that is subject to change. This eliminates ‘menu costs’ (the cost of the time it takes to update ever-changing information like prices).
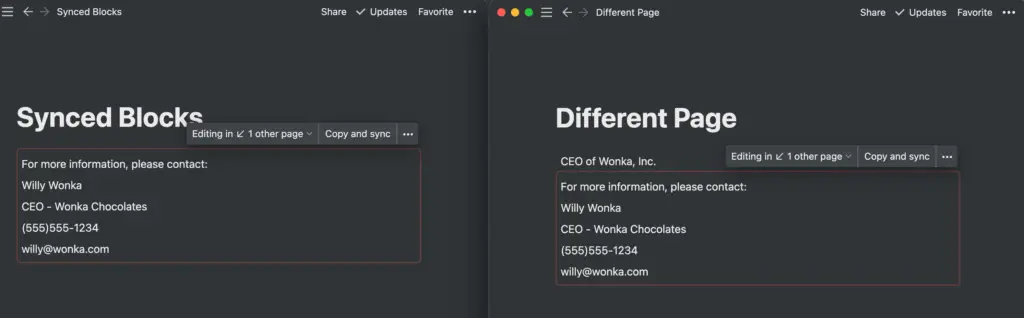
We found synced blocks useful for referencing contact information. Many users add blocks at the end of policies outlining a person of contact for more information. If this member of staff changes or gets a new number, it can be challenging to keep wherever they’re referenced up to date.
Users can create synced blocks for the contact details of notable people in their organization and can instead paste those blocks into documents.
This can also work for key information paragraphs in, for example, company policies. These rules are bound to be changed, and so wherever the policy is referenced will also need to be updated. This is a fantastic tool for keeping company wikis and knowledge bases up to date.
Thirdly, synced blocks can help keep shared checklists, to-do lists, and inboxes synced across team members. They can be a great management tool for remote collaboration.
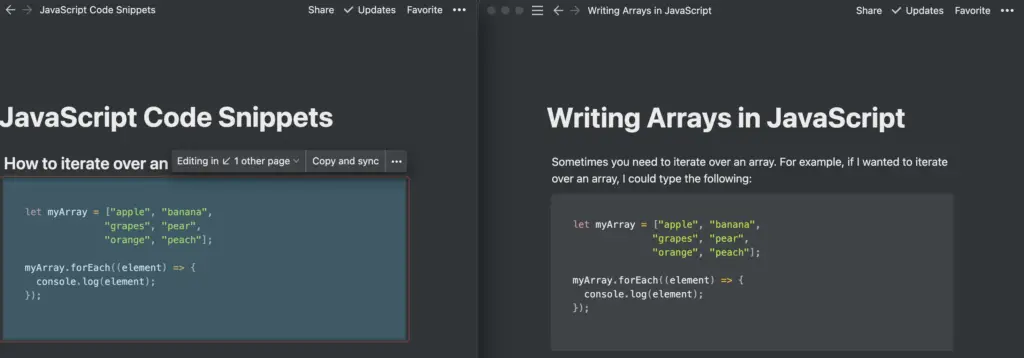
Another example might be code snippets. In you manage code in Notion, you could create a code snippet on a master code snippet page and then replicate that snippet on a software project page that leverages that snippet. That way, any changes to the snippet are automatically replicated to any project pages that use that code.
If you are looking to learn on the go, Audible is for you. Audible has a huge library of audiobooks on a variety of topics and listening to audiobooks is a great way to learn on the go. Audible includes podcasts and Audible Originals as well. For more information on Audible, click the link below to get your first 30 days on Audible for free:
Audible – Your First Audiobook is On Us
How to Create a Synced Block in Notion?
Synced Blocks are incredibly simple to create and manage. To create a synced block in Notion, do the following:
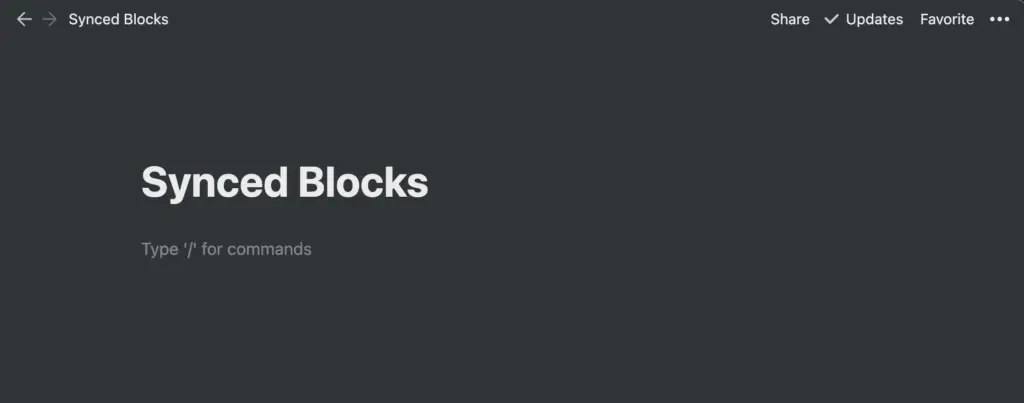
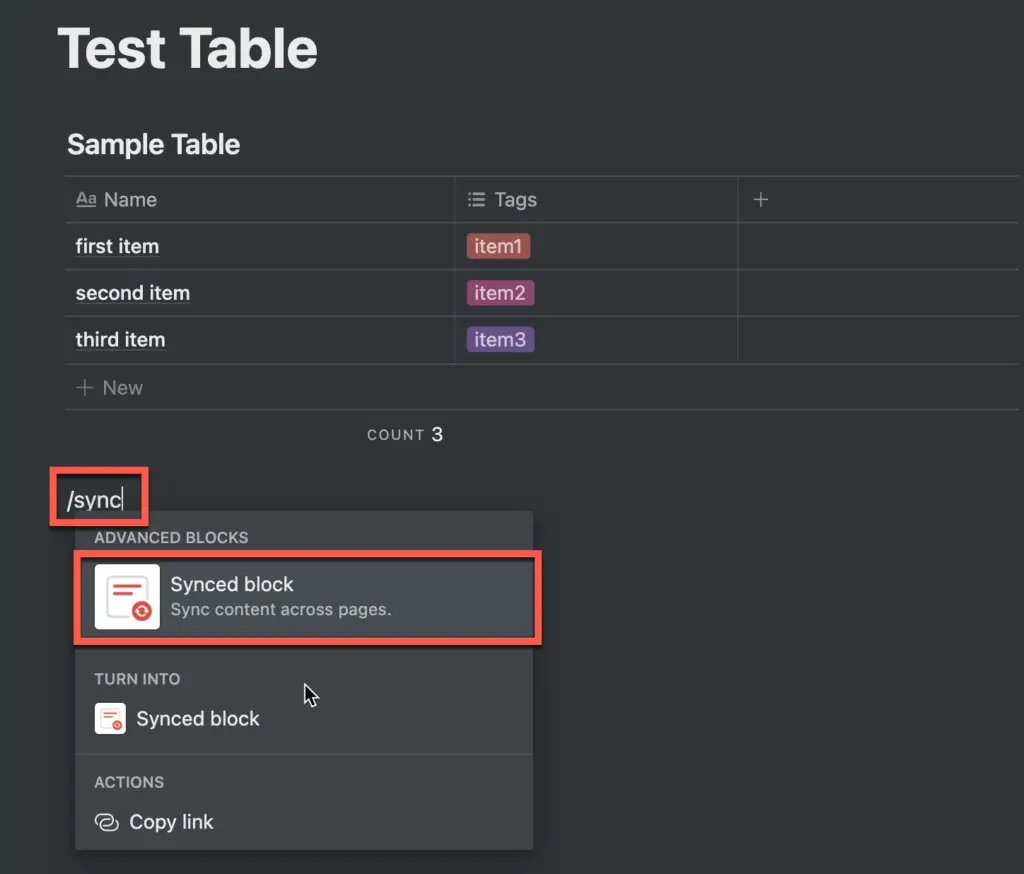
- Open or Create the page in Notion where you want to add the synced block
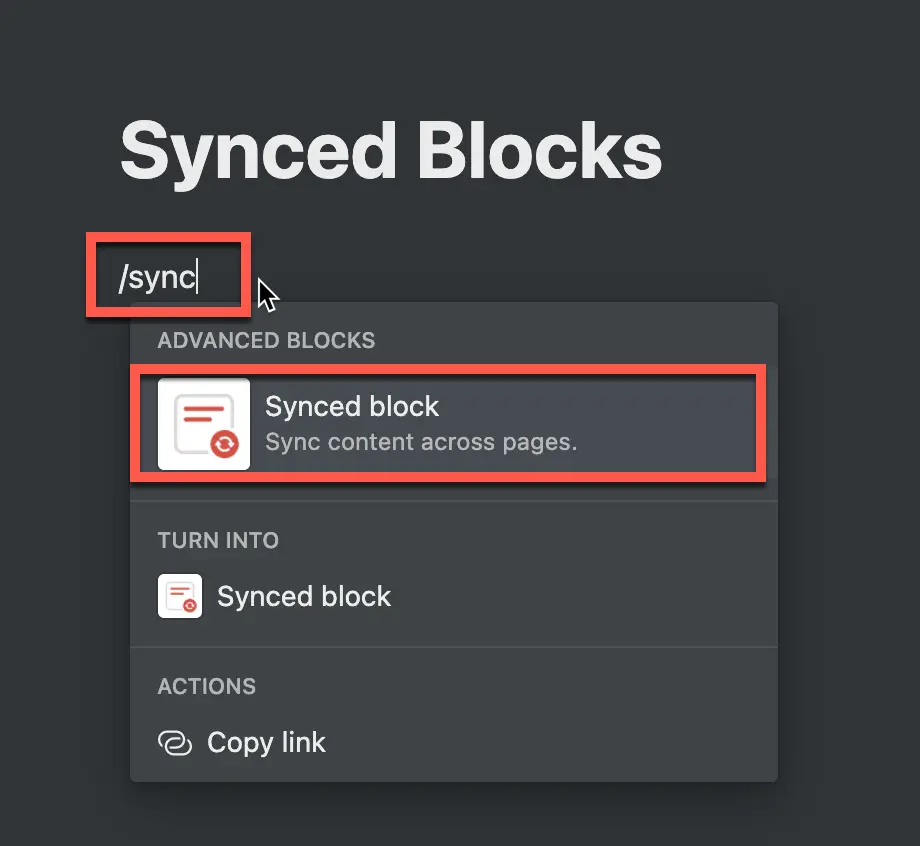
- Click where you want the synced block to appear and type ‘/sync‘ as shown in the screenshot above and press ‘Enter‘.
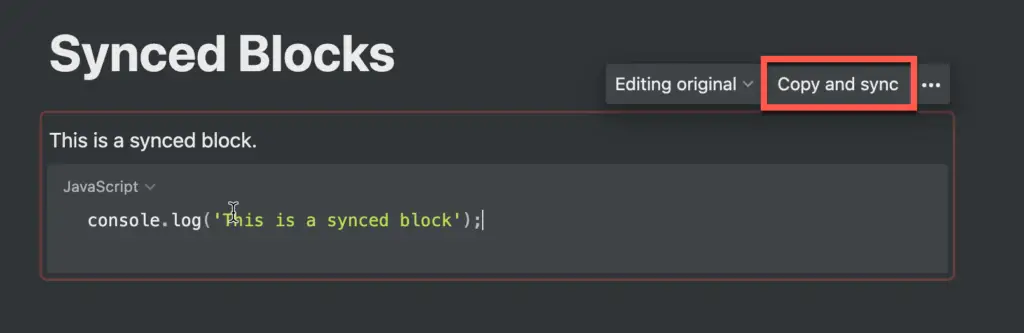
- An empty synced block will appear on your page. Add blocks inside your synced block as shown above. Click the “Copy and sync” button as shown above. This will copy the link to the synced block to your clipboard.
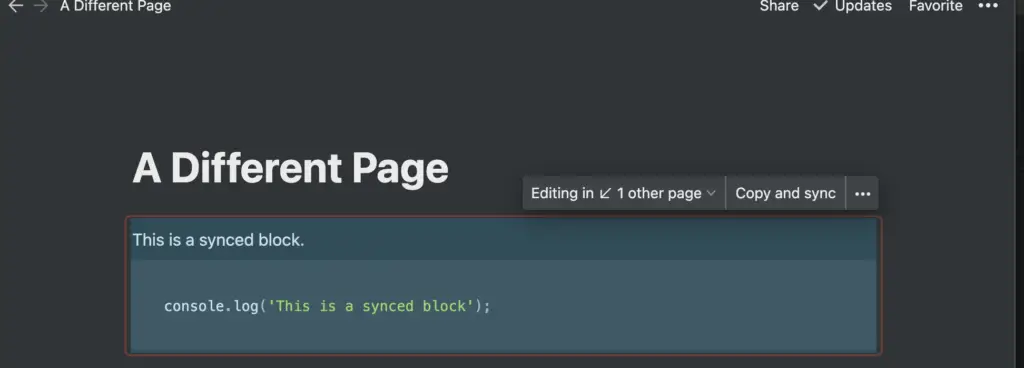
- Open the destination page where you want to add a reference to that synced block. Click where you want the block to appear and paste the link into the page. You should see a replica of the synced block in your page.
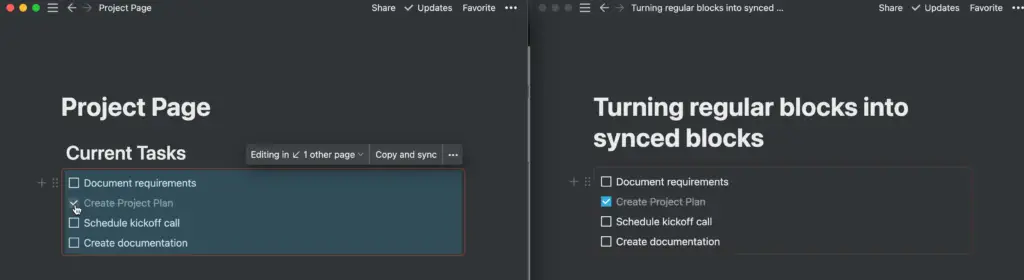
Once you edit either synced block, you will see that the changes will be automatically applied in real-time to the corresponding block.
How do I turn existing Blocks into Synced Block?
If you want to turn existing blocks into synced blocks, you can follow these steps:
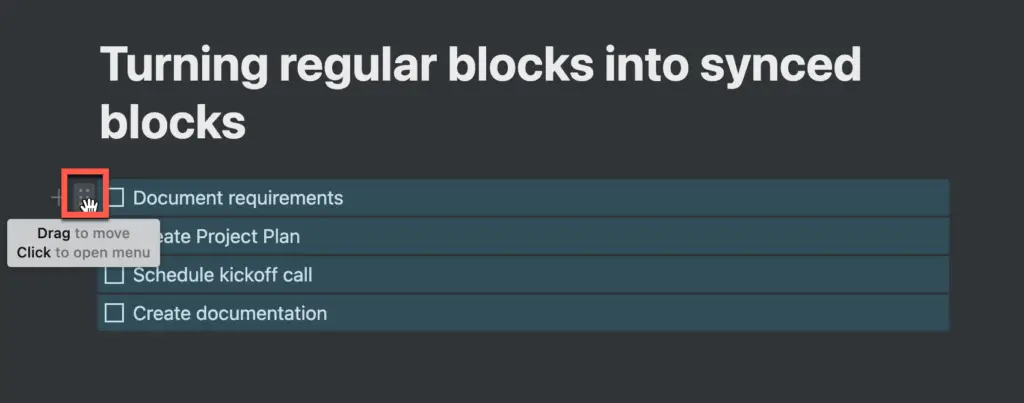
Step 1: Hover over the desired block and click on the ⠿ symbol to open the block menu.
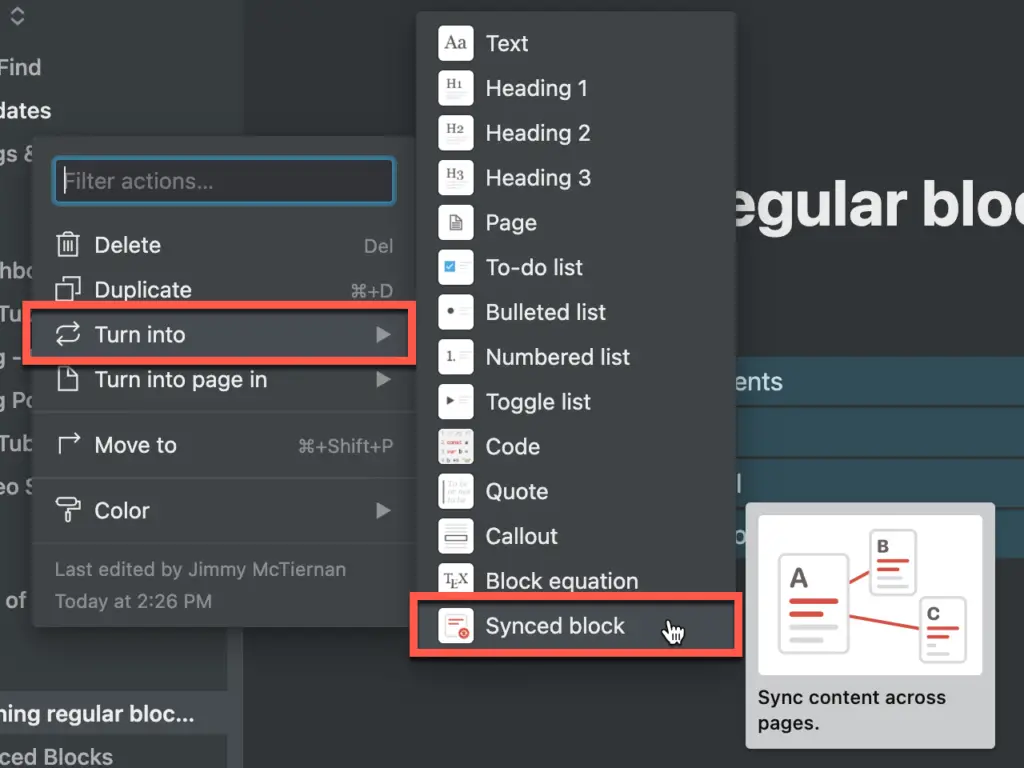
Step 2: Navigate to ‘Turn into’ and select ‘Synced Block’.
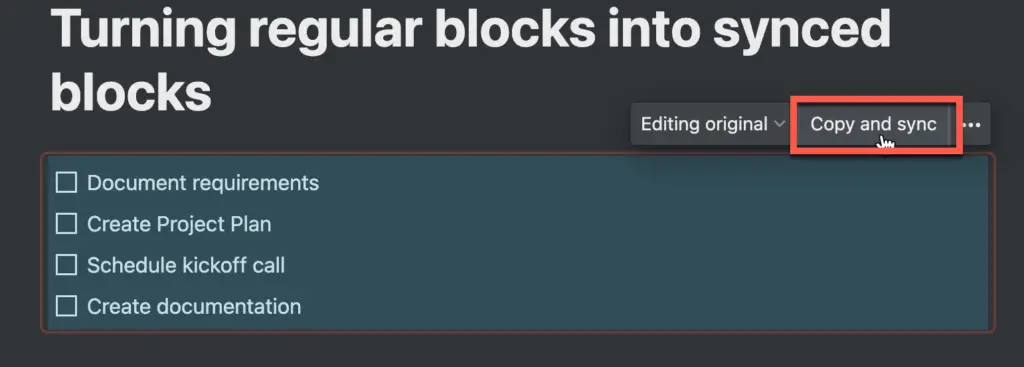
Step 3: Hover your mouse cursor over the block to find it now has an orange border. Select ‘Copy and Sync’ and paste the block wherever you want it to be referenced.
How do I use Synced Blocks with tables?
One of the questions you might be asking yourself is:
Can I turn a database or table into a synced block?
There is no open to turn a table into a Synced Block through the ‘Turn into’ menu, but here’s a workaround:
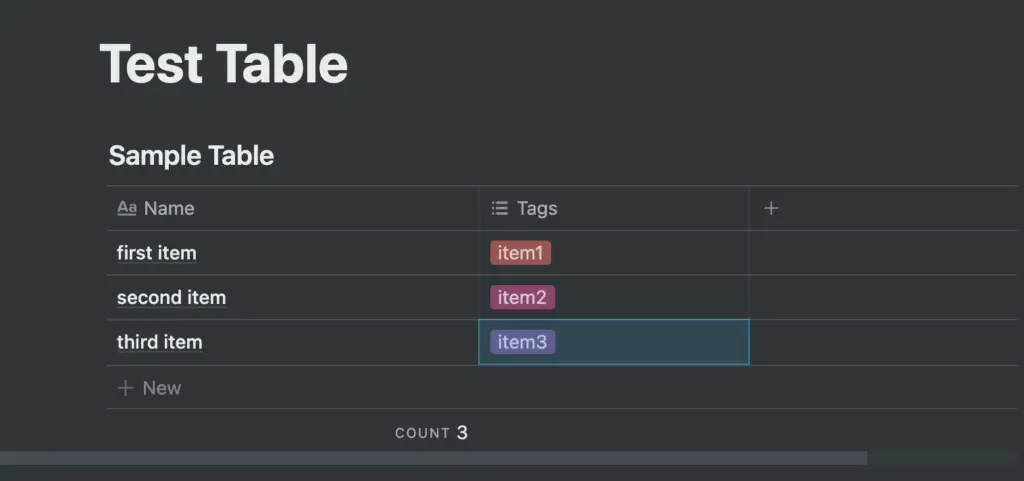
Step 1: Create a table or find an existing table.
Step 2: Use the /sync command to create a synced block.
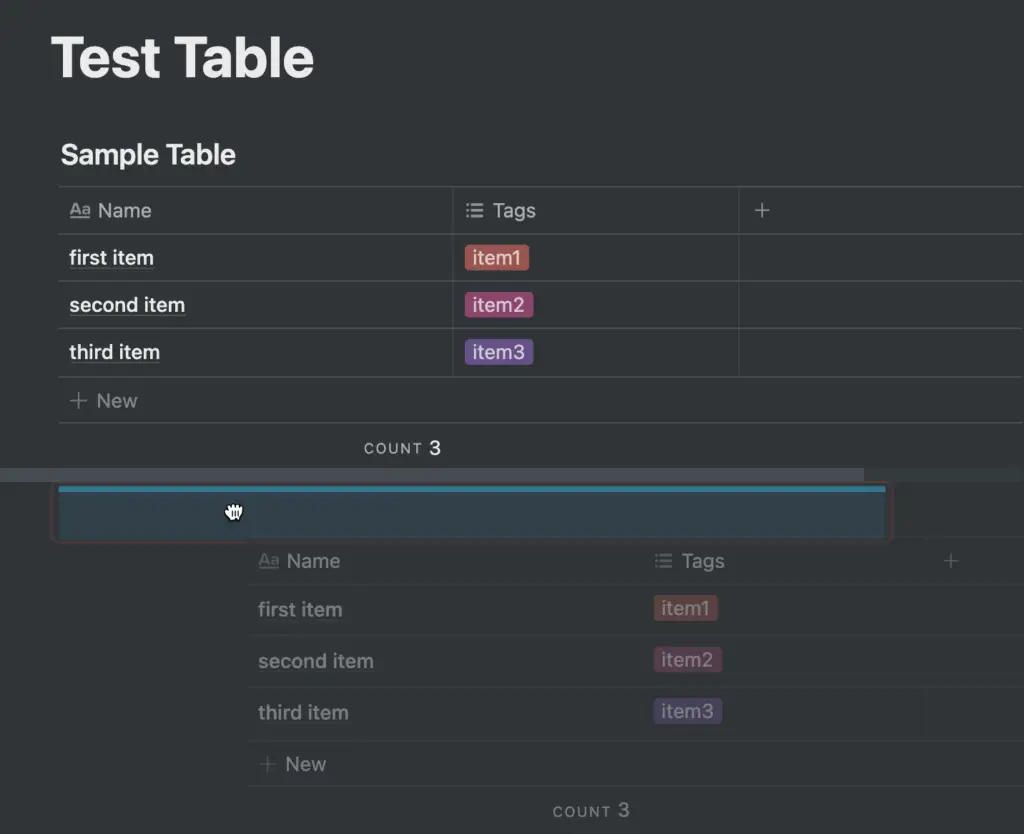
Step 3: Click and hold the ⠿ button to drag the table into the synced block. This will allow the table to be placed inside the synced container.
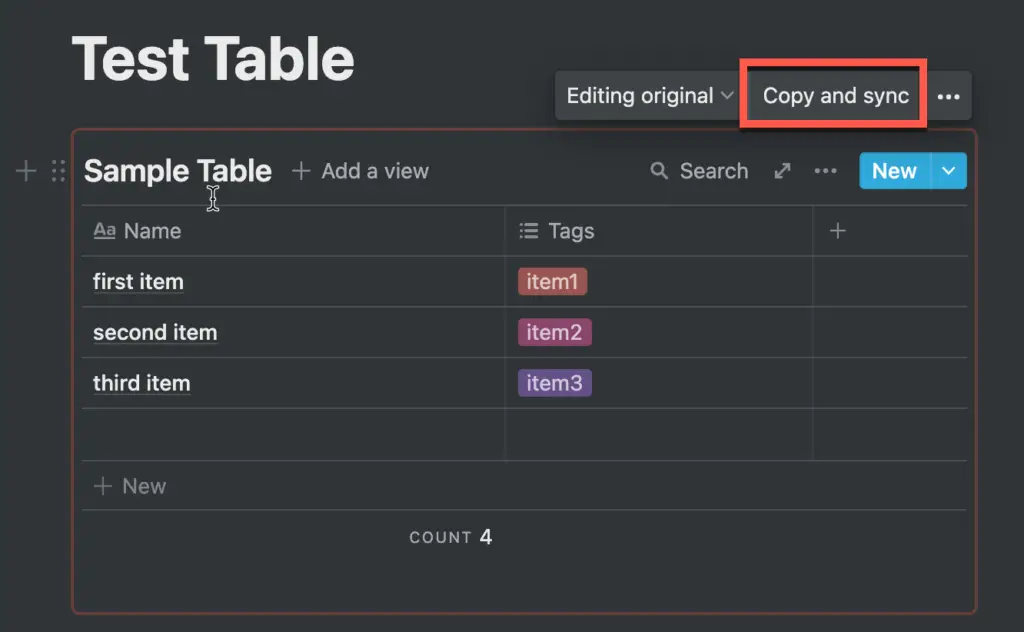
Step 4: Now when you hover over the table, you’ll be able to see an orange border indicating that it is a synced block.
You can use this method with elements like Kanban Boards, Calendars, Galleries, and even Timelines. Users can use Synced Blocks to mimic the view setting of a block. For example, if you add a filter to a synced calendar or table, the filter will also be applied in the destination synced block.]
That said, I recommend not doing this. Instead, you should really use the linked database option for creating views of an existing database on other Notion pages. I have a tutorial on linked databases that you can check out here.
Conclusion
Synced Blocks make it far easier to handle an extensive collection of workspaces using Notion, perfect for large businesses using the service for their company wiki or knowledge bases.
This feature can transform the way teams work collaboratively online and bring us closer to Ted Notion’s idealized perfect computerized information system.
Want More Tips and Tricks? Subscribe to our Newsletter!
If you haven’t already subscribed, please subscribe to The Productive Engineer newsletter. It is filled with tips and tricks on how to get the most out of the productivity apps you use every day. We hate spam as much as you do and promise only to send you stuff we think will help you get things done.
Check Out Our YouTube Channel!
We have a YouTube channel now and we are working hard to fill it with tips, tricks, how-tos, and tutorials. Click the link below to check it out!
Looking to Get Started Blogging or on YouTube?
Getting started can seem daunting and scary (I know it was for me) but it doesn’t have to be. I was very lucky to find a program that that has helped me grow my blog to over 35,000 page views and a YouTube channel that is growing at over 100% month-over-month.
Income School is the program that I have used. I have been a member for over a year now and just renewed my membership. I cannot recommend Income School enough! For more information on Income School, click the link below:
Income School – Teaching You How to Create Passive Income from Blogs and YouTube
Check out our Resources Page
Check out our resources page for the products and services we use every day to get things done or make our lives a little easier at the link below: