How to Bullet Journal using Notion with Screenshots
Bullet Journaling is an excellent way to keep track of all that you are working on in your day-to-day life. Bullet Journaling has the following benefits:
- Consistent, easy-to-understand structure
- Versatility
- Usable in both Digital and Analog options
While bullet journals are normally constructed using a physical notebook, the simple, straight-forward schema of bullet journaling allows them to also be deployed in digital systems such as Notion. Using a digital system like Notion has the advantage of being backed up and being able to search for your past entries quickly.
So how do we bullet journal in Notion? Enclosed below is the list of steps you will need to take to create a bullet journal in Notion:
- Create a Notion Page to Hold Your Bullet Journal Entries
- Determine the Structure of the Bullet Journal in Notion
- Create a Bullet Journal Template
- Populate the Bullet Journal Template with Your Entries
If you are just starting out with Notion and aren’t sure where to get started, you really need to check out my comprehensive beginner’s guide to Notion. It goes through all things you need to know to get started the right way. Enclosed below is the link to the guide:
Link to Beginner’s Guide to Using Notion With Screenshots
Looking for some information on the power of Notion? Check out our article containing tips to help you become a power user of Notion at the link below:
Before we get started with the tutorial, if you are looking to learn more about apps like Notion, Todoist, Evernote, Google Docs, or just how to be more productive (like Keep Productive’s awesome Notion course), you should really check out SkillShare. Skillshare is an online learning platform with courses on pretty much anything you want to learn. To learn more about Skillshare and its vast library of courses and get 30% off, click the link below:
SkillShare – Online Learning Platform
What is a Bullet Journal?
The Bullet Journal system was created by Ryder Carroll as a way to quickly get things out of your head and onto paper (or into a trusted system ala Getting Things Done by David Allen). Bullet journals are set up to provide daily and monthly views of your activities. For more information on how bullet journals work, visit Ryder Carroll’s site for more information.
Why Use Notion as a Bullet Journal?
Notion is a great productivity tool that really blends different aspects of productivity well. If you are already using Notion for other aspects of your productivity workflow, it only makes sense to extend it for your journaling as well.
The ability to link your bullet journal entries to existing Notion pages and files provides an additional benefit for using Notion as your bullet journal that traditional, hand-written Bullet Journals simply do not provide.
Getting Started
Now it’s time to get started building your bullet journal inside of Notion. Getting started is pretty easy, assuming that you have a rough idea of what you want this to look like. A little bit of planning that must happen before you start working in Notion. You must have an idea of how you want to layout your bullet journal inside of Notion.
Collections
Typically, the highest level of the Bullet Journal hierarchy is a collection. The easiest way to think of a collection is A grouping of related information. You may have for example several collections within your bullet journal related to different aspects of your life. I find, however, that you should start with one collection. It’s very easy to get overwhelmed with trying to tackle too much at one time. For me, I like to take things on bite-size pieces.
To create your first bullet journal collection in Notion, do the following:
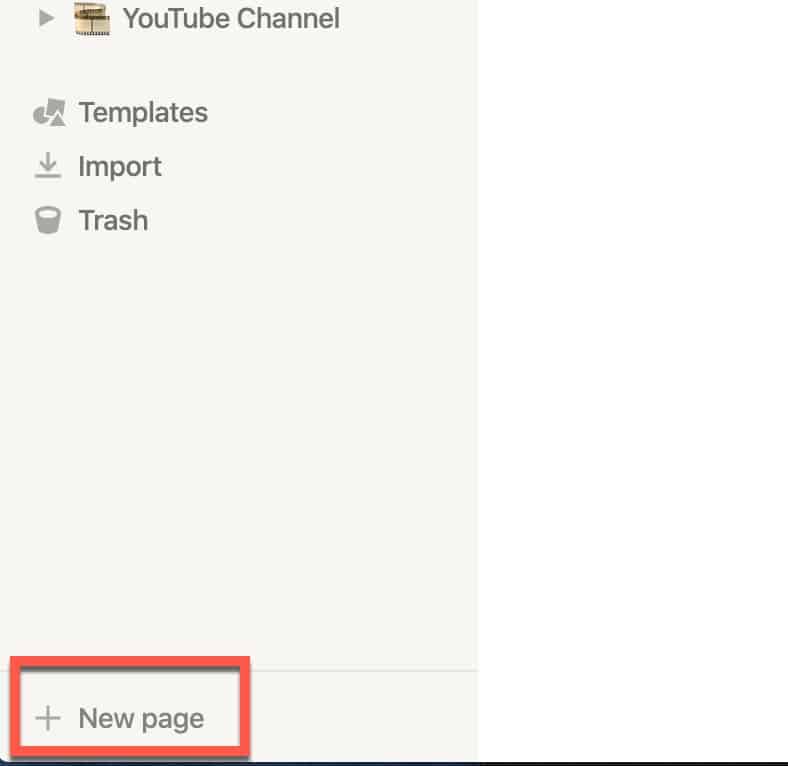
Open Notion and Create a New Page for your Collection by clicking the “+ New page” button in the lower left-hand corner of the Notion screen.
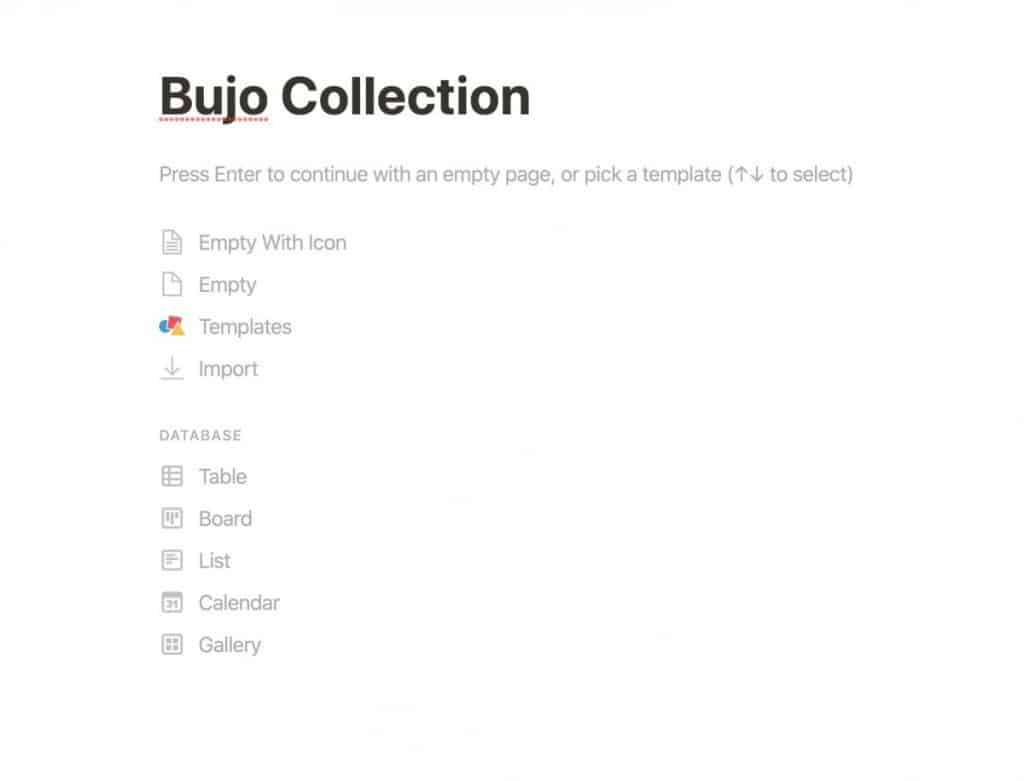
Give your collection a name by typing it into the title header and press “enter“.
Index
Within your bullet journal, you will need a way to navigate it as it grows. The quickest way to do this is to have an index. An index refers to the dashboard of your bullet journal. Think of it as a table of contents for the journal. The index is one of the places where you can really let the muscle of Notion shine by using links to different sections of your Bullet journal.
To create an index for your bullet journal in Notion, do the following:
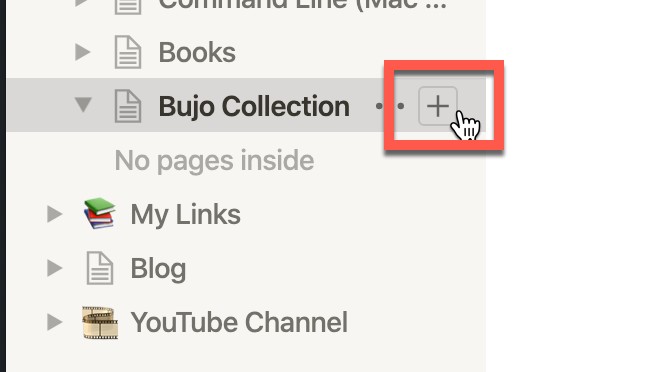
In the left panel of your Notion window, hover your bullet journal collection page and click on the “+” button to create a new Notion page inside your collection.
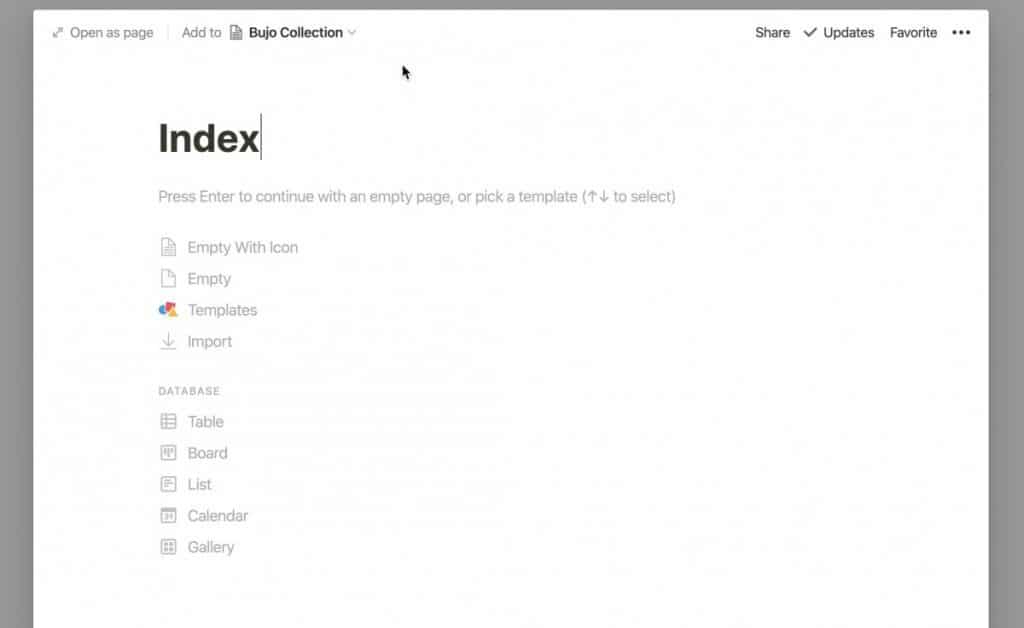
A new page will appear. Click on the Title heading and type “Index” and press enter.
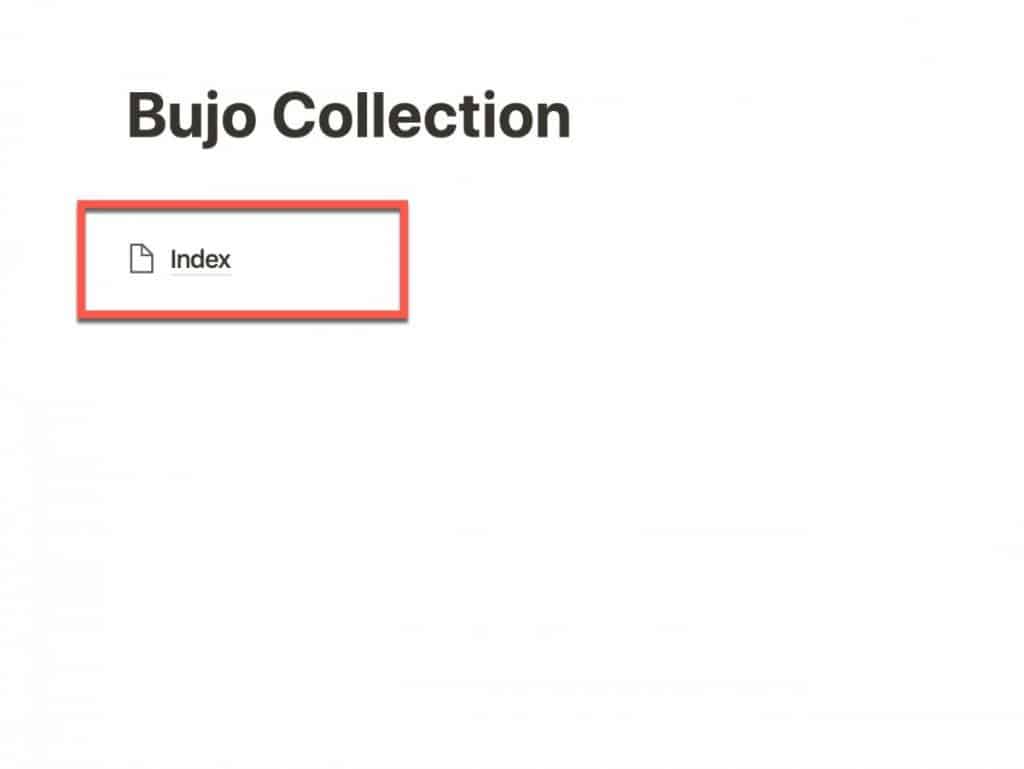
Your collection page will now have a link to your index page.
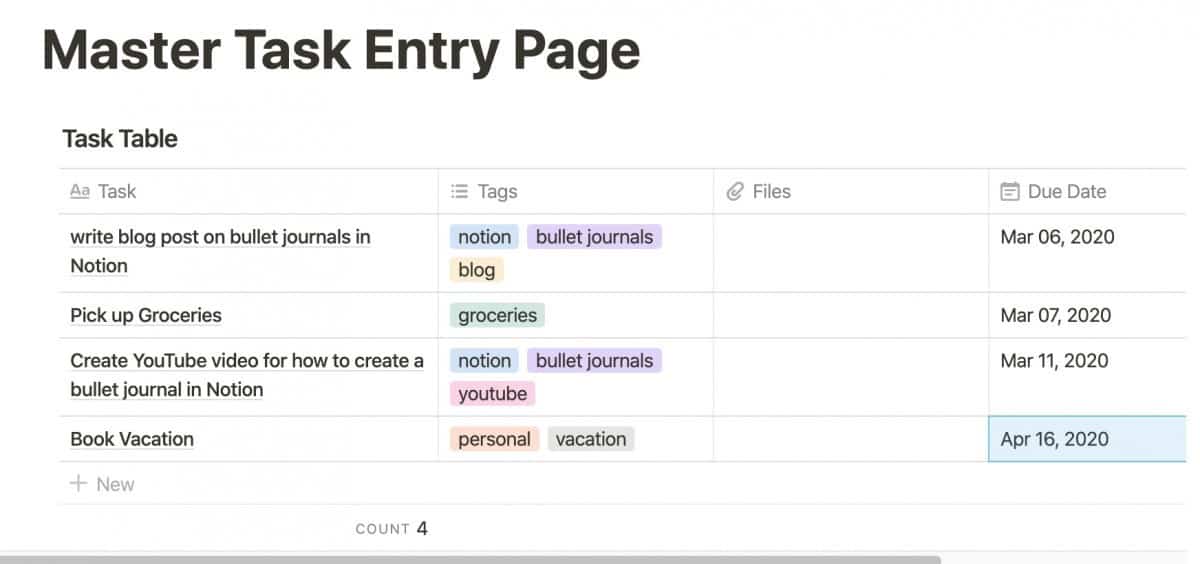
Master Task Entry Page
This is not typically found in a physical (i.e. non-digital) bullet journal. However, one of the best features of Notion is its support for tables and customizable views of those tables. We are going to use the power of Notion’s tables and views to make our bullet journal more flexible and easier to use.
To create your Master Task Entry Page for your bullet journal in Notion, do the following:
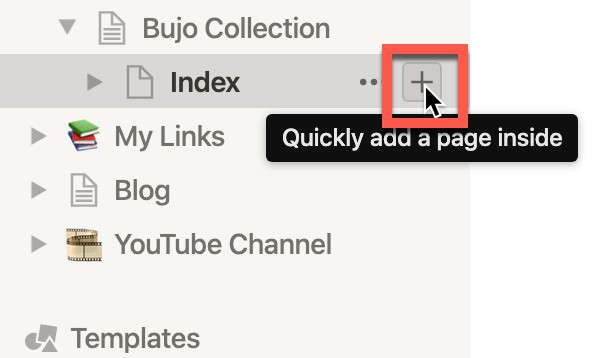
Navigate to the left panel and hover over the “index” page and click the “+” button to create a new page inside of the index page.
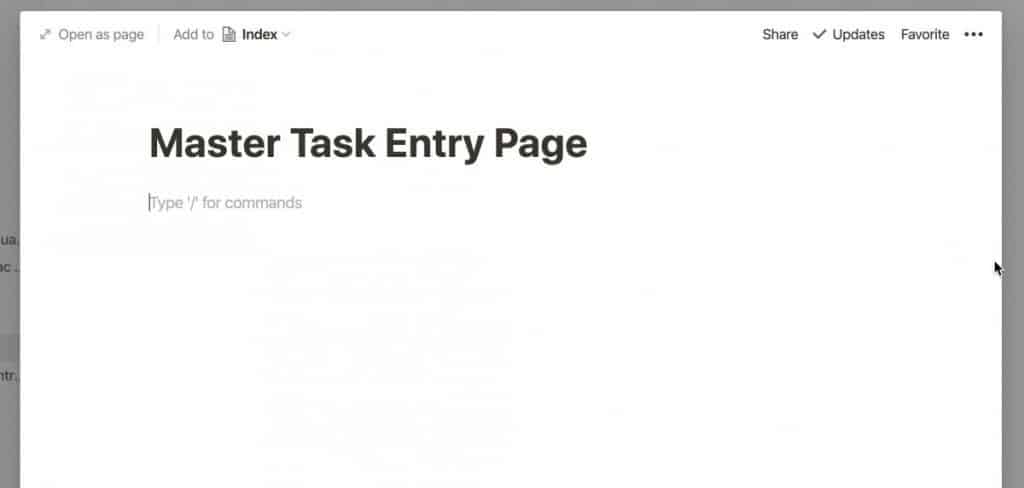
Click on the Title heading and type in the name of your task entry page (in my case, Master Task Entry Page) and press enter.
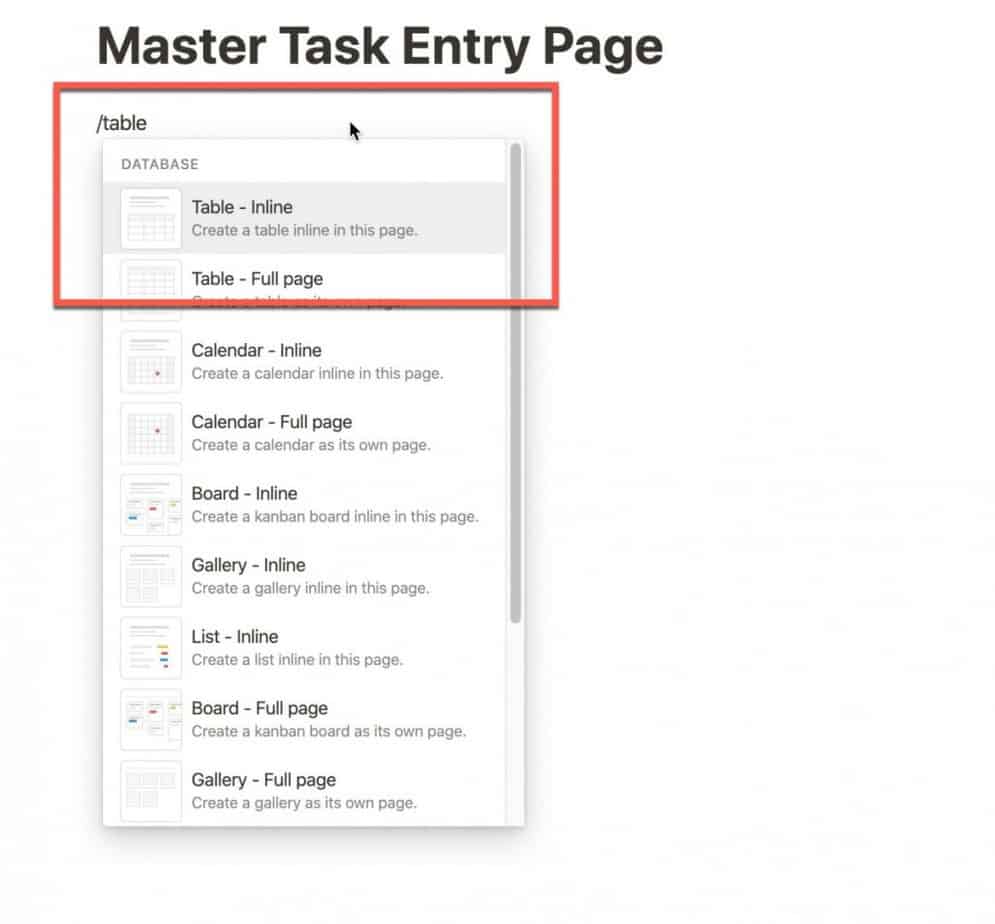
Click in the body of your new page and type /table. Select the “Table – Inline” option by clicking on it.
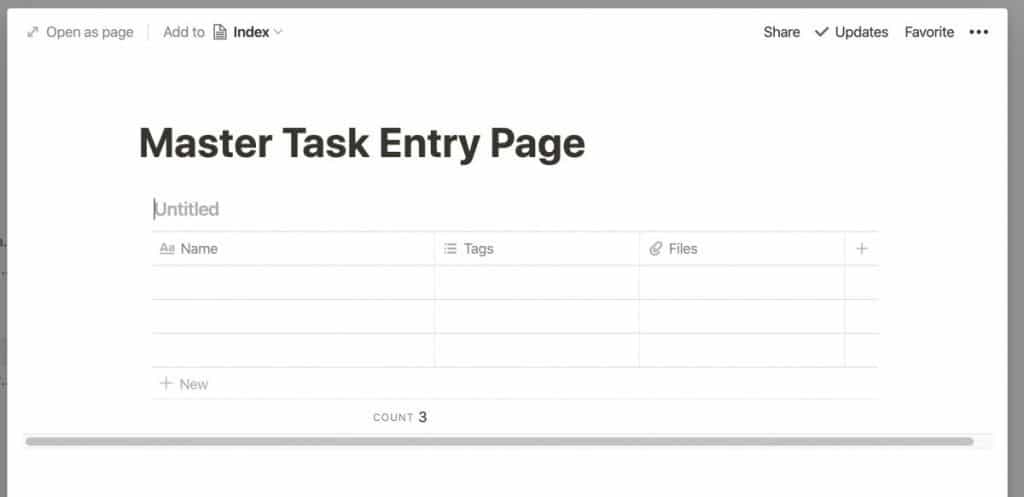
A table will appear on your page. Let’s customize it by editing it to fit our needs.

Click on the sub-heading right above the columns of the table (it should currently say “Untitled“. Click on where it says “Untitled” and type in the name of your table and press enter.
There are three default columns that all Notion tables start off with when you first create a Notion table:
- Name
- Tags
- Files
We are going to change these to fit what we want our task table to hold.
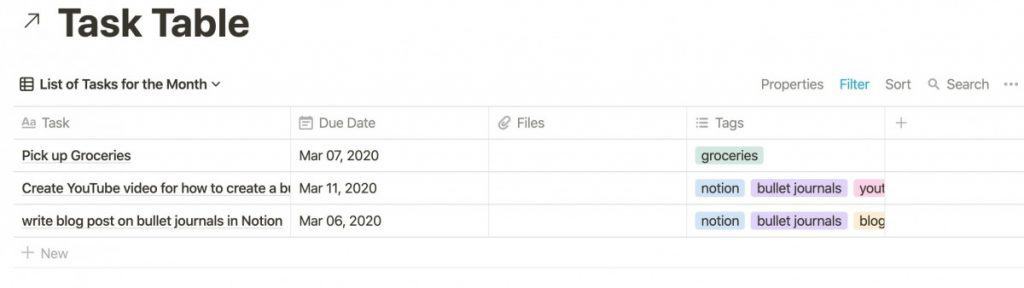
First, let’s change the “Name” column. The Name column is a column that holds the title (in our case, our task description).
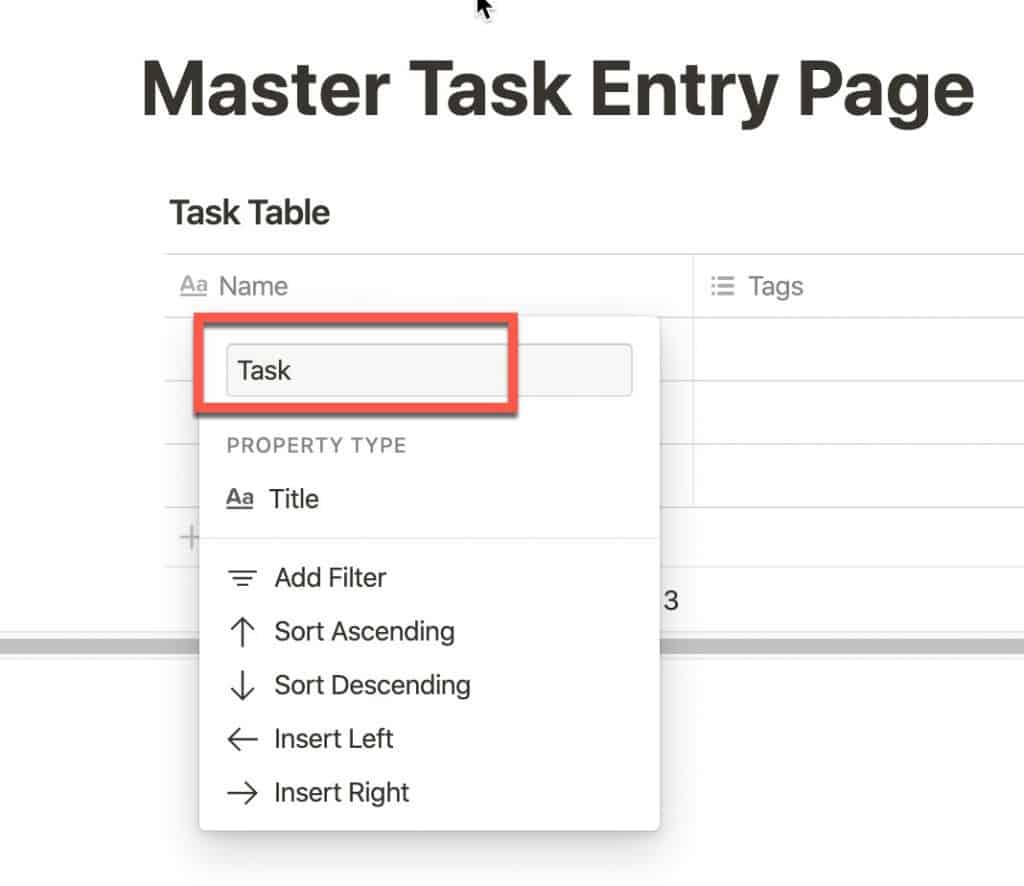
Click on where it says “Name“, backspace it out and type “Task” and press enter.
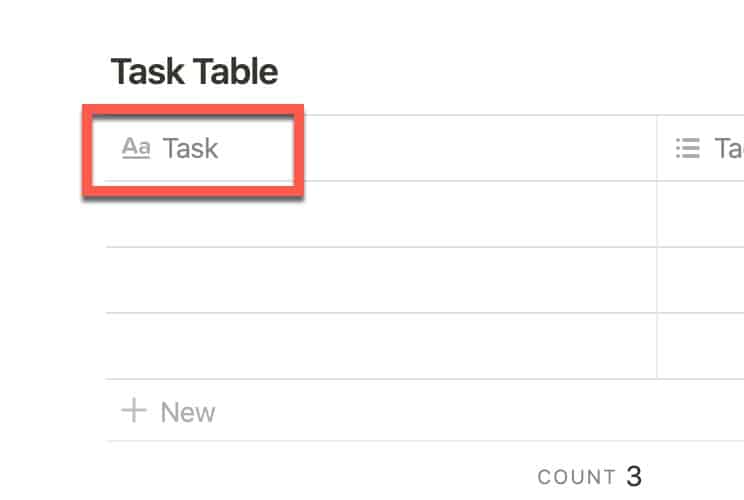
The column should now be titled “Task”. We are going to leave the Tags column as is. The reason for this is that tags can be very powerful as a search element when looking to see all the tasks that share a common attribute.
So let’s move on to the Files column. There are pro’s and con’s of leaving it in or removing it. If you have a use case where you need or want to have a file associated with your task, it can definitely make sense for you to use it. We will leave it in for our purposes.
One of the key aspects of task management (and of bullet journals in general) are due dates. The due date of a task is the key aspect of a bullet journal so we definitely need to add it to our bullet journal.
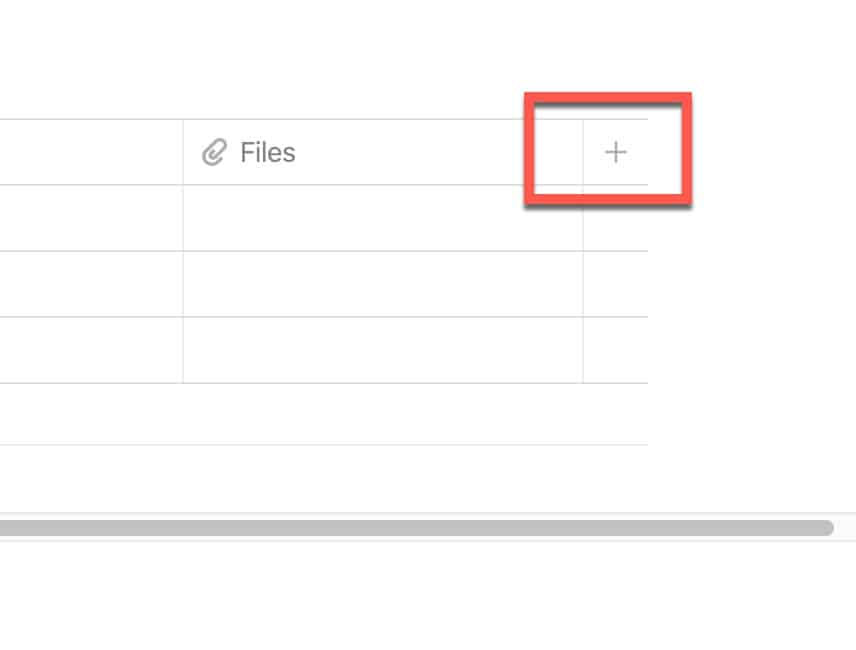
In your table, click on the “+” button to the right of the “Files” column.
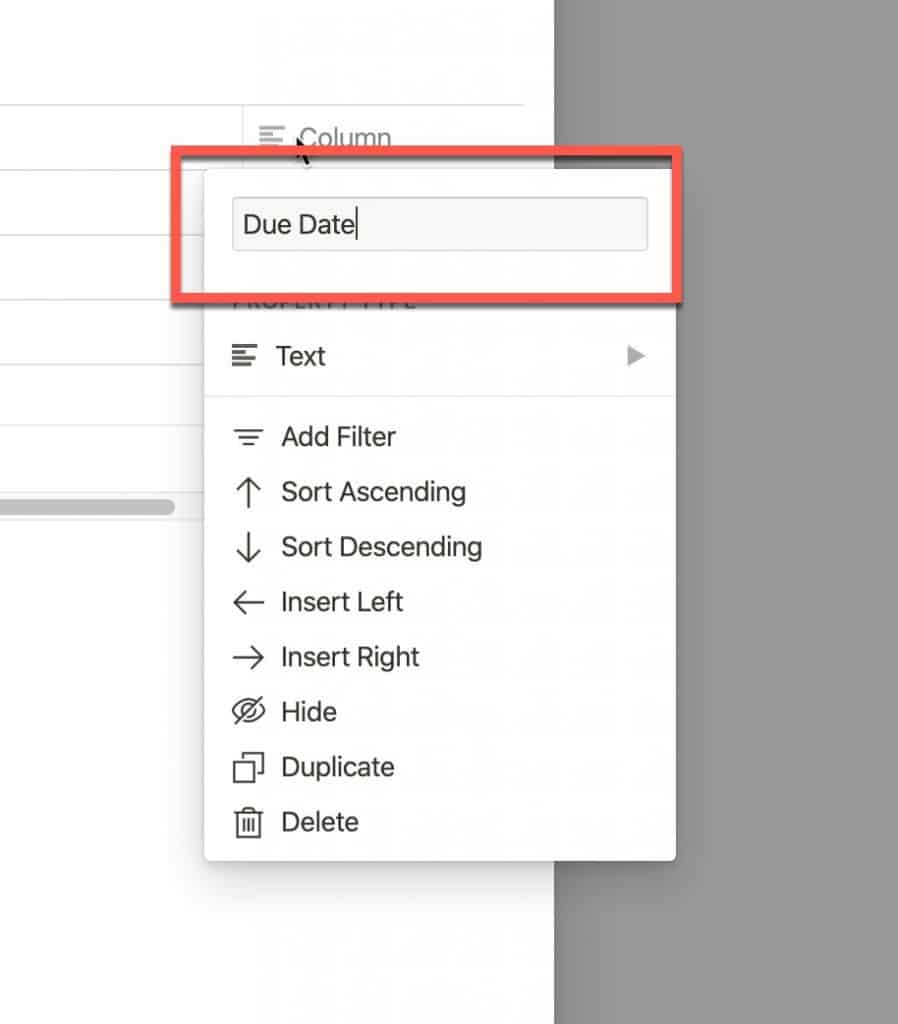
Click on the text box and type in “Due Date“.
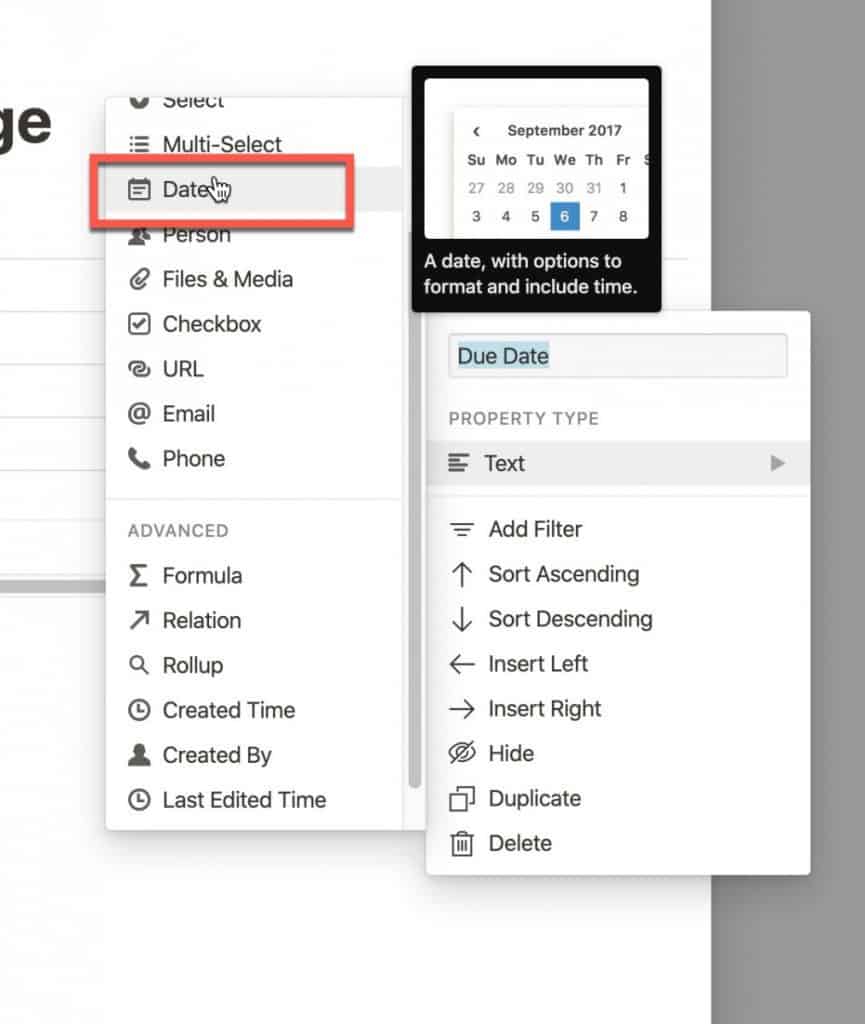
Next, hover your mouse over “Text” underneath the “Property Type” section. This will bring up a sub-menu contains a list of property types. Select “Date” from the sub-menu.
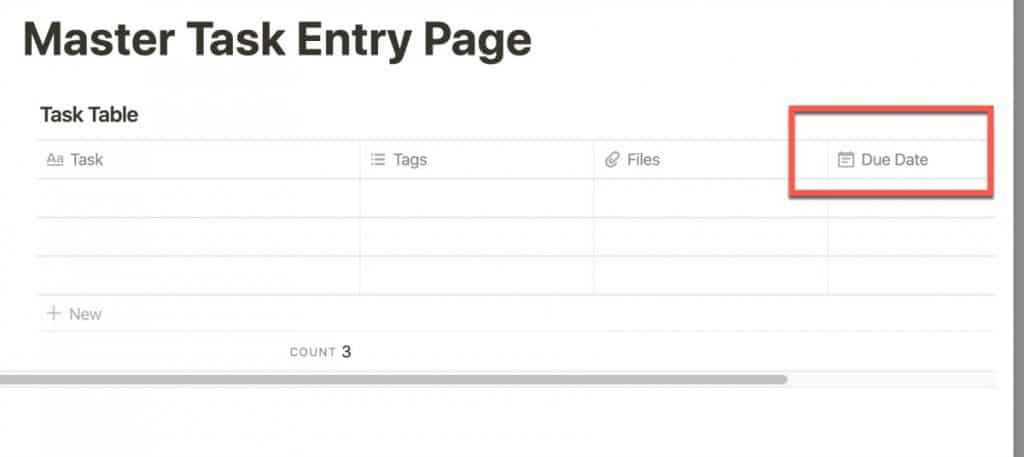
Your due date column should now appear in your table.
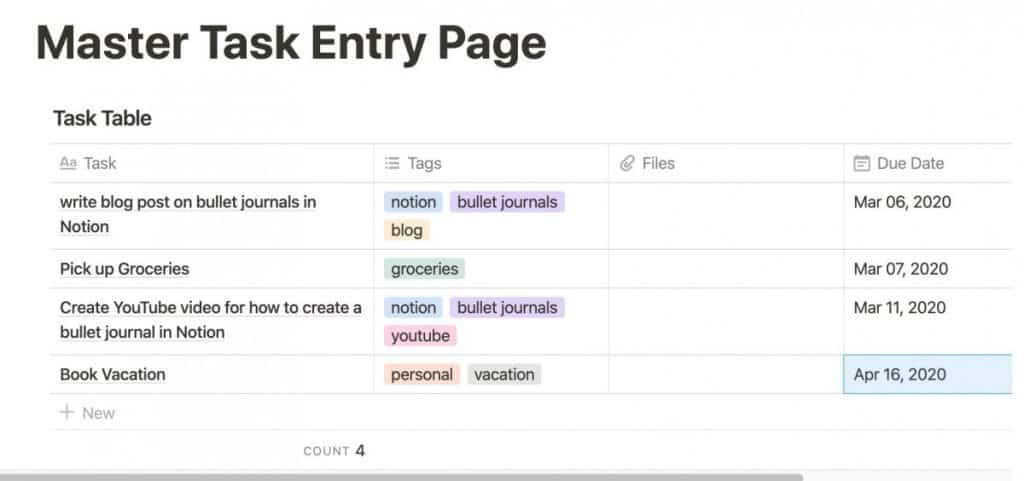
Populate your table with some tasks and due dates.
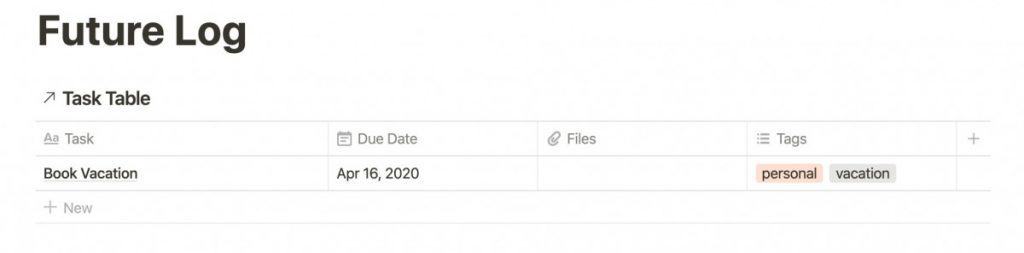
Future Log
Your future like will contain todos and activities that are outside the current month. It is easy to get caught up in the things that are immediate at the expense of the longer-term. Your future like helps you capture the things that you need to care for beyond the immediate time frame.
To set up a Future Log for your Notion Bullet Journal, do the following:
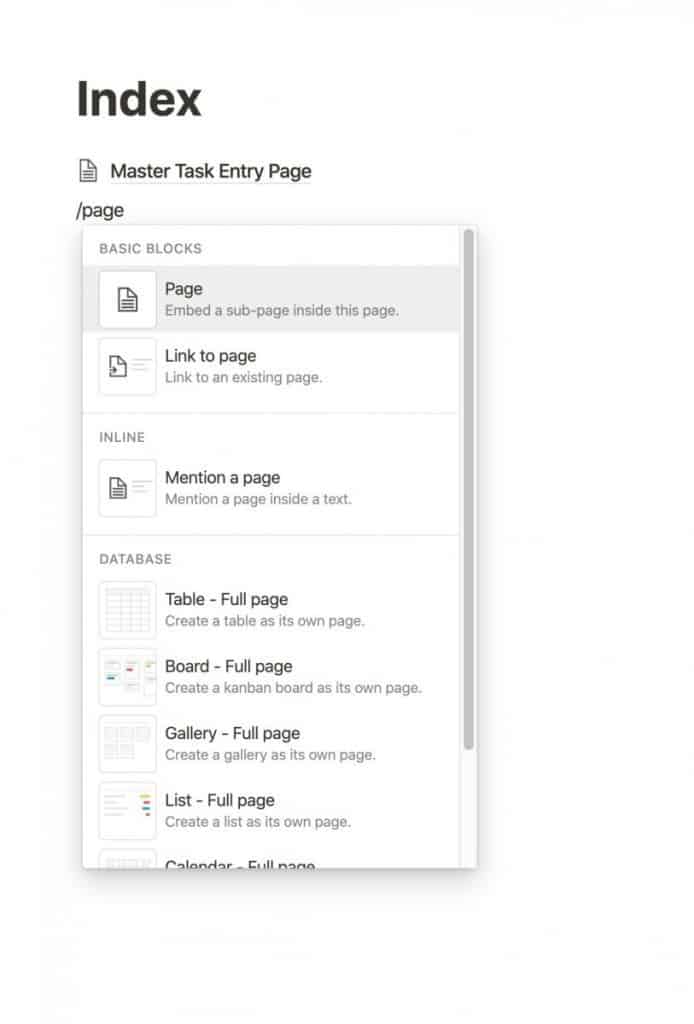
Open your Index page in Notion. Click in the body of the page and type “/page” and select “Page” from the sub-menu to create a new sub-page.
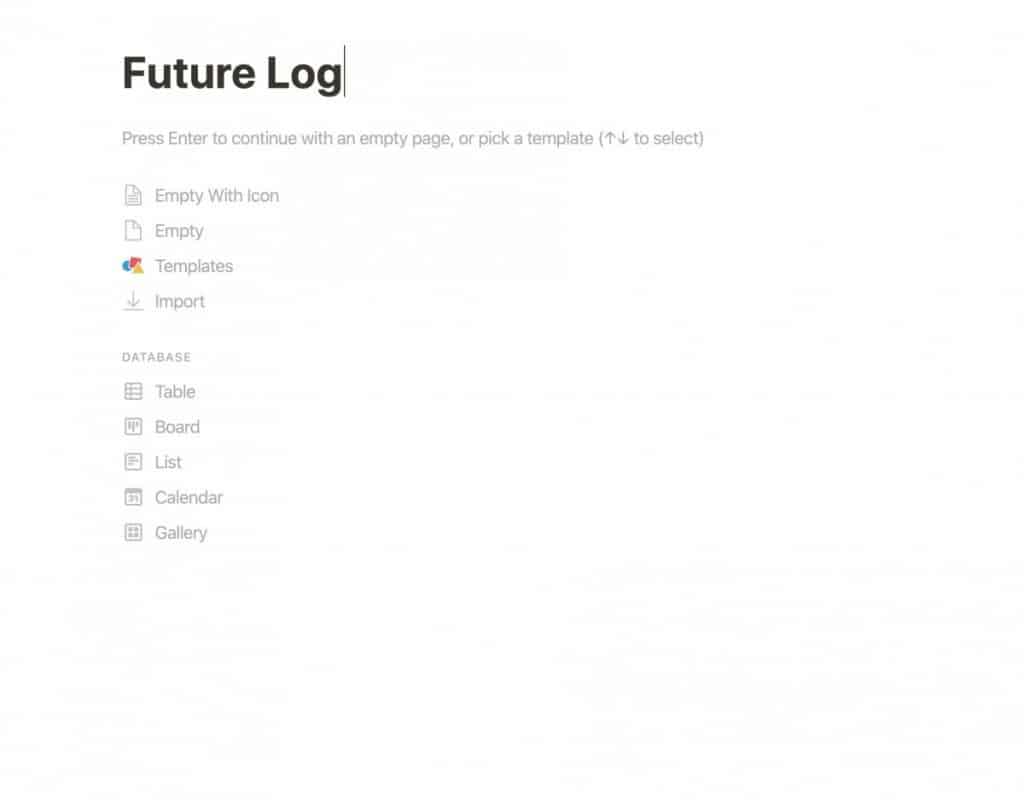
In the Title heading, type “Future Log” and press enter.
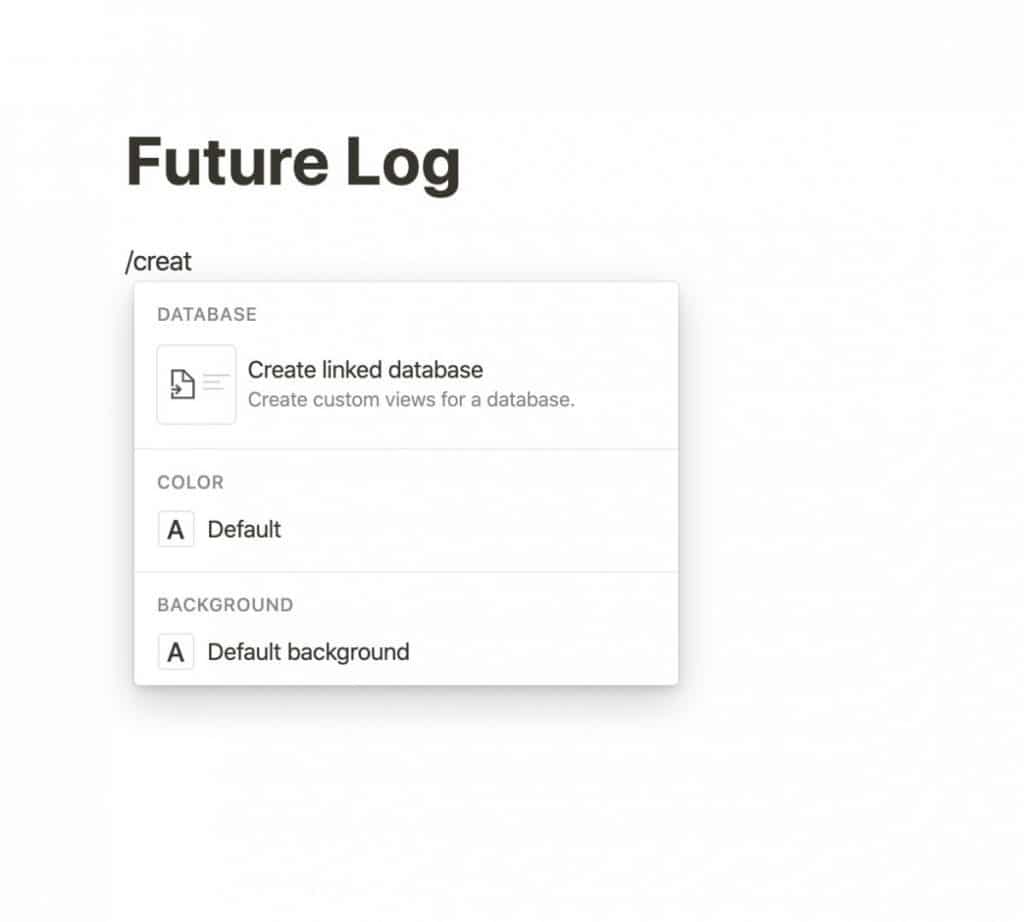
Click inside the body of the page and type “/create” and select “Create linked Database“. Linked databases in Notion are essentially table views of an existing table. You will see how they work in a couple of steps from now.
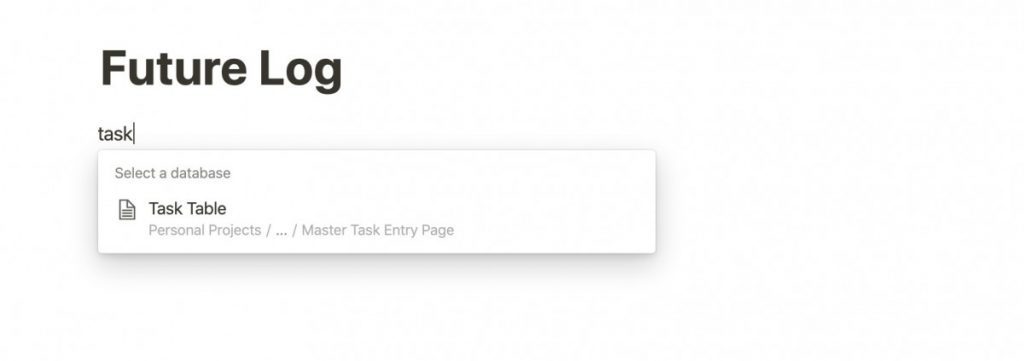
A pop-up menu will appear listing your tables in Notion. Simply start typing the name of your table (in my case Task Table) and then select it.
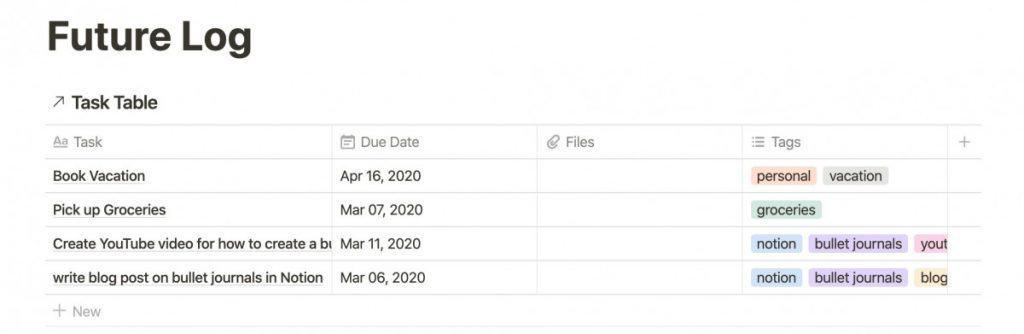
A view of your task table will appear. It will look very similar to the original table with one key exception. Notice the arrow before the table title. This indicates that this table is actually linked to another table, in our case our task table.
So what do we do with this view of the table? Well, as you may remember, the future log is a list of all the tasks you have that will occur a month from today or greater.
So let’s add a filter to our table view to only show us the tasks due beyond a month from today:
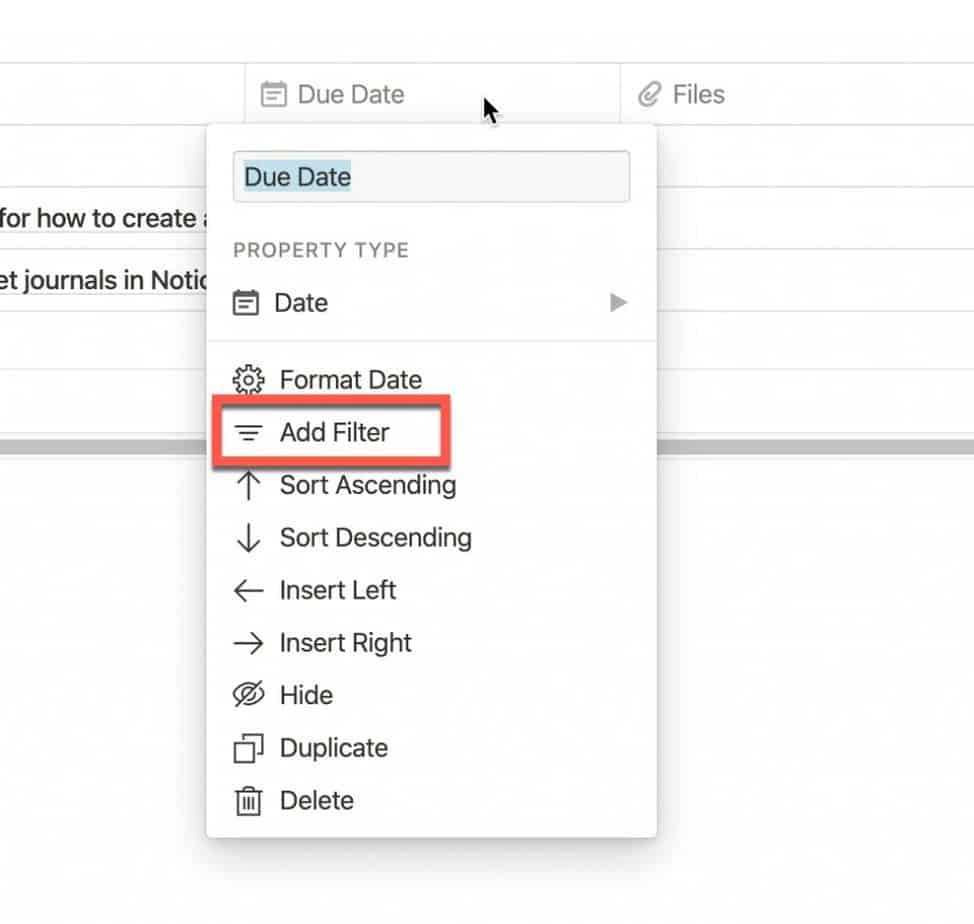
Click on the “Date” column header and select “Add Filter” from the dropdown menu.

You will see a pop-up that shows the following fields:
- Column (Due Date)
- Argument (Is)
- Criteria (Exact Date)
- Date
These are filters that allow you to narrow down what tasks you see in the table view. In our case, we want to see all tasks that occur a month from today so let’s set that up.
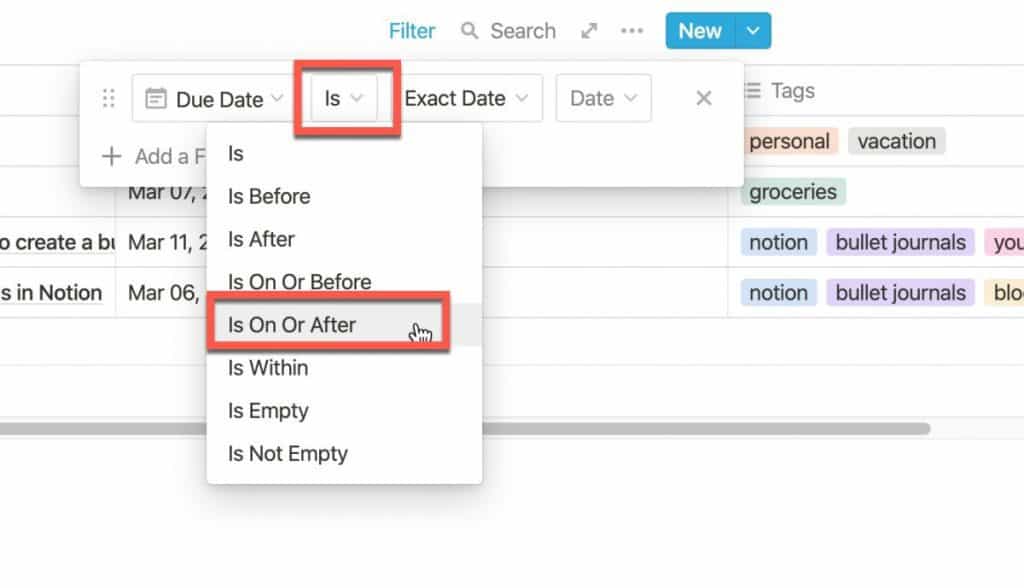
Leave the “Due Date” column alone and click on the “Is One Or After” option.
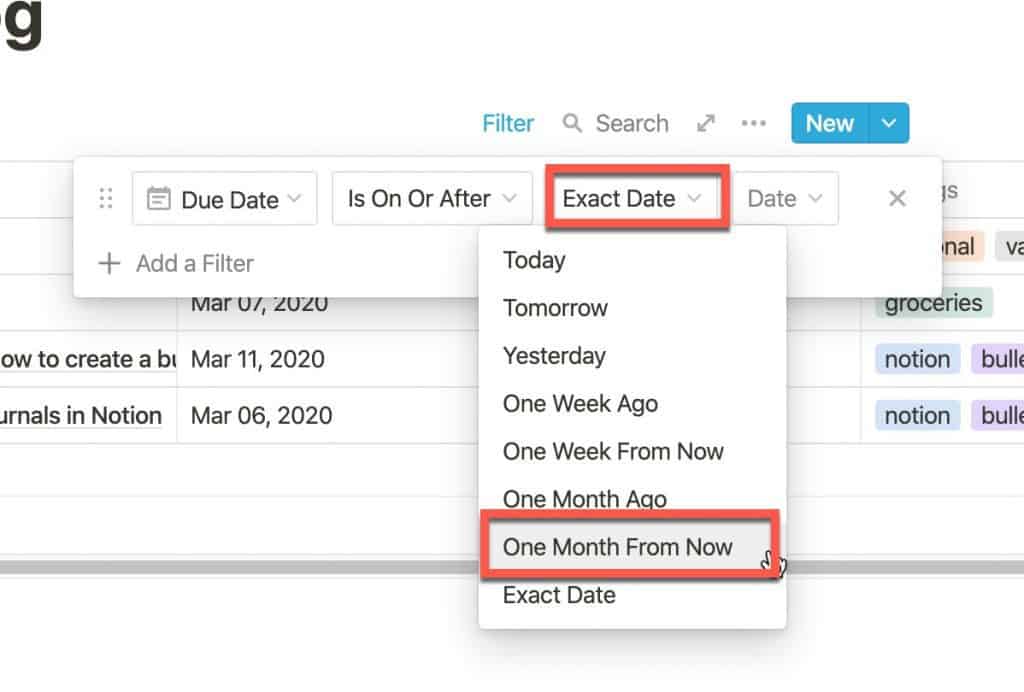
Now click on the “Exact Date” option and select “One Month From Now”.
You should now only see any tasks with a due date that is due a month from now or later.
You might be asking yourself “Why should I use linked databases (a.k.a. table views) for this? The reason why is that, once you set up a view, you never have to touch it again. You simply add all new tasks to your master task list with a due date and the table view automatically updates!
Monthly Log
Think of your monthly log as your calendar or planner for the current month. In a traditional bullet journal, the Monthly Log has two subpages:
- Calendar Page
- Task Page
We are going to use a similar approach that we used for the Future Log when making the Monthly Log. The difference is that our Monthly Log will have a task table view and a task calendar view.
Let’s start by creating the Monthly Log page. We do it the same way we build the Future Log page.
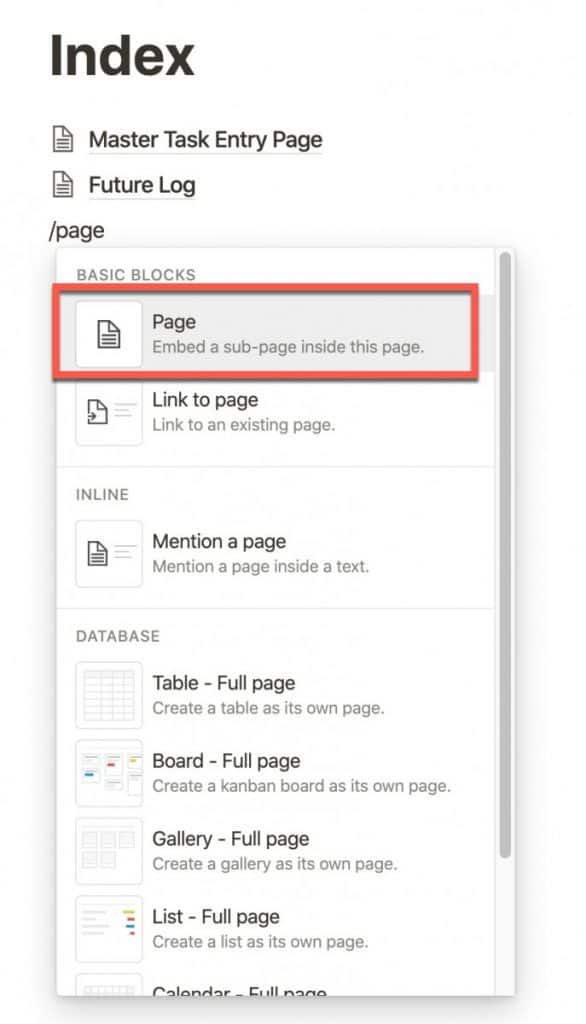
Open the Index page, click in the body of the page after your Future Log and type “/page” and select Page.
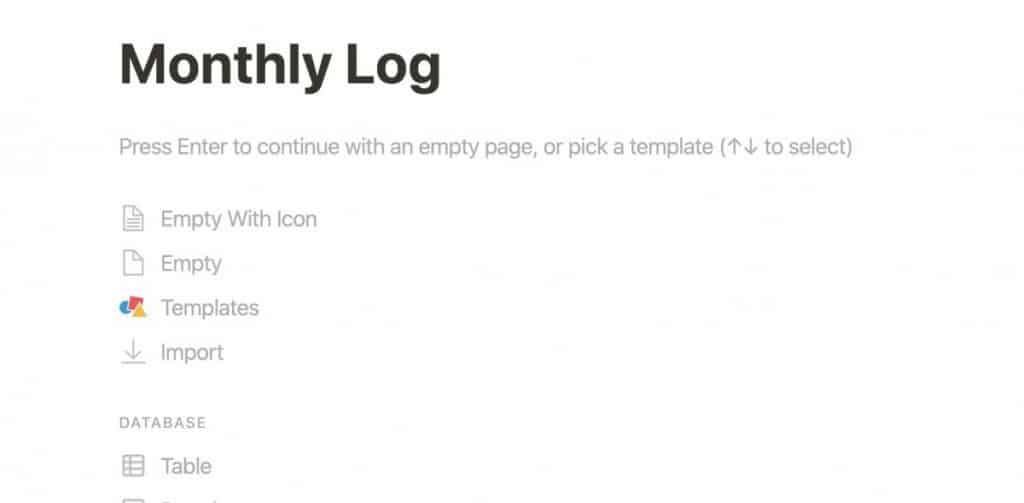
Click in the Title heading and type “Monthly Log” and press enter.
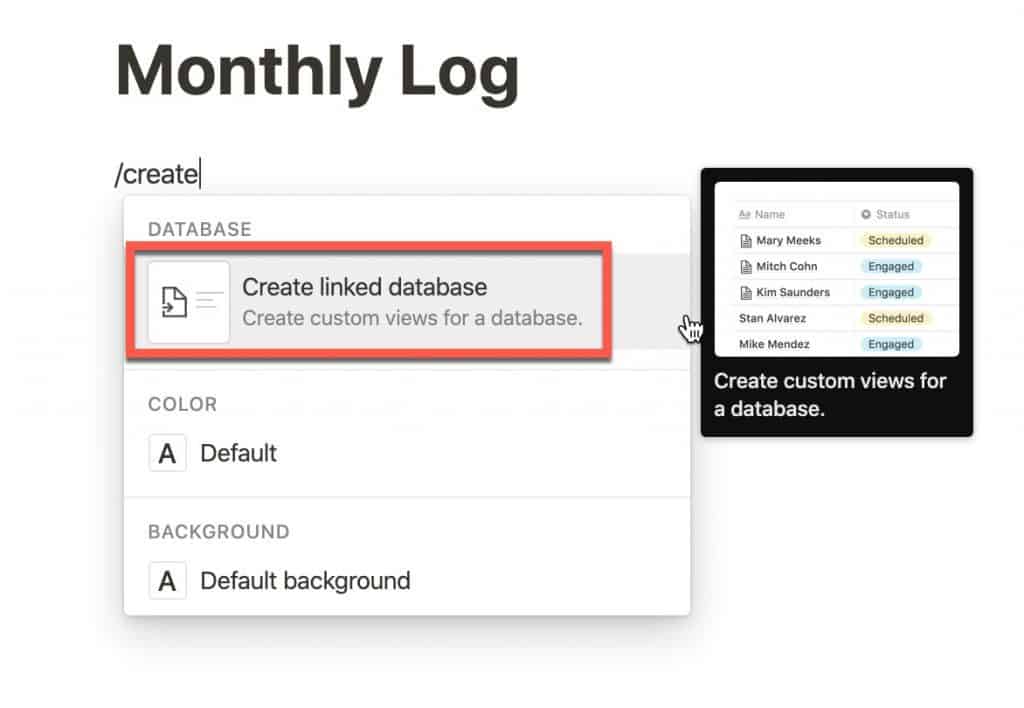
Click in the body of the page and type “/create” and select “Create linked database“.
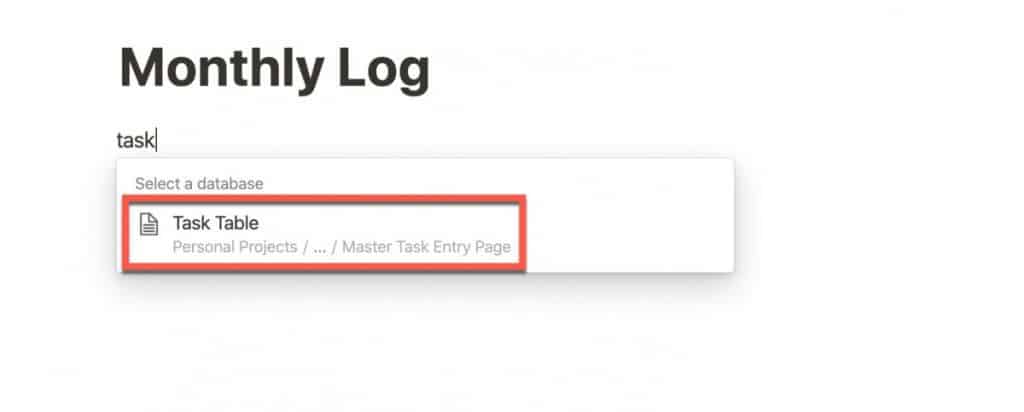
You will be presented with the “Search for a Database” menu. Type the name of your database (in this case Task Table) and select your table.

You will see a table view of your master task table. Let’s add a filter to only see the tasks due within a month of today.
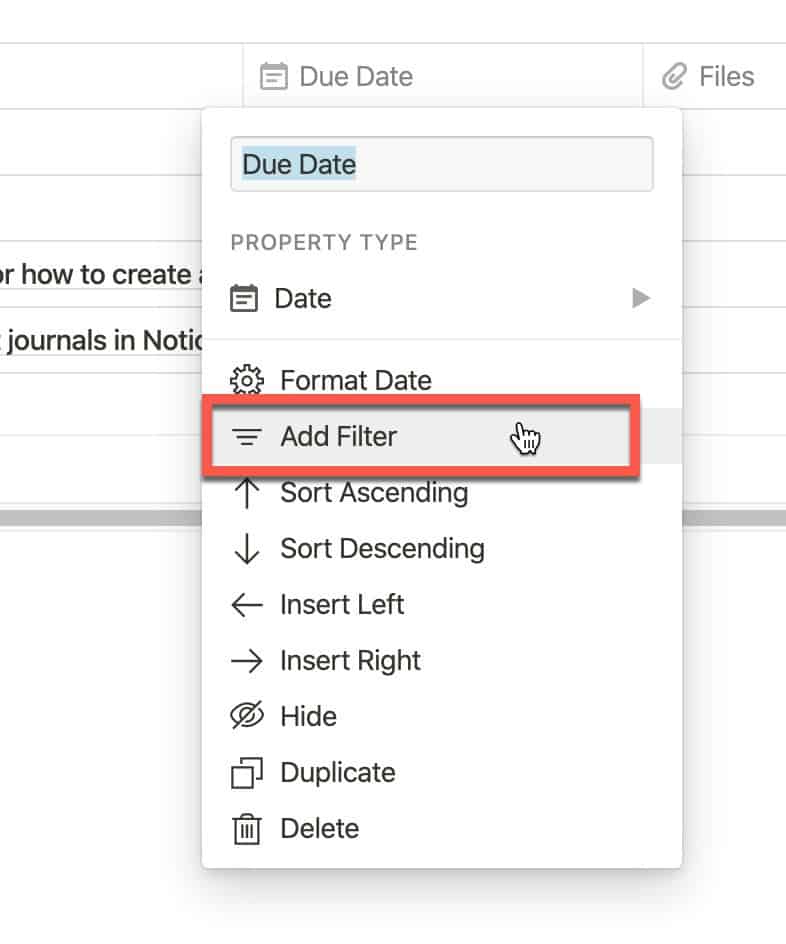
Click on the “Due Date” column headers and select “Add filter”.
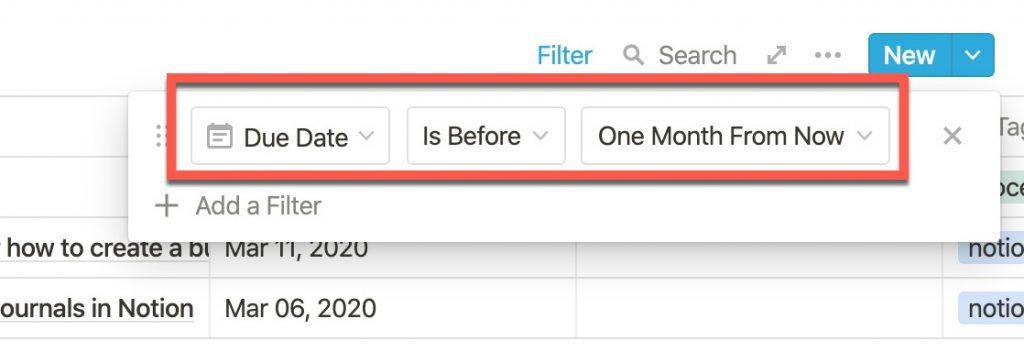
Change the “Is” filter to “Is Before” and the “Exact Date” option filter to “One Month From Now” as shown in the screenshot above this paragraph.
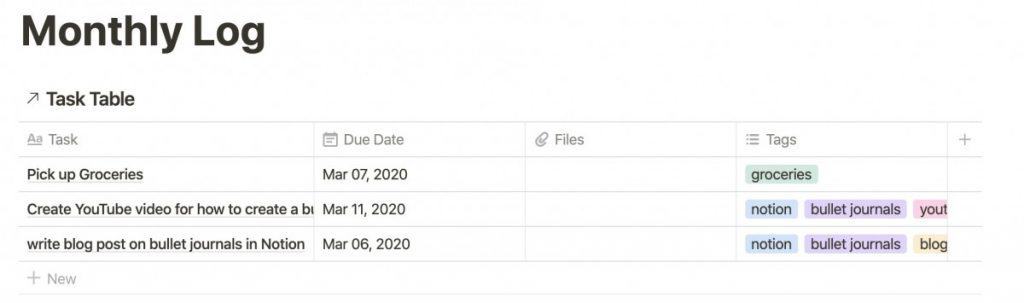
You should now have a table view that only shows tasks only due less than a month from now.
One of the cool things you can do is change the way the current view displays the data. We are going to change the view to look like a calendar.
To change the view of the current table view to a calendar view, do the following:
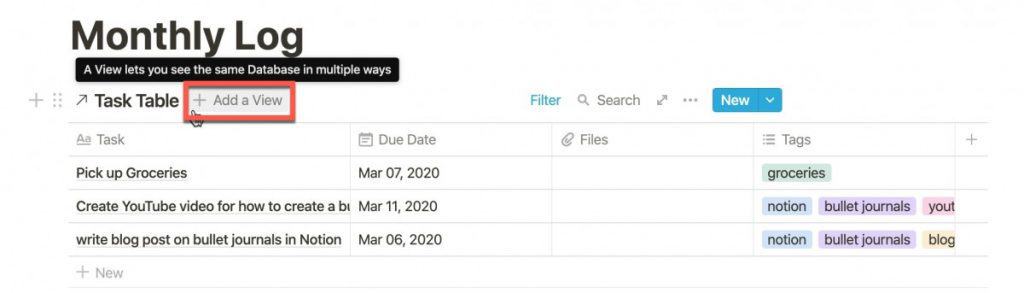
Hover over the name of the table view and you should see “+ Add a View” appear like in the screenshot above. Click the “+ Add a View” button.
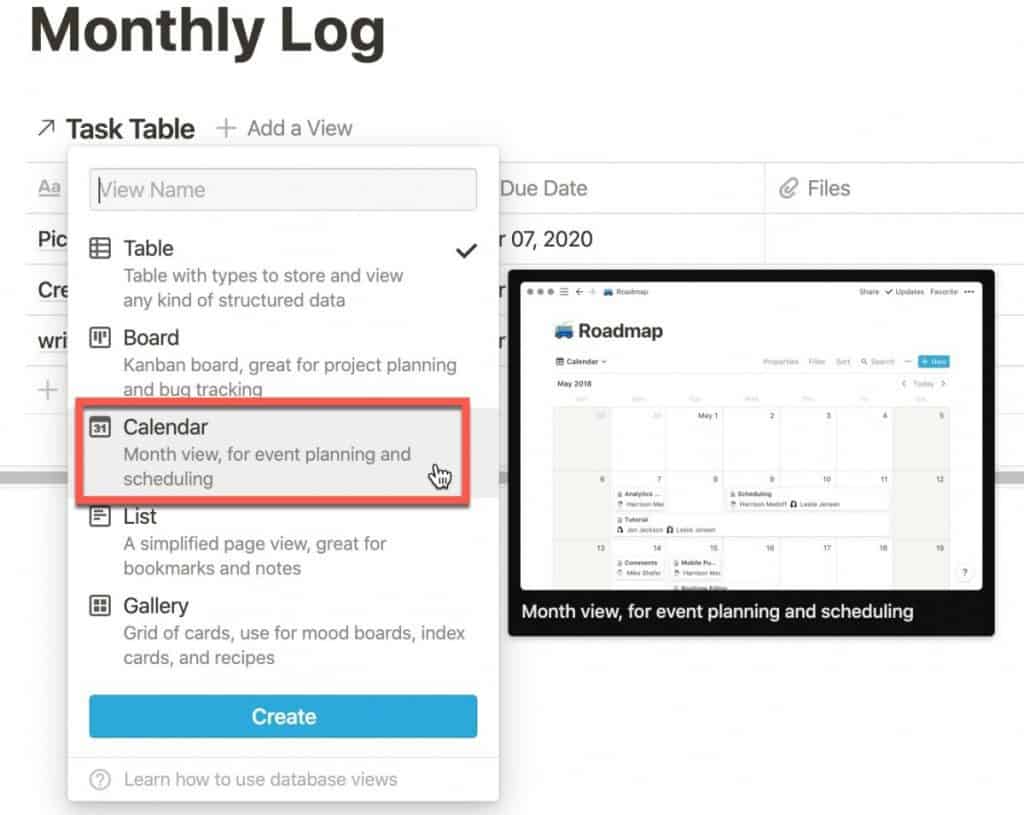
A drop-down menu will appear with a list of view options for your table view. Select “Calendar” from the menu and click the “Create” button.
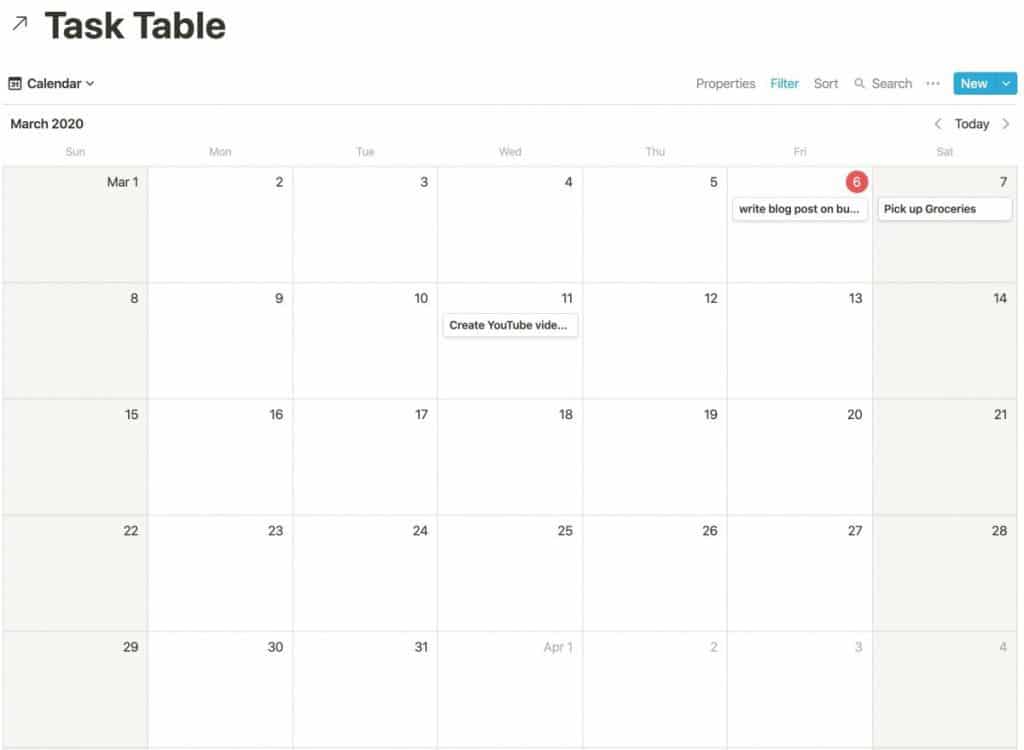
You should now see a calendar with your tasks for the month in it. Pretty cool, right?
Now you might think you know need to add another view for a list view of tasks due for the month but nope you don’t!
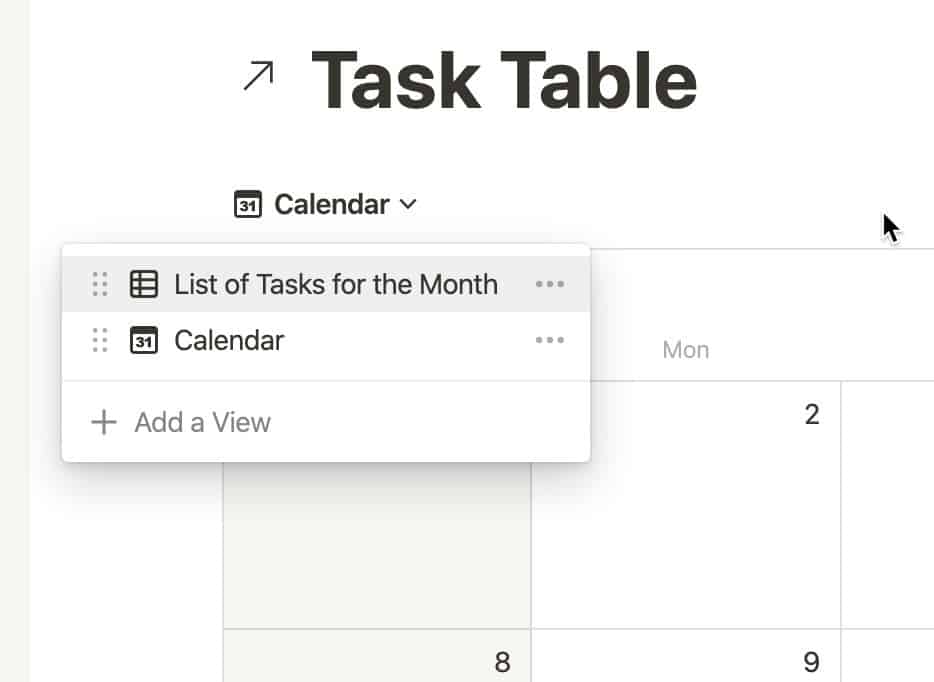
Simply click on the view name like in the screenshot above and select the other view to see the list view.
The ability to view your master task data in multiple ways using different view options and filters is very powerful.
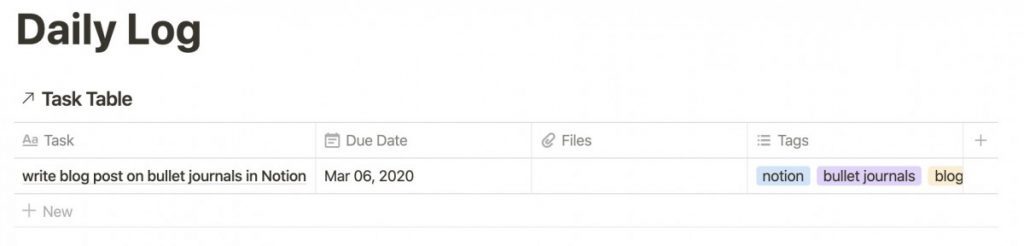
Daily Log
Sometimes you just want to see everything that needs to get done today. That is what the Daily Log is for. Let’s set up our Daily Log page.
Open your index page. Click in the body of the page and type “/page” and select Page to create a new sub-page.
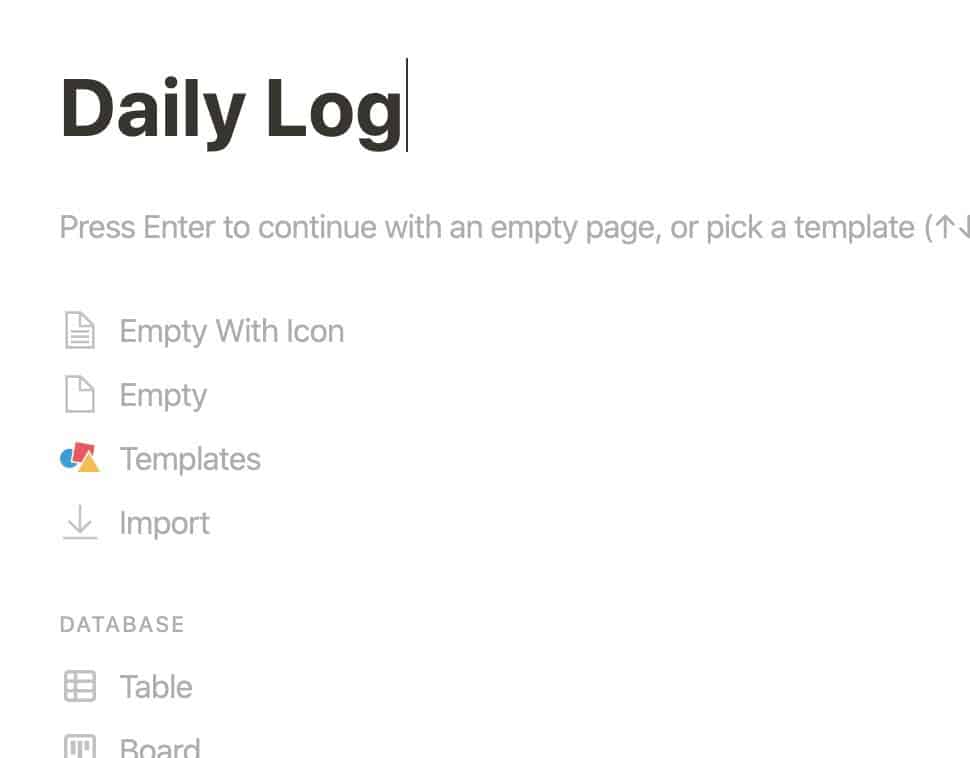
Click on the Title heading and type “Daily Log” and press enter.
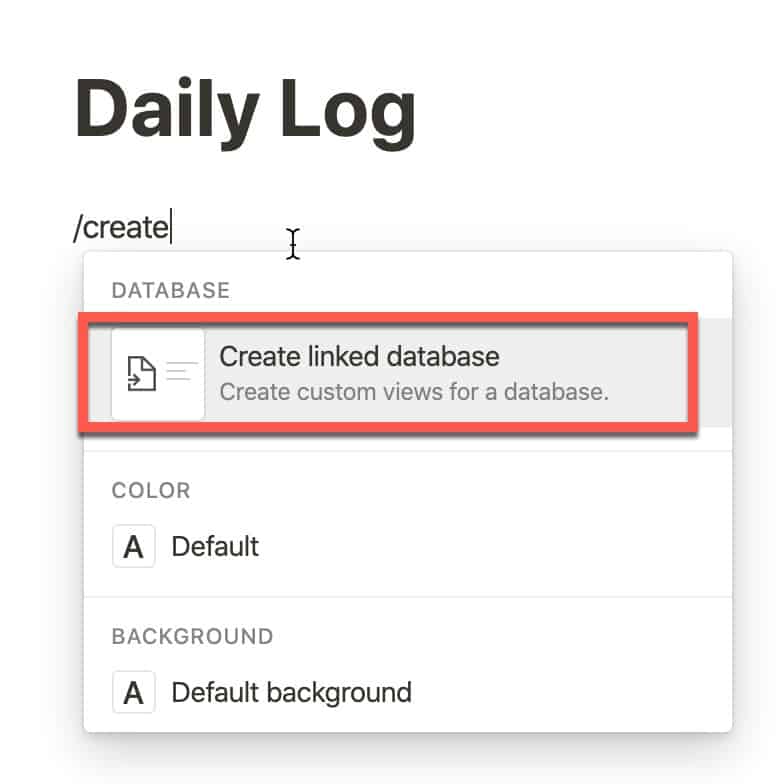
In the body of the page, type “/create” and select “Create linked database“.
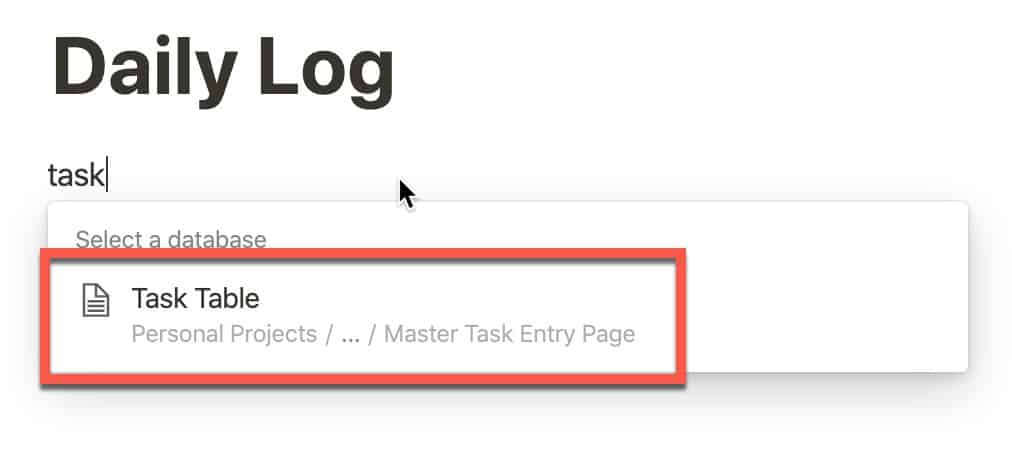
The “Search for a database” menu will appear. Type in the name of your database (Task Table for mine) and select it.
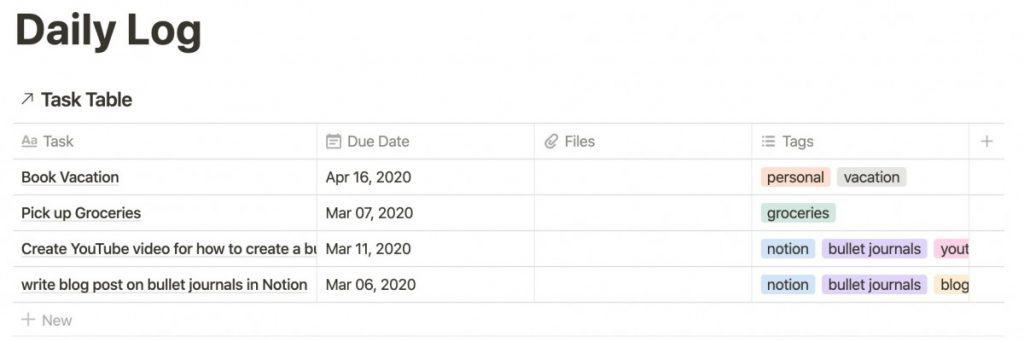
The table will appear. Now we will build a filter to only show us the tasks due today.
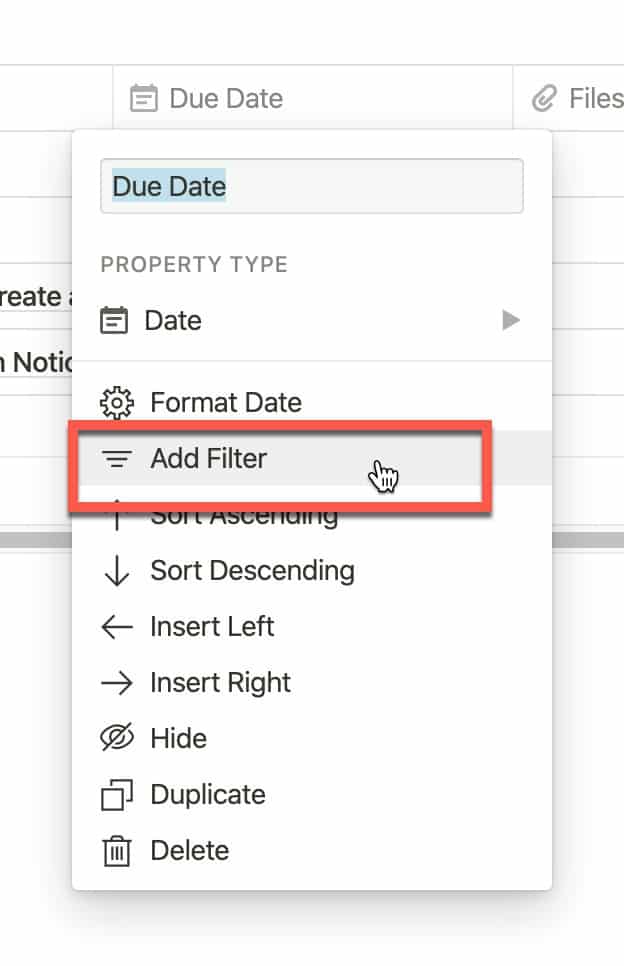
Click on the “Due Date” column header and select “Add filter“.
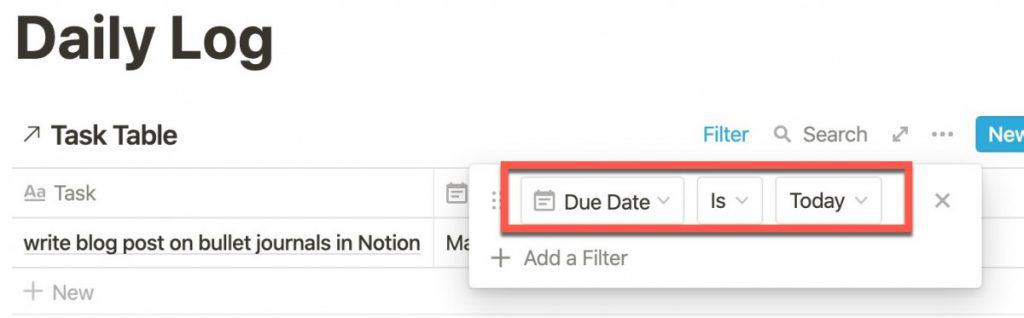
Change the “Exact Date” filter to “Today“.
You should now only see tasks that are due today.
Summary
Bullet Journaling is a great way to view and track your tasks over time. When you couple it with the power of Notion, you can make your bullet journaling even easier and better.
Want More Tips and Tricks? Subscribe to our Newsletter!
If you haven’t already subscribed, please subscribe to The Productive Engineer newsletter. It is filled with tips and tricks on how to get the most out of the productivity apps you use every day. We hate spam as much as you do and promise only to send you stuff we think will help you get things done.
Check Out Our YouTube Channel!
We have a YouTube channel now and we are working hard to fill it with tips, tricks, how-tos, and tutorials. Click the link below to check it out!
Check out our Resources Page
Check out our resources page for the products and services we use every day to get things done or make our lives a little easier at the link below: