How to Use the Gallery Block in Notion – A Step-by-Step Guide
Galleries in Notion allow you to create image-oriented collections of information and present them in a visually pleasing way. Galleries are a type of database and can leverage the same customization capabilities as traditional databases in Notion. This step-by-step tutorial will teach you everything you need to know to get started using galleries in Notion effectively.
So, how do you create a gallery in Notion? Enclosed below are the list of steps needed to create a gallery in Notion:
- Open Notion to the page where you want the Gallery to appear
- Type /gallery and select either “inline” or “full-page” depending on whether you want the gallery to be on an existing page or its own page
- The gallery block should appear. Configure each card by clicking on it and editing it.
If you are looking to master Notion, William Nutt of Notion.vip is creating a new course: Notion A-to-Z. Notion A-to-Z is a masterclass on all things Notion and is a must if you want to truly master Notion. Notion is actually coming out with a Notion certification for everyday users and William is the person developing it for Notion. What better way to prepare than to take William’s course? For more information about the course, please visit the link below:
Notion A-to-Z – From the creator of Notion VIP and Notion’s expanding certification programs
If you are just starting out with Notion and aren’t sure where to get started, you really need to check out my comprehensive beginner’s guide to Notion. It goes through all things you need to know to get started the right way. Enclosed below is the link to the guide:
Link to Beginner’s Guide to Using Notion With Screenshots
Looking for some information on the power of Notion? Check out our article containing tips to help you become a power user of Notion at the link below:
Let’s get started with the tutorial 😀.
Creating a Gallery in Notion
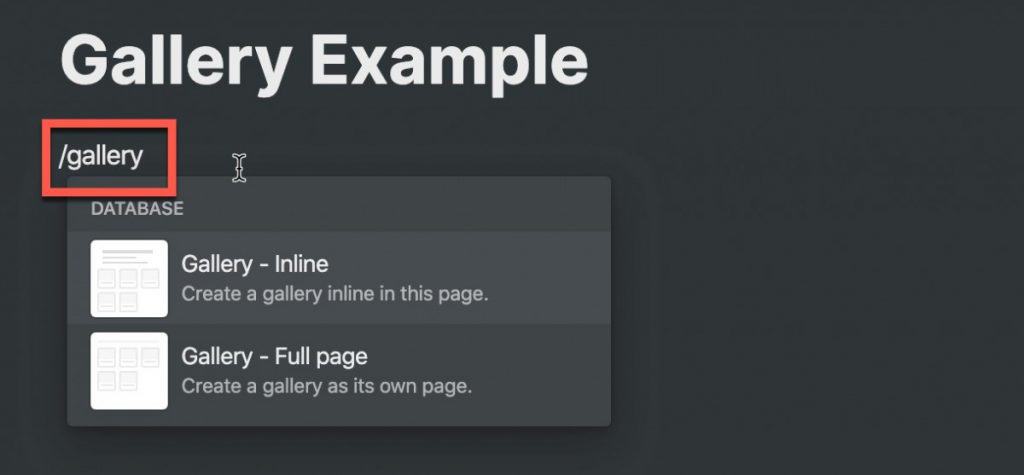
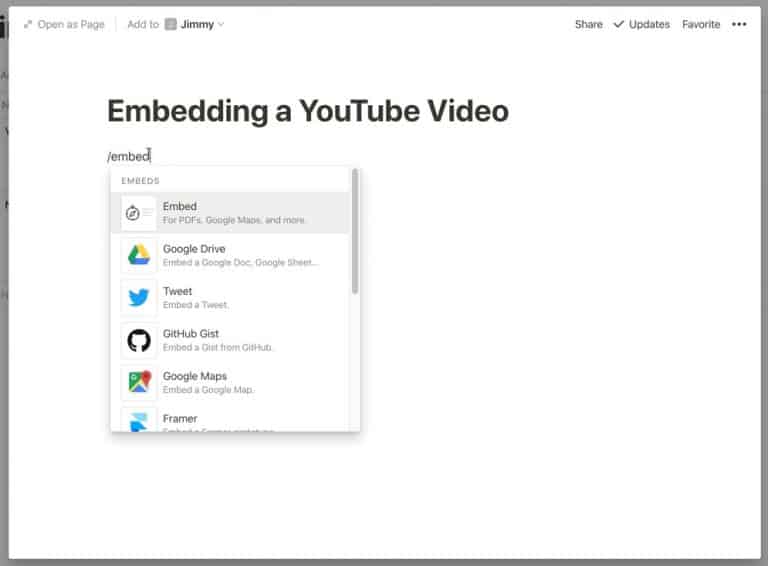
Creating a gallery in Notion is simple. Open the page in Notion where you want your gallery to appear. Simply type “/gallery” as shown in the screenshot above.
You will be presented with two options:
- Gallery – Inline
- Gallery – Full page
An inline gallery will appear on the current page you are on. A full page gallery will create a new sub-page on your current page containing your gallery.
Select which type of gallery you want by clicking on it.
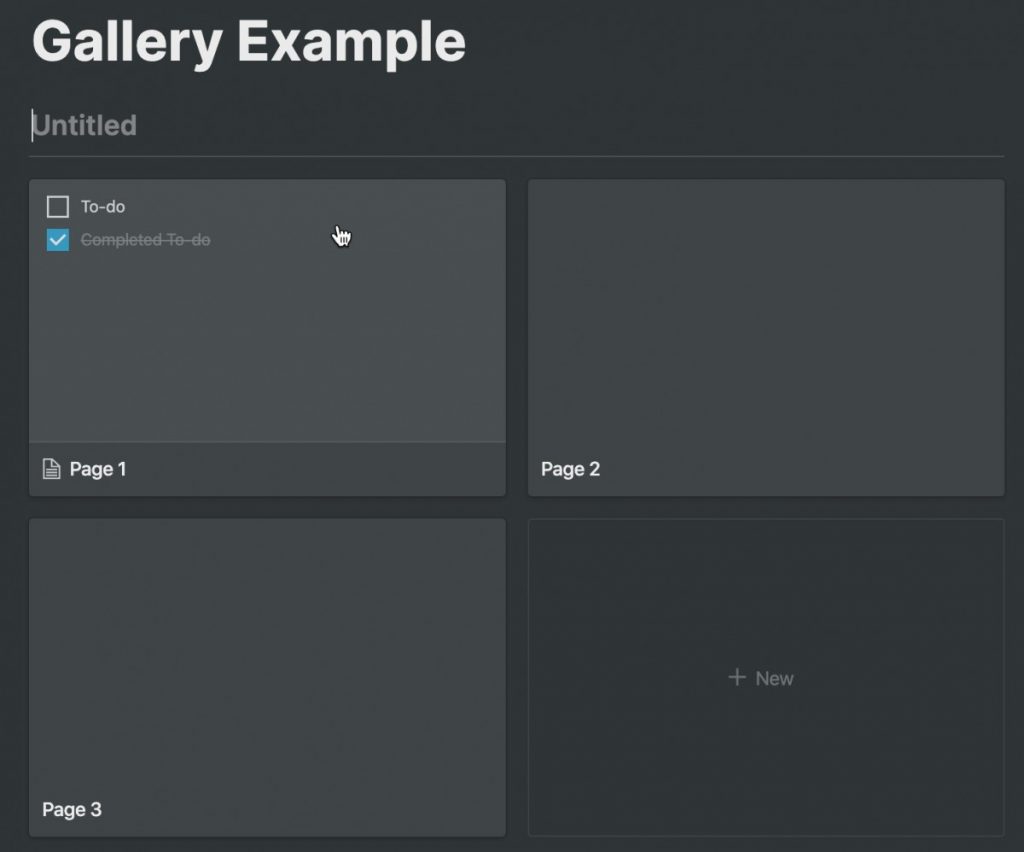
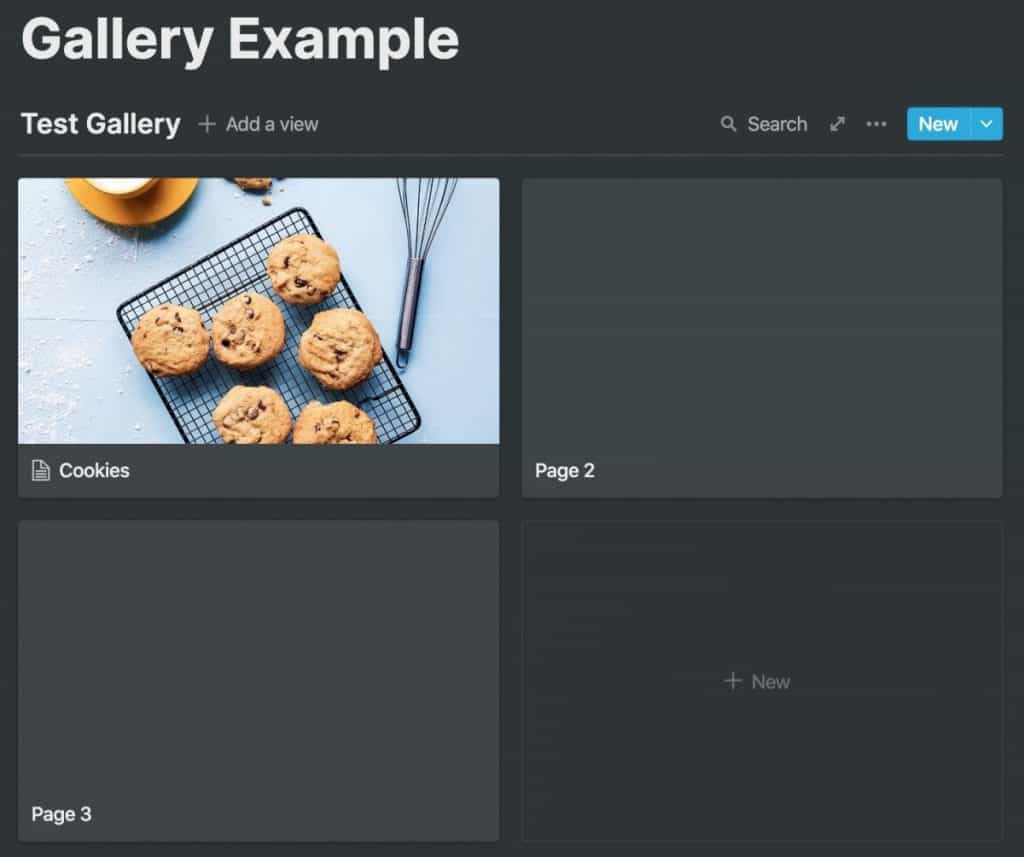
Your Notion page should look like the screenshot above. By default, Notion provides three cards:
- Page 1 -> contains two checkboxes
- Page 2
- Page 3
You can edit these cards (which we will do in a minute) or simply delete them. There is also a box that contains the text “+ New” that allows you to create a new card by simply clicking on it.
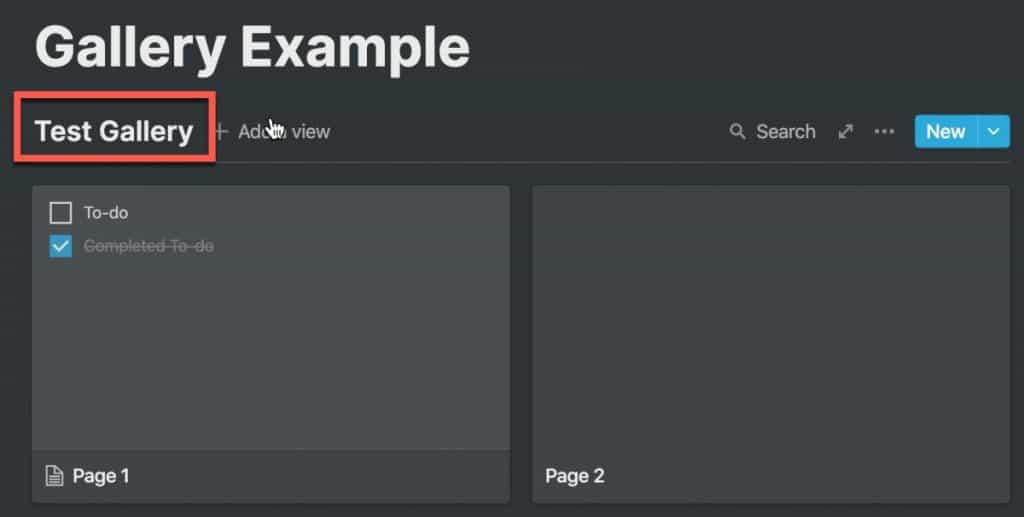
Let’s give our gallery a title. Click on the text box marked “Untitled“. Type in a name for your gallery and press Enter.
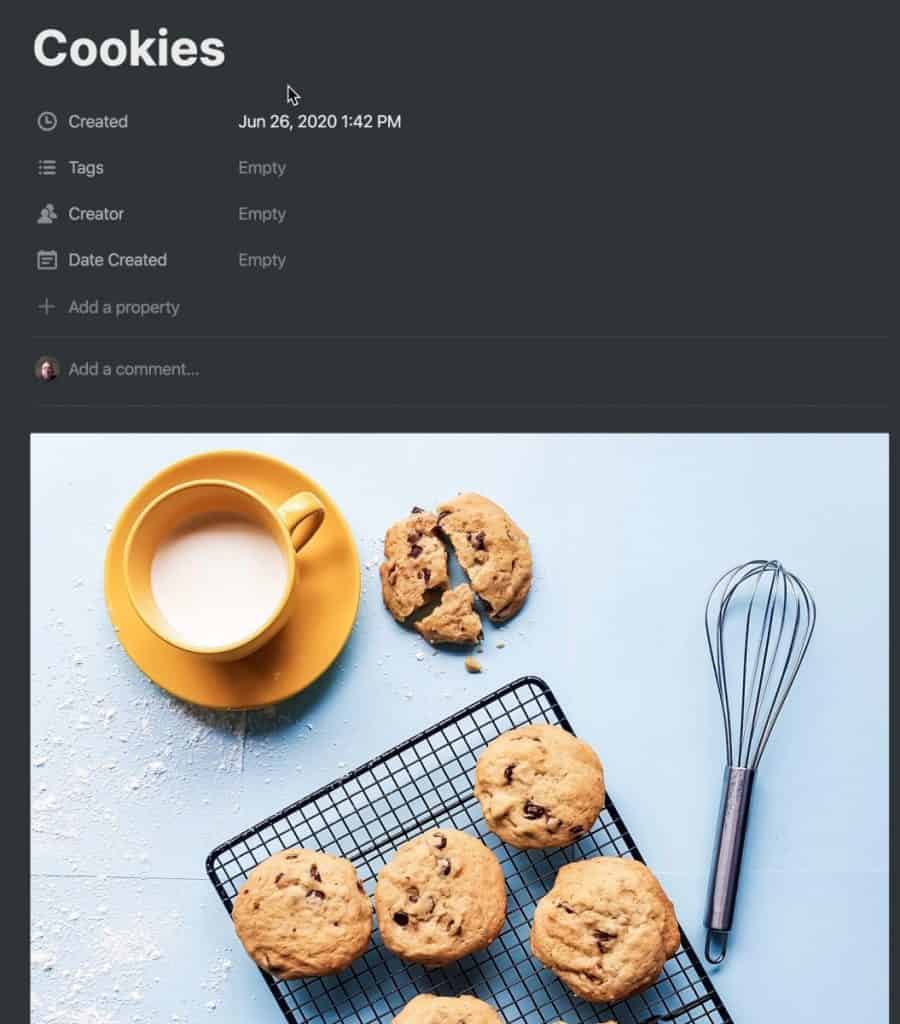
Editing a Gallery Card in Notion
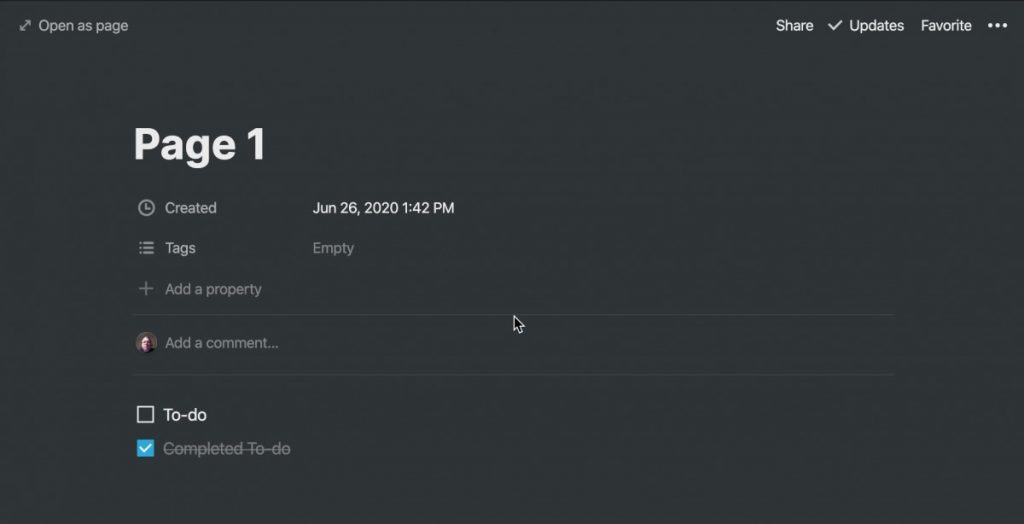
It is important to remember that a gallery is a database, just like any other database type in Notion (Board, Calendar, Table, etc.). As such, think of each card in your gallery as a row in your database. You can fill it with all the same stuff that you can in a table.
Each card comes with two default properties:
- Created
- Date Created
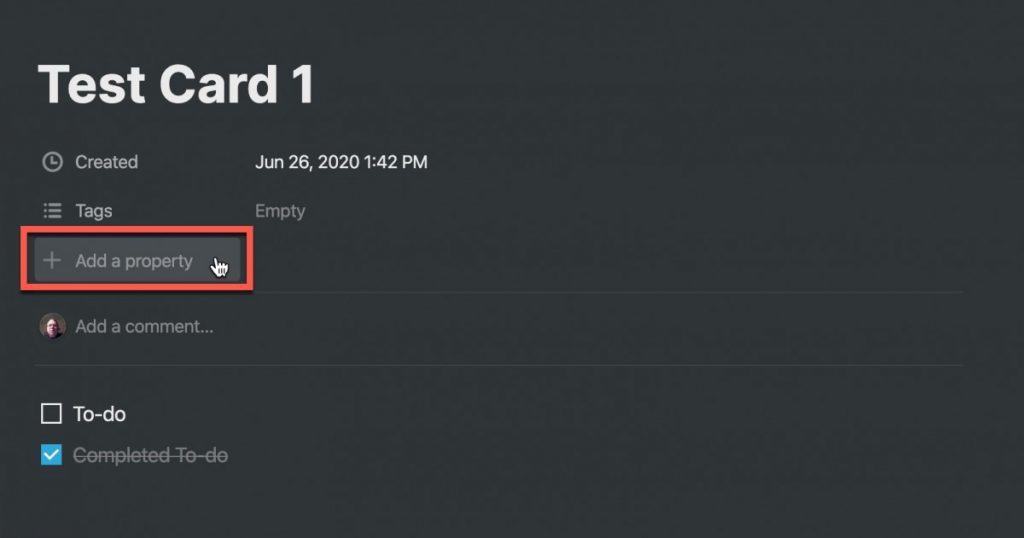
To add more properties, click on the “+ Add a property” button and configure your property.
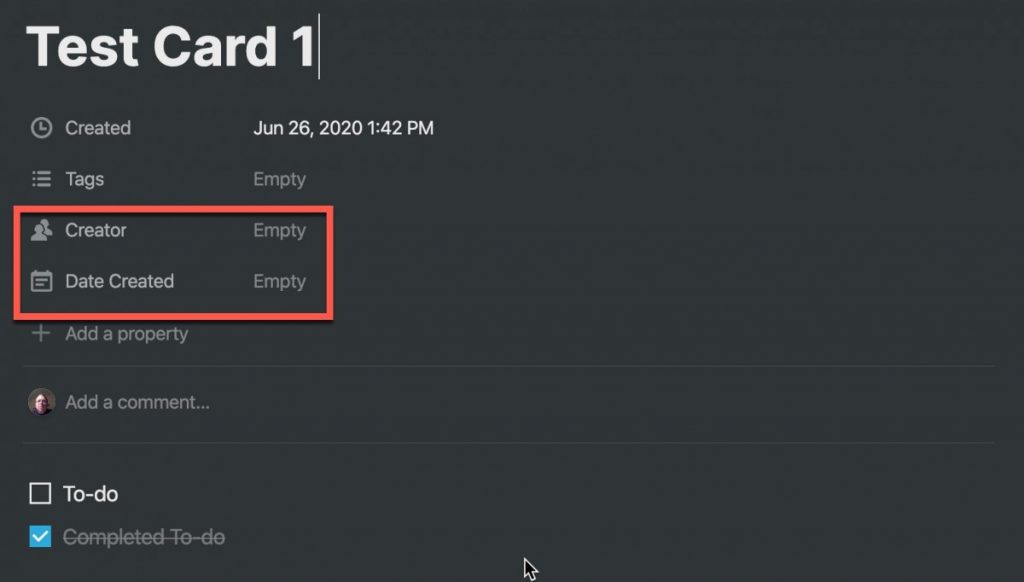
Once you have added properties to your card, those properties will automatically be added to all the other cards in your gallery.
If you are looking to learn on the go, Audible is for you. Audible has a huge library of audiobooks on a variety of topics and listening to audiobooks is a great way to learn on the go. Audible includes podcasts and Audible Originals as well. For more information on Audible, click the link below to get your first 30 days on Audible for free:
Audible – Your First Audiobook is On Us
Adding an Image to a Gallery Card in Notion
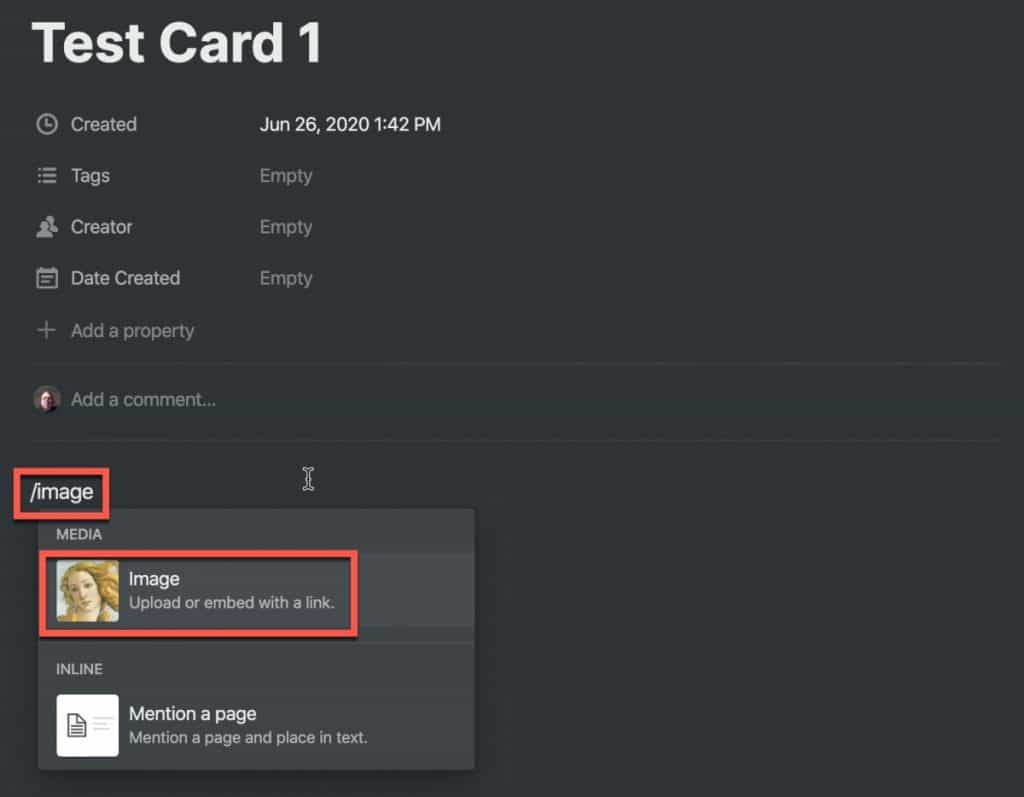
Let’s add images to our cards (after all, it is a gallery). To add an image to your card in Notion, simply click in the body of the card and type “/image“. Select Image from the menu by click on it.
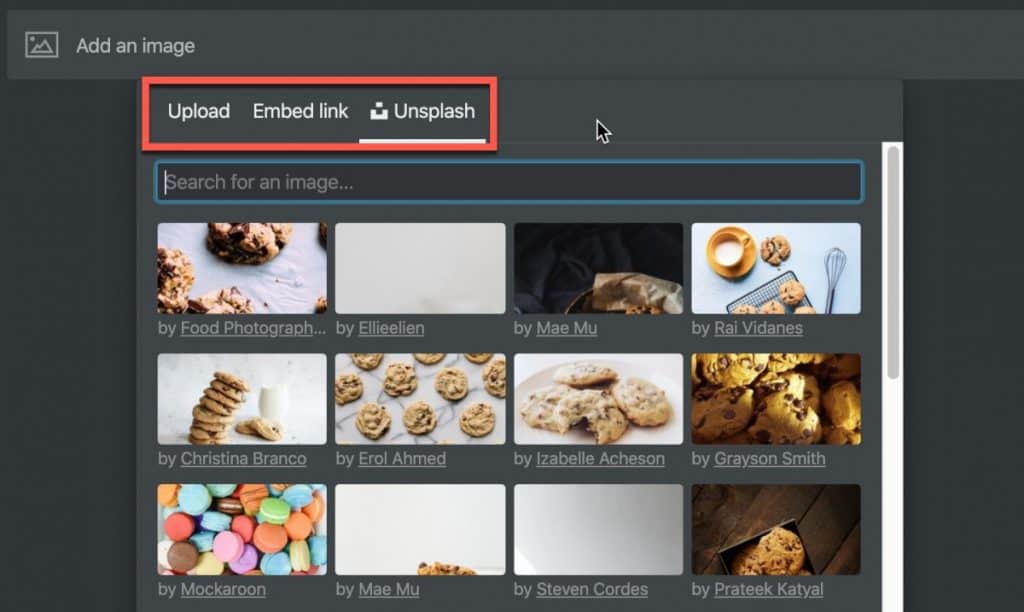
You will be presented with a tabbed menu with three options:
- Upload -> Allows you to upload your own images
- Embed Link -> Allows you to provide URL of an image on the web
- Unsplash -> Photo service only available on paid Notion plans
Add your image and it should appear on your card as shown below:
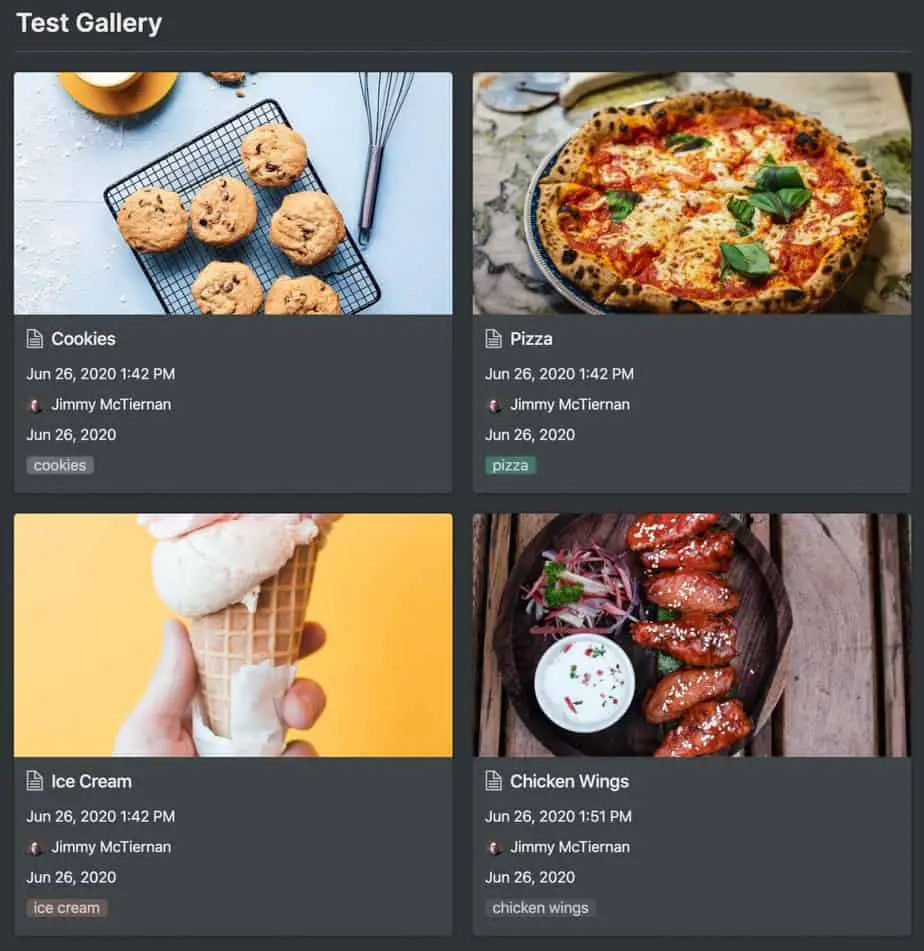
Your gallery should now look kind of like the screenshot above. Now edit the remaining cards and add a new card and add images just like we did with the first card.
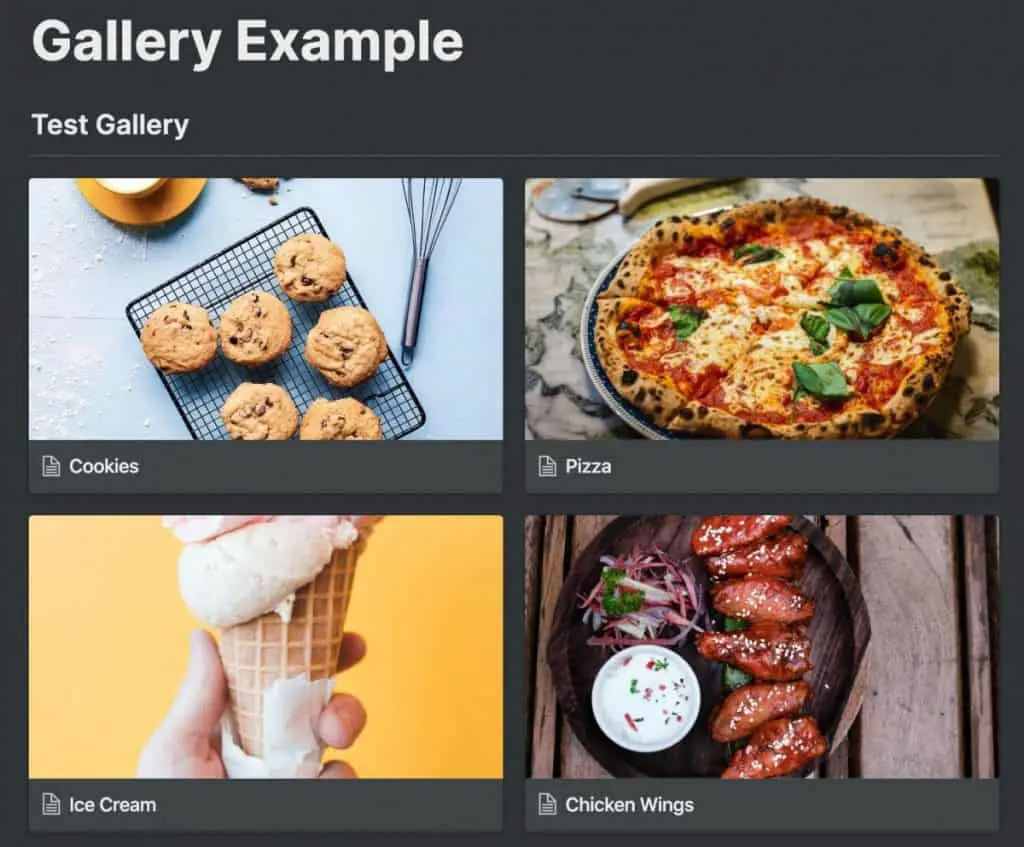
Your gallery should now look like the screenshot above (albeit it might not have images of food 😀).
If you are looking for a system for setting up your Notion Workspace, you should check out The Bulletproof Notion Workspace by Notion VIP. It is an excellent organizational system that provides a strong framework for setting up Notion. You can either manually setup the system using the above video as a reference or purchase the fully developed templates from the link below:
The Bulletproof Notion Workspace – Notion VIP
If you do choose to purchase the templates, use my coupon code productiveengineer for $50 off.
Customizing the Look of Your Gallery Card in Notion
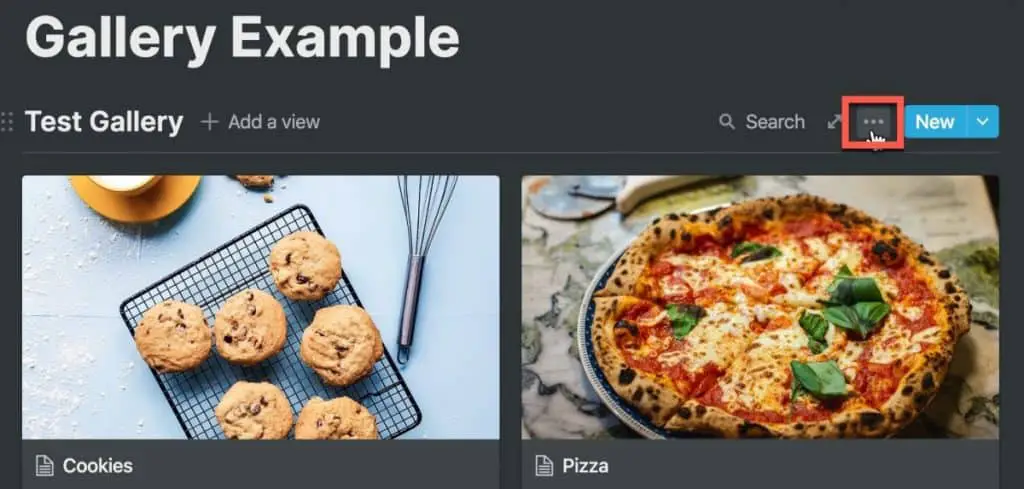
Now let’s talk about customizing how the cards in your gallery look. To get started, hover over your gallery and click on the ellipsis (…) to bring up the menu.
A menu will appear. Select “Properties” by clicking on the option in the menu as shown in the screenshot above.
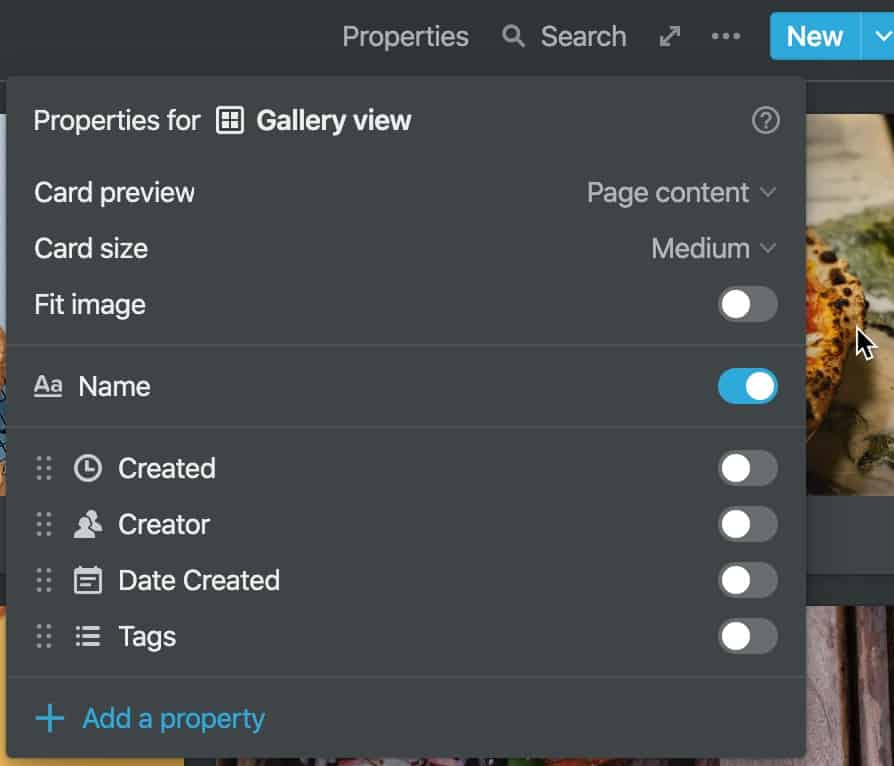
The properties menu will appear. It contains the following parameters that you can configure:
| Property | Description |
|---|---|
| Card Preview | Toggles on/off showing image of card in gallery view |
| Card Size | Adjusts the size of the card |
| Fit Image | Allows you to fit the entire image in gallery view |
| Name | Toggles viewing of name under card on/off |
| Properties on Card | Toggle viewing of each property on card on/off in gallery view |
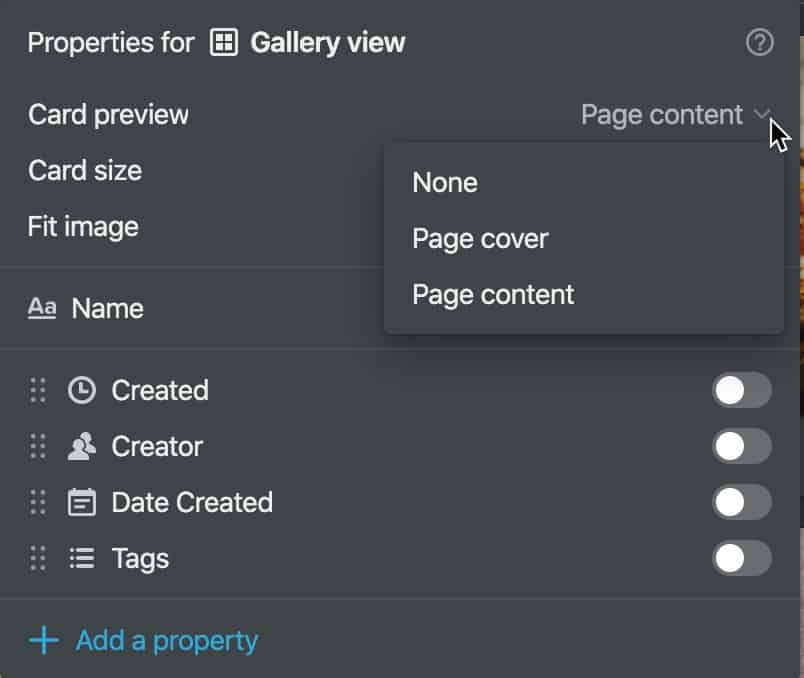
The card preview property provides 3 options:
- None – No image appears in Gallery view
- Page Cover – Shows the page cover as the image in gallery view
- Page Content – Picks first image in body of card for viewing in gallery view
Page Content is the default setting.
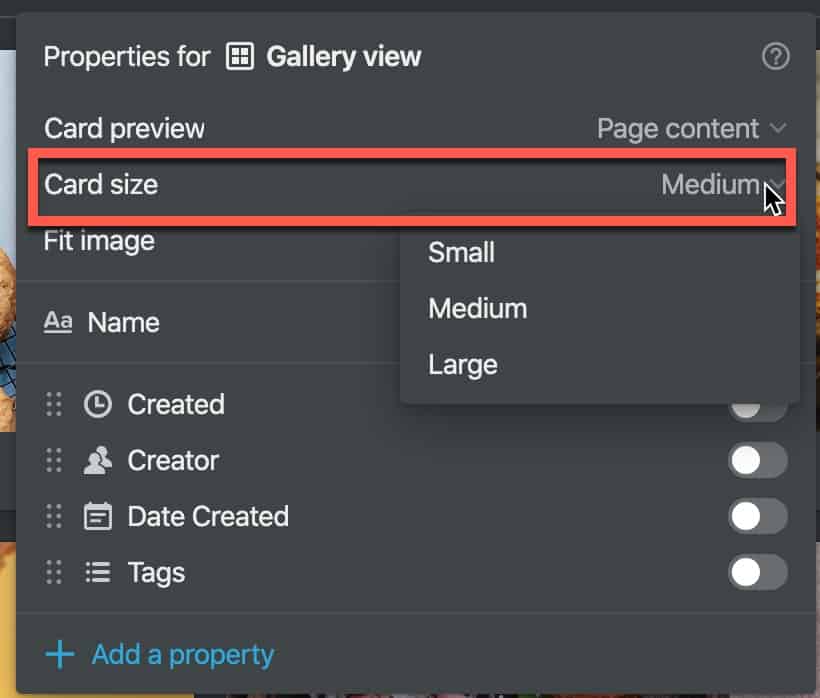
Card size allows you to adjust the size of the card in gallery view. It provides three options:
- Small
- Medium
- Large
Medium is the default setting.
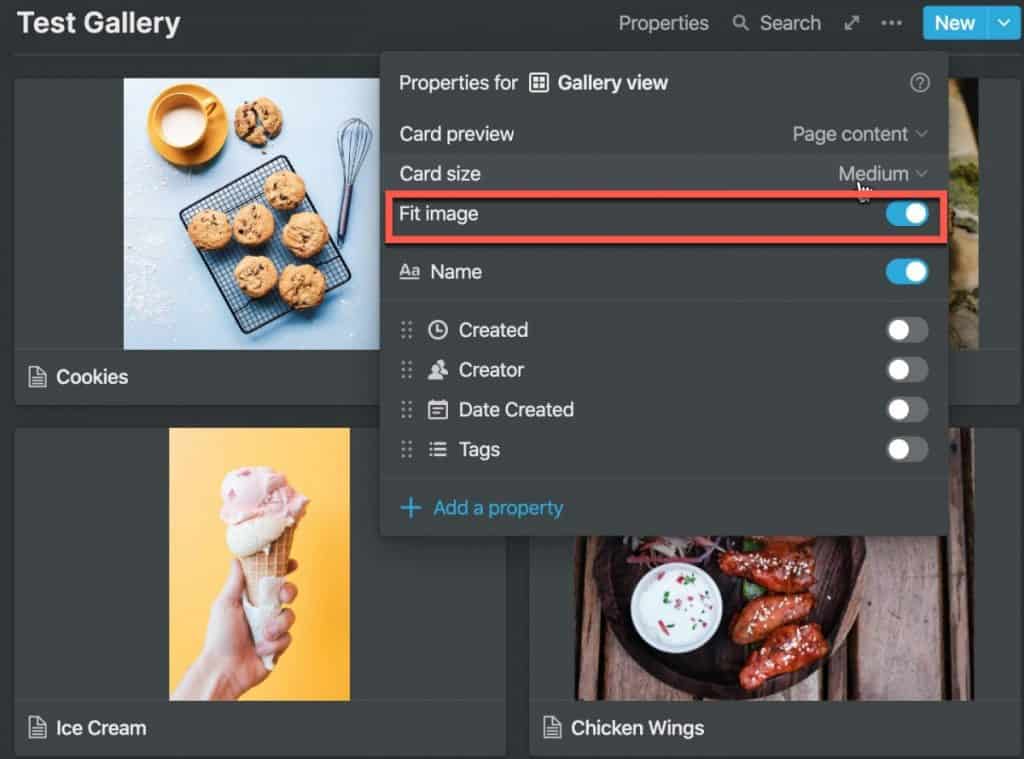
Fit image scales the image so that the entire image in the gallery view. As you can see in the screenshot above, it varies how the gallery looks.
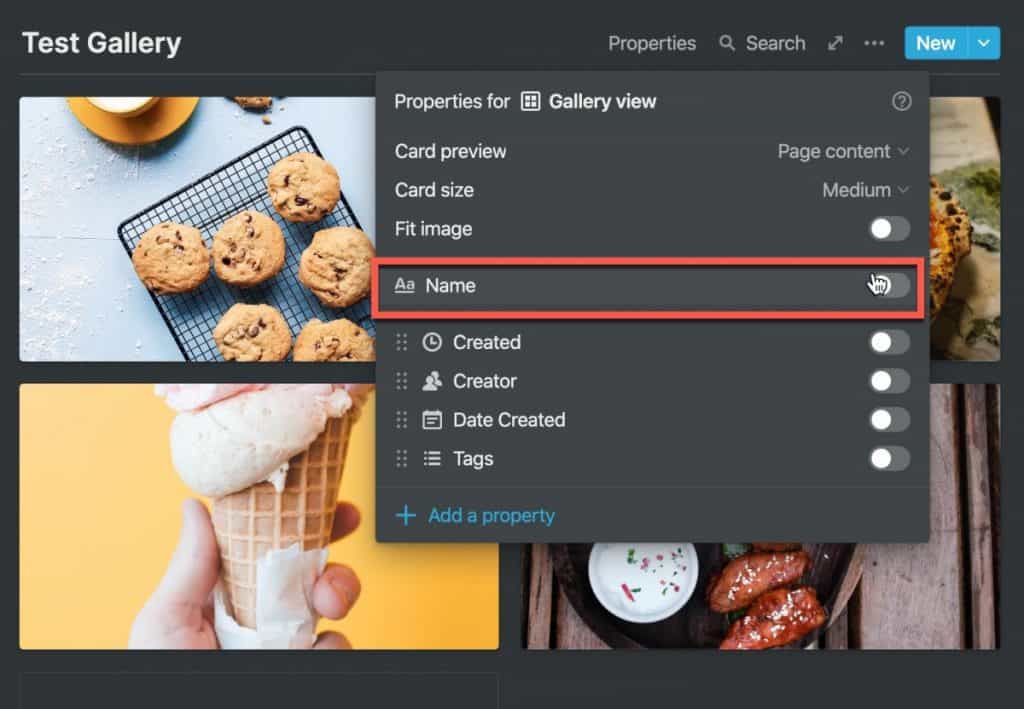
Name allows you to toggle the name on/off underneath the image of the card as shown above.
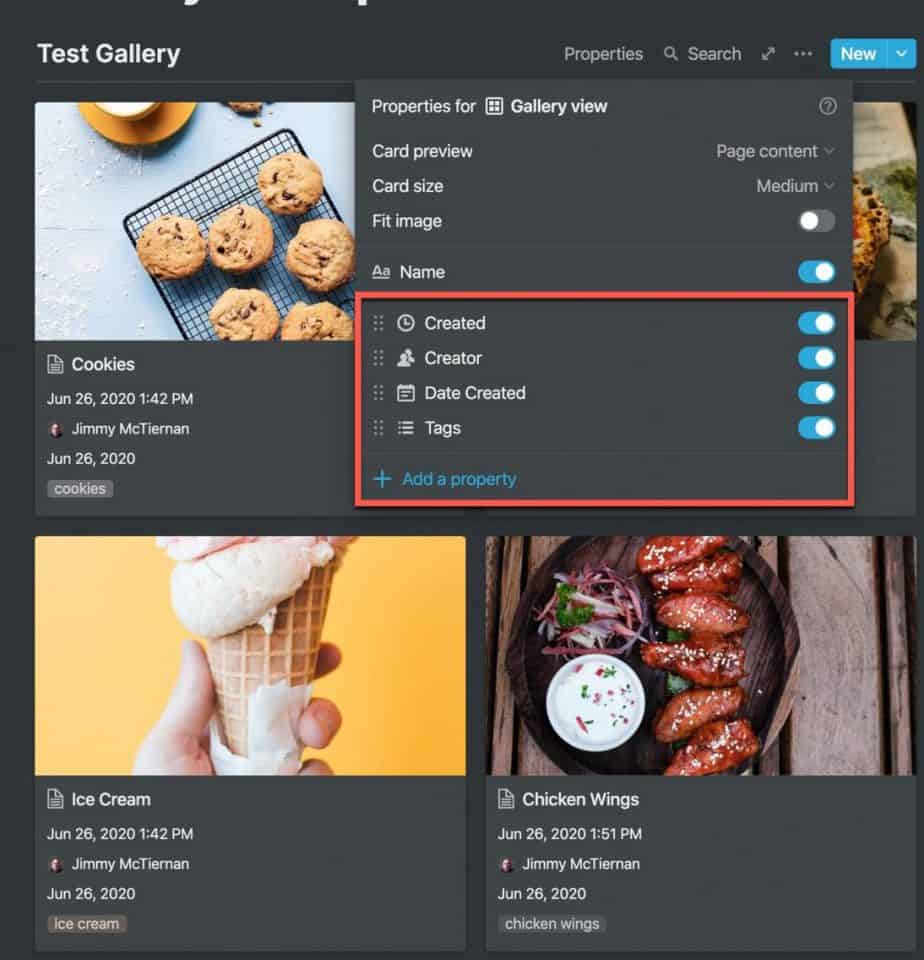
Additionally, you can toggle each property type of your cards on/off. In the screenshot above, I toggled all of the properties on and, as you can see in the screenshot above, they all show up underneath the image in the gallery view.
Summary
Galleries in Notion are great for idea boards, dream boards and other information that would benefit from being displayed in an image-oriented manner. I hope this tutorial was helpful to you. If you are just getting started with Notion, check out my beginner’s guide to Notion video below. It starts at the very beginning assuming you know nothing about Notion and covers all the various pieces of Notion.
Want More Tips and Tricks? Subscribe to our Newsletter!
If you haven’t already subscribed, please subscribe to The Productive Engineer newsletter. It is filled with tips and tricks on how to get the most out of the productivity apps you use every day. We hate spam as much as you do and promise only to send you stuff we think will help you get things done.
Check Out Our YouTube Channel!
We have a YouTube channel now and we are working hard to fill it with tips, tricks, how-tos, and tutorials. Click the link below to check it out!
Looking to Get Started Blogging or on YouTube?
Getting started can seem daunting and scary (I know it was for me) but it doesn’t have to be. I was very lucky to find a program that that has helped me grow my blog to over 35,000 page views and a YouTube channel that is growing at over 100% month-over-month.
Income School is the program that I have used. I have been a member for over a year now and just renewed my membership. I cannot recommend Income School enough! For more information on Income School, click the link below:
Income School – Teaching You How to Create Passive Income from Blogs and YouTube
Check out our Resources Page
Check out our resources page for the products and services we use every day to get things done or make our lives a little easier at the link below: