Relations and Rollups in Notion – The Ultimate Guide
Notion is one of my favorite tools in my productivity toolbox. It is so flexible and using the database functions in Notion really feels like having a superpower. Two of the biggest reasons why it feels this way are relations and rollups. Relations allow you to create a relationship between two different databases. Rollups allow you to derive values from fields in other databases.
To quickly create a relation in Notion, do the following:
- Open Notion to the database you want to create a relation on
- Click the “+” button in the last column of your database
- Click in the text box and type in a name for your relation
- Click on “Text” under “Property Type” and select “Relation“
- Click the “Select a Database” dropdown
- Start typing in the name of the database you want to connect to your database and select it from the drop-down menu
- Click the “Create relation” button to create the relation
Before we get started with the tutorial, if you are looking to learn more about apps like Notion, Todoist, Evernote, Google Docs, or just how to be more productive (like Keep Productive’s awesome Notion course), you should really check out SkillShare. Skillshare is an online learning platform with courses on pretty much anything you want to learn. To learn more about Skillshare and its vast library of courses and get 30% off, click the link below:
SkillShare – Online Learning Platform
If you are just starting out with Notion and aren’t sure where to get started, you really need to check out my comprehensive beginner’s guide to Notion. It goes through all things you need to know to get started the right way. Enclosed below is the link to the guide:
Link to Beginner’s Guide to Using Notion With Screenshots
Looking for some information on the power of Notion? Check out our article containing tips to help you become a power user of Notion at the link below:
Let’s get started with the tutorial 😀.
What is a Relation?
As mentioned earlier, a relation allows you to create a relationship (hence the name relation) between two different databases. This allows you to reference data from one database and display/access it in another.
Let’s create a relation in Notion.
Open Notion to the Page Containing Your Tables/Databases
The first thing you want to do is open up Notion to the database that you want to add a relation to.
Creating a Relation in Notion

Scroll to the far right column and press the “+” button to create a new column in your database.
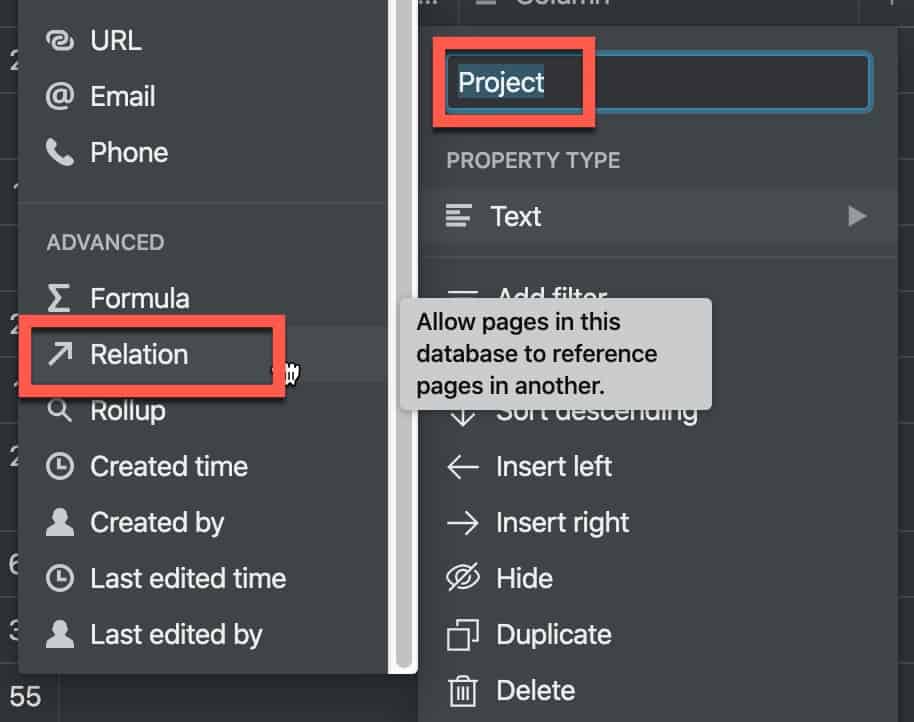
Type in the name you want for the column (for our example, we chose “Project”). Click on “Text” under “Property Type” and select “Relation” in the “Advanced” section of the drop-down menu.

Click on the “Select a database” drop-down.

Type in the name of the database you want to connect to and select it from the drop-down list.

Click the “Create relation” button to create your relation in your database.

Your relation column should now appear in your database as shown in the screenshot above. Notice the arrow before the name of your column (like shown above). The arrow indicates that this column is related to another database.
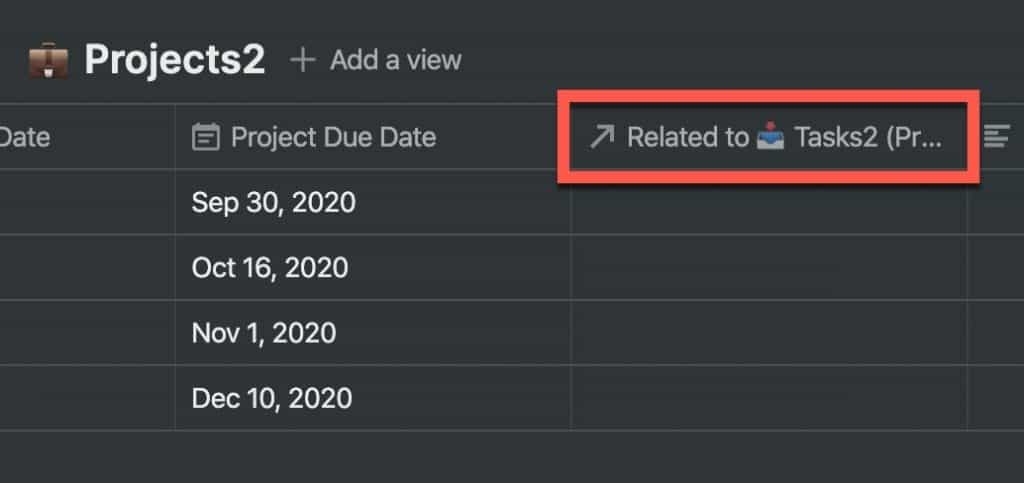
Now, go to the database that you connected your relation to. Notice anything different? You should see a column like the one above in the database. When you create a relation between two databases, a new relation column is added to both databases.

Click on the current name of the relation column and type in a name for it. In my example, this database is a “Project” database that has a relation to a “Tasks” database.

What does this mean? Easiest way is to show you an example.
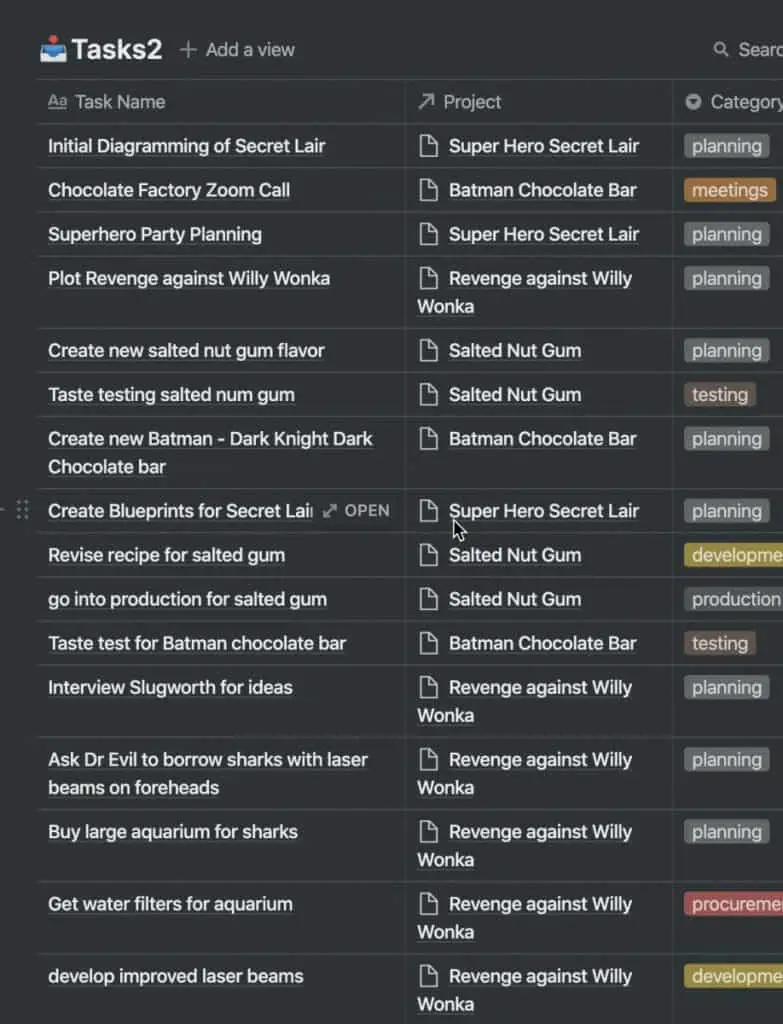
Here is a snapshot of my tasks database that contains a relation to my “projects” database. I added a project to each task by simply clicking on the “Project” field for each task. When I do that, a list of the projects appears and I click the “+” button to add it.
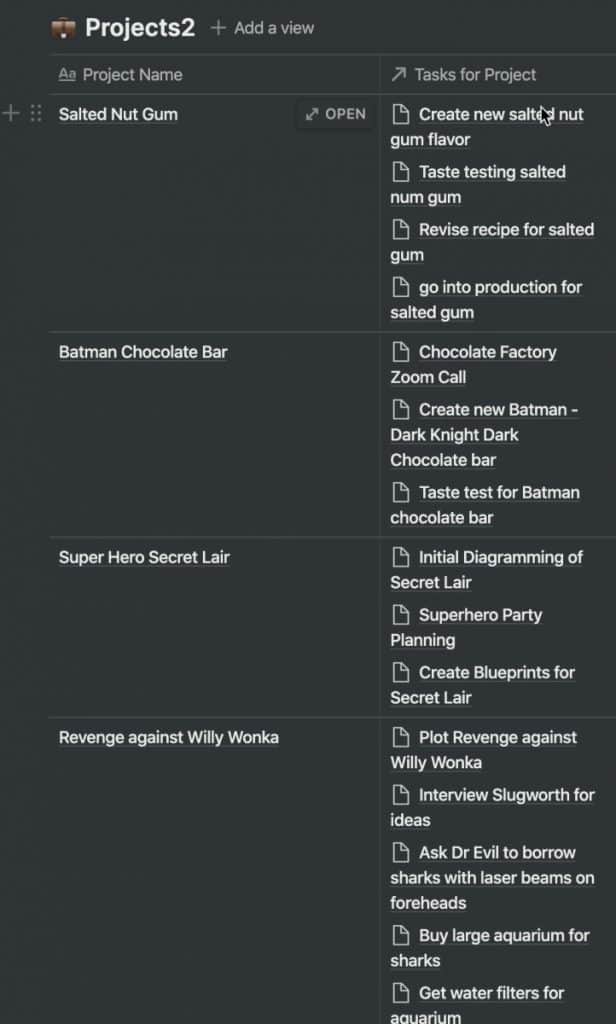
Let’s now look at my projects database. Notice that the relation to my tasks database is now populated. Each task field for each project now contains all of the tasks assigned to each project. As mentioned earlier, relations are bi-directional and when you change the relation on one database, the corresponding database’s relation will be updated as well. Pretty cool, right?
Now that we have covered relations, let’s talk about rollups.
Looking to learn more about synced blocks in Notion? Check out our Ultimate Guide to Synced Blocks in Notion!
What is a Rollup?
Rollups, as discussed earlier, provide the ability to share and create calculations based on values in one database in another database.
Again, the easiest way to explain how a rollup works is to show you so let’s get to it!
Creating a Rollup in Notion
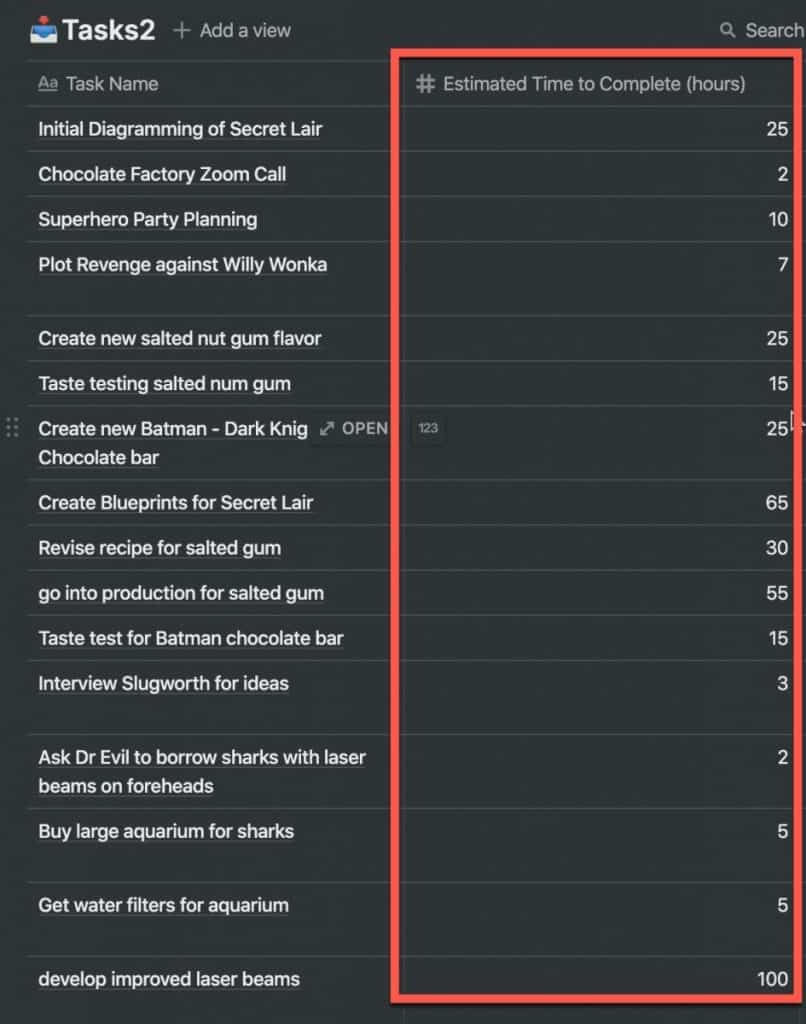
In my example, my “Tasks” database has a column called “Estimated Time to Complete (hour)” that provides an estimate of how much time I think it will take to complete each task. Wouldn’t it be great if I could see this information in my “Projects” database such that I could see how many total hours each project will take based on the sum of all the tasks assigned to each project? This is where rollups come in handy!
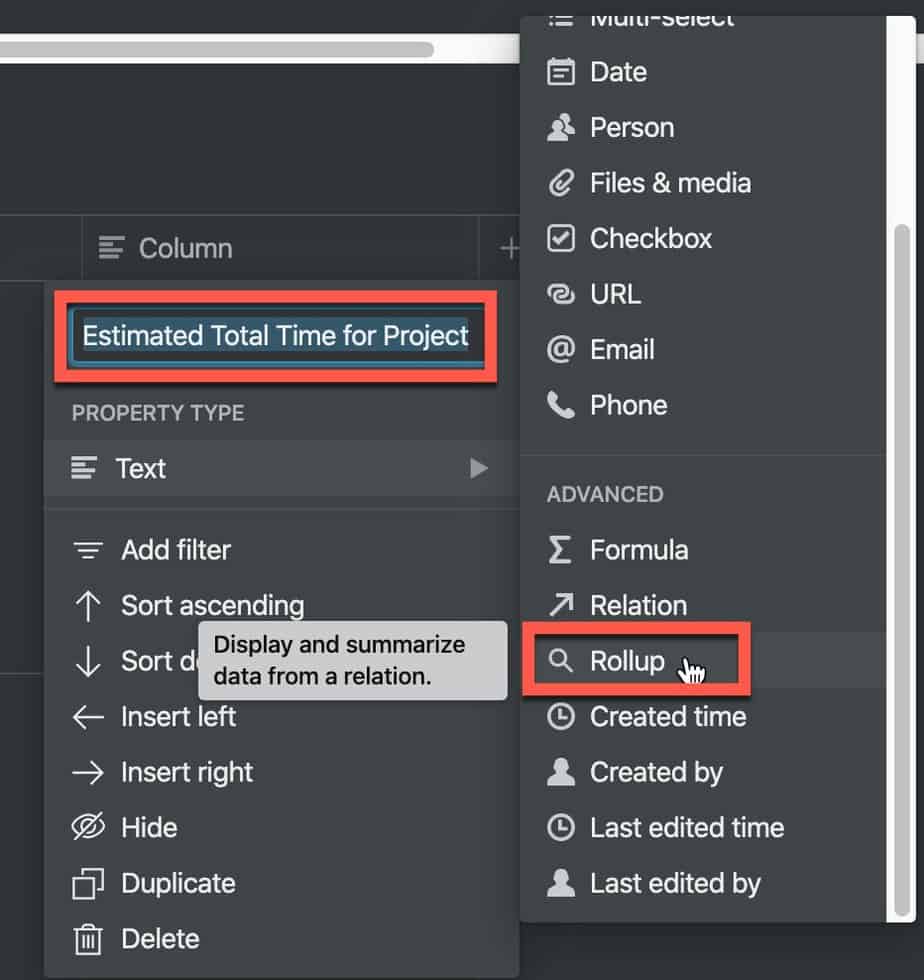
Go to the database you want to add the rollup to (in my case, my “Projects” database). Create a column, give it a name, and select “Rollup” as the property type as shown above.
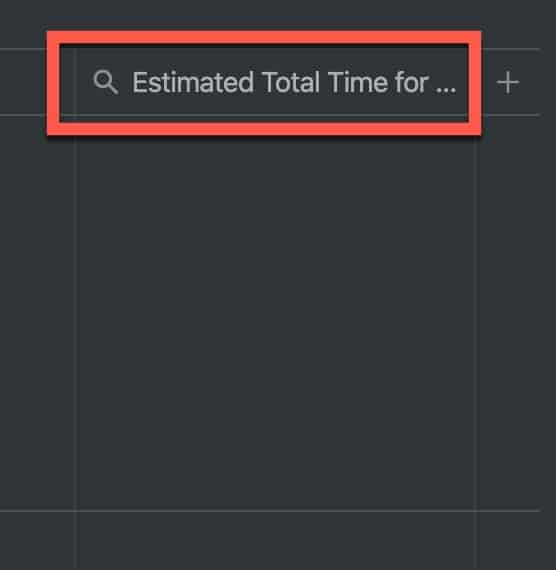
Your new column should appear with a magnifying glass icon in it. This indicates that this column is a rollup of data from another database.
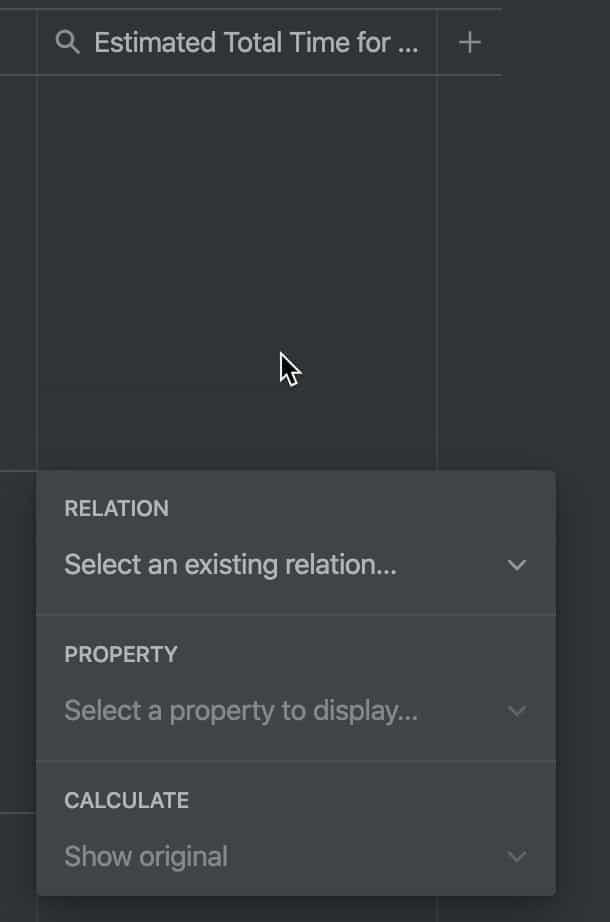
Click on one of the cells in the relation column (“Estimated Total Time” for my example). You will be presented with a pop-up menu with three options:
- Relation
- Property
- Calculate
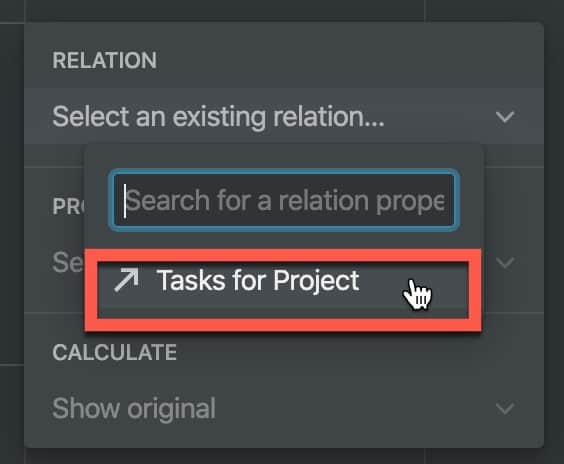
Click on the “Relation” drop-down and select the relation you want to use for the rollup (in our example, the “Tasks for Project” relation).
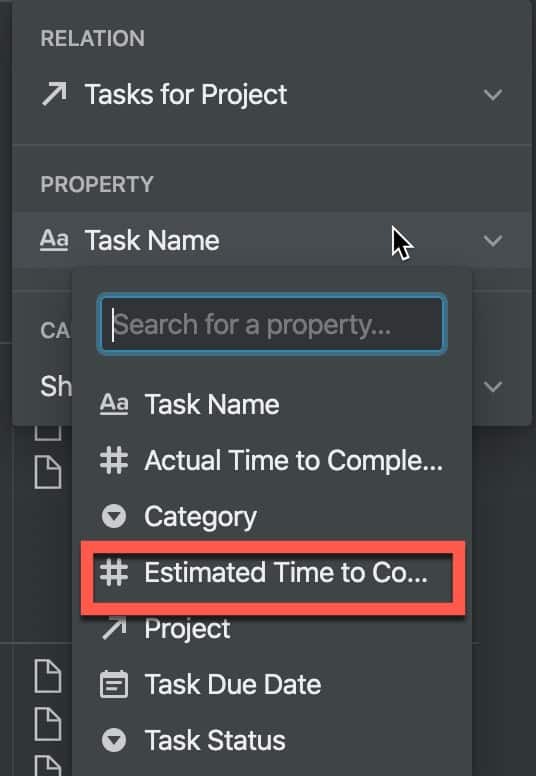
Next, click on the “Property” drop-down and select the field you want to use to create the rollup from. In our example, I want the “Estimated Time to Complete” field so I selected that one.
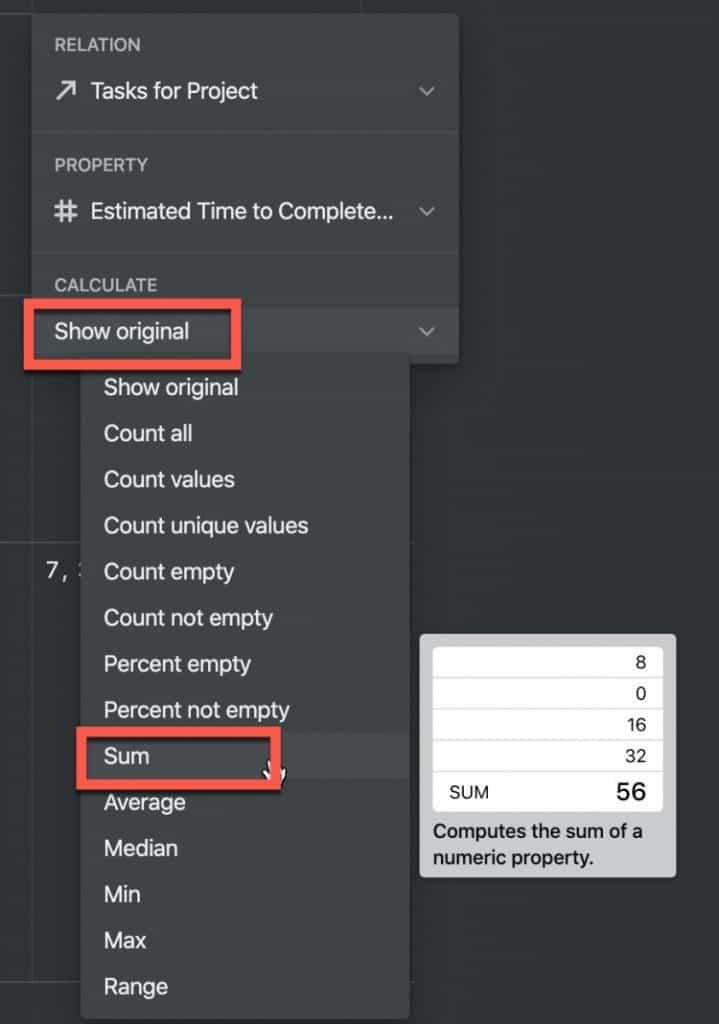
Now, click on the “Calculate” drop-down and select the mathematical function you want to perform on your rollup. In my example, I wanted the total number of hours so I chose the “Sum” option.
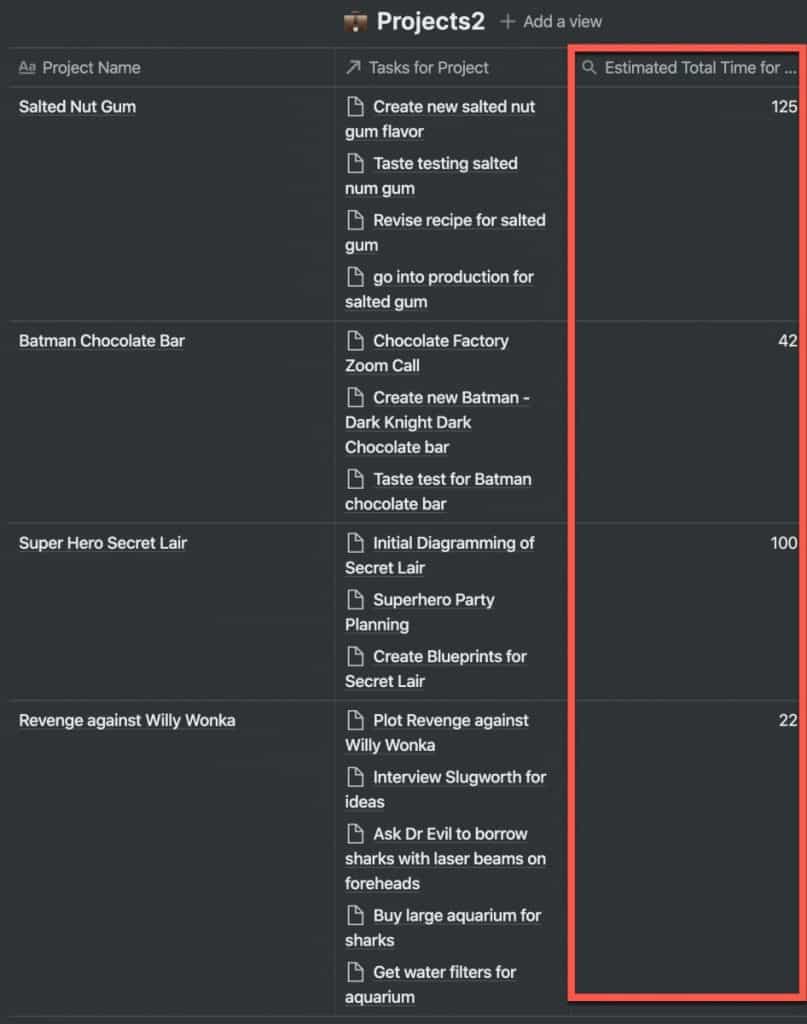
As you can see from the screenshot above, the rollup shows the total hours each project will take. It accomplishes this by adding up all the estimated hours for each task in each project. Rollups can be really powerful and I recommend you experiment with them to see how the might be able to improve your Notion workflow.
Subscribe to Our Newsletter
If you like this article, subscribe to our newsletter. It contains tips and tricks to help you get things done.
Check out our Resources page
Check out our resources page for the products and services we use everyday to get things done or make our lives a little easier at the link below:
Check Out Our YouTube Channel!
We have a YouTube channel now and we are working hard to fill it with tips, tricks, how-tos, and tutorials. Click the link below to check it out!
Looking to automate your productivity workflow? You should check out my Guide to the Elgato Stream Deck. Stream Deck allows you to set up actions that can be enabled by a simple push of a button.
Looking to Get Started Blogging or on YouTube?
Getting started can seem daunting and scary (I know it was for me) but it doesn’t have to be. I was very lucky to find a program that that has helped me grow my blog to over 35,000 page views and a YouTube channel that is growing month-over-month.
Project 24 by Income School is the program that I have used. I have been a member for over a year now and just renewed my membership. I cannot recommend Project 24 enough! For more information on Income School, click the link below:
Project 24 byIncome School – Teaching You How to Create Passive Income from Blogs and YouTube