Timeline View in Notion – Detailed Guide
Notion recently introduced a new way to view your database data, timeline view. Timeline view is essentially a gantt chart view of your database. This sounds complicated but is actually really easy to set up in Notion and this guide will teach you everything you need to know to use the timeline view effectively.
So how do you enable timeline view in Notion? Enclosed below are the steps required to setup timeline view in Notion:
- Open up Notion to your database
- Hover over database and select “Add a View”
- Give view a name and select “Timeline” and click the “Create” button
- Your database will now be in timeline view
- Setup filters and the time interval based on your needs
Before we get started with the tutorial, if you are looking to learn more about apps like Notion, Todoist, Evernote, Google Docs, or just how to be more productive (like Keep Productive’s awesome Notion course), you should really check out SkillShare. Skillshare is an online learning platform with courses on pretty much anything you want to learn. To learn more about Skillshare and its vast library of courses and get 30% off, click the link below:
SkillShare – Online Learning Platform
If you are just starting out with Notion and aren’t sure where to get started, you really need to check out my comprehensive beginner’s guide to Notion. It goes through all things you need to know to get started the right way. Enclosed below is the link to the guide:
Link to Beginner’s Guide to Using Notion With Screenshots
Looking for some information on the power of Notion? Check out our article containing tips to help you become a power user of Notion at the link below:
Notion Timeline View Tutorial
Open up Notion
Open Notion and navigate to to the page that contains the database that you want to add a timeline view to. Please note you can also add a timeline view to a linked database of an existing database as well. More information on how to create and use linked databases can be found in the tutorial linked below:
Using Linked Databases in Notion – A Step-by-Step Guide
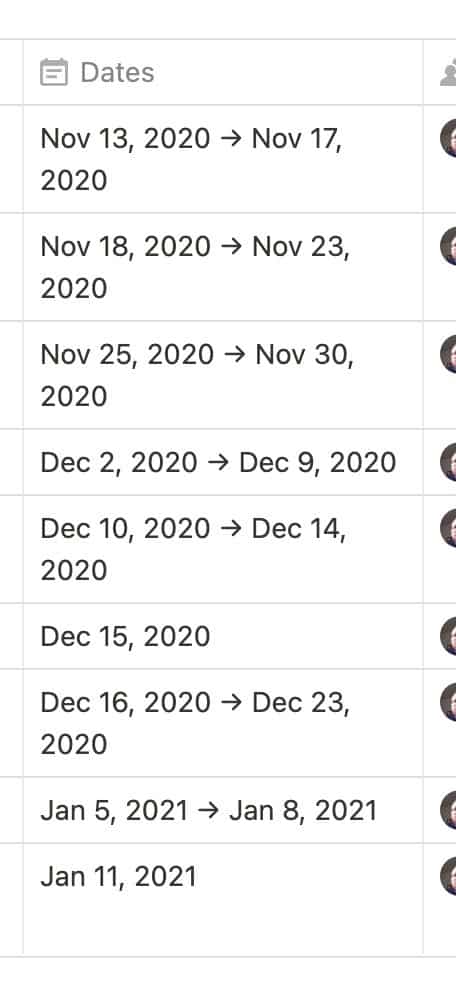
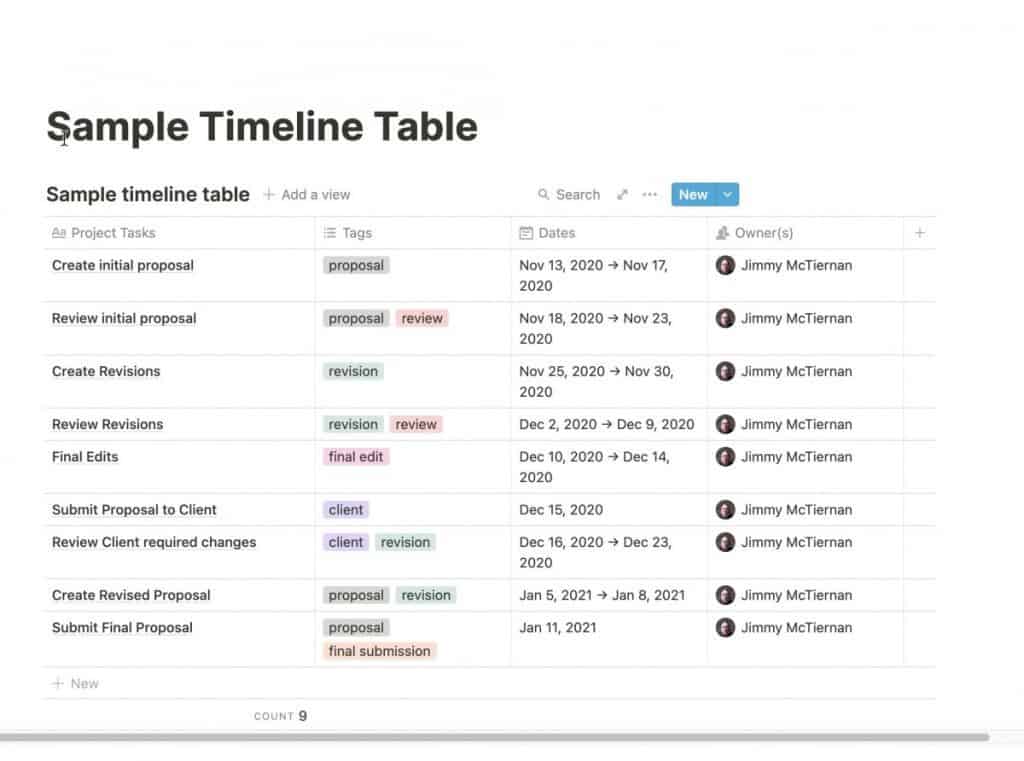
In order to effectively use the timeline view in Notion, your database should have a least one column that is a date property type. The timeline view uses dates as the basis of its view.
Adding a Timeline View to a Database in Notion
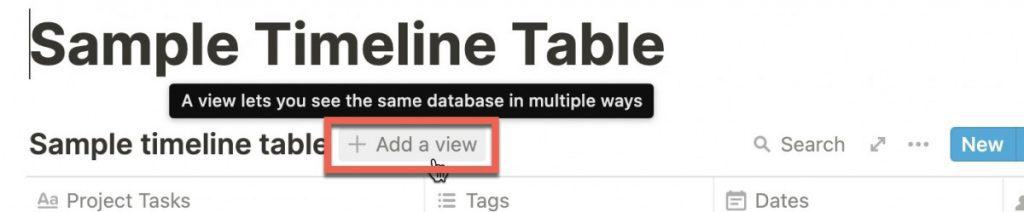
To add your timeline view to your database in Notion, hover your mouse over the database. An “+ Add a view” button should appear as shown in the screenshot above. Click on the “+ Add a view” button”.
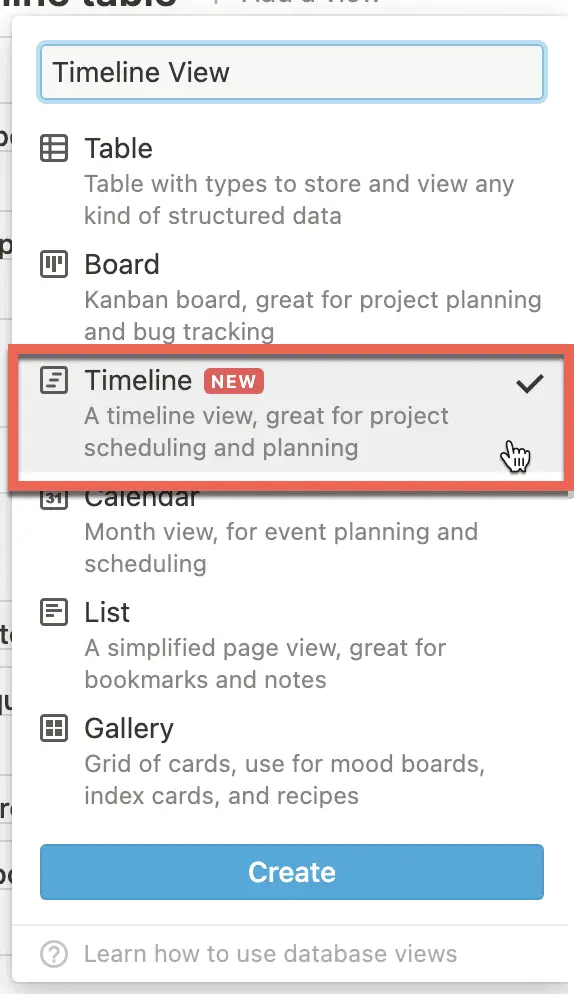
A menu listing the database view types for Notion will appear. Give your view a name and click the “Create” button as shown in the screenshot above. In our example, I gave my timeline view the name “Timeline View“. I recommend using a name that explicitly describes the view.
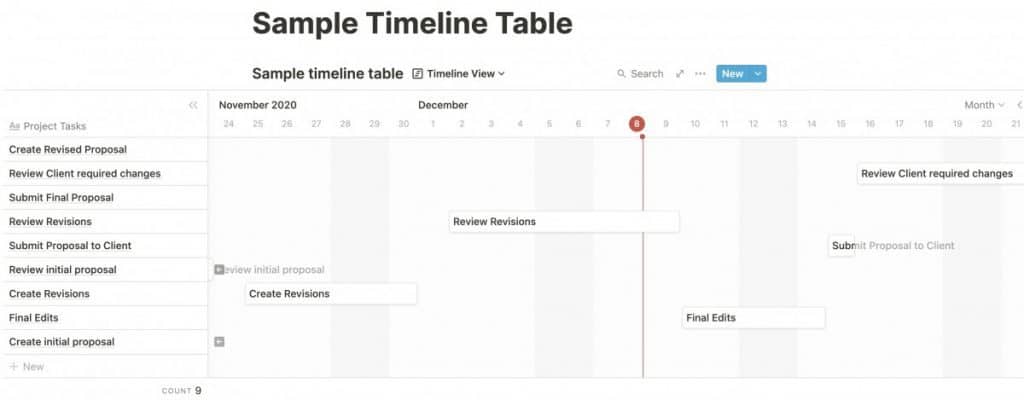
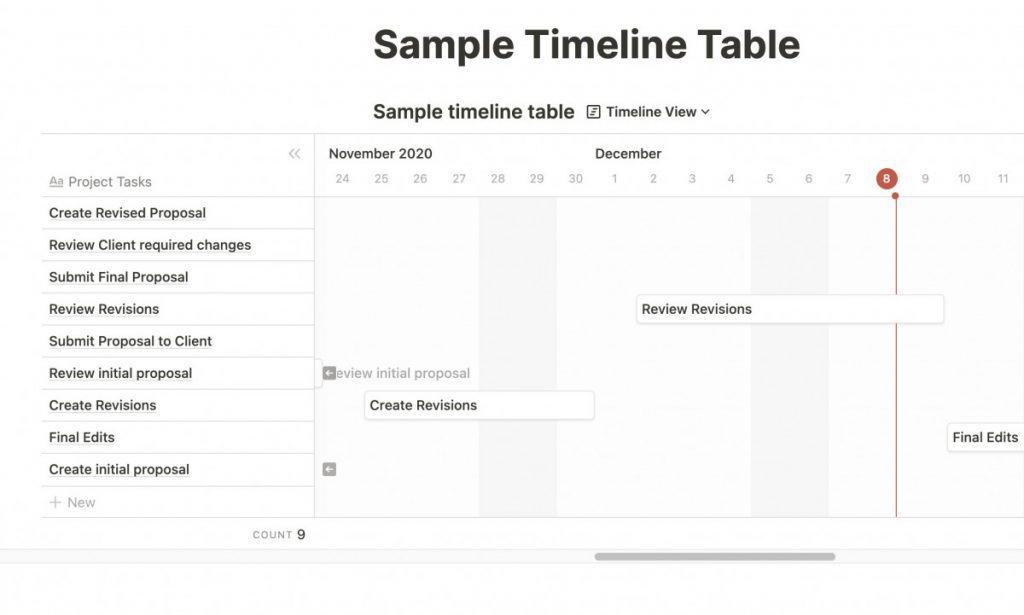
Your timeline view should now be visible. Each item in your database will appear on the left with the timeline to the right.
Next, let’s learn how to customize the timeline view in Notion.
Customizing the Timeline View in Notion
Notion is great at providing ways to customize how your data appears and this ability extends to the timeline view. The first thing you might want to do is to hide the list of items in your timeline view so that you only see the timeline.
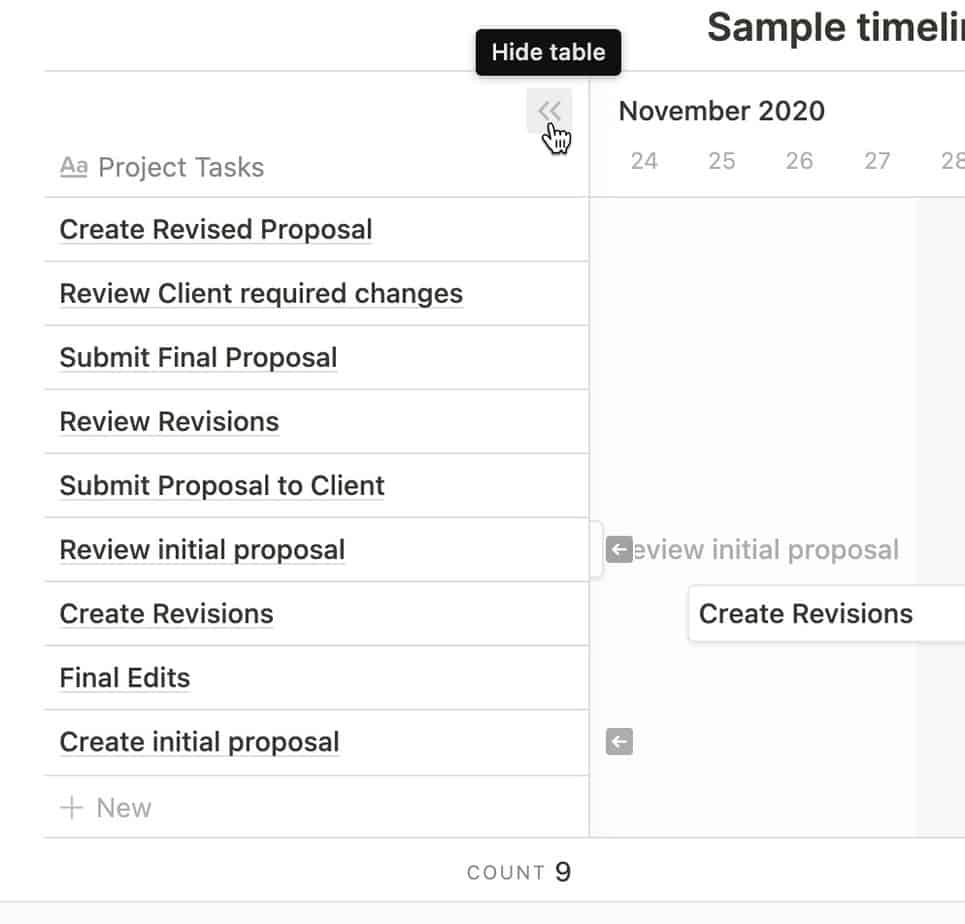
To hide the items in your database while in timeline view, simply click on the “double left arrow” button as shown in the screenshot above.
This will hide the items from the view so that you only see your timeline (like the example shown above). To unhide the list of items in timeline view, click on the double right arrow button.
Your timeline should now have the items showing again.
Choosing the Time Property Column in Timeline View for Notion
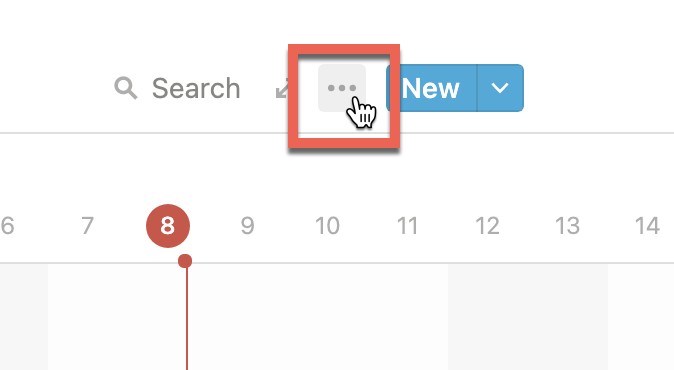
If you have more than one date property in your Notion database, you can configure which one your timeline view uses. To select the date property column to use, hover your mouse over the timeline view and click on the ellipsis (…) button.
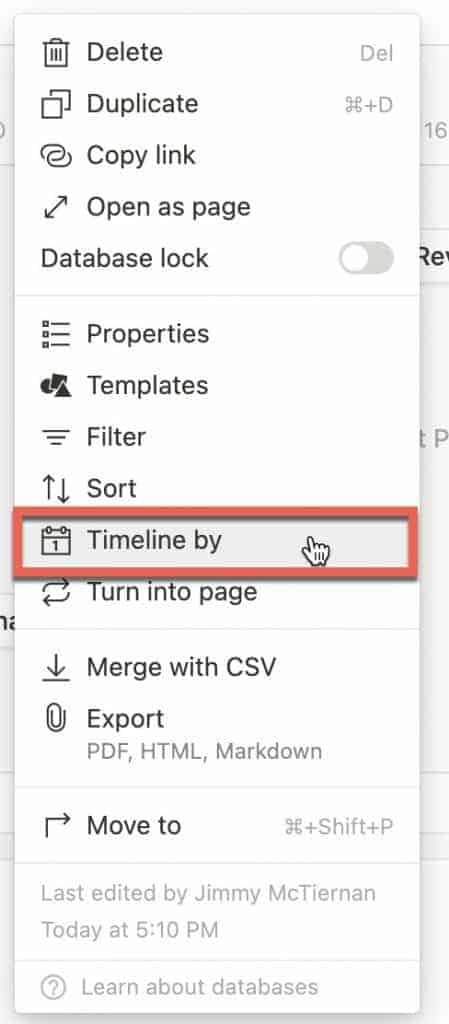
You should now see a menu like the one above appear on your screen. Select the “Timeline by” option.
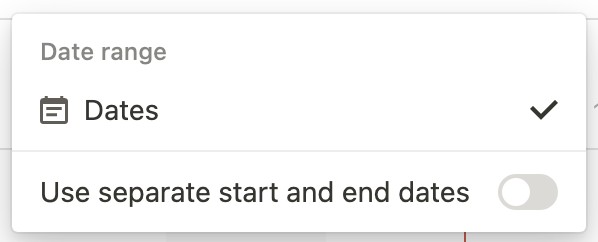
Choose the property type to use. In our example, we only have one date property type in our database so we selected it.
Customizing the Time Interval Used in Notion Timeline View
While the default time interval in Notion’s timeline view is monthly, you can change it very easily to suit your needs. To change the time interval of your timeline in Notion, do the following:
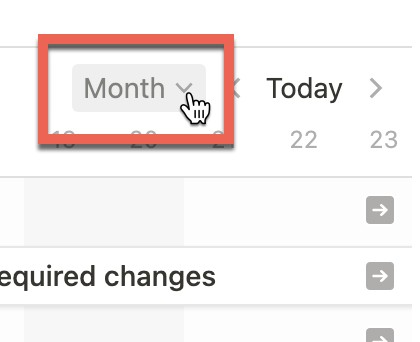
Above your timeline, you should see a dropdown menu button on the right hand side as shown above. Click on the button.
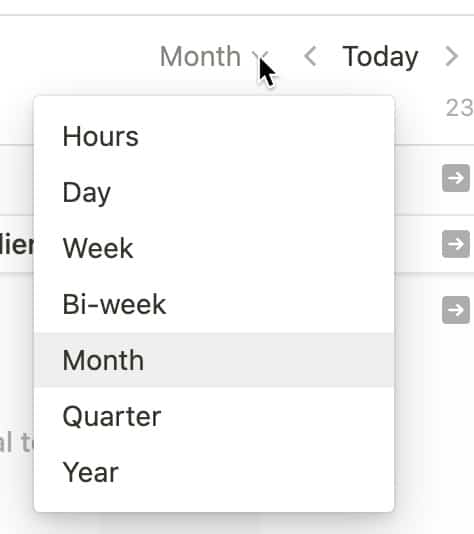
A pop-up menu should appear listing the time options that you can pick. The time intervals you can select are:
- Hours
- Day
- Week
- Bi-week
- Month (default)
- Quarter
- Year
Select the option you want. Notion will display your timeline based on your selection.
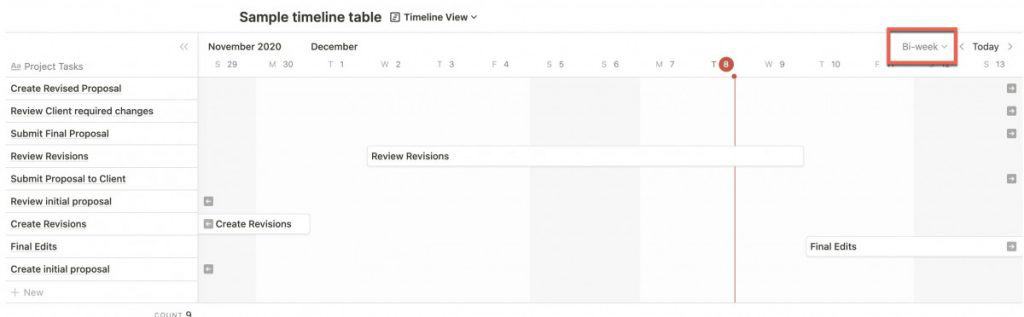
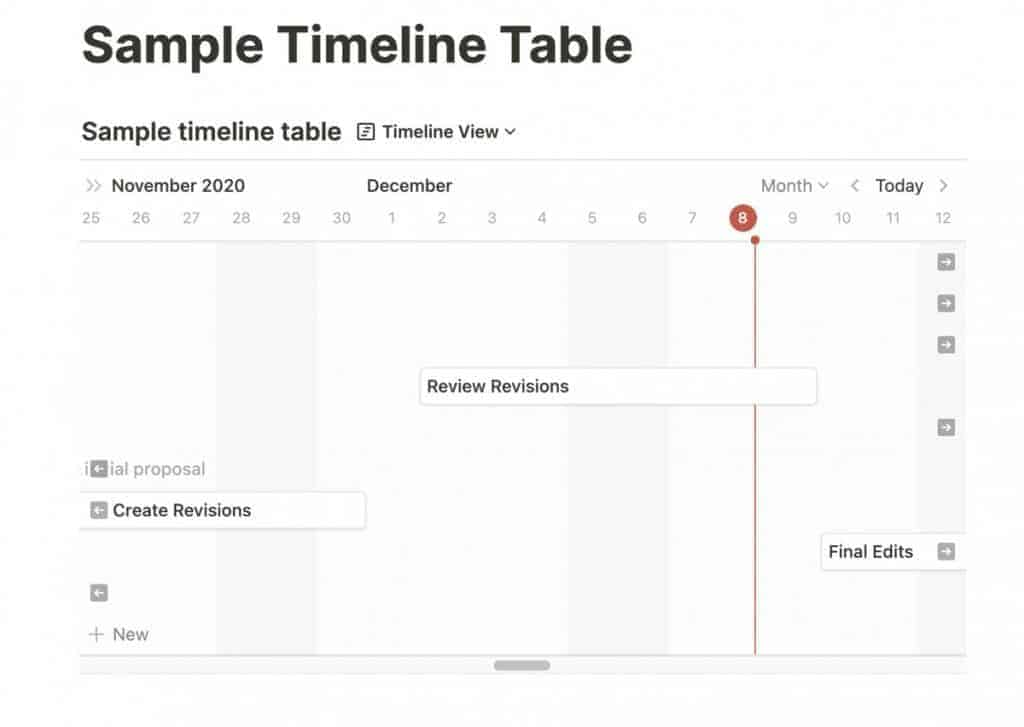
In our example, we changed the interval to bi-weekly and Notion redrew the timeline to reflect the bi-weekly interval as you can see in the image above.
I hope this tutorial was helpful to you. Good luck!
Looking to automate your productivity workflow? You should check out my Guide to the Elgato Stream Deck. Stream Deck allows you to set up actions that can be enabled by a simple push of a button.
Check Out Our YouTube Channel!
We have a YouTube channel now and we are working hard to fill it with tips, tricks, how-tos, and tutorials. Click the link below to check it out!
Do You Ever Need to Edit or Annotate PDFs?
If the answer is yes, you should really PDF Expert! PDF Expert is my go-to app for editing and marking up PDF documents. It is easy to use, has a ton of features and is very cost effective compared to other options out there. For more information on PDF Expert, click the link below:
PDF Expert – Fast, robust and beautiful PDF editor
Looking to Get Started Blogging or on YouTube?
Getting started can seem daunting and scary (I know it was for me) but it doesn’t have to be. I was very lucky to find a program that that has helped me grow my blog to over 60,000 page views and a Monetized YouTube channel that is growing month-over-month.
Project 24 by Income School is the program that I have used. I have been a member for over a year now and just renewed my membership. I cannot recommend Project 24 enough! For more information on Income School, click the link below:
Project 24 byIncome School – Teaching You How to Create Passive Income from Blogs and YouTube