Using Linked Databases in Notion – A Step-by-Step Guide
Perhaps the most powerful and useful aspect of Notion is its database functionality. Once you learn about concepts like how to link databases in Notion, you will really be able to build some interesting workflows.
But, how do you create a linked database? Enclosed below is a list of steps you can use to create a linked database in Notion:
- Choose the source database (table) you want to base your linked database on
- Open the Page Where You Want the Linked Database to Reside
- Type /create and select “Create linked database” from the menu
- Type the name of the table you want to link to and select it from the menu
Before we get started, if you are looking to learn even more about Notion or other apps, Skillshare is a great resource to check out. Skillshare has courses on Notion, Evernote, Todoist, Things 3, Trello and more. In fact, there is a great Notion course by Francesco D’Alessio on Notion that you can check out at the link below:
Link to Notion Course on Skillshare
If you are just starting out with Notion and aren’t sure where to get started, you really need to check out my comprehensive beginner’s guide to Notion. It goes through all things you need to know to get started the right way. Enclosed below is the link to the guide:
Link to Beginner’s Guide to Using Notion With Screenshots
If you are looking for some power user Notion tips, check out our article containing tips to help you become a power user of Notion at the link below:
Let’s get started learning how to use linked databases in Notion.
Choose the Source Database (table) You Want to Base Your Linked Database on
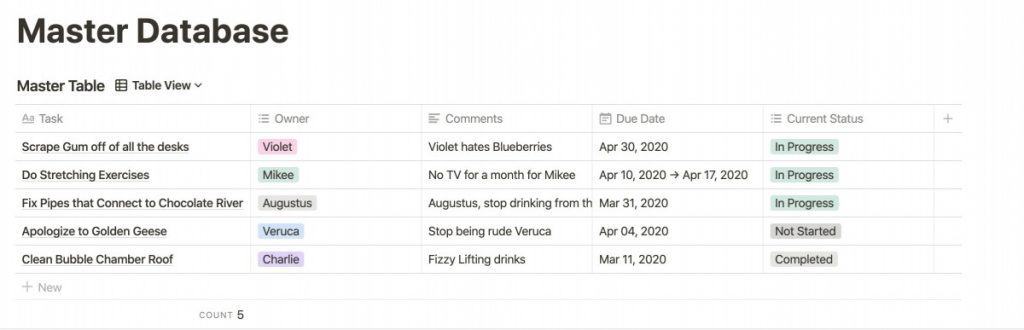
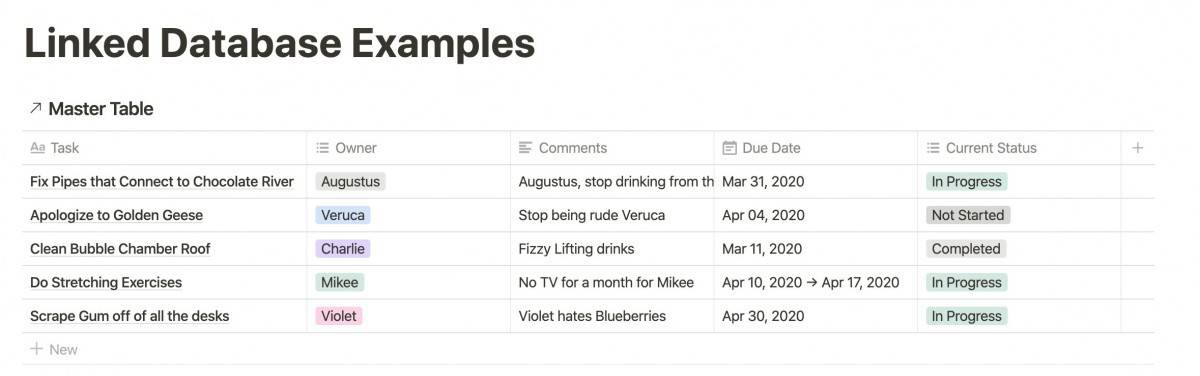
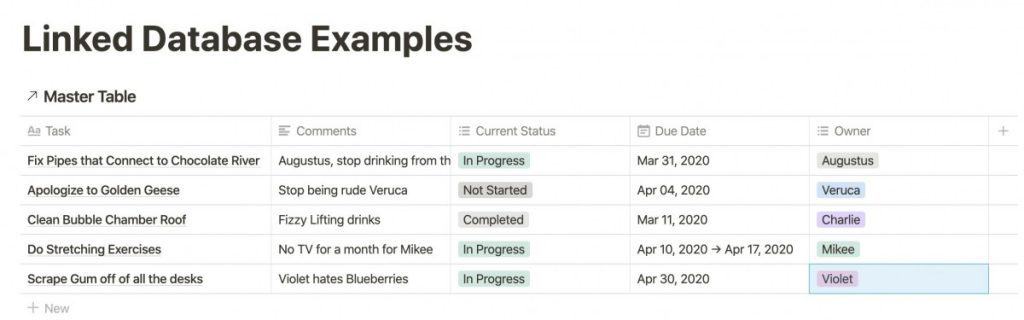
Choose the table you want to use as the source of your linked database. In this case, I will be using a sample database I created for the purposes of this tutorial.
Open the Page Where You Want the Linked Database to Reside

Open or create a page where you want the linked database to appear.
Type /create and select “Create linked database” from the menu
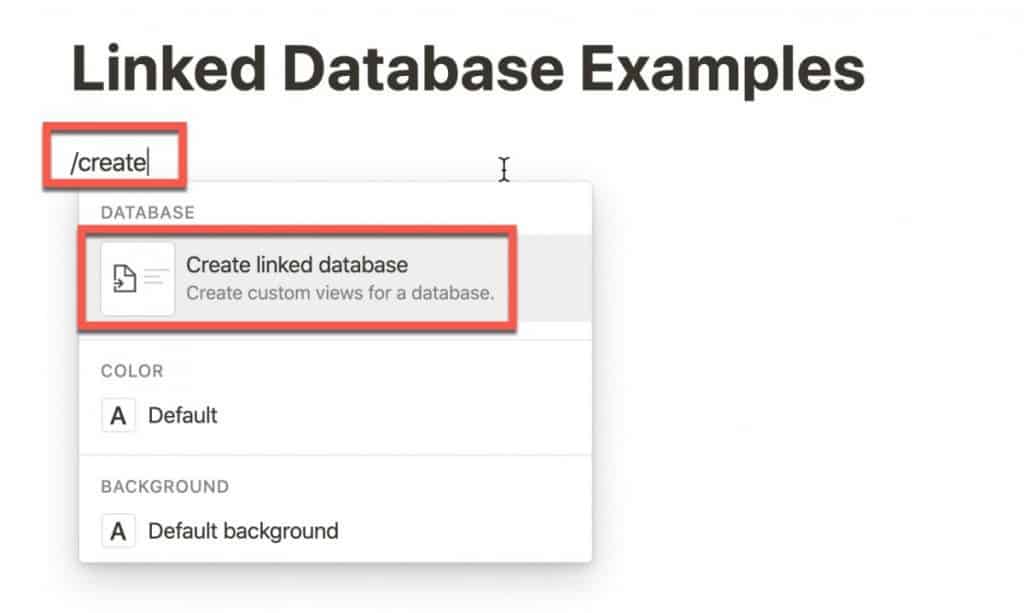
Click on the body of the page and type /create. A menu will appear. Select the “Create linked database” option as shown in the above screenshot.
Type the Name of the Table You Want to Link to and Select It from the Menu
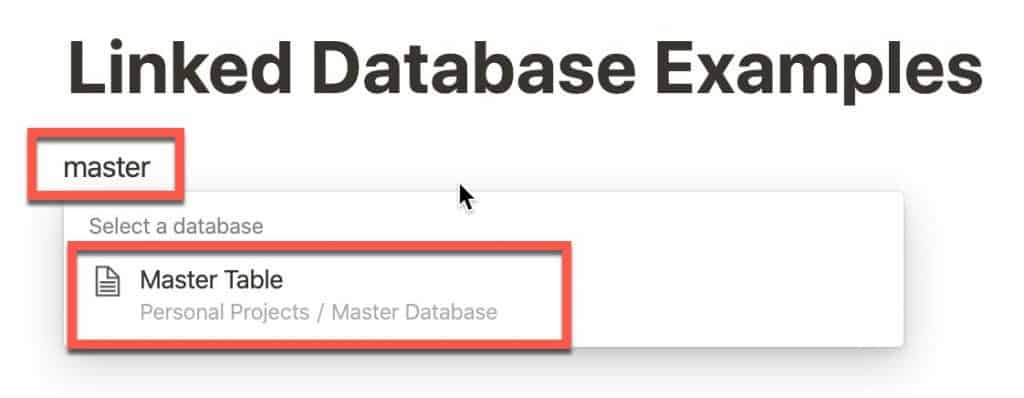
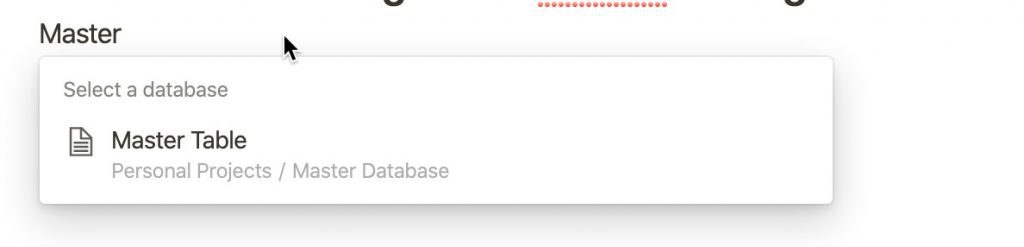
The “Select a database” dialogue will appear that will contain a list of your existing tables/databases. To save time, start typing the name of your table (in the case of this tutorial, master) and Notion will narrow down the results. Once you see your table, select it.
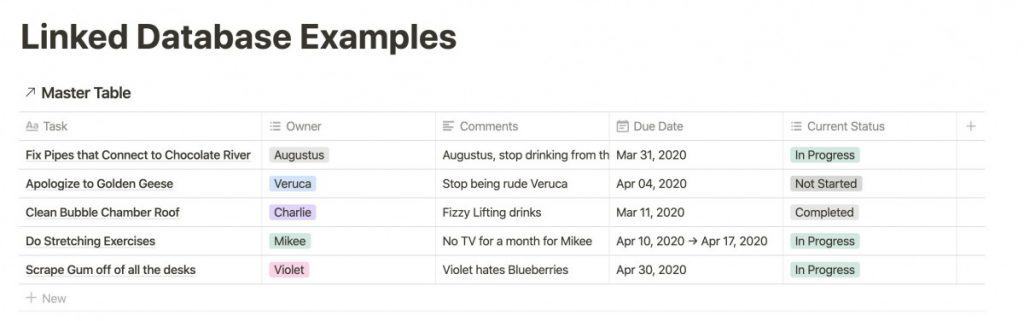
Your linked database will appear and will look very similar to your master table/database. There is one key difference, however.
Look to the left of the title of your table name. Notice something different? You should see an arrow like the one in the above screenshot. This arrow indicates that this table is actually linked to the original database (Master Table, in the case of our tutorial).
You may notice that the columns are not in the same order as your original table. That is ok as Notion can do that sometimes when creating the linked database. You can correct this by simply clicking and dragging the column to the position you want it to be in.
How to Customize Your Linked Database in Notion
Creating a linked database in Notion is straight-forward as you can see but now the question remains: what do I do with it? There are several things you can do and we will walk through a couple of examples.
Use Filters to Create a New View of Your Data in Notion
The way that I use linked databases in Notion is to provide a customized view of my data. As databases/tables get bigger and bigger, it gets harder and harder to find the specific information you want to see quickly.
Fortunately, Notion provides linked databases as a way to create custom views of your data.
To create a filter for your linked database, do the following:
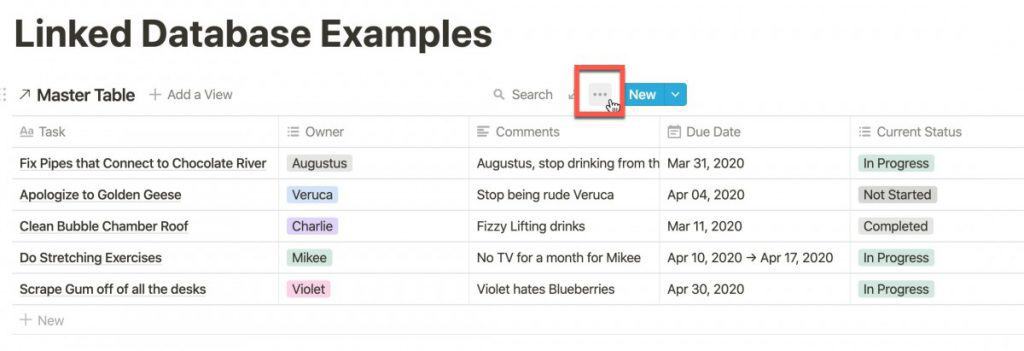
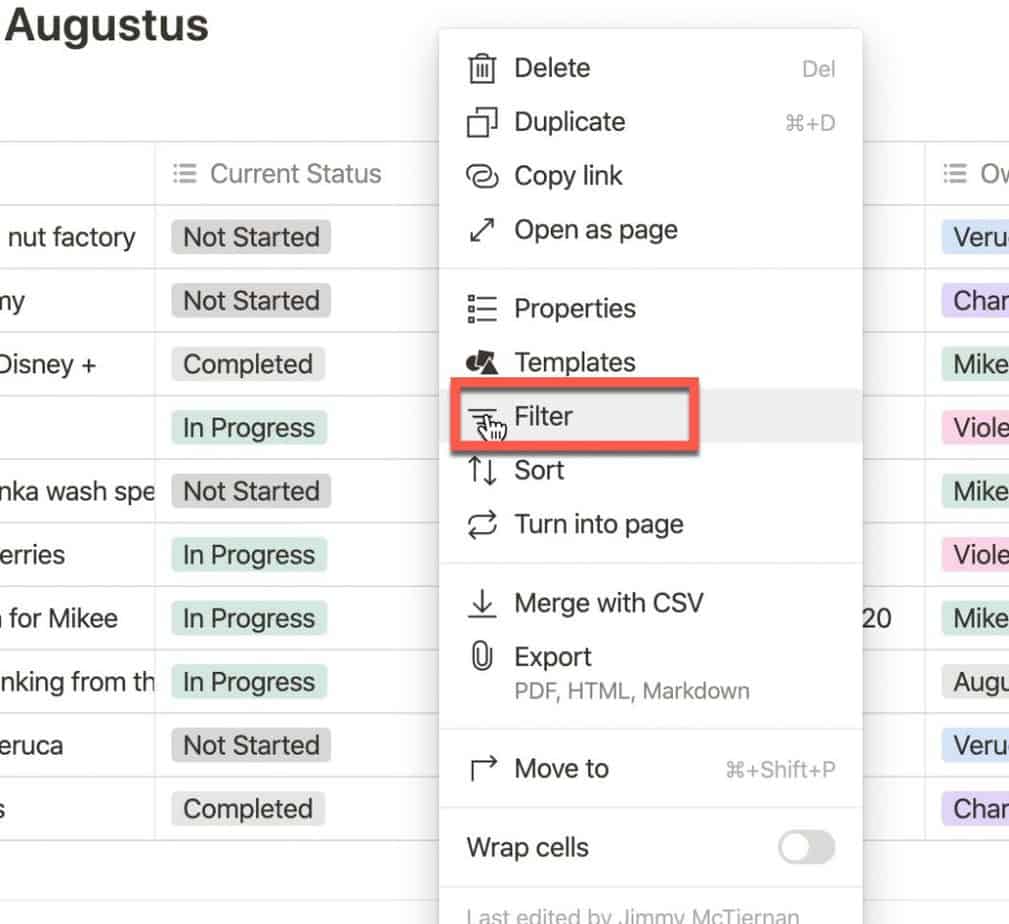
Hover your mouse cursor over the top of your linked database. You should see some context data appear including an ellipsis (…) button. Click the ellipsis button.
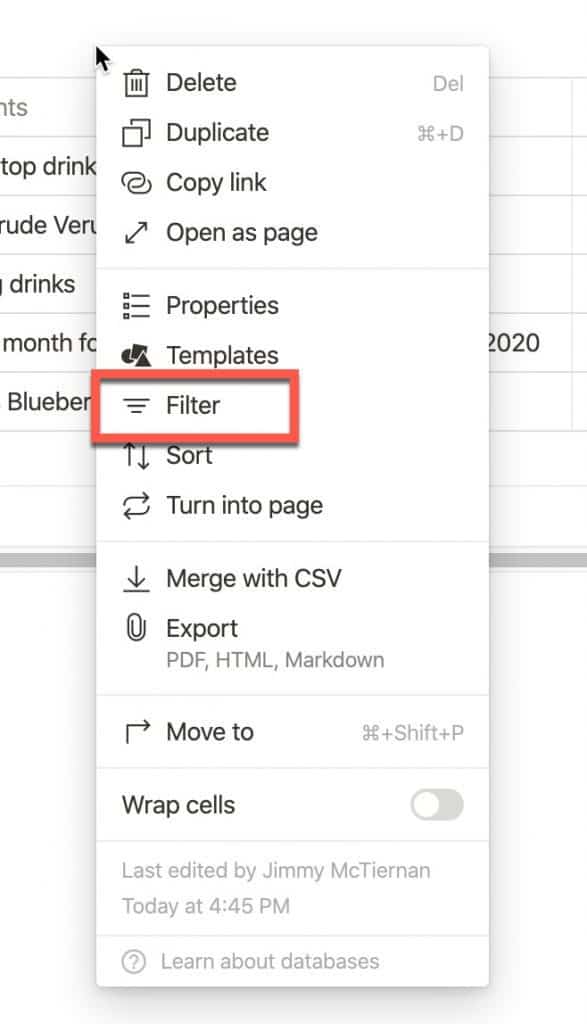
A pop-up menu will appear. Select the “Filter” option from the pop-up menu.
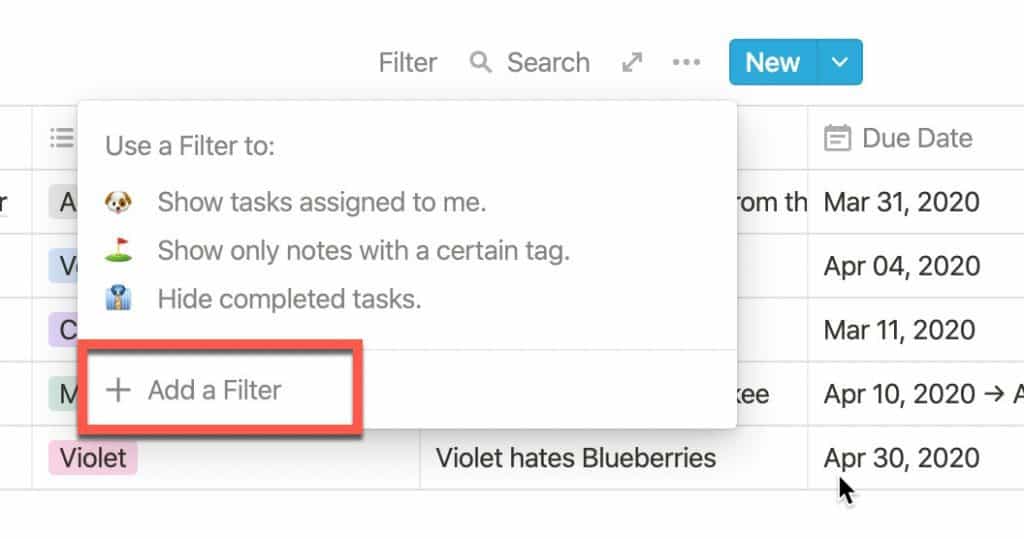
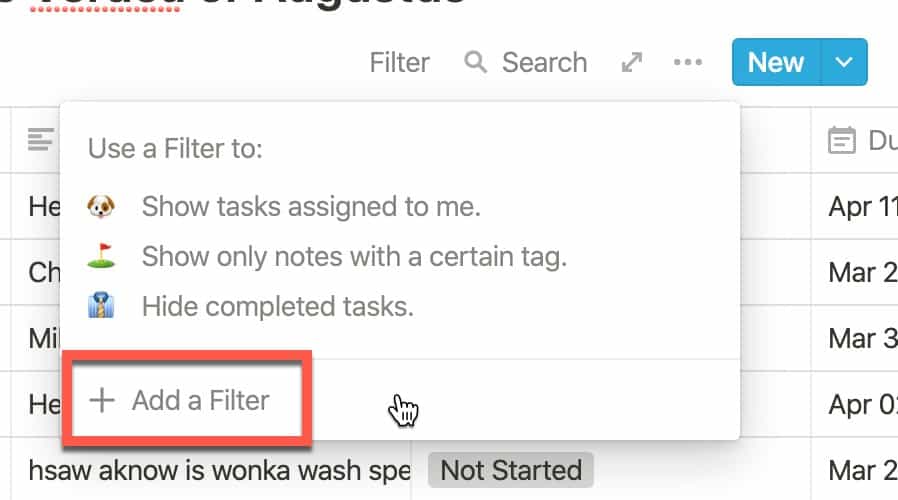
A small pop-up window will appear containing a list of example filter types and a “+ Add a Filter” button. Click the “+ Add a Filter” button.

A small pop-up window will appear with filter criteria in it.
Configure the filter to only view the content you want to see. The filter itself consists of three parts:
- Variable (Column)
- Comparison Operator
- Value(s) to Use for Filtering
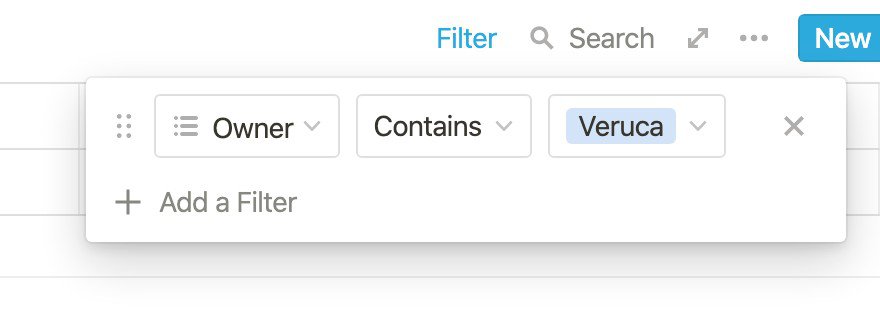
The variable is the column (in our case Task, Owner, Comments, Due Date and Current Status). These will be unique to your table. Select the column you want to filter on. For the tutorial, I want to create a view of all the tasks at Veruca is responsible for.
Next, you will configure the comparison operator. This is the “verb” of your filter and contains the following options:
- Contains
- Does Not Contain
- is Empty
- is Not Empty
For the tutorial, we will use the “Contains” option. Lastly, there is the value option. Select the value you want to see. For the tutorial, we will choose “Veruca” as we want to see only tasks assigned to Veruca.

As you can see, our linked database only shows us the tasks assigned to Veruca. Pretty cool, right? But what if I want to make a more complicated view. Let’s add a bunch more tasks to the master list.
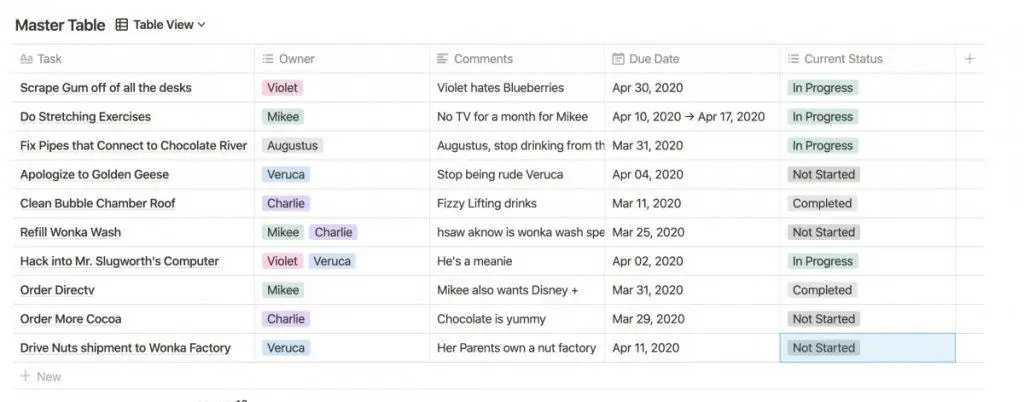
As you can see, I added a bunch of data to the master table. So, let’s create a view that all the tasks that are NOT assigned to Veruca or Augustus.
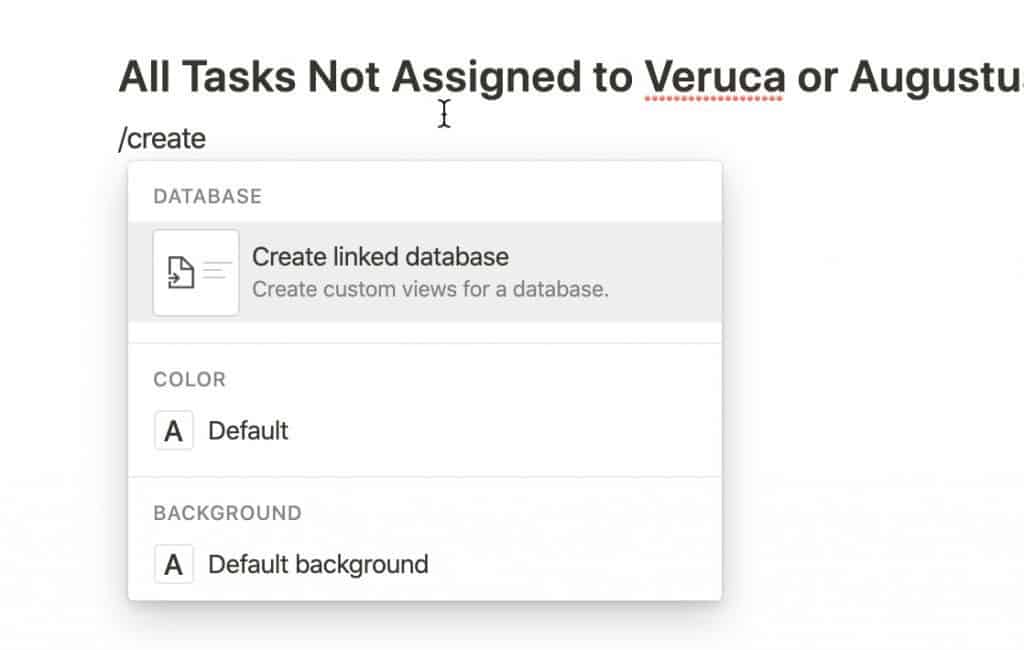
We create our linked database by typing /create and selecting the “Create linked database” option from the menu.
When the “Select a database” menu pops up, I type the name of my master table (Master Table) and select it from the menu.
My linked database appears and I hover over the top of the table and click the ellipsis. I select the “Filter” option from the menu.
The filter menu comes up and I click “+ Add a Filter” to bring up the filter criteria menu.
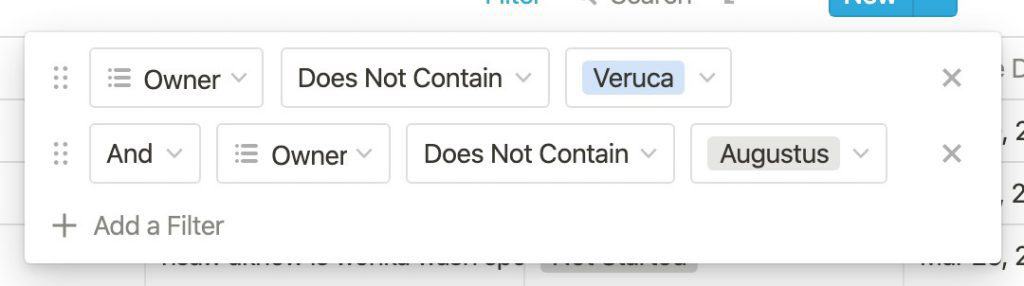
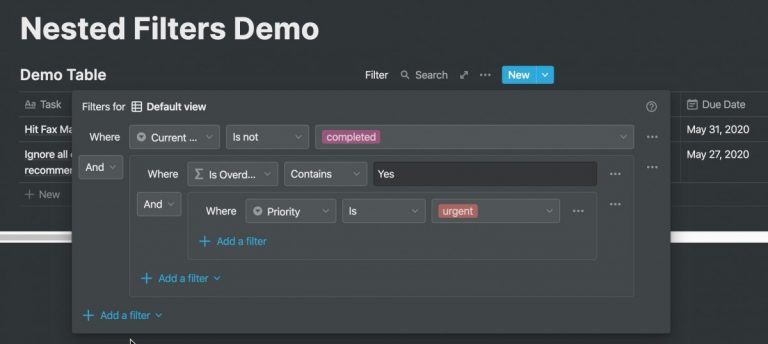
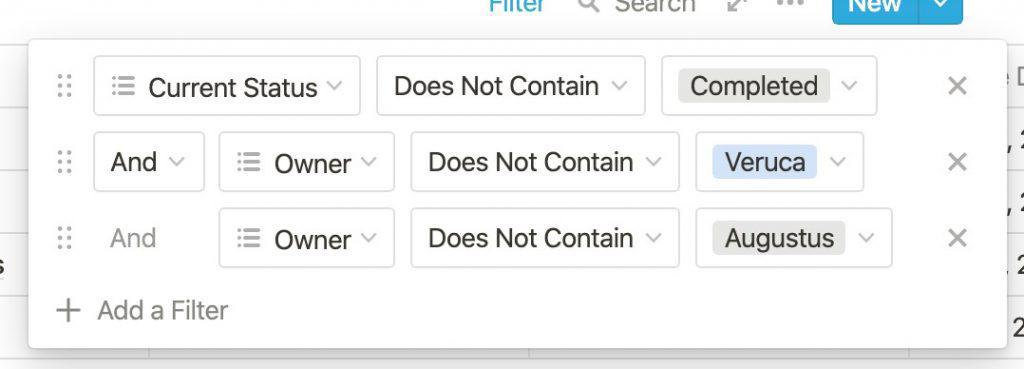
I set up my filter to screen out both Veruca and Augustus and this is where things get a little bit interesting. You can see in the screenshot above that I have a second row of filter criteria. This is a compound filter as it has two or more conditions to it. The joining conditional between the first condition (Owner does not contain Veruca) and the second one (Owner does not contain Augustus) is AND. For the joining conditional, you have a choice of AND or OR. AND means that both the first condition and the second condition must be true for the record to appear. The OR conditional specifies that only ONE of the conditions has to be true.
We wanted to exclude both Veruca and Augustus so we chose the AND conditional.
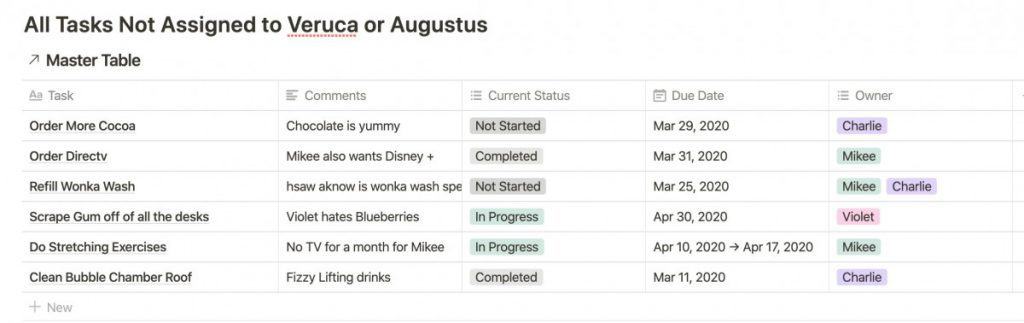
As you can see from the image above, we were able to filter out all of the tasks that were assigned to Veruca or Augustus. Hopefully, you can see how powerful filters are in Notion. Now, for our final activity, let’s combine a filter and a specific view type. In this case, let’s view all of the tasks that are not completed and are assigned to either Charlie, Violet or Mikee as a Kanban Board.

I created a new linked database. Now let’s create our filter.
I hope I didn’t lose you with the filter above. The filter basically says “I want all tasks that do not have a status of Completed and the owner does not contain Veruca and the owner also doesn’t contain Augustus”. If you notice that third joining AND conditional is grayed out. That is because after the first joining conditional in a filter, all subsequent one will be the same as the first one. So if the first one is an AND, all the rest will be ANDs. If the first one is an OR, all the rest will be ORs.
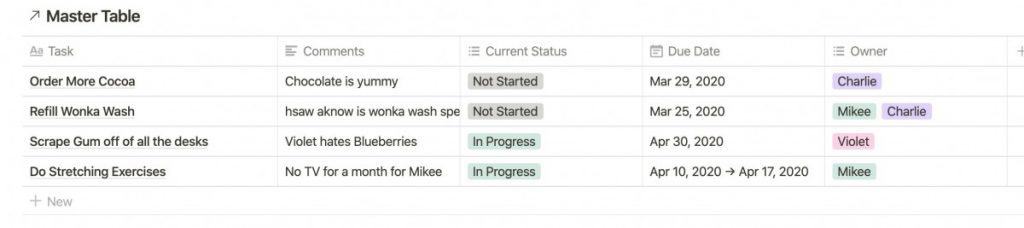
As you can see from the screenshot above, the linked database only shows non-completed tasks that are not assigned to Veruca or Augustus. Now let’s create a board view of this linked database.
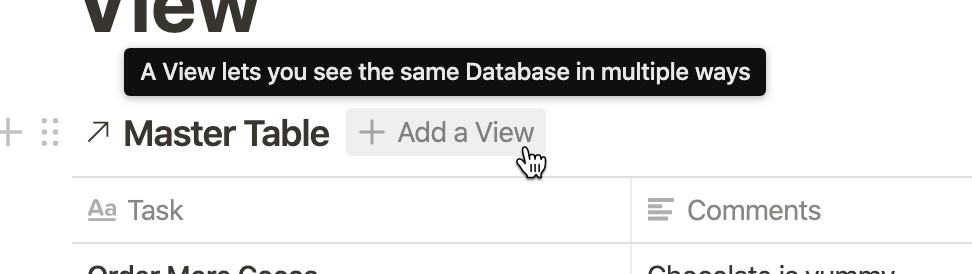
Hover over the top of the linked database and click the “+ Add a View” button.
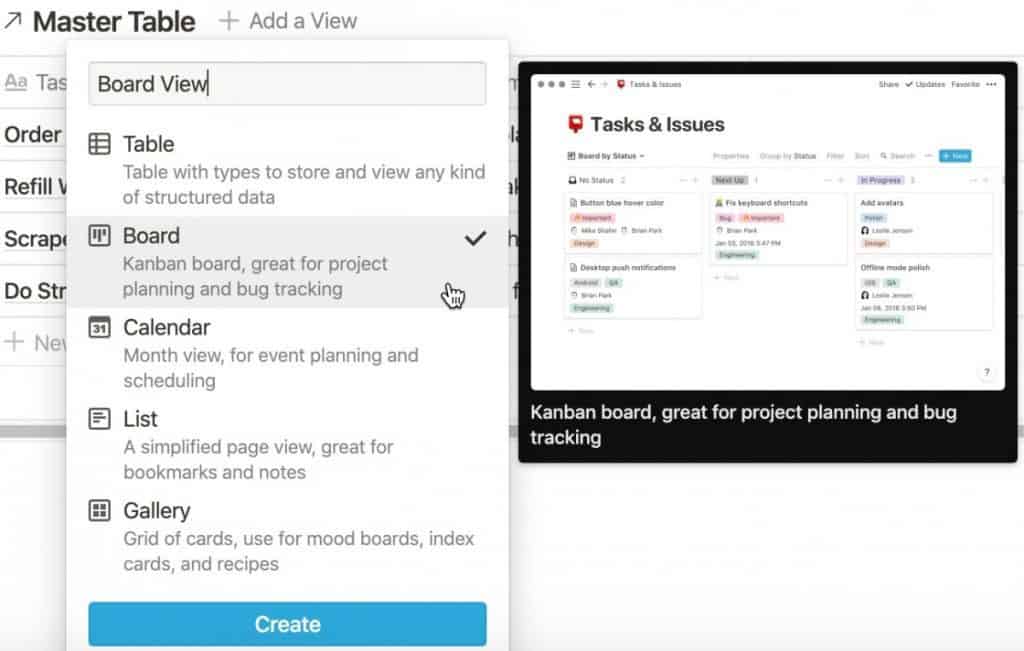
A menu will appear. Type in the name you want to assign to the view (I chose Board View), select the “Board” option and click the “Create” button.

Your linked database will now be displayed in a board view. As you can see, the board is using the current status as the sorting element. If you want to see your board using another criterion, do the following:

Hover over the top of your board and click the ellipsis.
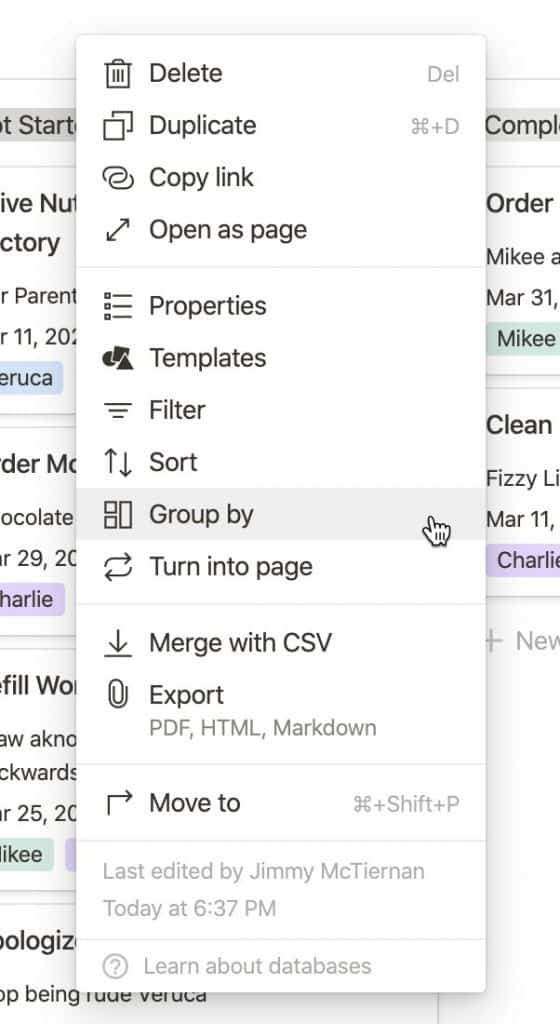
When the menu comes up, select the “Group by” option.

A chooser menu will come up. Select the criterion you want to use as your sorting element.

Your board view will change to now sort by the criterion you selected. In the case of our tutorial, I was able to change from sorting based on the current status to the owner. Very powerful.
Summary
Working with tables and creating custom views by creating linked databases is very powerful once you get the hang of it. As you play with tables, filters and linked databases, you will get more comfortable and will start to see places in your workflow where they might be helpful to you.
I hope this tutorial was helpful to you. Good luck!
Looking to Get Started Blogging or on YouTube?
Getting started can seem daunting and scary (I know it was for me) but it doesn’t have to be. I was very lucky to find a program that that has helped me grow my blog to over 35,000 page views and a YouTube channel that is growing at over 100% month-over-month.
Income School is the program that I have used. I have been a member for over a year now and just renewed my membership. I cannot recommend Income School enough! For more information on Income School, click the link below:
Income School – Teaching You How to Create Passive Income from Blogs and YouTube