PDF Handling – Evernote’s Best Feature
Evernote is the grand-daddy of all note-taking services. It has been around forever and, despite some bumps, remains one of the best note-taking services on the market. Some will argue that Evernote has slipped in recent years but I believe there are still things that Evernote does better than any other note-taking service. It is cross-platform and has a rich feature set.
The best feature that Evernote has and, in my opinion, does better than any other note-taking service in the market today is how well it handles PDFs. Evernote is the king of PDF handling. Specifically, it is the king of PDF search. Evernote is the place where I put the PDF documents that I want to be able to quickly reference and find the key piece of information that I need. While other apps can do some of what Evernote does, in my experience of using Evernote, no one does it better. This blog post will walk you through how to import, annotate and search for and in PDFs in Evernote.
Before we get started with the tutorial, if you are looking to learn more about apps like Notion, Todoist, Evernote, Google Docs, or just how to be more productive (like Keep Productive’s awesome Notion course), you should really check out SkillShare. Skillshare is an online learning platform with courses on pretty much anything you want to learn. To learn more about Skillshare and its vast library of courses and get 30% off, click the link below:
SkillShare – Online Learning Platform
If you are new to Evernote or simply looking to improve your productivity in Evernote, you should check out my Beginner’s Guide to Evernote at the link below:
Beginner’s Guide to Evernote – The Productive Engineer
This comprehensive guide will teach you all you need to know to use Evernote productively.
What are PDFs
Before we start talking about how to import PDFs into Evernote, it is probably smart to describe with a PDF file is. PDF stands for Portable Document Format and was created by Adobe in the nineties as a way to be able to open, review and print documents on any operating system while still preserving the layout of the document itself. PDF files have become a common file type for documents such as:
- Ebooks
- User Manuals
- Forms
- Scanned documents
As you can see from the examples above, PDFs are pretty commonplace. Now that we know what PDFs are and have examples of documents that use this file type, the next question is why should I put these documents into Evernote in the first place?
Why Put PDFs into Evernote?
There are several great reasons why you should consider placing non-sensitive PDF documents in Evernote. I say non-sensitive documents because Evernote is a cloud-based service and your data, including your PDFs, will live on Evernote’s servers. As with any cloud service, if the service is breached, your sensitive data would be at risk. As a general rule, I typically don’t put sensitive data into cloud services and would recommend that you do the same. Evernote does have some good webpages that walk your through their approach to security:

Evernote security website
link to Evernote’s security website
Evernote’s Customer security tips
link to Evernote’s customer security tips
Evernote’s Security Updates page
link to Evernote’s Security Updates page
With the obligatory security warnings out of the way, let’s get back to talking about why you should put your non-sensitive PDF files into Evernote.
If you are looking to learn how to harness the power of Evernote Home, check out our Ultimate Guide to Evernote Home.
Evernote OCR’s PDF Documents
OCR stands for Optical Character Recognition and is the secret sauce that makes search inside PDFs possible. Optical Character Recognition identifies letters and words inside of pictures and other files (like PDFs). OCR essentially makes the image or PDF readable and searchable by applications like Evernote. There are other note-taking applications that have OCR but, again in my opinion, Evernote does it the best.
Making PDF documents searchable opens up Evernote to function like a second brain in terms of storing data that may be important to you in the future and providing quick and easy access to it with powerful search capabilities.
Evernote Supports PDF Search Created by
- Microsoft Word
- Adobe Acrobat
- Scanned Documents
- Other 3rd Party Office Apps
Examples of PDF Documents You Should Put into Evernote
What type of PDF documents should you put into Evernote? Here are the three main types of documents that I find having in Evernote makes my life easier:
Manuals
This one is the biggest one for me in my day-to-day work. I am an engineer and I am always digging into install guides, solution description documents and product manuals. Having them in Evernote reduces the time it takes to find the data I am looking for.
Receipts
Keeping track of receipts is also great in Evernote. While this isn’t an example of PDF support, it does leverage the OCR capabilities of Evernote to help you quickly search and retrieve receipts. I keep all my receipts and any extended support documents for my purchases in Evernote.
Ebooks in PDF Format
Much like manuals, storing eBooks that are in PDF format in Evernote instantly makes the book searchable. I have a bunch of tech ebooks that I reference when I need to remember who to do something and Evernote really helps with that.
How to get PDFs into Evernote
Getting PDFs into Evernote is very easy and can be done in several ways.
On Evernote Desktop Client, simply drag the PDF into a Note
This is the most common way I use for PDFs that I get online. To do this, simply perform the following steps:
- Open Evernote and Create a New Note
- Click and Drag your PDF file onto the Note and Release the Mouse Button
Your PDF will appear in the note. Give your note a title (typically the title of the PDF document) and add any tags that apply to the document.
Scan PDF directly to Evernote
Some scanners actually include the ability to actually scan and place your file directly into Evernote. In my experience the two best companies with good Evernote integration are:
- Fujitsu – link to Fujitsu ScanSnap website
- Doxie – link to Doxie website
Fujitsu makes the ScanSnap line of scanners. I personally use the ScanSnap IX500 Model shown below:
The ScanSnap desktop application has two options for how to scan a document into Evernote:
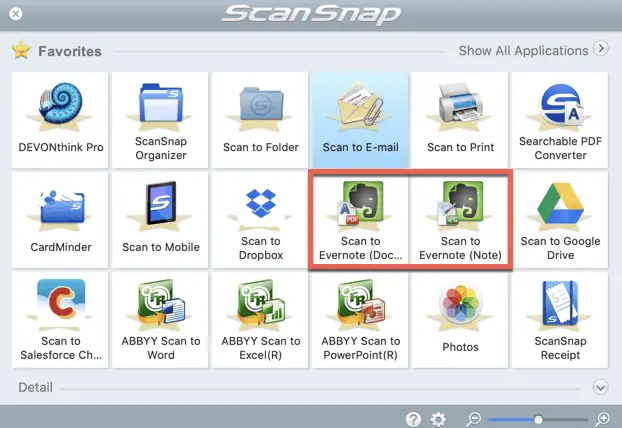
- As a Document (i.e. pdf)
- As a Note (i.e. an image)
For scanning a document, I recommend the document setting. There are currently four models of ScanSnap scanners:
- iX500 Desktop scanner
- iX100 Portable Scanner
- S1300i Desktop Scanner
- SV600 Scanner

The ScanSnap scanners are great (I personally love my iX500) but it is pricey. If you are on a budget or just don’t want to spend a lot on a scanner, go with the ix100 if you want a ScanSnap scanner. For more information on the ScanSnap ix500, check out our Top Picks page at the link below:
link to Fujitsu ix500 Scanner on Top Picks page
Doxie also makes great scanners that integrate with Evernote. Doxie makes three scanners:
- Doxie Go SE
- Doxie Q
- Doxie Flip
The Go SE is a portable scanner that comes in two flavors: Wired USB connection or Wifi connected. The Doxie Q is the high end model while the Doxie Flip is a flatbed scanner geared toward photo scanning.
Open Note and click on paperclip

If the click and drag way of adding a PDF to Evernote isn’t your speed, you can also open the note and click on the “paperclip” button. This will bring up a file viewer window where you can select the PDF you want to add to the note.
PDF Search Example
For example, let’s say I was looking for information on how to setup iLO 5 on HP servers. I can google and do the research that way but that might take a while. Alternately, I can simply search Evernote for the information. I know I have iLO guides in Evernote. So I can do a search for “iLO setup” to see what Evernote finds:

Searching for “iLO setup” (the quotes are important as they indicate to Evernote to only search for the exact phrase), Evernote returns the HP iLO 5 user guide with all of the appearances of the phrase “iLO setup” that appear . Next, I would search for “iLO setup” within the document. To do this, perform the following:

Click in the body and select all. This can be done be going to Edit -> Select All in the main menu or using the shortcut Command A on a Mac or Control A on Windows.

Evernote returns the number of times the phrase “iLO setup” appears in the document and provides arrow buttons that allow you to quickly toggle through each appearance of the phrase until you find what you are looking for.

This is much quicker than google searching for iLO setup and going through the results.
What Type Of PDFs Are Searchable in Evernote?
- Scanned PDFs with clear, typed text
- PDFs that do not already contain text that you can select or copy
- PDFs that are not password-protected
- PDFs that are not corrupted or unreadable
Annotating PDFs in Evernote
In addition to being able to store and search PDF documents, Evernote also supports the ability to annotate (markup) them. Annotating a PDF allows you to effectively markup the document. This is great for editing drafts of documents such as:
- Technical Documents
- Wireframes
- Making notes on key points of a document
- Making edits or comments on diagrams or flowcharts
Annotating a PDF in Evenote Desktop Client
To annotate a PDF in the Evernote Desktop Client, do the following:
Open Evernote and open the note with the PDF you want to annotate

Click the annotate button in the upper right hand corner of the note (see image above).

You will see a window like the one above. The annotation toolbar will be on the left hand side of the window (see red box in image above).
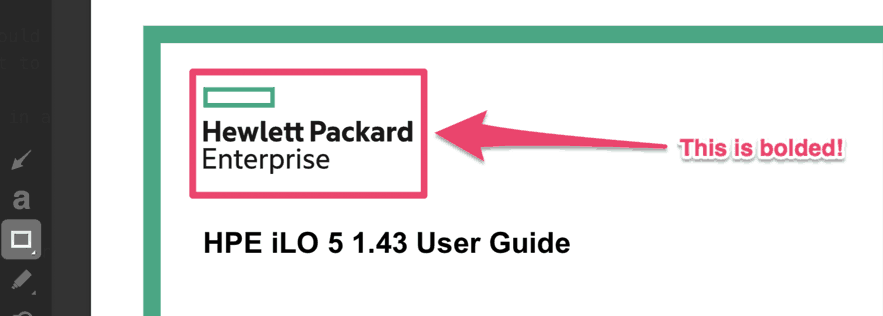
The Arrow Tool
The first tool in the toolbar from top down is the arrow tool. The arrow tool draws an arrow pointing at the point in the document you click on.
To move the tip or the base of the arrow:
- Click on the arrow and blue dots should appear at the tip and the base of the arrow
- Click on the tip or base and drag it to a new position and release the mouse button
To move the entire arrow itself, while in annotation mode, simply click on the arrow and drag it where you want it.
The Text Tool
The second tool from the top of the toolbar is the text tool. The text tool allows you to overlay text on the PDF document.
To add text to the document:
- Select the text tool from the toolbar
- Click where you want the text to be. A blue box will appear around the text. Simply click anyway else in the note and it will disappear.
To move the text box, while in annotation mode, click on the text box. The blue box should return. Drag the text box where you want it and release the mouse button. Click anyway in the note to make the blue box go away.
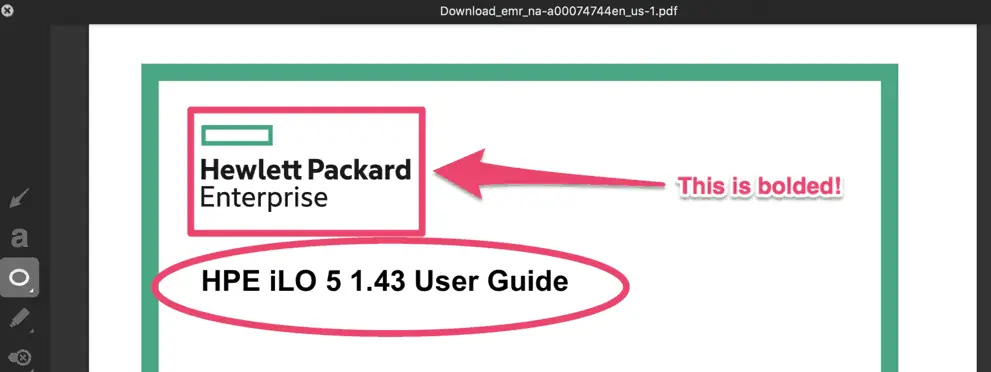
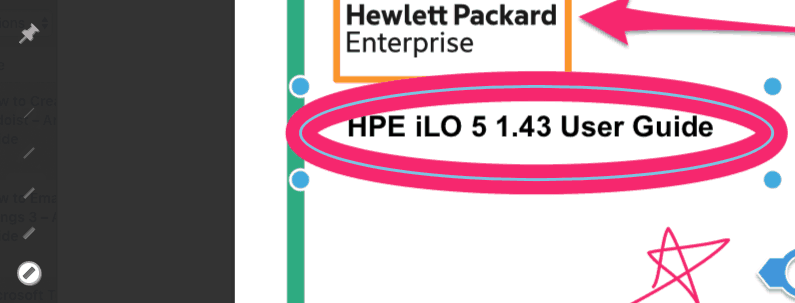
The Shape Tool
The third tool from the top of the toolbar is the shape tool. The shape tool allows you to draw a shape around an area in the document. There are four shape options:

- Rectangle
- Rounded rectangle
- Circle/Oval
- Line
To use the shape tool, do the following:
- Select the shape tool. When you click on it, the toolbar will show the four shape options
- Select the shape you want to use.
- Click and drag the area you want to enclose with the shape. Release the mouse button.
To adjust the shape, in annotation mode, click on the shape. Four blue buttons should appear when the shape is selected. Click on one of the corners and drag it until the shape is how you want it.
To move the shape simply select it and drag it to its new position and release the mouse button.
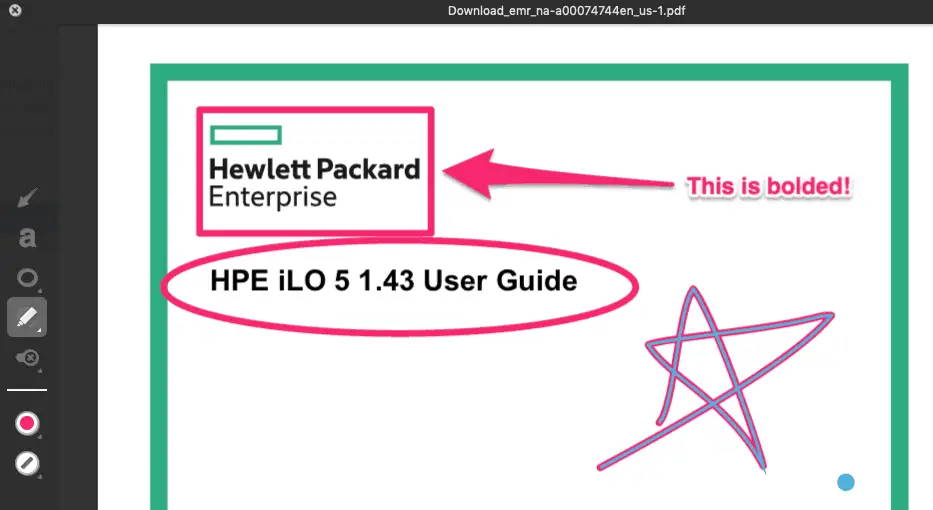
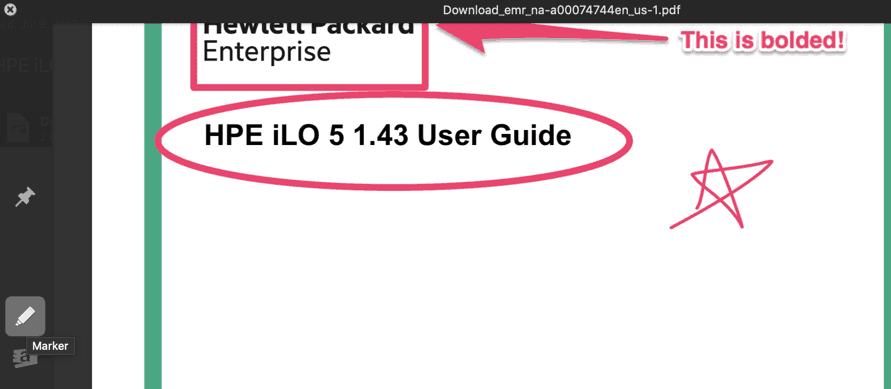
The Marker/Highlighter Tool
The next tool in the toolbar is the marker/highlighter tool. As the name implies, this tool has two modes of operation:
- Marker
- Highlighter
The Marker tool is what it sounds like, a tool that allows you to write or draw on the document. To use the Marker tool do the following:
- In annotation mode, select the marker tool
- In the marker sub-toolbar, select the marker (it is the default tool selected)
- Click and hold where you want to write or draw. Write or draw and release mouse button when complete
To resize the text or drawing you made, click on it. A blue dot will appear near the shape. Click, hold and drag the shape to make it bigger or smaller and release the mouse button. To move the writing/drawing simply click on it, hold and drag it to its new position.
To use the Highlighter tool:
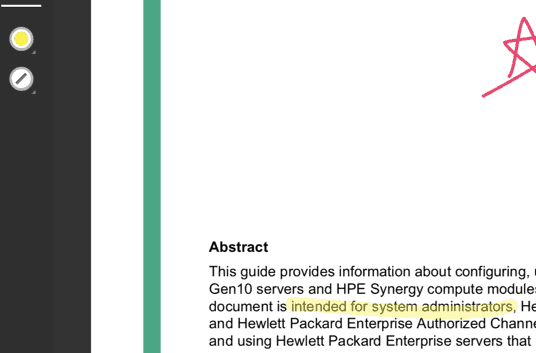
- In annotation mode, select the marker tool
- In the marker sub-toolbar, select the highlighter
- Click and hold where you want to highlight. Release mouse button when complete.
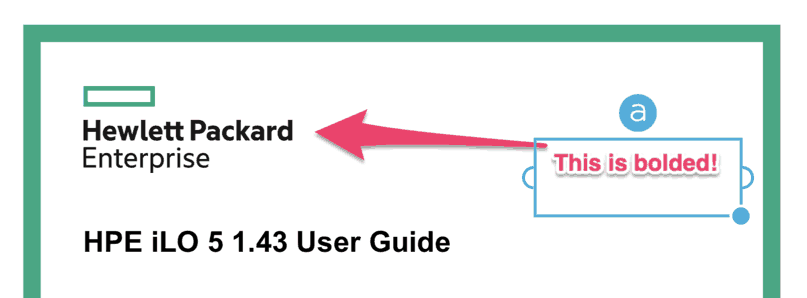
The Sticker Tool
The sticker tool allows you to put pre-defined stickers on your document. It, like the shape and marker tools, offers a couple of options in a sub-toolbar:

- Rejected (the red sticker)
- Attention (orange)
- Question (blue)
- Approved (green)
- Perfect (pink)
To use one of the stickers, do the following:
In annotation mode, select the stickers tool.
In the stickers sub-toolbar, click on the sticker you want to use and click where you want it in your document

Click on the sticker and a blue circle with a black “a” tab will appear.
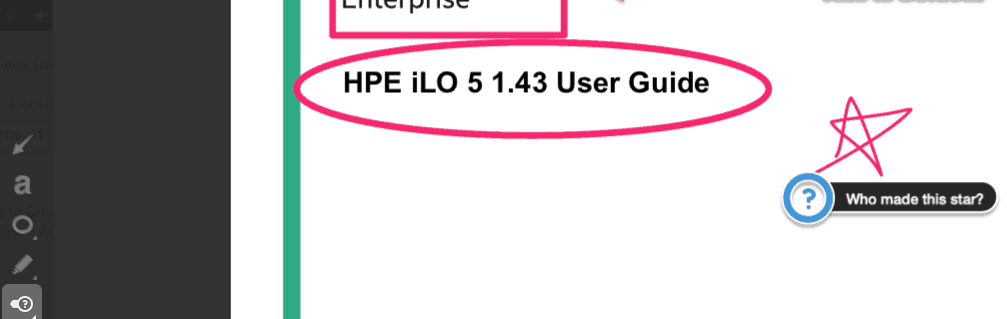
Double-click on the “a” tab and the tab will expand into a text box.

Type in your text and hit the Enter key
To move the sticker, in annotation mode, click on the sticker, hold and drag it to its new position. You can also add a pointer to the left of the sticker icon.
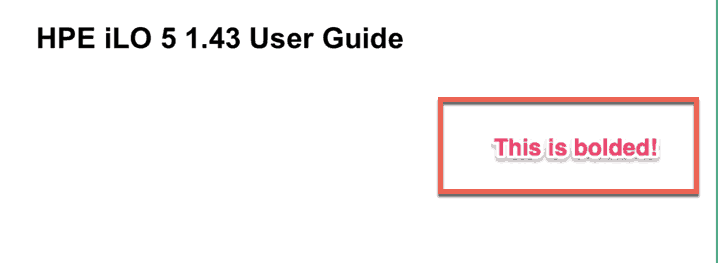
To add a pointer to your sticker, do the following:
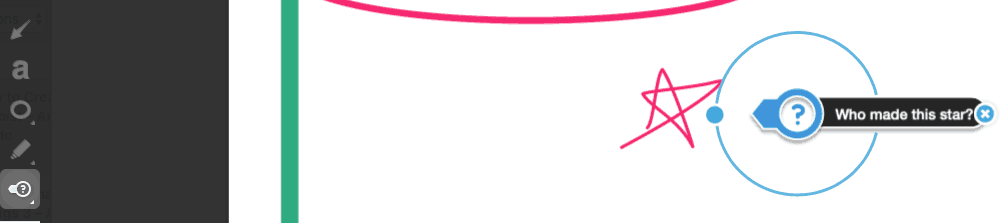
- In annotation mode, select the sticker. A blue circle will appear with a blue “+” sign on the left side of the circle
- Click on the “+” sign on the blue circle. A blue arrow on the left side of this should appear.
- Re-position your image and sticker accordingly
The Color Button
Below the tools on the toolbar are two buttons. The first of which is the color button. Clicking on the color button brings up the submenu below:

Selecting any of the preset colors will make whatever shape or tool you use be that particular color.
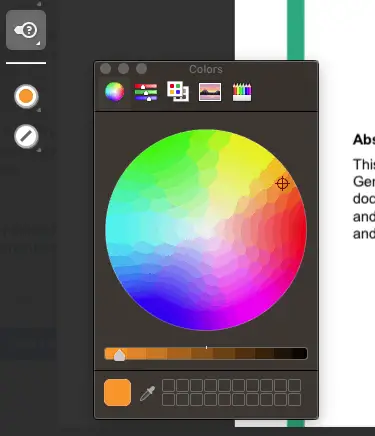
To change the color of an existing of an existing object, simply select the object, click the color button and select the color. The last color option, when pressed, brings up a color pop-up window that allows you to select a custom color.
The Size Button

The last button is the size button. The size button allows you to set the thickness or thinness of the object. To change the thick or thinness of an object, do the following:
- In annotation mode, select the object you would like to change
- Click on the size button and select the desired thick/thinness
- The object will redraw with the new thick/thinness setting
Annotation Summary
Evernote offers the ability to add an annotation summary to PDFs in the Desktop and Mobile Evernote clients. An annotation summary provides a synopsis of all the annotations made to a pdf document in Evernote. Annotation summaries provide the following information:
- Annotation count – The number of each type of annotation
- Snippet Summary – Cropped areas of the PDF that show where and on what page each annotation appears.
The Annotation summary makes it easier to both keep tabs of how many annotations are in your document and where each of them are.
How to Add an Annotation Summary
Adding an annotation summary is easy to do but varies depending on platform.
Adding an Annotation Summary on Mac
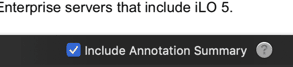
Select the note. Click the annotation button to go into annotation mode. Check the Include Annotation Summary button at the bottom of the annotation window.
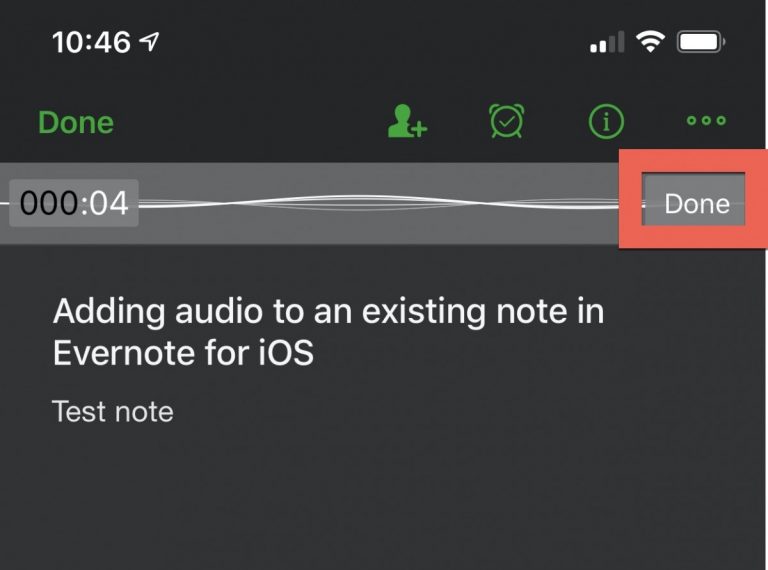
Adding an Annotation Summary on iOS

Select the note and select Include Summary from the Document Options menu.
Adding an Annotation Summary on Android
Select the note and press the ellipsis (…) to the left of Save in the upper right of the window. Check the Include Annotation Summary checkbox.
Adding an Annotation Summary on Windows
Select the note and select Edit -> Include Annotation Summary from the main menu.
How to Delete Annotations
The instructions for clearing annotations varies depending on if you are Mac user or a Windows user.
To clear annotations on a Mac:
- Open the note with the PDF
- Press the annotation button to enter annotation mode
- Select the menu icon and a drop down menu should appear
- Select Clear Annotations from the drop down menu
The annotations should be gone from your PDF.
To clear annotations on Windows simply select the note and go to Edit -> Clear Annotations in the main menu.
How to Rotate a Page of a PDF (Evernote Mac Client only)
The mac version includes the ability to rotate a page of a PDF. To rotate a page of a PDF, do the following:

- Select the note and the page in the PDF that you want to rotate
- Press the annotation button to enter annotation mode
- Click on the menu button in the top-right corner of the annotation window
- Select either Rotate Clockwise or Rotate Counter-Clockwise from the menu (or use the keyboard shortcuts Command R and Shift Command R respectively)

The page of the PDF should now be rotated.
Delete a Page of a PDF
In the mac version of the Evernote client, you can delete a page from a PDF.
To delete a page from a PDF, do the following:
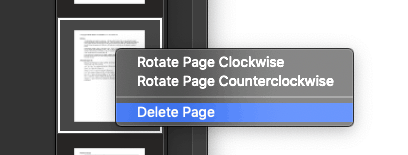
- Select the note
- Press the annotation button to enter annotation mode
- Select the page in the PDF that you want to delete
- Right-click on the page and select Delete Page
Your page will be deleted from your PDF in Evernote.
Check out our Resources page
Check out our resources page for the products and services we use everyday to get things done or make our lives a little easier at the link below:
Summary
Evernote offers tremendous tools for working with PDF files. Its ability to OCR pdf files and make all of the contents searchable is powerful. The annotation features in Evernote allow you to markup PDF files and simplifies collaboration with others.
Please Subscribe to our Newsletter
If you like the content on this site, please subscribe to our newsletter. We promise not to be spammy!
Subscribe Form
Helpful Links
Evernote Tips for searching scanned PDFs
link to Evernote Tips for searching scanned PDFs
How to annotate images and PDFs in Evernote
link to How to annotate images and PDFs in Evernote
Evernote security website
link to Evernote’s security website
Evernote’s Customer security tips
link to Evernote’s customer security tips
Evernote’s Security Updates page
link to Evernote’s Security Updates page
Fujitsu ScanSnap Scanners
link to Fujitsu ScanSnap website
Doxie Scanners
link to Doxie website
Other Articles You Might Be Interested In
Why Does Evernote Have An Elephant Logo and Why It’s So Great at Helping You Remember?
link to Why Does Evernote Have An Elephant Logo and Why It’s So Great at Helping You Remember
Does Evernote Support Markdown?
link to Does Evernote Support Markdown?
How to organize and search notes in Evernote
link to How to organize and search notes in Evernote