The Beginner’s Guide to Obsidian Notes Step-by-Step
Obsidian Notes is an interesting productivity application. It is a Markdown-based system that incorporates tags, plugins and backlinks to create a compelling to use system. That said, it can be hard to know how to get started in Obsidian Notes. That is the purpose of this beginner’s guide. To teach you everything you need to know to both get started and be productive in Obsidian Notes.
Before we get started with the tutorial, if you are looking to get the most value out of the books you read, you really must try Shortform. Shortform is a book summary service that provides insight and context that goes beyond what a traditional book summary would provide. Shortform is a service that I use constantly to glean not only the insights of the author but also other related context from other sources that directly relate to or expand the concepts in the book.
For more information on Shortform and to get a FIVE DAY FREE TRIAL and 20% discount on an annual subscription, click the link below:
Shortform – Way More than Book Summaries
If you are wondering how Obsidian stacks up against Notion, you should really check out our Obsidian Notes vs Notion comparison guide.
Getting Started
Obsidian makes it very easy to get started creating notes. In the section below, we will cover the user interface and how to navigate Obsidian Notes.
User Interface
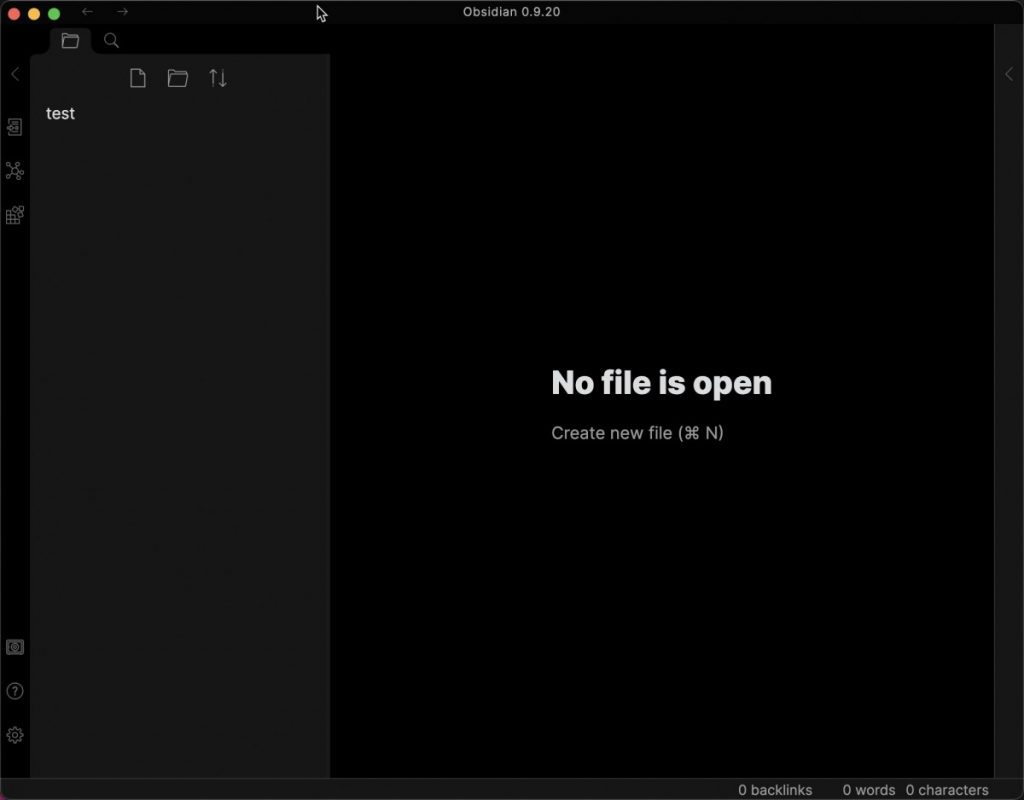
The above image is the main Obsidian window. It is very clean and works from left to right. On the left are the various options, then the folder/files panel and finally the composition area where you actually create/edit your notes.
Left-Most Panel
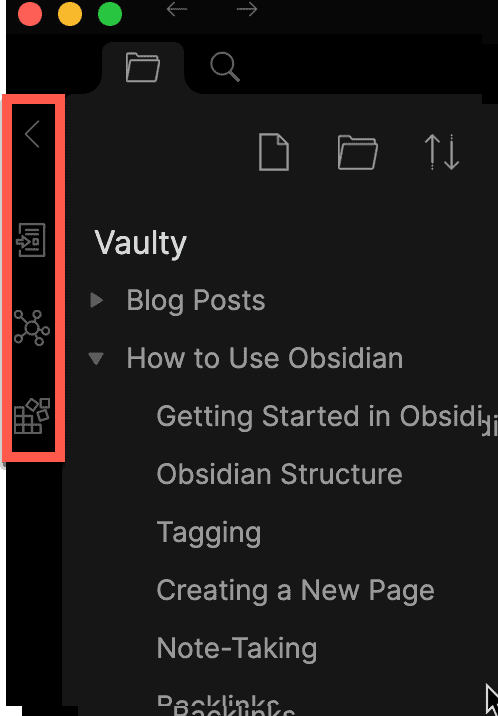
There are four icons in the left-most panel (listed below from top to bottom):
- Collapse Panel
- Open Quick Switcher
- Open Graph View
- Open Markdown Importer
The “Collapse Panel” button shows/hides the left-most panel.
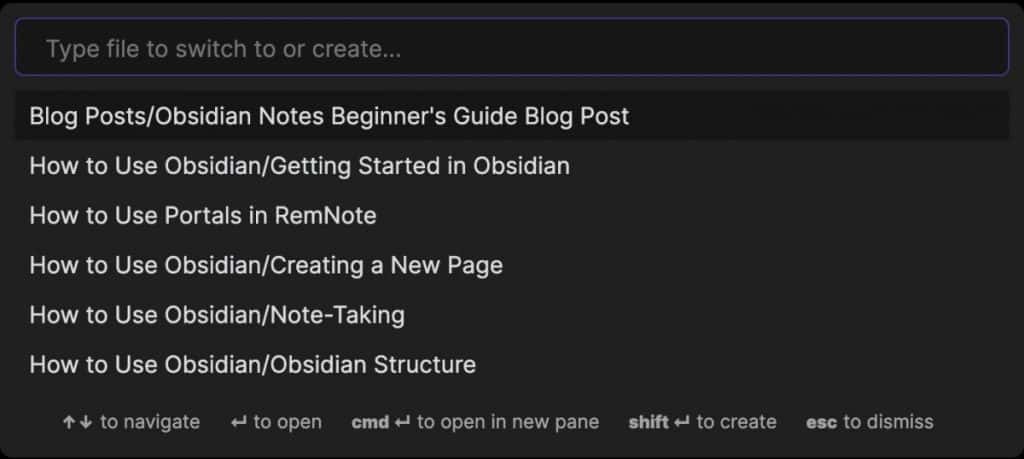
The “Open Quick Switcher” button brings up a text box (shown above) where you can type in a page you want to open.
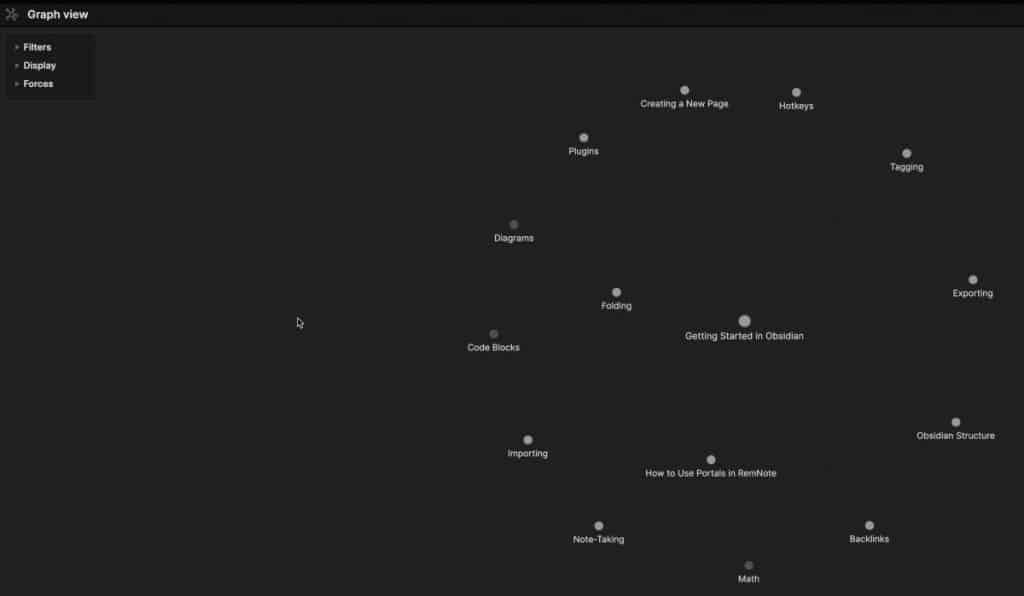
The “Open Graph View” will show you a graph depicting the relationships of each page to each other. We will cover this more in detail later on in this tutorial.
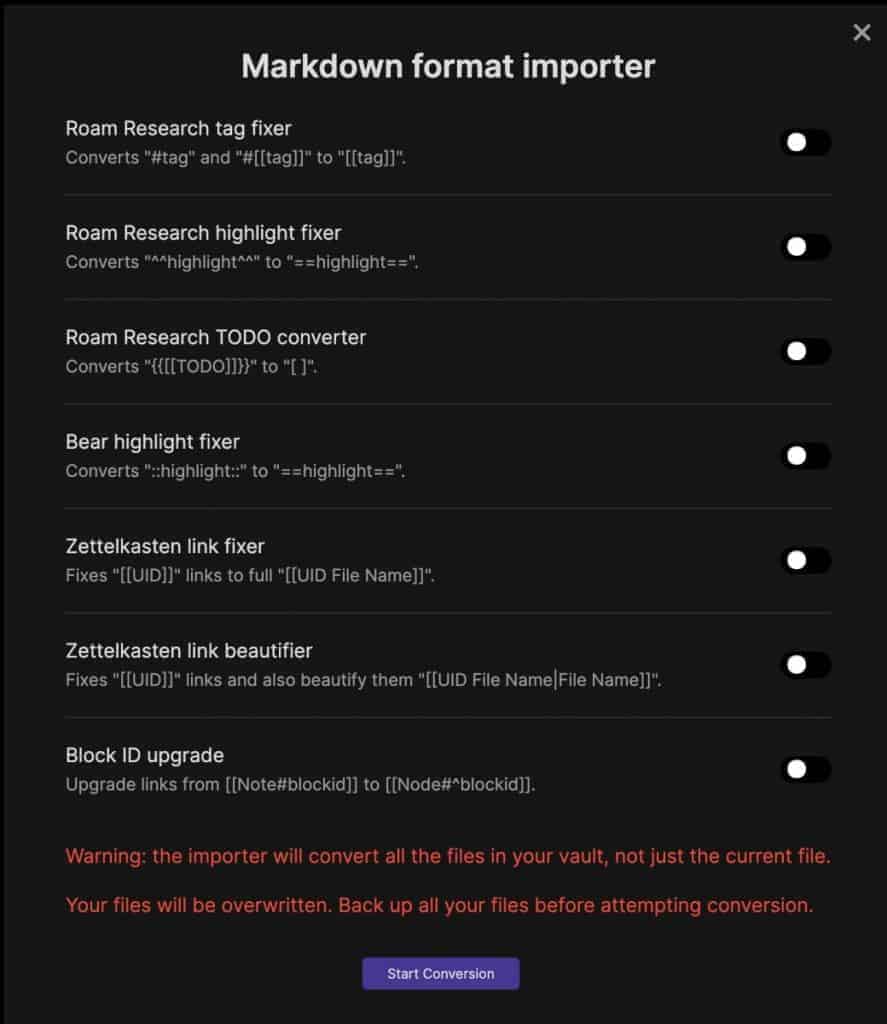
The “Open Markdown Importer” button allows you to import markdown files from other applications into Obsidian. It includes some setting specific to applications like Roam Research and Bear Notes.
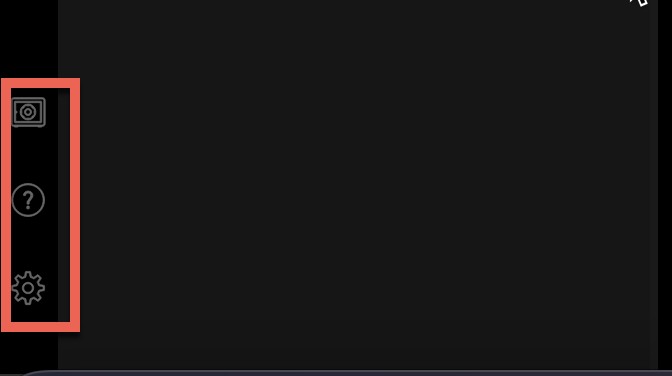
There are also three buttons at the bottom of the left-most panel (listed below from top to bottom):
- Open another Vault
- Help
- Settings
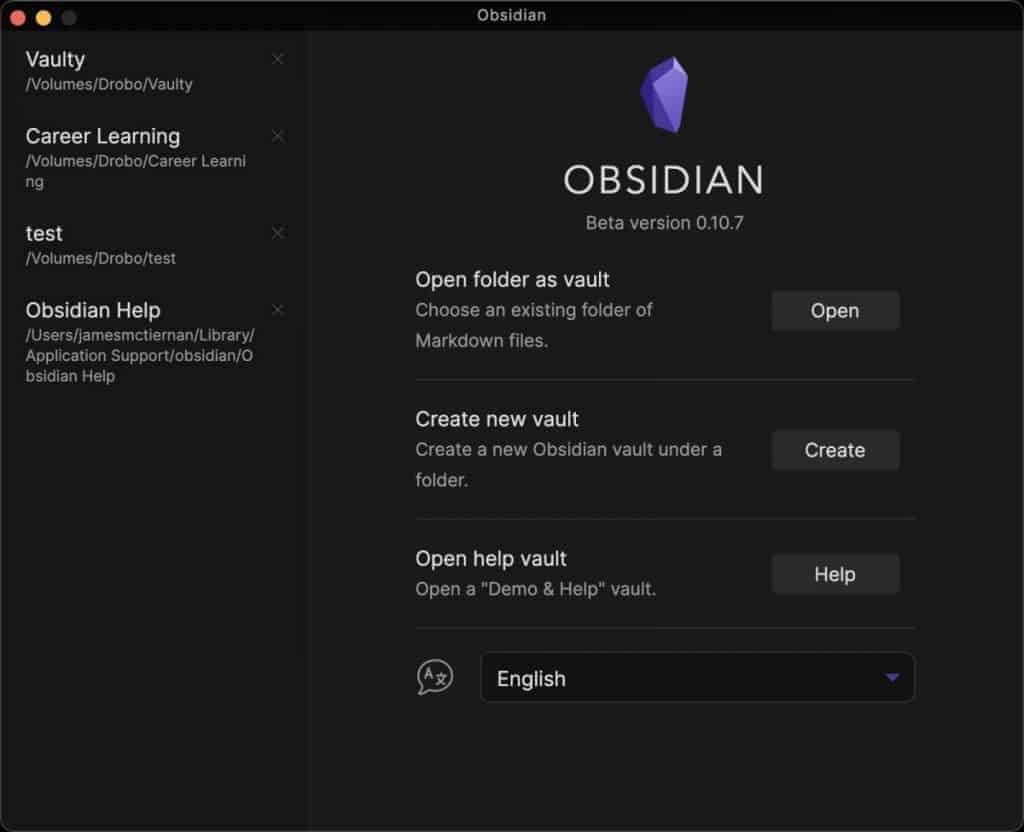
The “Open Another Vault” button allows you to open up another vault (a collection of notes). You will see a pop-up window like the one above that allows you to either open another existing vault or to create a new one. We will talk about vaults in more detail later on in the tutorial.
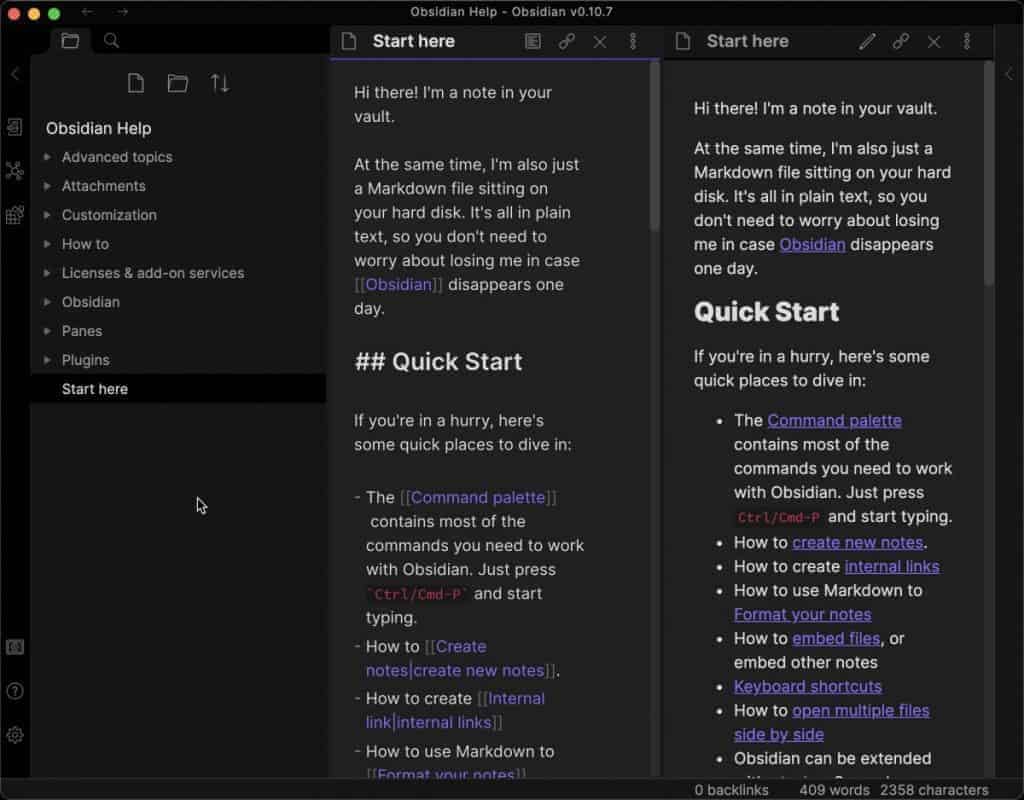
The “Help” button brings ups the Obisidian help section. Obsidian has done an excellent job of documenting all of the functions and capabilities of the application.

The “Settings” button opens up the settings options. Obsidian offers a ton of configuration options in the settings including:
- Spell Check On/Off
- Auto-Convert HTML to Markdown when pasting
- Custom Theme Selection
- Configuring Hotkeys
- Adding core and third-party plugins
Take some time to look at each of the setting options to see what might work for your workflow.
Obsidian Structure
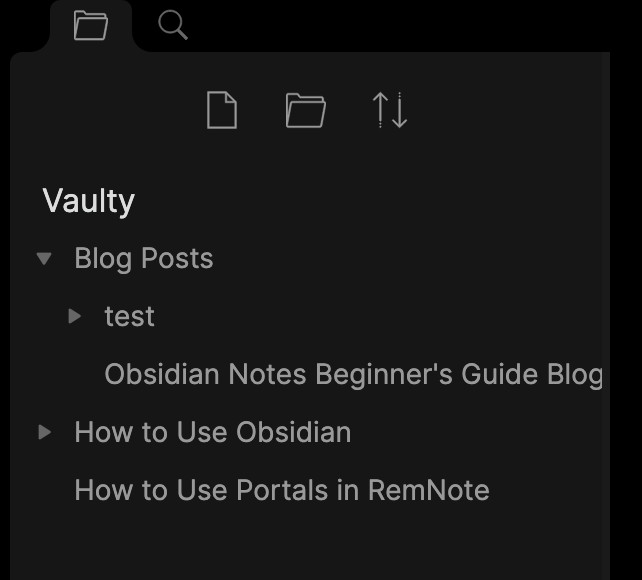
Obsidian uses a file/folder hierarchical structure similar to the files/folders system our computers use. Each vault you create will have its own files and folders. Files in Obsidian are called notes and you can add text, links and files to them as you can with other note-taking applications.
Creating Vaults
As referenced earlier, vaults are essentially a master directory containing all of the notes and folders that relate to each other. Obsidian starts out by default with a single vault (named Vaulty). If you want to have all of your notes and folders inside a single vault, that is fine. However, if you have the need for separate vaults based on function (work, personal, side hustle, etc.), Obsidian supports that as well.
To create a new vault in Obsidian, do the following:
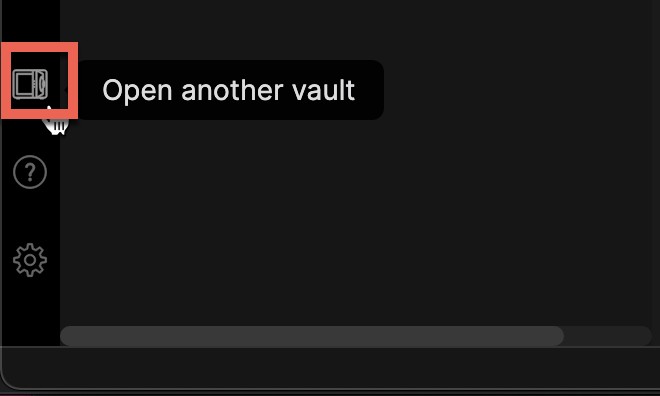
- In the lower-left corner of the Obsidian window, click the “Open another vault” button as shown in the screenshot above.
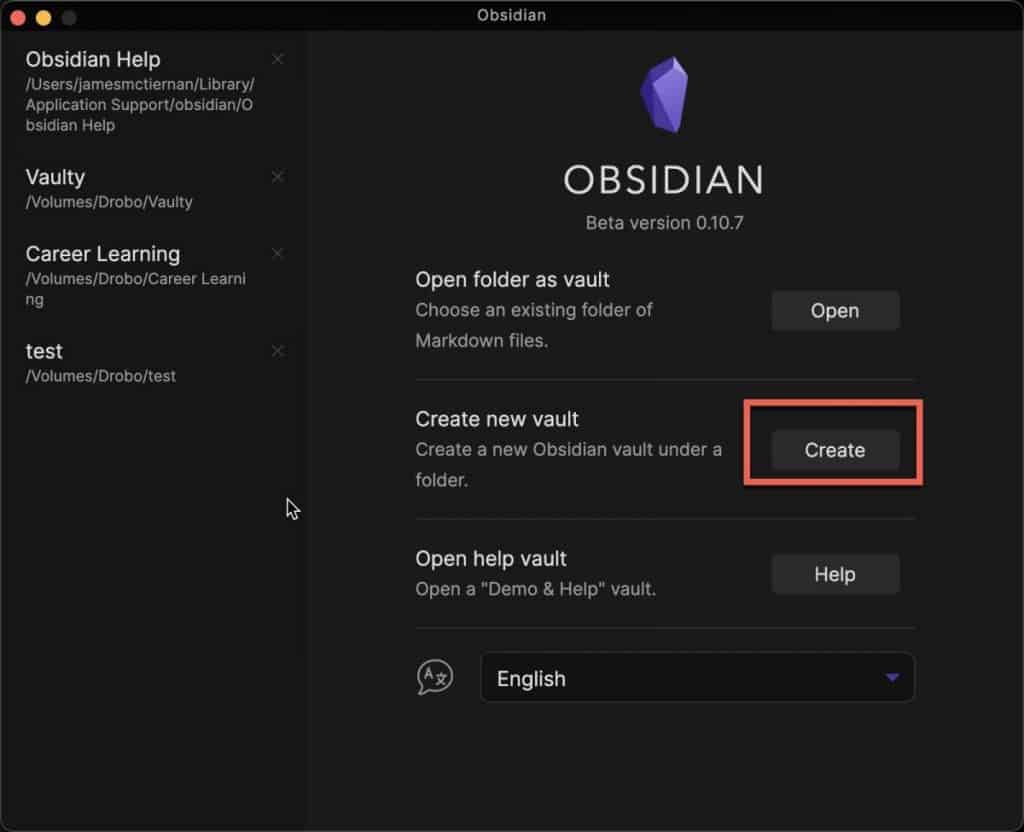
- Click the “Create” button next to the Create new vault section as shown in the screenshot above
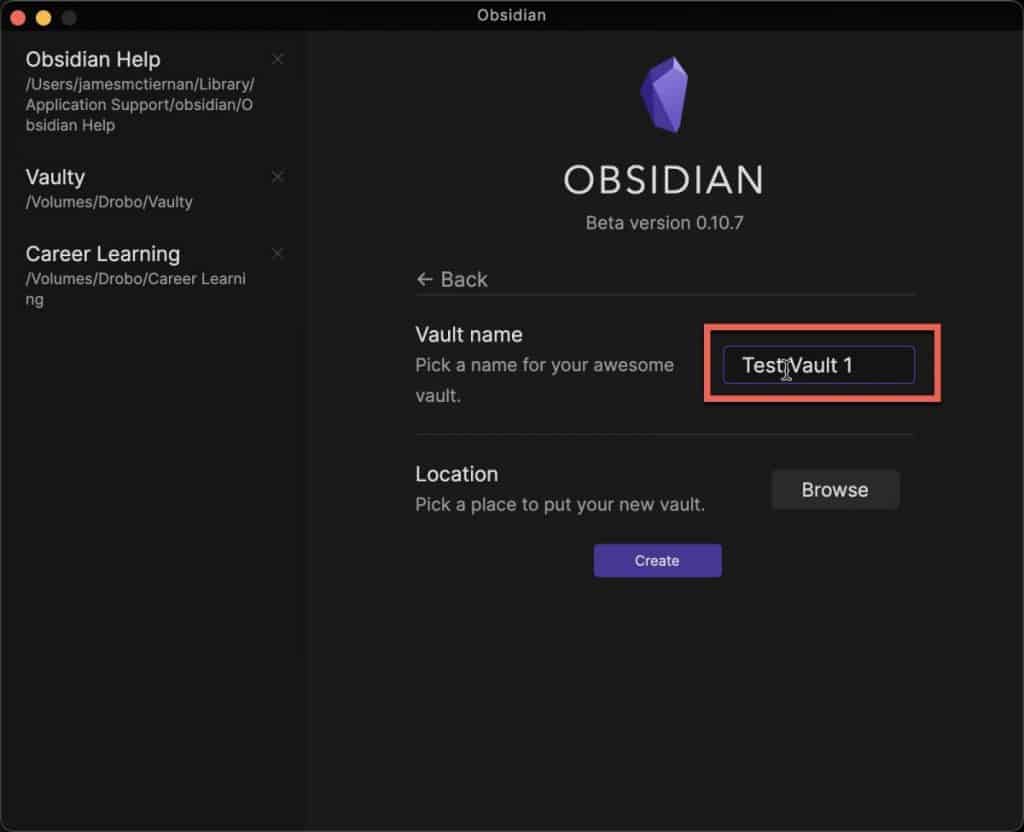
- You will see a screen like the one above, next to Vault name, click the text box and type in the name you want to assign to this vault
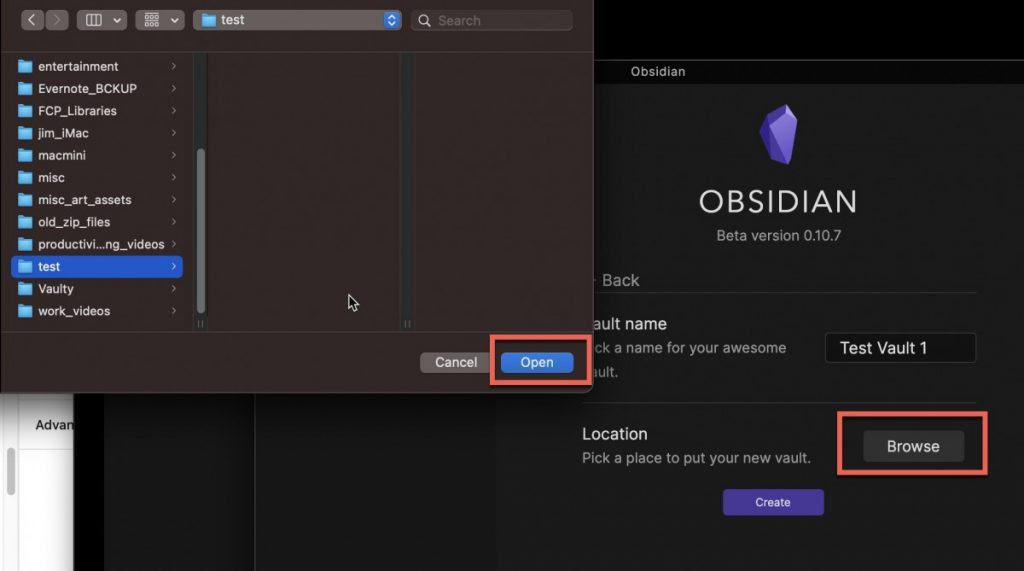
- Next, click the “Browse” button next to Location to assign where the vault will be stored on your computer. A file picker window will appear. Select the folder where you want to store your vault and click “Open“
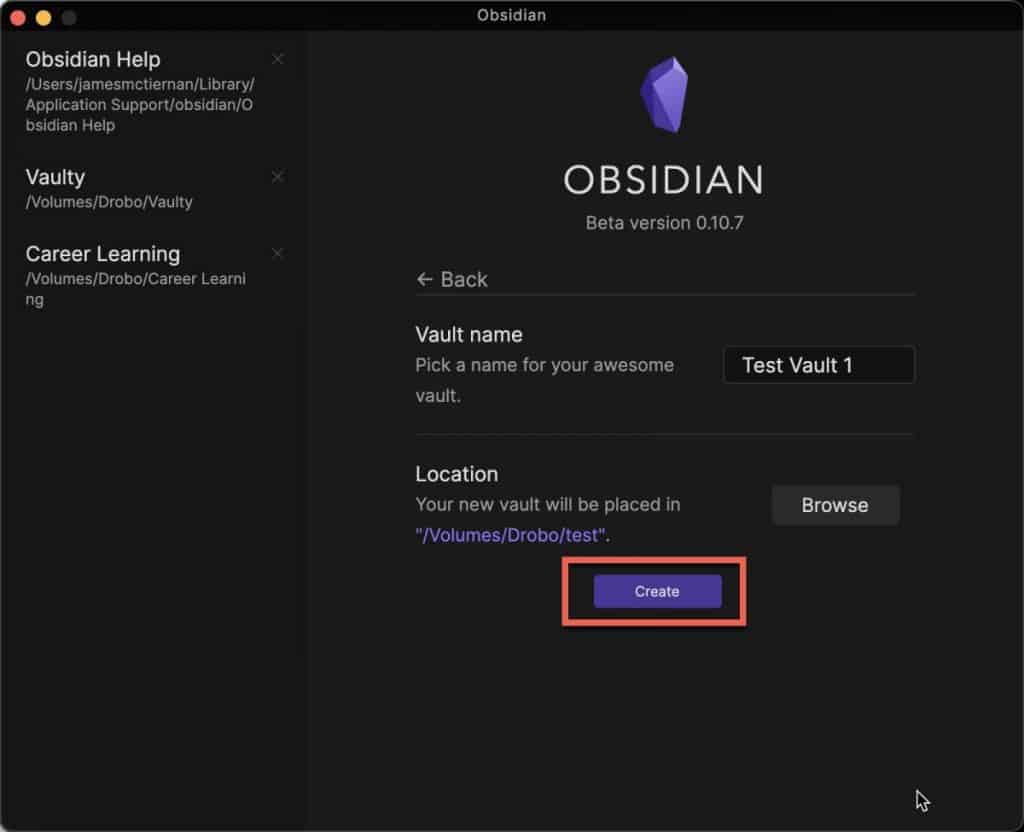
- Click “Create” on the main vault window as shown above to create your new vault
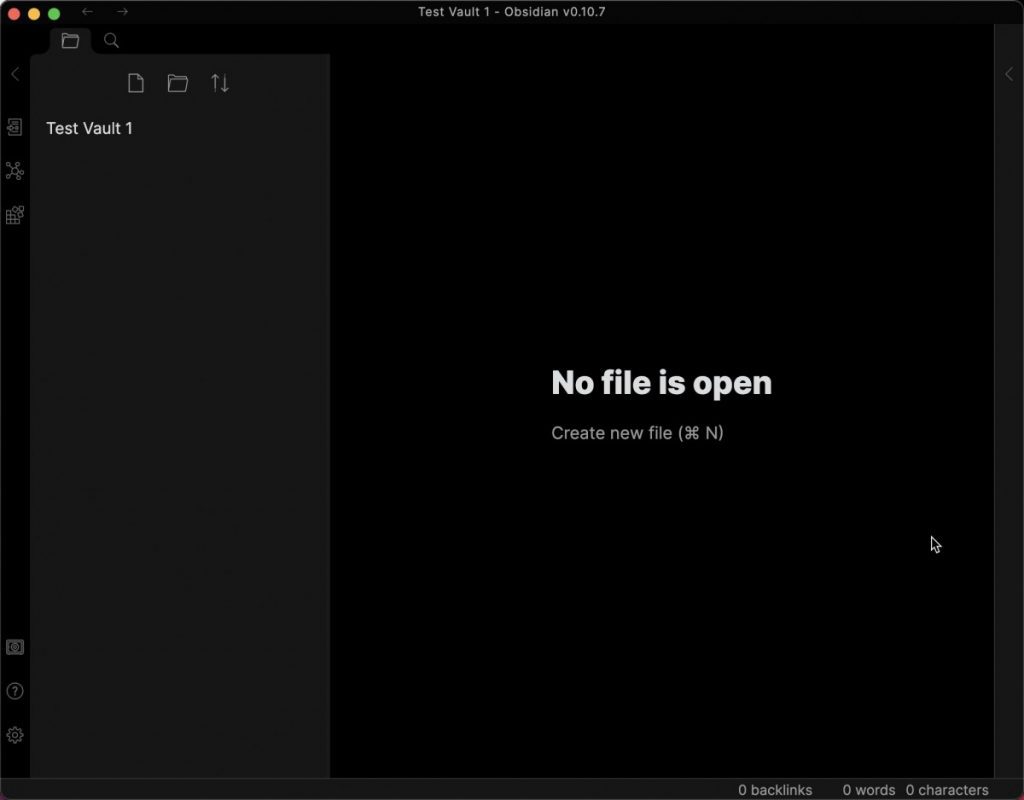
- Your vault will open in a new window ready for use.
Creating Notes
Obsidian makes it very easy to create a note. There are two ways to create a note in Obsidian:
- Creating a Note directly
- Creating a Note via link
We will cover each of these options below.
Creating Notes Directly
The first way you can create a note in Obsidian is by directly creating a note.
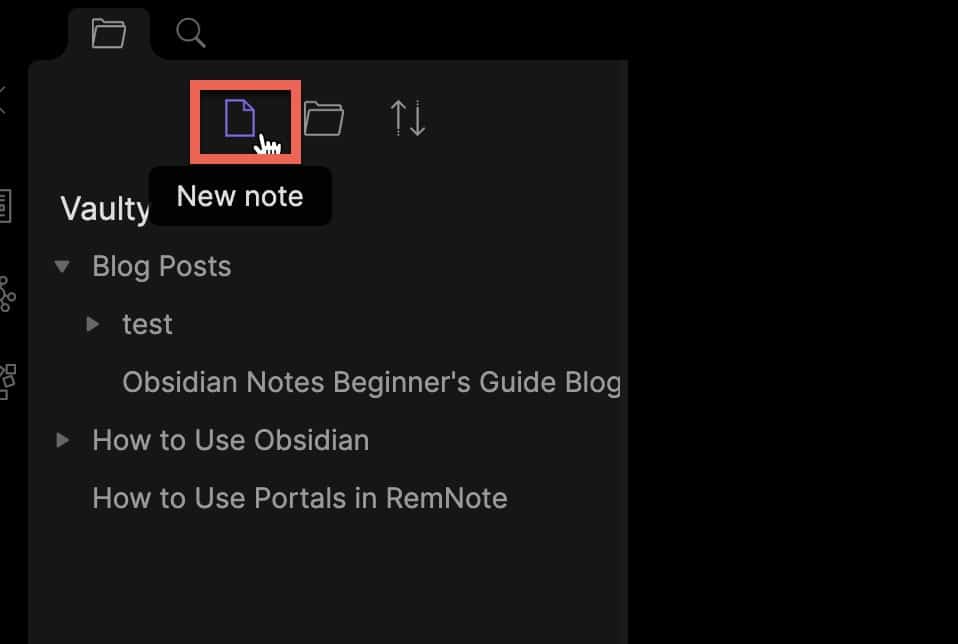
In the “folder” panel, click on the “New Note” button or use the keyboard shortcuts:
- Windows -> Control-N
- Mac -> Command-N

A new note will be created. Click on the title of the note (see image above).
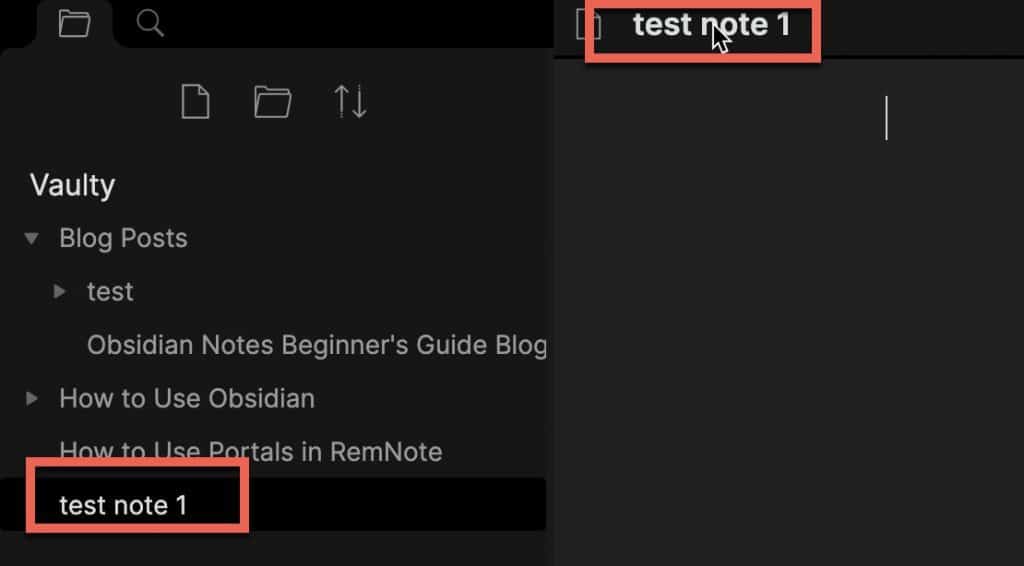
Your note will now have the name you gave it.
Creating Notes via Link
One of the cool things you can do to create a note that can save you some time when working in Obsidian is to create a note via a link. Basically, you can create a link to a note that doesn’t exist yet. This is great when you are working on a note and know that you will need to create another note but don’t want to fill it in right away. You can simply create a new link with the name you want to assign to that new note.
Sounds confusing? Let’s create an example so you can see how this works.
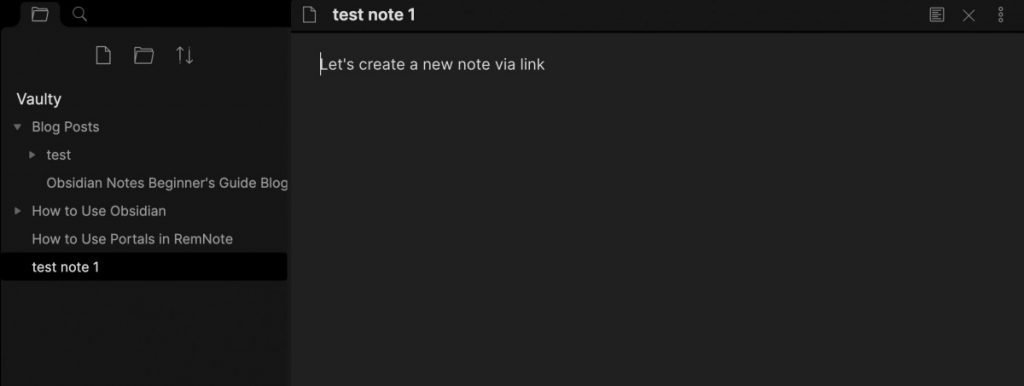
We have a simple note above.

Let’s say in the middle of working on my note, I realize there is another note I need to create but I don’t want to stop working on my current note. What should I do? I can create a new link to a note that doesn’t exist yet and activate it when I am ready to actually fill that new note in.

The way you create a link in Obsidian is by typing two open braces ([[), the name of the link or note, and then two closing braces (]]) as shown above.
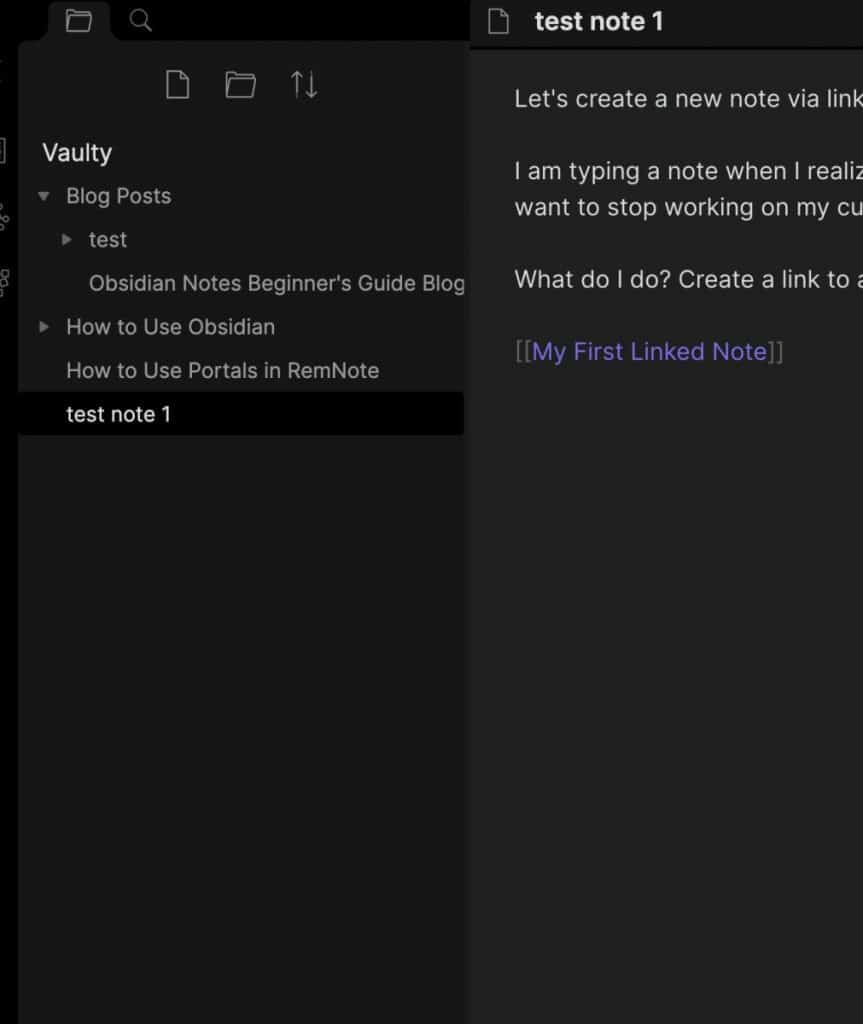
This creates a link to a new note that doesn’t exist yet. Notice in the screenshot above that while the link exists, the note doesn’t not show up in the note list to the left. That is because the link needs to be actually clicked in order to create it.
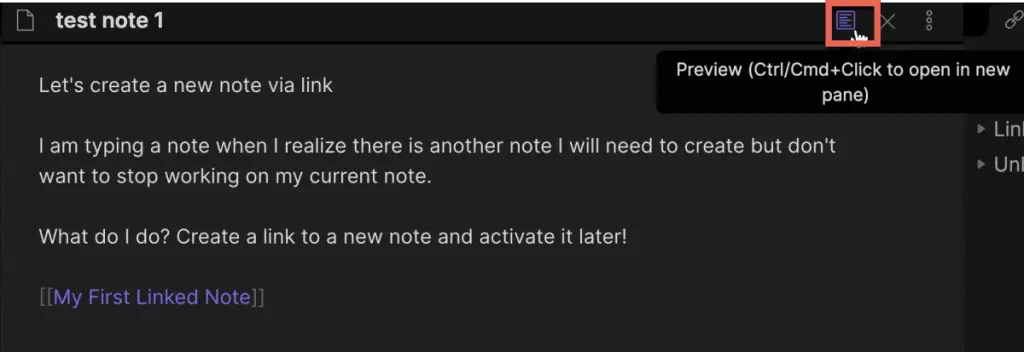
The way we can do that is to change from edit mode to preview mode for the current note and to then click the link. On the right side of the title bar for the note is a button shown in the image above that toggles between preview mode and edit mode. Edit mode is the mode that lets you write and edit the document while preview mode shows you the document with the desired formatting.
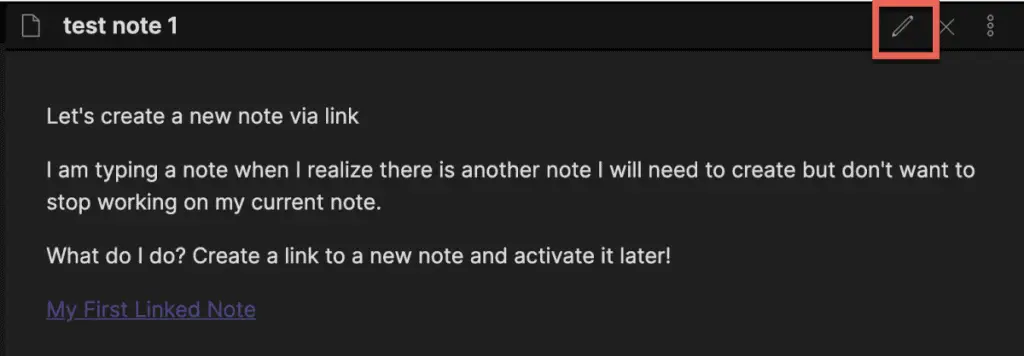
Click the toggle button. Your screen should now look like the one above. Notice that the link now appears without the braces and the toggle button now is a pencil icon that, when clicked will take you back to edit mode. Now click the link of the note to create your new note.

Your new note will now appear both in the main window and the notes panel. In order to edit your new note, click on the pencil button and type in some text.

The cool thing is that this document will still exist even if you delete the link from the original document as shown above. This is a lifesaver for me personally as I frequently get ideas for new notes I need but don’t want to stop my progress on the current note. This link approach also works great if you have a project where you know you need certain notes for aspects of the project. You can create a master project page and create links to all the documents you need. Once you are ready to actually populate those notes, simply click on the link. Very efficient.
Text Editing
Text editing works a little bit differently in Obsidian than it does in traditional word processors like Microsoft Word and Google Docs. Those tools have rich text editing toolbars with all the functions you might want like bold, italics, underline, etc.. Obsidian doesn’t have those toolbars or buttons. Instead Obsidian leverages Markdown for text editing.
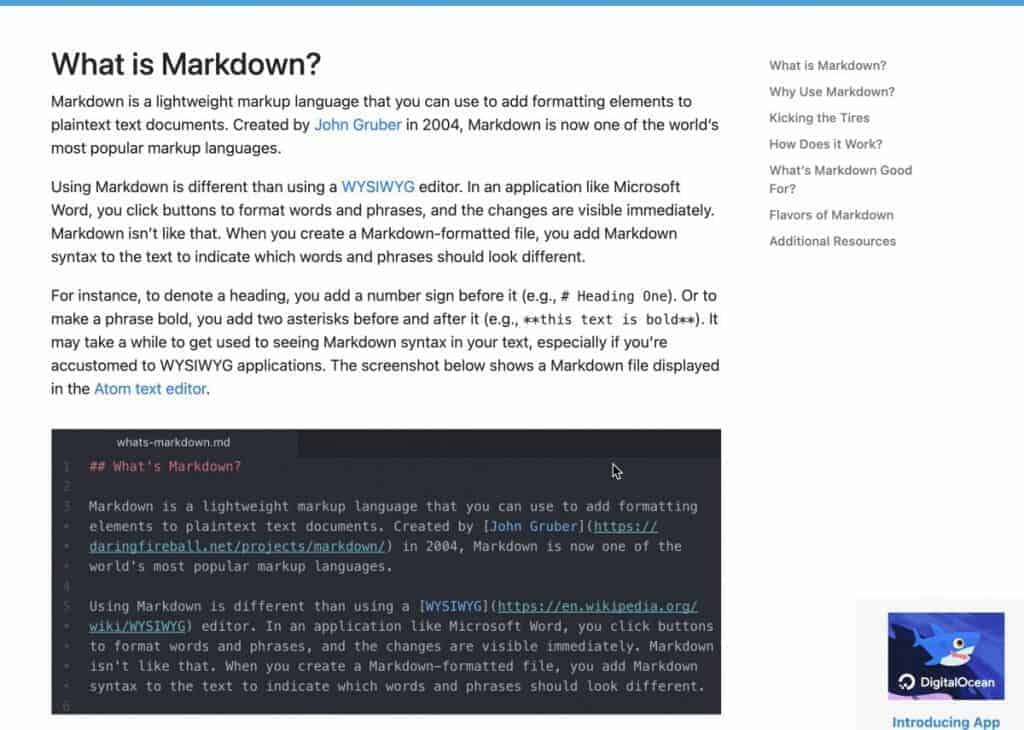
Markdown is a syntax that allows you to use symbols inside the text that can be interpreted as text formatting. This sounds hard but it is really not and I will teach you some of the basics below.
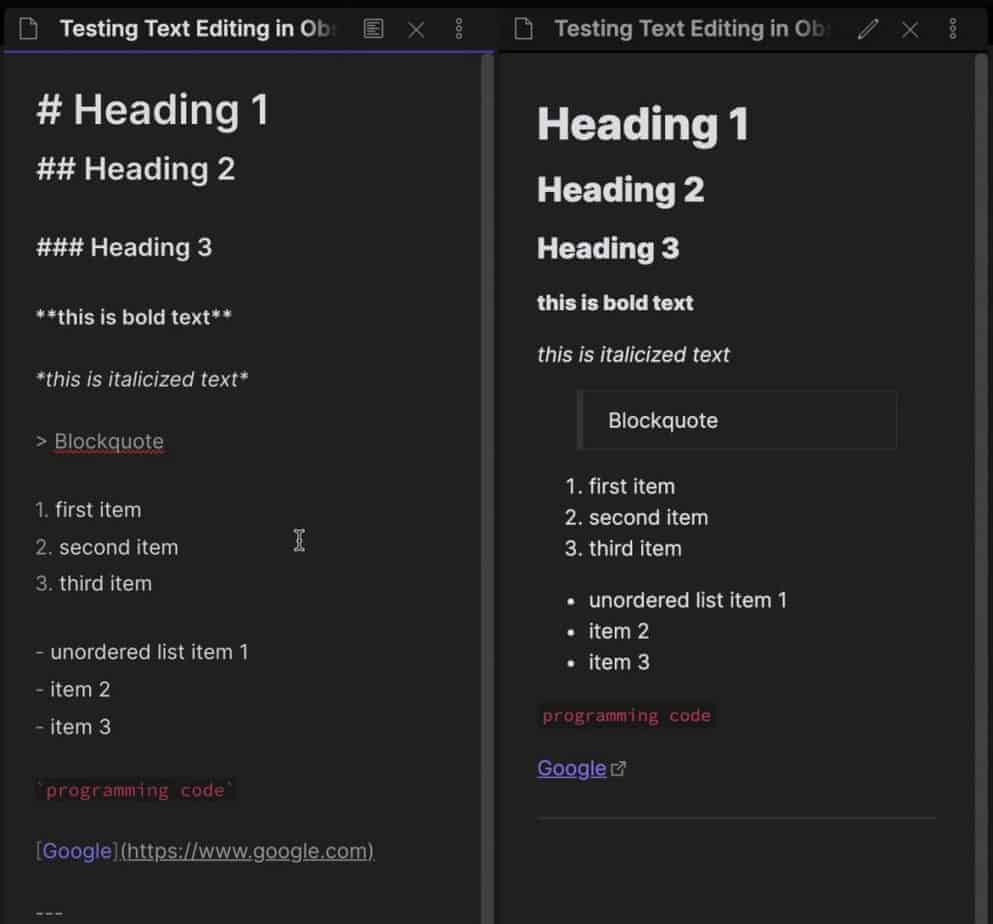
The image above shows how text formatting in the right panel with the left panel showing how to write it in Markdown. As you can see, it is relatively straight-forward once you get the hang of it. There is also an awesome cheat sheet at this link that can be helpful in learning Markdown.
Links
One of the strengths of Obsidian, in my opinion, is its powerful implementation of linking. We already know how to create new notes via link but you can also create:
- Backlinks to other documents
- Backlinks to specific headers inside a specific document
- External links
We will cover each of these next.
Backlinks
Backlinks are links in a note that take you to another note inside your Obsidian vault. There are two benefits to backlinking:
- Easier navigation to related content
- Seeing the relationships between notes via the Knowledge Graph
We will cover the knowledge graph later on in this tutorial.
Creating a Backlink
To create a backlink to another note in Obsidian, do the following:
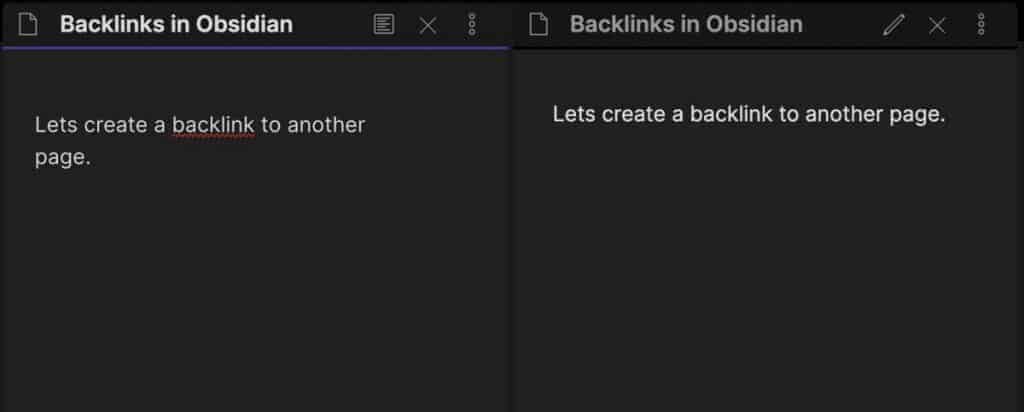
- Open the note that you want to create the backlink in.
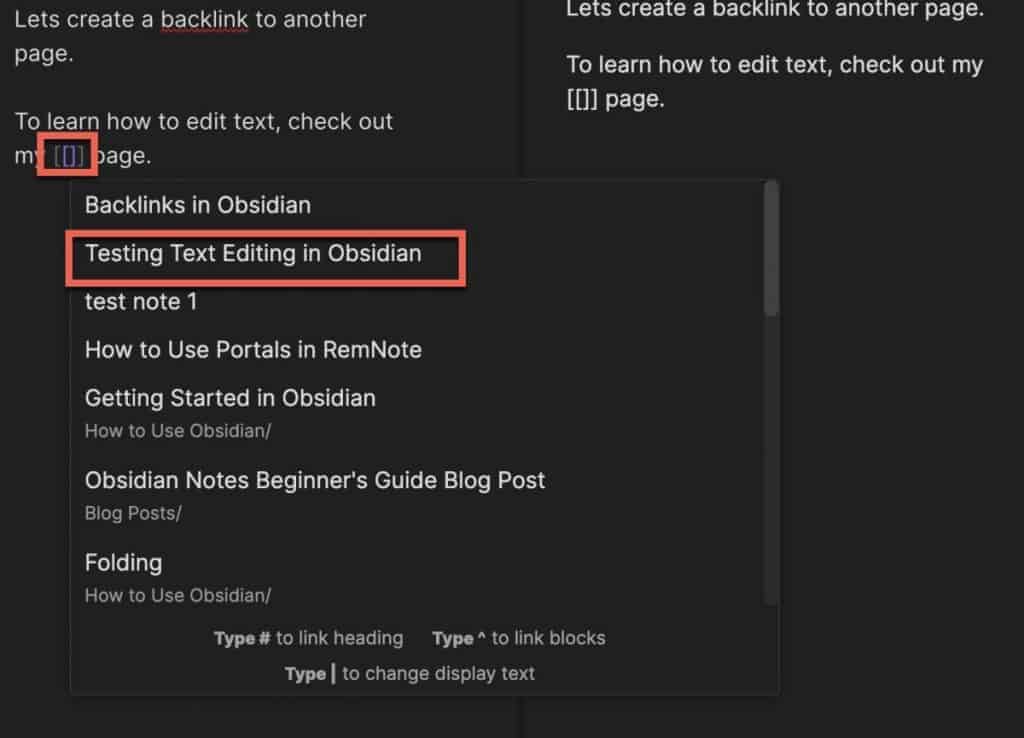
- Type two open braces to bring up to note selector and select your note from the list
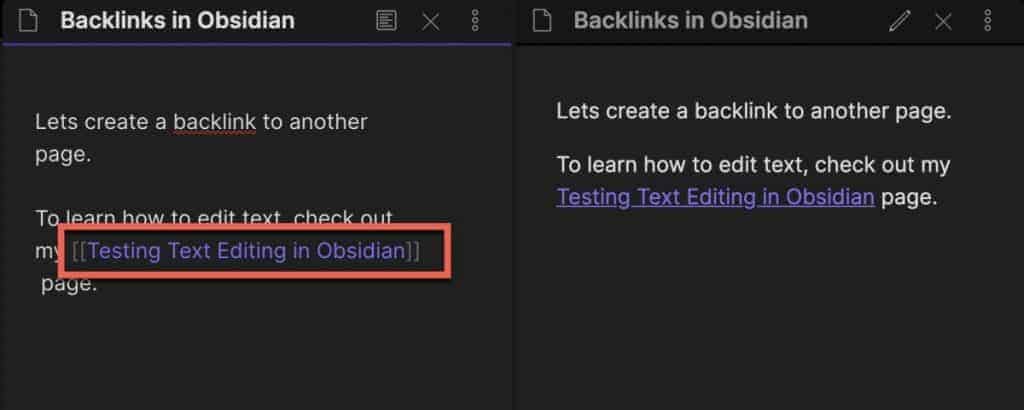
- Your backlink will now be created
But what if you want to create a link to a specific section of another note? Obsidian supports this as well.
Backlinks to a Specific Section of a Note
To create a backlink to a specific section of another note, do the following:
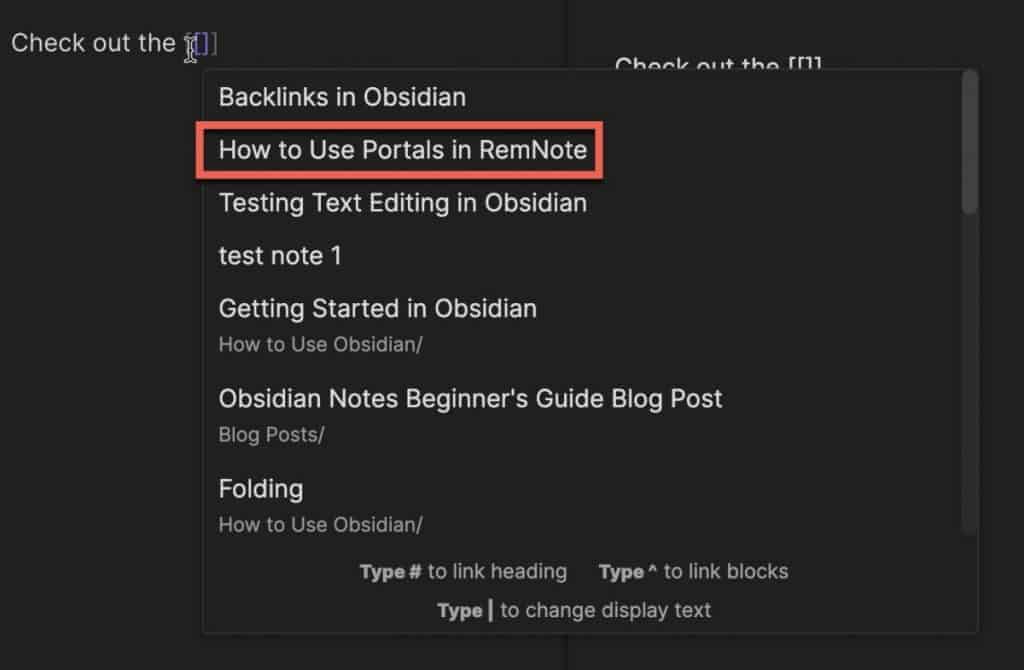
- Type two open braces and hover your mouse over it
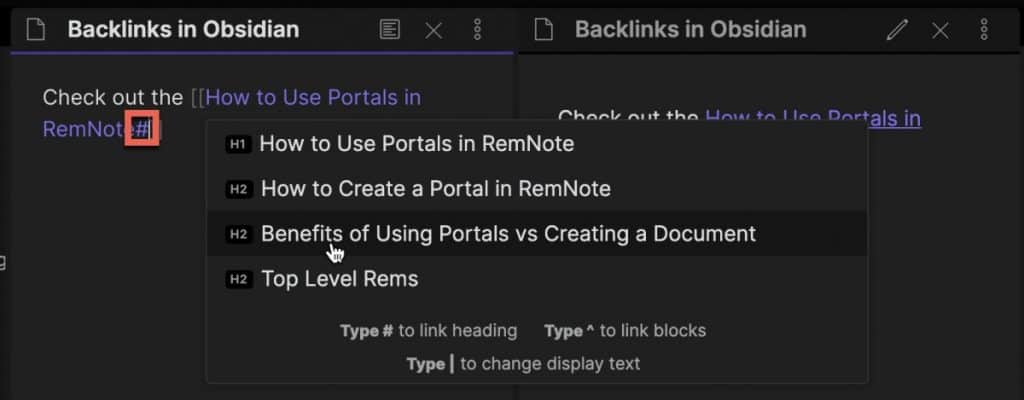
- Type the pound sign (#) to bring up the list of headings in that note. Click on the one you want to add a backlink to.

- Your backlink will appear.
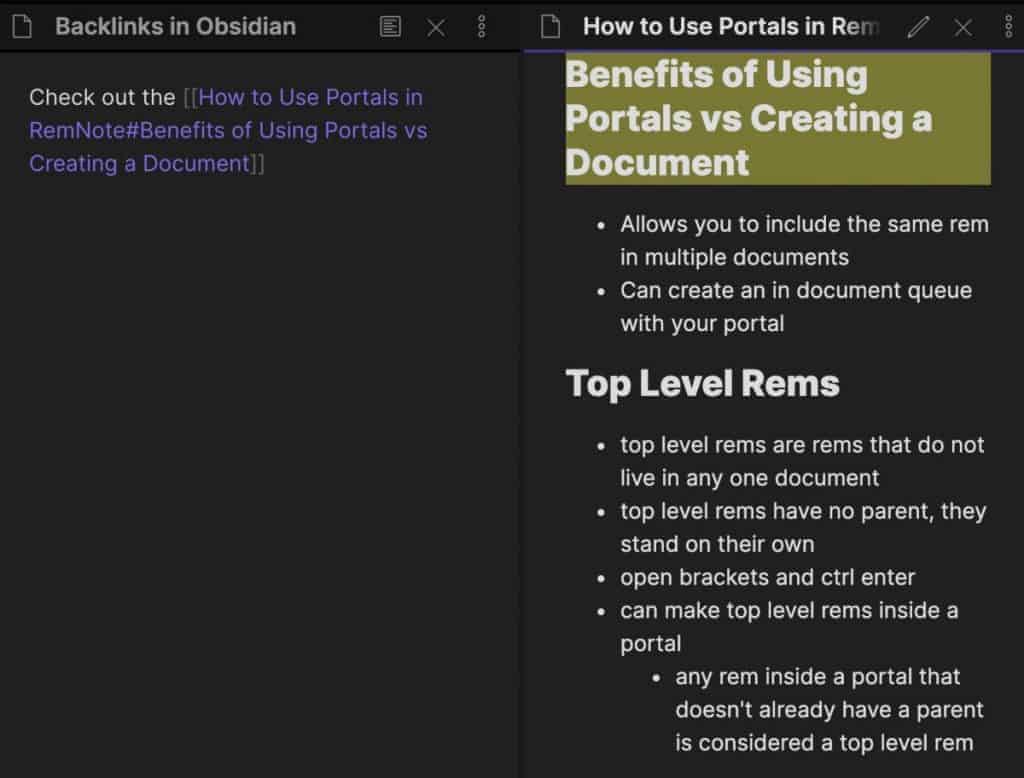
- Click the link in preview mode and the backlinked note will open to the specific section you set
Creating External Links
Creating external links to websites is straight-forward as well. You need to write use the Markdown structure for links which is:
- [Website Name](URL)

As you can see from the image above, I show writing a link for Google on the left in edit mode using markdown schema. On the right, you can see it rendered in preview mode.
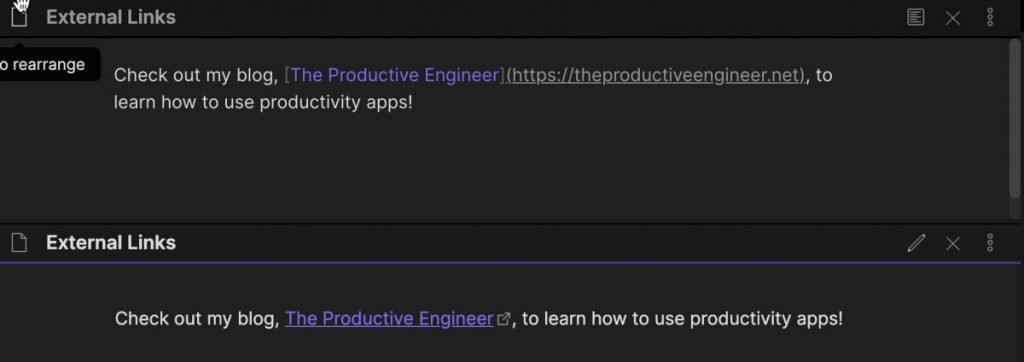
You can also create external links inside a sentence or paragraph as shown above. Writing URLs in Markdown is pretty easy once you get the hang of it.
Knowledge Graph
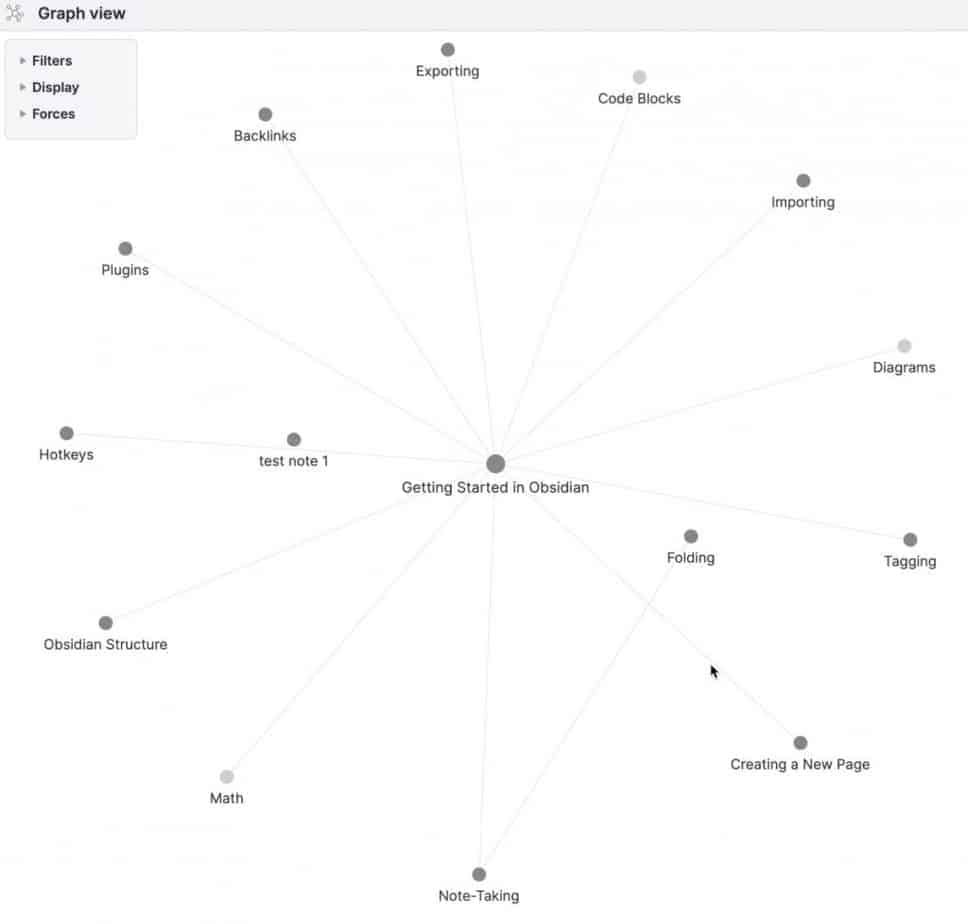
Remember earlier in this tutorial when I mentioned how backlinks can be used to create a knowledge graph of your notes? Well, the image above is a knowledge graph that was created based on the backlinks created in each of my notes (i used light mode so you could see the connections better). Pretty cool, huh?
Knowledge graphs can be a great way to view the inter-relationships between various notes in your vault. In the beginning of using Obsidian, this may seem not that great. However, as you create more and more notes and create backlinks to tie information together, the knowledge graph will show you more and more relationships that may not be readily apparent.
Filtering the Knowledge Graph
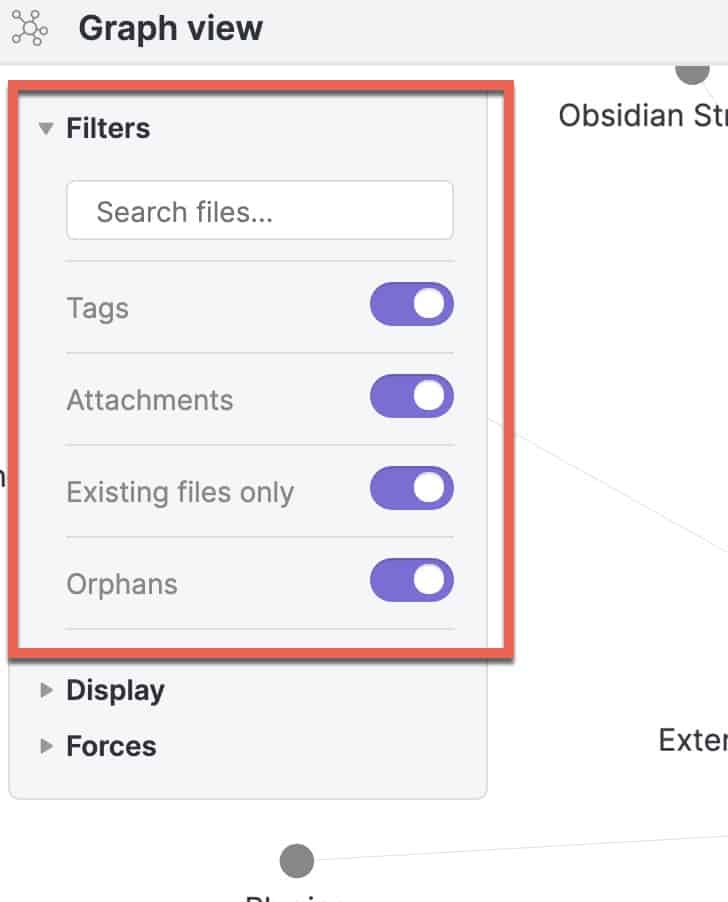
The knowledge graphs includes the ability to filter the graph based on the following parameters:
- Notes contain a specific word or words
- Whether the note has a tag
- Whether the note has an attachment
- Notes that are existing files (i.e. not just a link)
- Whether the note is an orphan (i.e. not backlinked to any other note and having no other notes linking to it)
You can toggle these on or off to get more granular as you need.
Panes
As you may have noticed earlier, you can actually have multiple panes open at the same time. Panes can be different notes or the same note and can be displayed horizontally (i.e. side-by-side) or vertically. The way I typically use panes is to have the same note in two panes with one in edit mode and the other in preview mode. That way I can see the formatted results of my edits in realtime as I type.
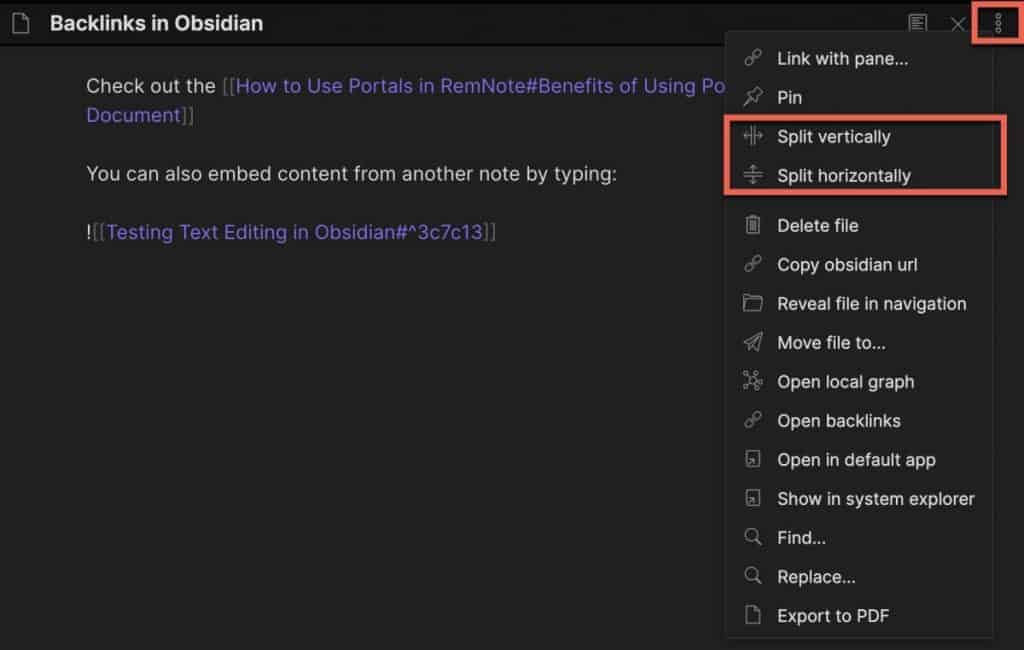
To create a new pane is to click on the vertical ellipsis in the upper-right hand corner of the Obsidian window and select either “Split vertically” or “Split horizontally” from the menu as shown in the screenshot above.
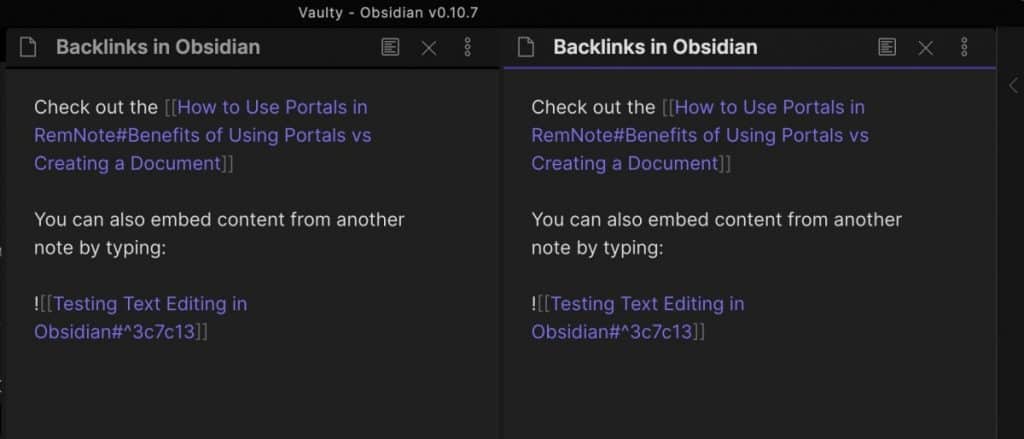
You should now see the same note in two panes.
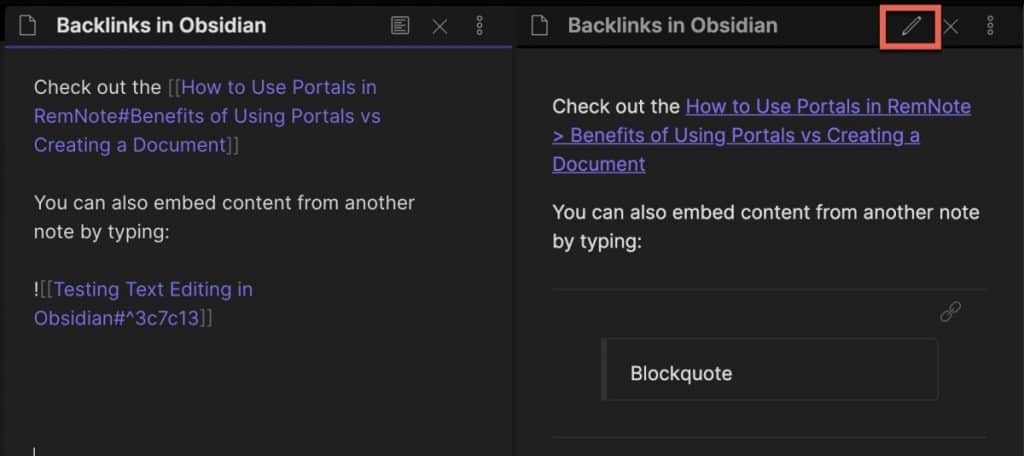
I recommend putting the right side one in preview mode. That way you can perform your edits of the note on the left side and instantly see the results on the right.
Importing Files
Obsidian supports the ability to import several file types:
- Images
- Audio/Video
- PDFs
Images
Let’s start with images. There are a couple of different ways to add an image to a note:
- Drag the image into the note
- Use Markdown syntax
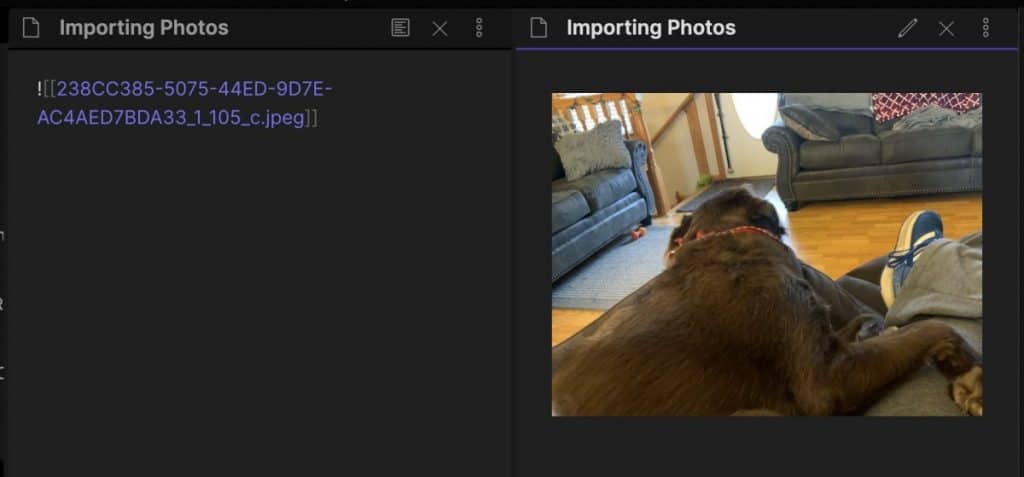
Dragging the image onto the note works just as you would expect. Open your note in edit mode and add a pane with the same note in preview mode. Drag an image onto the note in edit mode. You should see the markdown image syntax in the edit mode pane and the image itself showing in the preview pane as shown in the screenshot above.
You can also use the Markdown syntax for adding an image by typing:

For example, if you had a PNG file of a flower the syntax would be:


You can also resize images by going to the end of the photo extension, typing a bar (|) and the dimensions in pixels you want the image to be as shown in the screenshot above.
Audio and Video
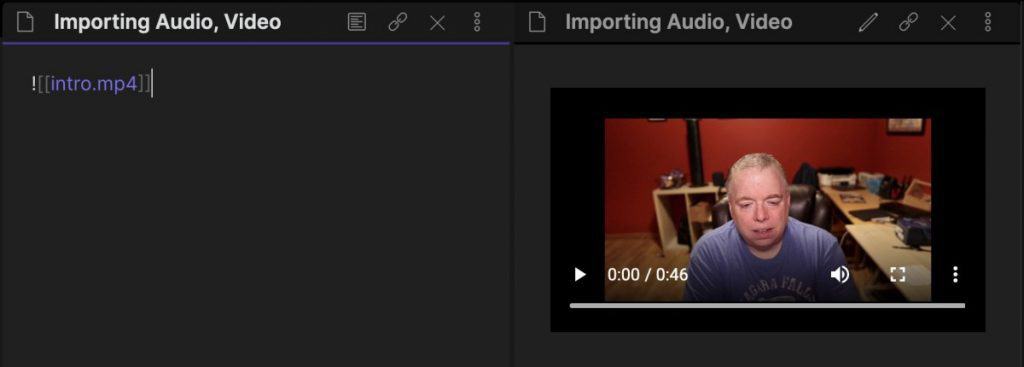
Audio and video work largely the same as images. You can simply click and drag your audio or video file into your note in edit mode and it will render in the preview pane.

PDF files work slightly differently in Obsidian. PDF files can only be attached to a note, not embedded in the document. This means that in preview mode, you will not see the actual PDF contents in the note.
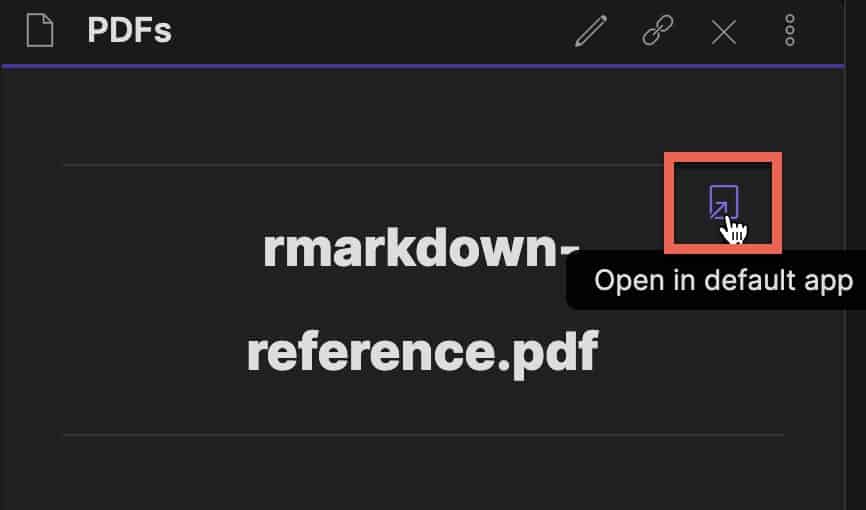
Rather, you will see a box with the title of the PDF and an “Open in default app” button. Clicking that button will open the PDF in app that by default opens PDFs on your computer.
Tagging

Tags are a great way to add some context (called metadata) to your notes to make them easier to organize and search for. Adding a tag to a note in Obsidian is easy. To add a tag to a note in Obsidian, simply type # followed by the name of your tag. For example, if I wanted a tag named tutorial, I would type:
#tutorial

The main way I use tags is to make searching for notes with a specific attribute. In the example shown in the screenshot above, I click on the search option (the magnifying glass shown in the image above) and type in my tag including the # sign in the search box. Obsidian will display all the results that contain that tag.
Plugins
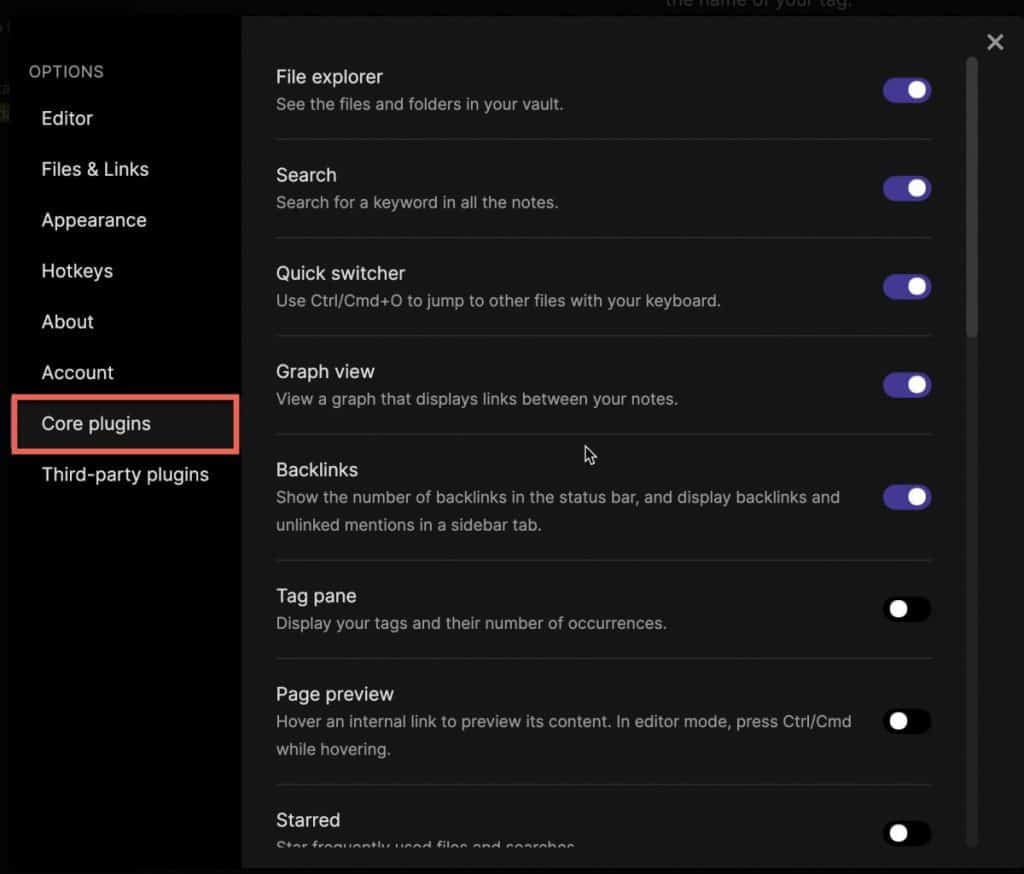
If you are looking for functionality not in the base load of Obsidian, there are plugins you can enable that enhance the abilities of Obsidian. The Plugins option is in the “Settings” option and have two categories: Core plugins (shown above) and Third-party plugins. Core plugins are the ones that Obsidian themselves have made.
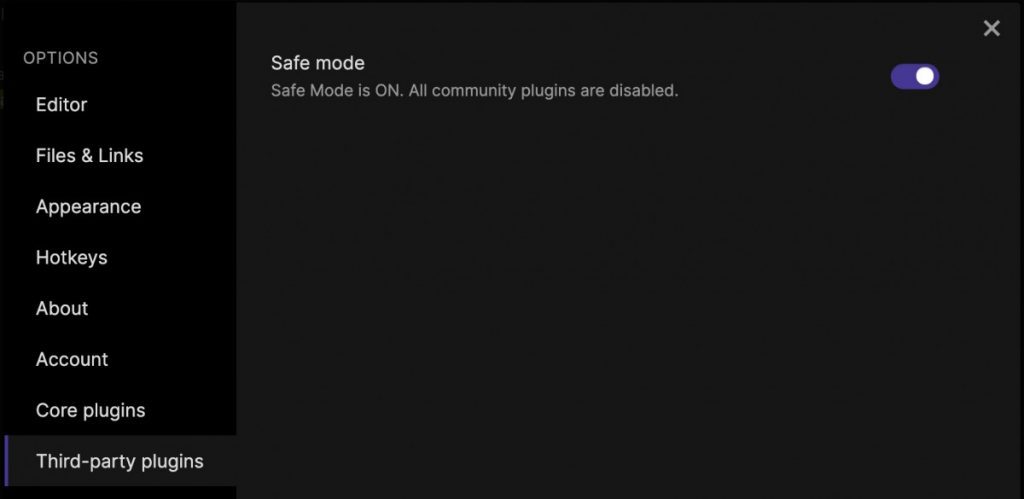
Third-party plugins are those made by other people not associated with Obsidian. In order to access third-party plugins, you would need to disable safe mode (shown above).
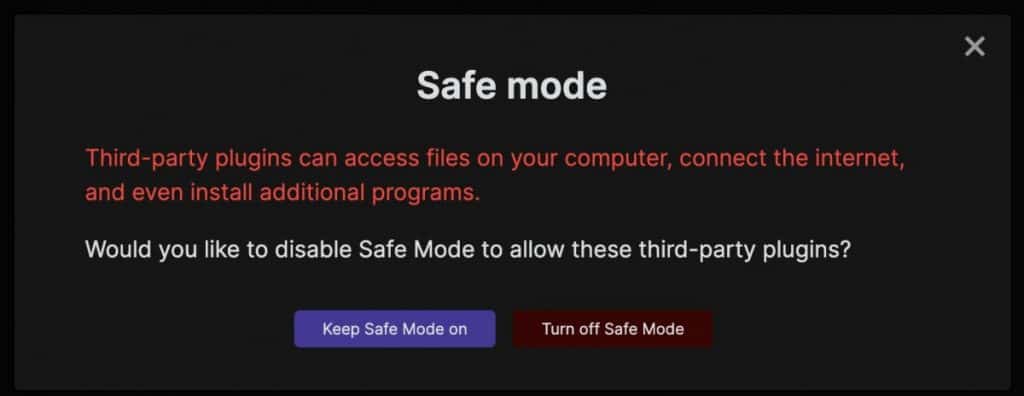
When you disable safe mode, you will see a message like the one above warning you about the level of access these plugins will have to your computer. There is always a risk to using third party plugins so consider that as you decide whether to enable them or not. If you do choose to use third party plugins, I would recommend limiting your usage only to those you can’t live without to minimize your risk.
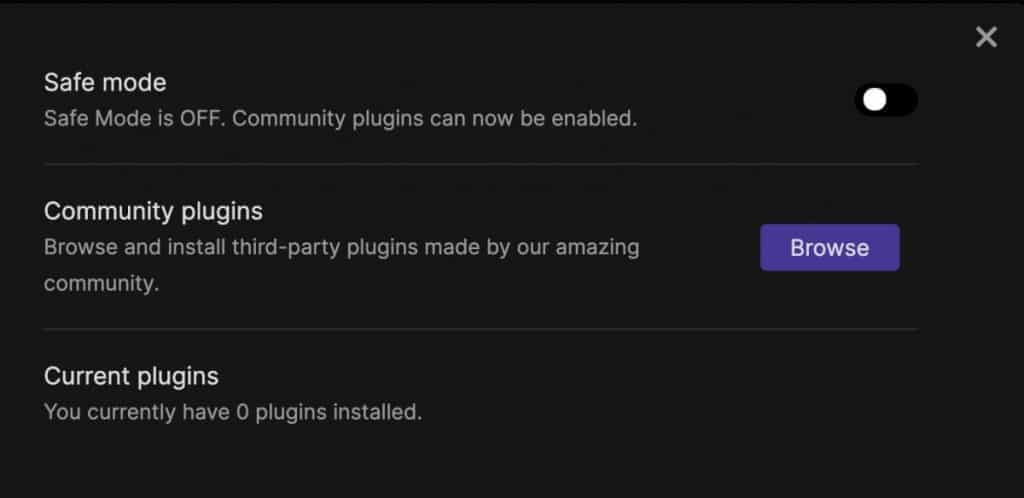
If you do enable third party plugins, you will see the screen above with a browse button to browse third-party plugins and a list of plugins you currently have installed.
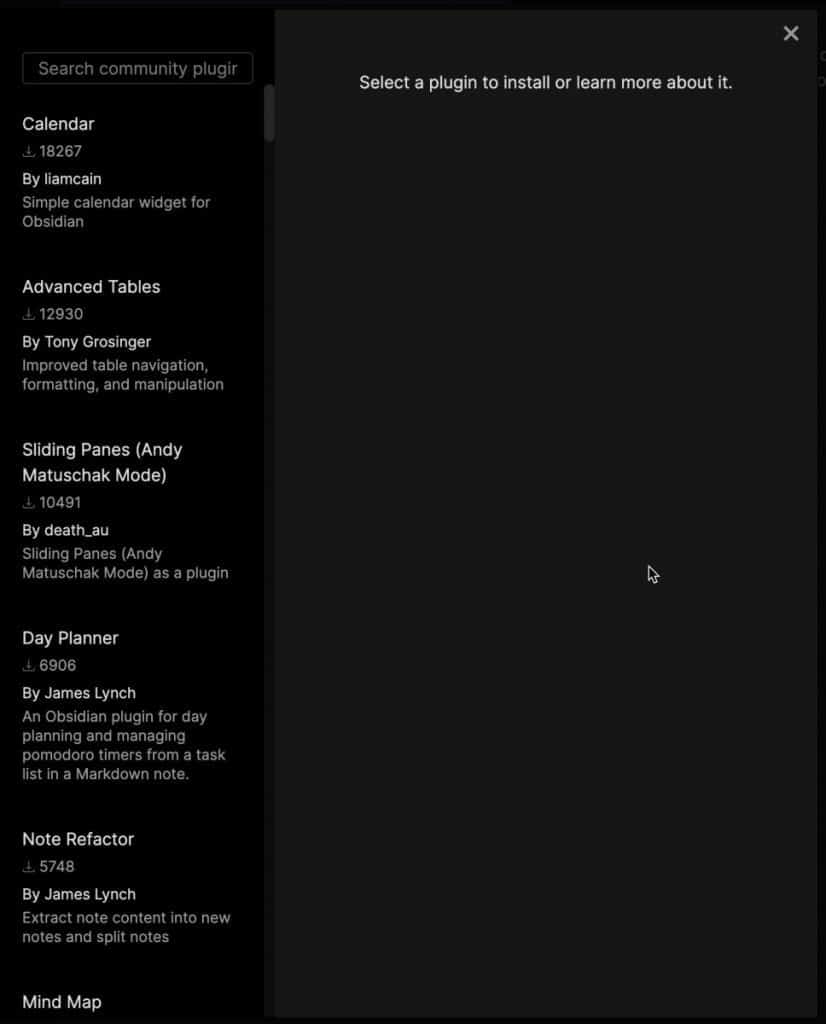
If you click the browse button, you will be presented with the plugins menu as shown above. Each plugin listed includes a description of its functionality and how many times it has been downloaded.
Check Out Our YouTube Channel!
We have a YouTube channel now and we are working hard to fill it with tips, tricks, how-tos, and tutorials. Click the link below to check it out!
Do You Ever Need to Edit or Annotate PDFs?
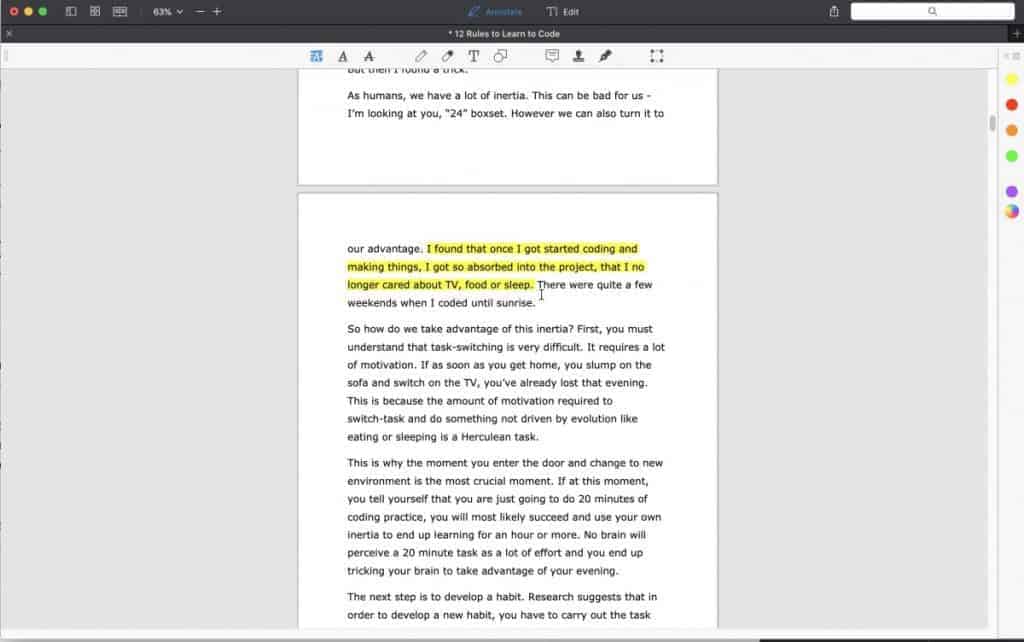
If the answer is yes, you should really PDF Expert! PDF Expert is my go-to app for editing and marking up PDF documents. It is easy to use, has a ton of features and is very cost effective compared to other options out there. For more information on PDF Expert, click the link below:
PDF Expert – Fast, robust and beautiful PDF editor
Looking to Get Started Blogging or on YouTube?
Getting started can seem daunting and scary (I know it was for me) but it doesn’t have to be. I was very lucky to find a program that that has helped me grow my blog to over 60,000 page views and a Monetized YouTube channel that is growing month-over-month.
Project 24 by Income School is the program that I have used. I have been a member for over a year now and just renewed my membership. I cannot recommend Project 24 enough! For more information on Income School, click the link below:
Project 24 byIncome School – Teaching You How to Create Passive Income from Blogs and YouTube

