How to Create a Dashboard in Notion
Dashboards in Notion are a great way to see everything you want to see in one place. Leveraging the power of Notion databases along with widgets and other elements can provide a space that provides a single pane of glass feel to your productivity workflow.
But how do you create a dashboard in Notion? Enclosed below are the steps to create a dashboard in Notion:
- Create or pick an existing database(s) you want to use as the source data for your dashboard
- Create a new page for your dashboard
- Add a cover image and icon to your dashboard page
- Add widgets as required from sites like Indify or Apption
- Use Dividers to break up sections of your dashboard
- Use Linked Databases to access key data you want on your dashboard
We will cover each of the above steps in great detail in this tutorial.
Before we get started with the tutorial, if you are looking to learn more about apps like Notion, Todoist, Evernote, Google Docs, or just how to be more productive (like Keep Productive’s awesome Notion course), you should really check out SkillShare. Skillshare is an online learning platform with courses on pretty much anything you want to learn. To learn more about Skillshare and its vast library of courses and get 30% off, click the link below:
SkillShare – Online Learning Platform
If you are just starting out with Notion and aren’t sure where to get started, you really need to check out my comprehensive beginner’s guide to Notion. It goes through all things you need to know to get started the right way. Enclosed below is the link to the guide:
Link to Beginner’s Guide to Using Notion With Screenshots
Looking for some information on the power of Notion? Check out our article containing tips to help you become a power user of Notion at the link below:
Let’s get started with the tutorial 😀.
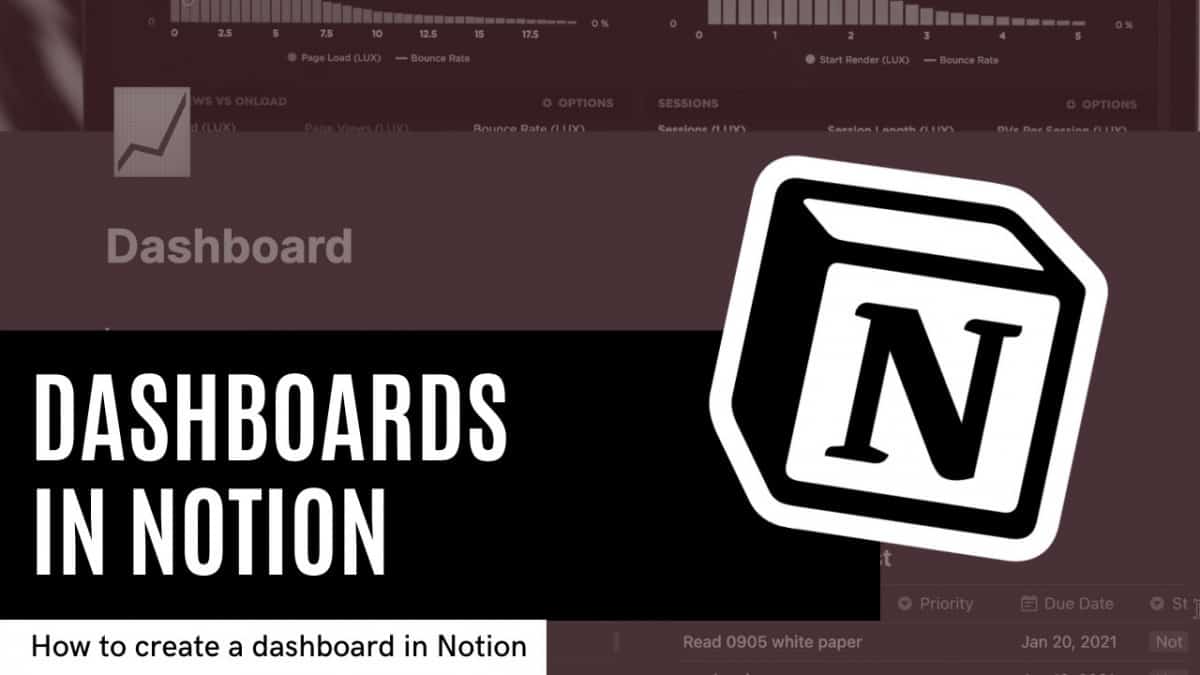
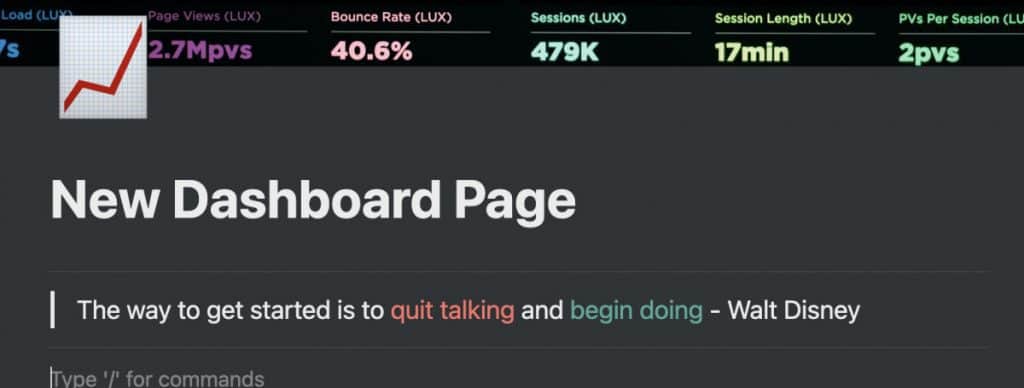
The End Product
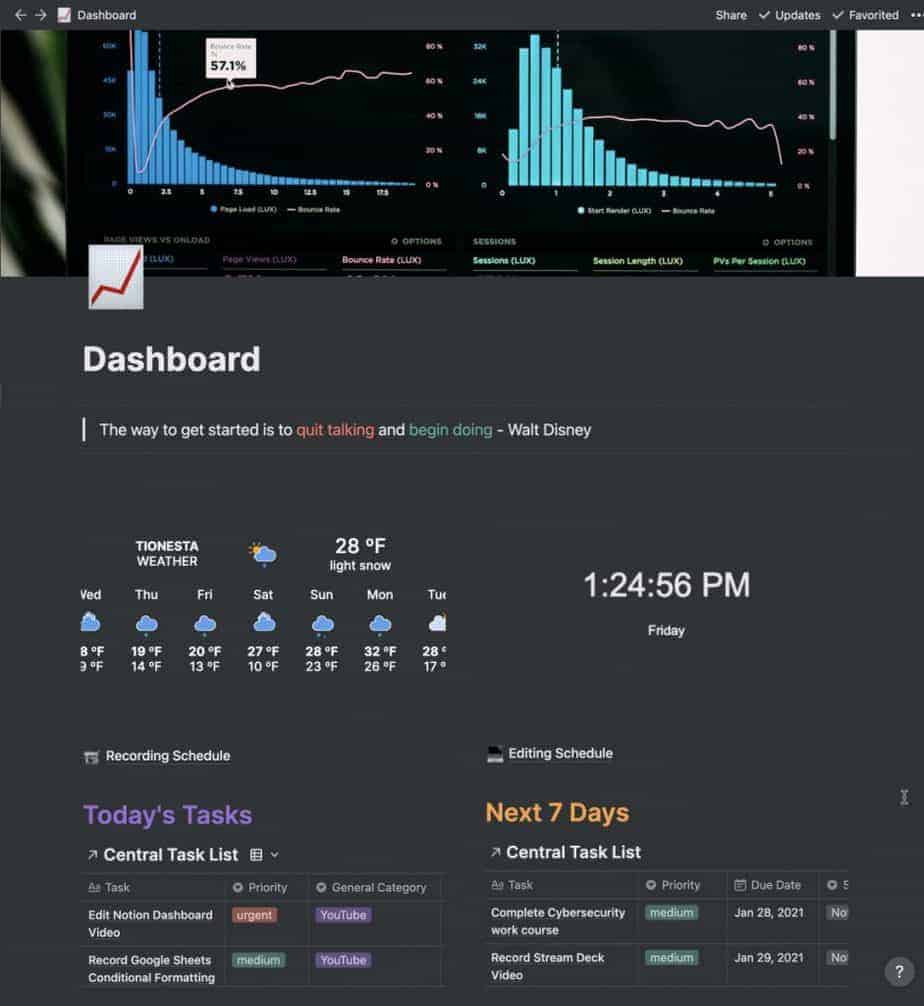
The image above is the dashboard that we will be creating in this tutorial. I wanted to show you the finished product so that you could get a feel for what a dashboard can look like and some of the elements we will be incorporating before we get started.
Our dashboard will use the following elements:
- Headings
- Dividers
- Quotes
- Widgets
- Linked Databases
Each of the above elements add context to our dashboard but please do not feel limited by this. You should use whatever elements make sense for how you work.
Using Databases for Your Notion Dashboard
There are a couple of different ways to get data to put onto your dashboard. However, the most powerful information is the data that resides in your existing Notion databases. Your databases (also known as tables) contain the data you use everyday.
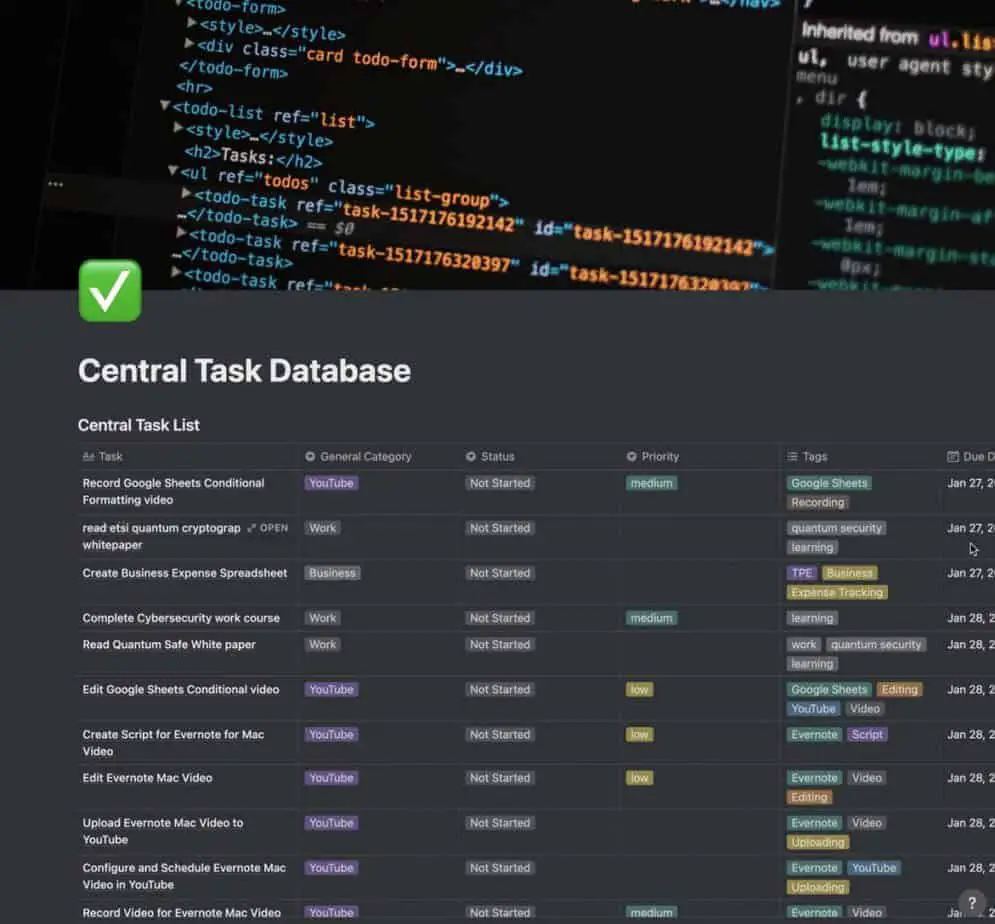
For example, I use Notion to manage both my blog and YouTube channel. I manage everything including all the tasks in a main task database. I use this database to pull out data for my dashboard and this will be the database we will use to populate part of the dashboard we will be building in this tutorial.
If you are looking for a system for setting up your Notion Workspace, you should check out The Bulletproof Notion Workspace by Notion VIP. It is an excellent organizational system that provides a strong framework for setting up Notion. You can either manually setup the system using the above video as a reference or purchase the fully developed templates from the link below:
The Bulletproof Notion Workspace – Notion VIP
If you do choose to purchase the templates, use my coupon code productiveengineer for $50 off.
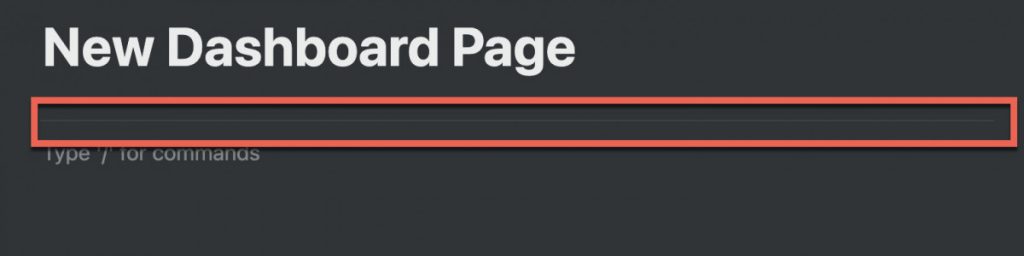
Creating Our Dashboard Page
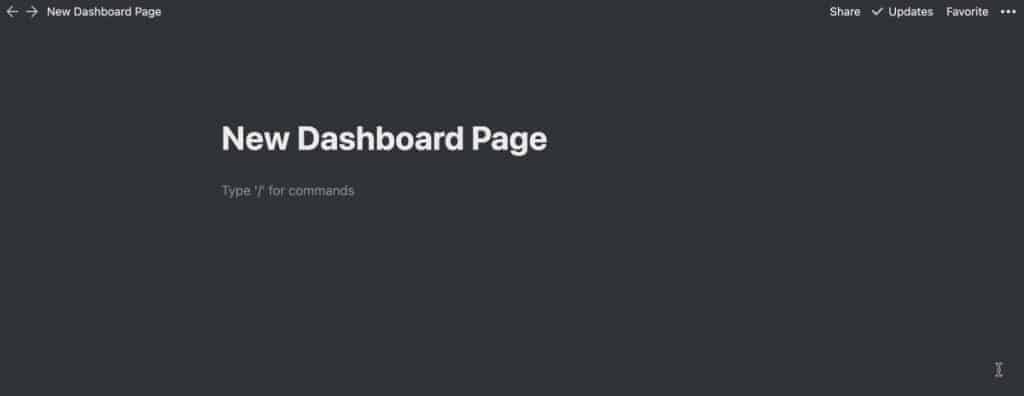
Let’s create a new page that will house our dashboard. Create a new page by clicking on the “+” button in the left hand panel of the Notion window. Give you page a title as shown in the screenshot above.
Add a Page Image to the Dashboard Page
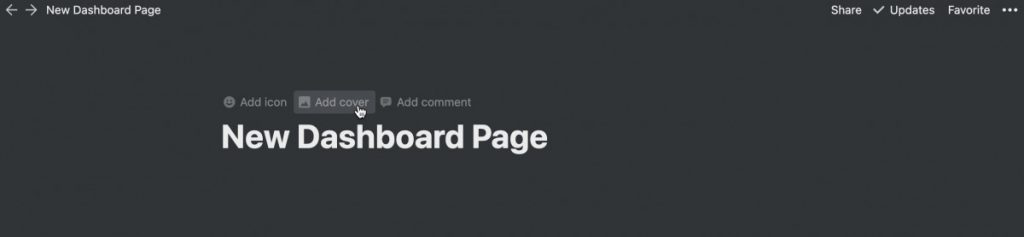
Adding a cover image to your dashboard helps make the dashboard look nicer. To add a cover image to a page in Notion, click the “Add Cover” button as shown in the screenshot above.
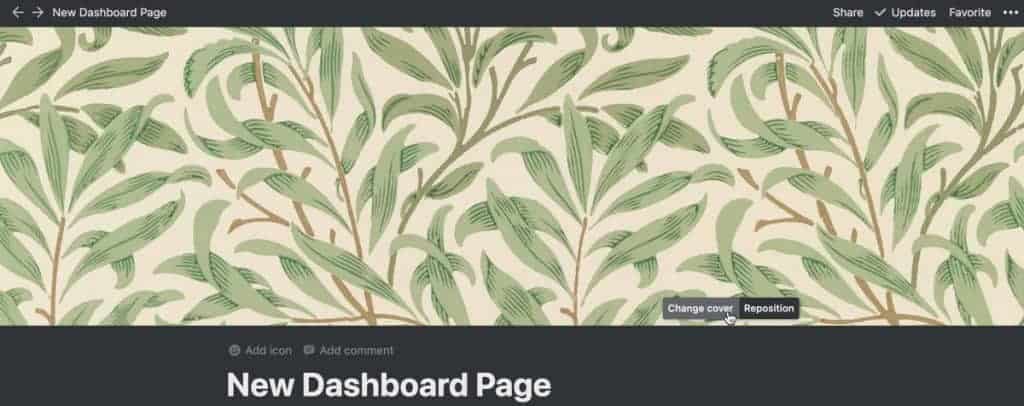
Notion will populate a random image. If you want to change the image, click on the “Change Cover” button as shown above.
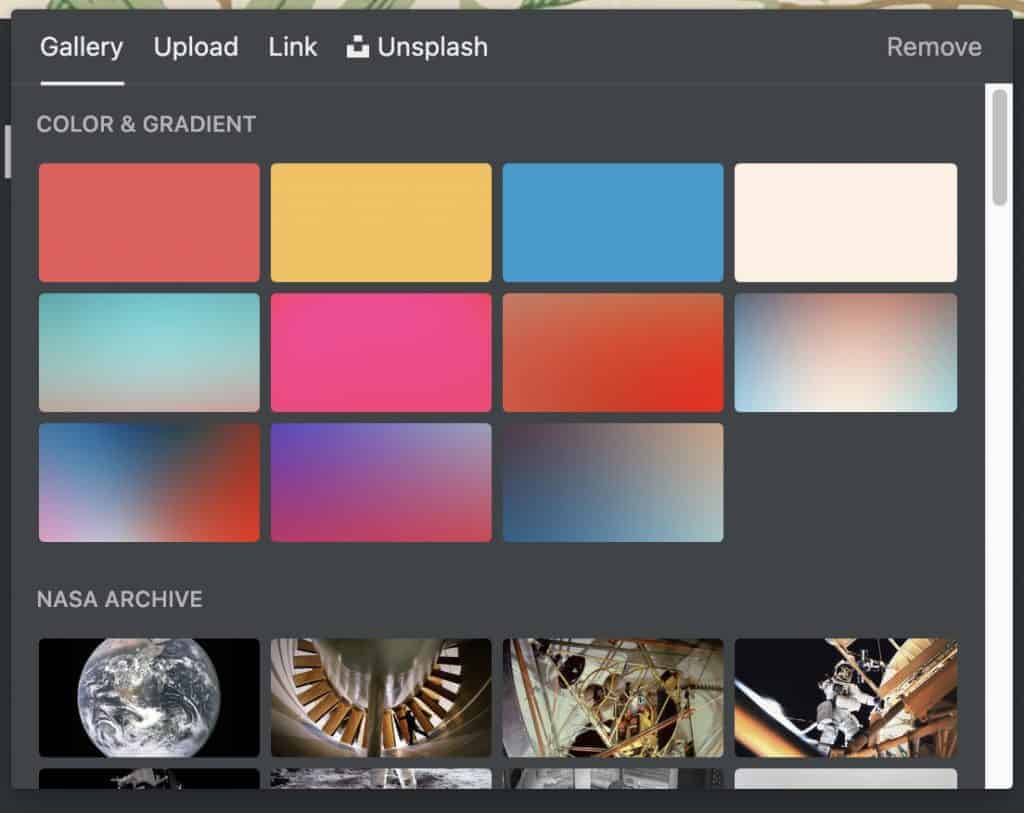
The cover image picker pop-up window will appear as shown above. There are four options:
- Gallery
- Upload
- Link
- Unsplash
Gallery are a group of images that Notion makes available to you. Upload allows you to upload an image from your computer. Link allows you to link to an image on the internet. Lastly, Unsplash is a service that is available to Notion users that have a paid Notion account.
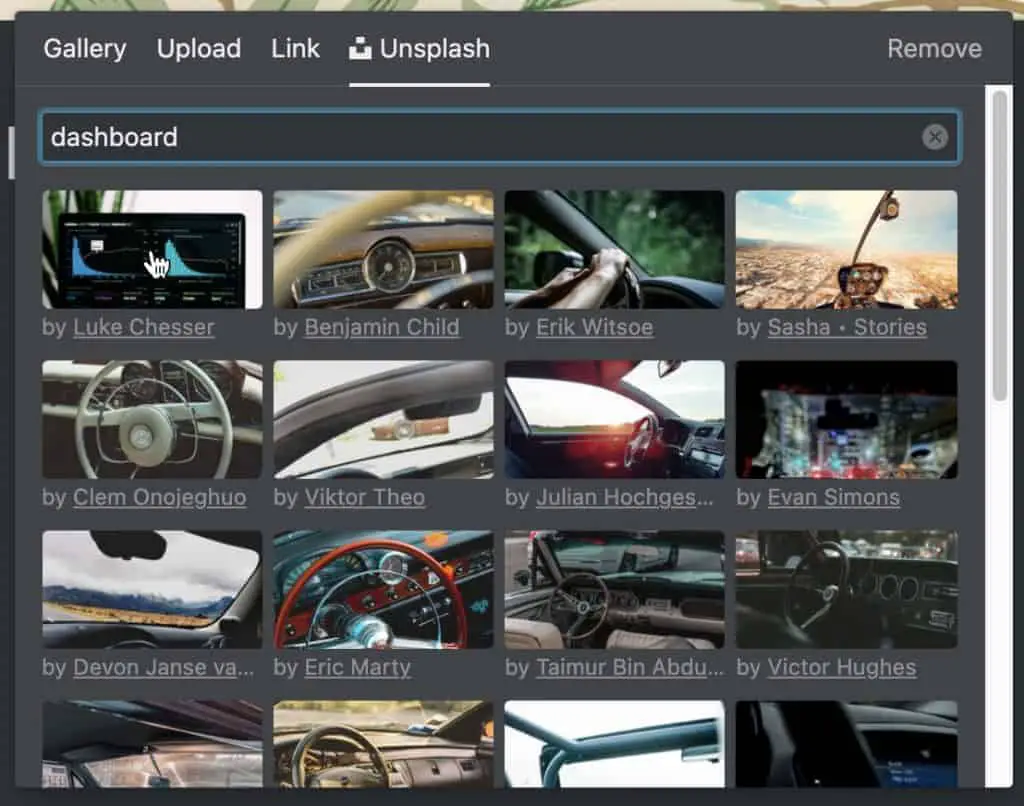
I have a paid Notion account so I will use the Unsplash option by clicking on the Unsplash tab and typing a description of the type of image I want. In this case, I want an image of a dashboard screen so I type in “dashboard”.
Images will appear that attempt to match your intent. I select the image I want by clicking on the image.
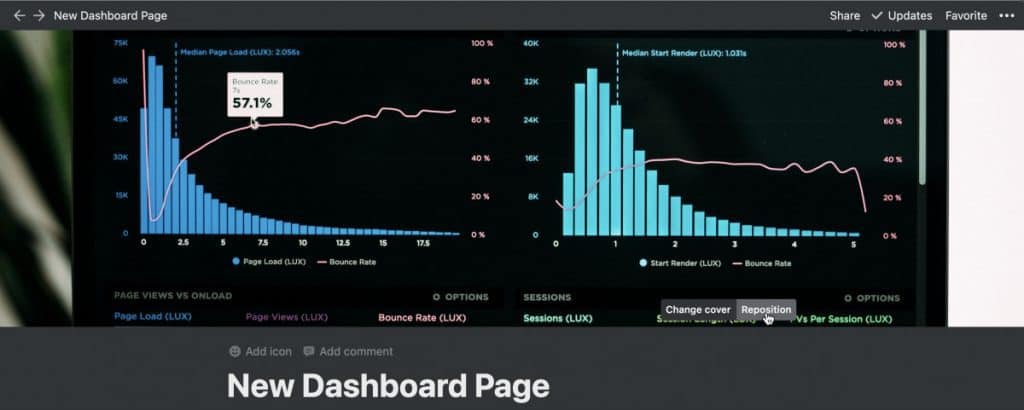
Your image should now appear at the top of your dashboard page.
Next, let’s add an icon to our Dashboard page.
Looking to learn more about synced blocks in Notion? Check out our Ultimate Guide to Synced Blocks in Notion!
Adding a Page Icon to Notion Dashboard Page
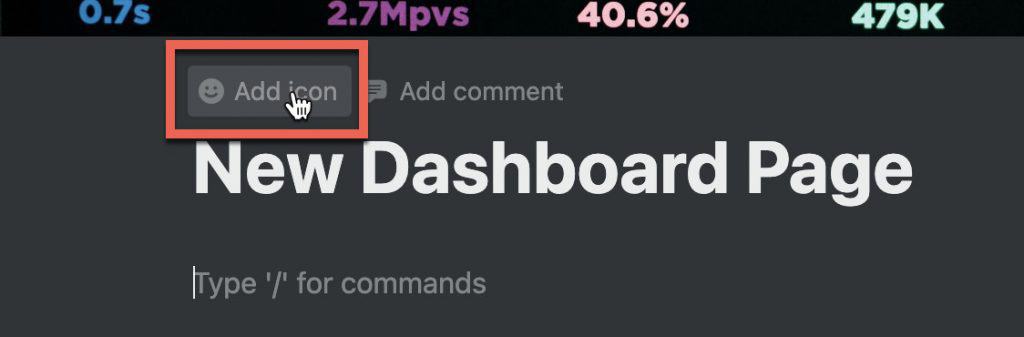
To add an icon to your page, hover your mouse over the area above your page title as shown in the screenshot above and click the “Add Icon” button.
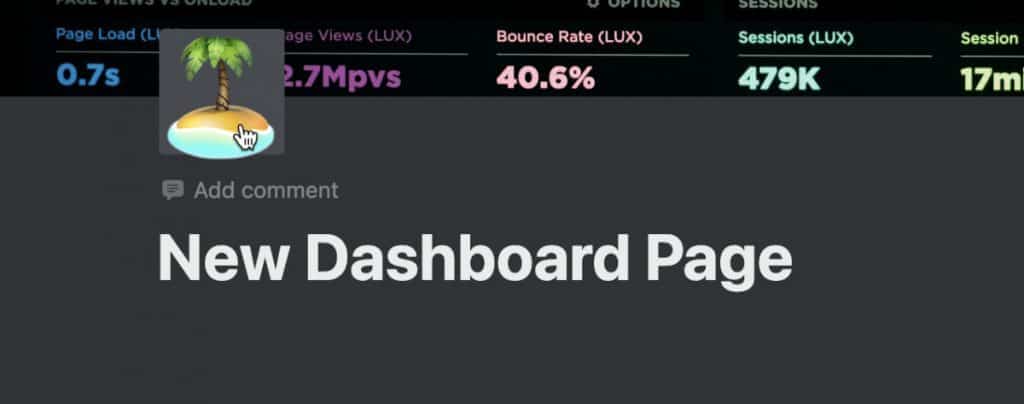
A random icon will appear. To change the icon, click on the icon.
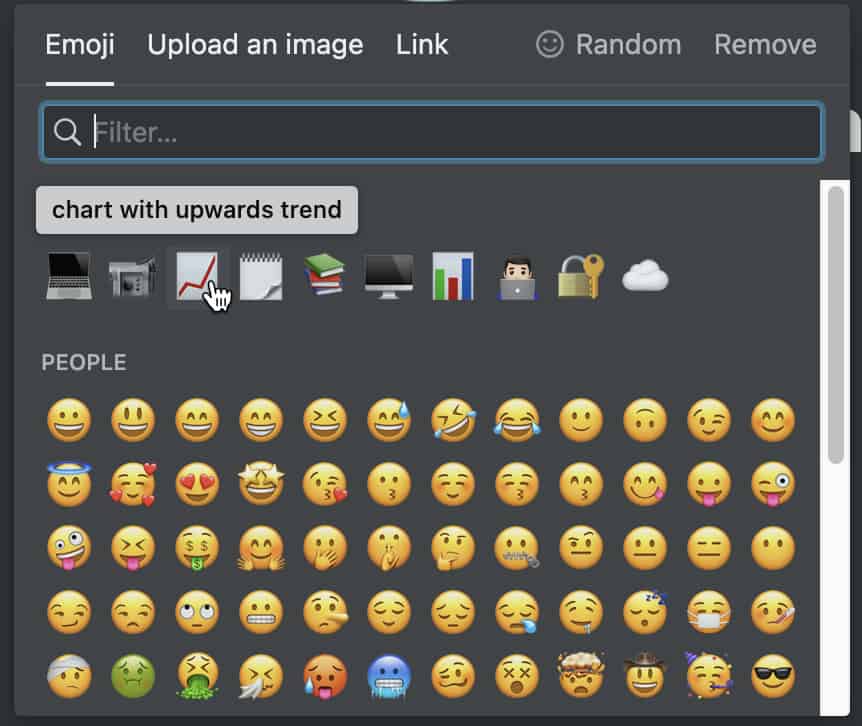
The icon picker display with appear. You can pick an emoji, upload an image or link to an existing image online. We will use a chart emoji.

The page icon you selected will now appear in your Notion dashboard.
If you are interested in learning how to implement a Zettelkasten system in Notion, check out our Complete Guide to Zettelkasten in Notion.
Adding Dividers and Quotes to a Notion Dashboard
Dividers can help visually separate various areas of your Notion dashboard. Creating a divider is very easy to do in Notion.
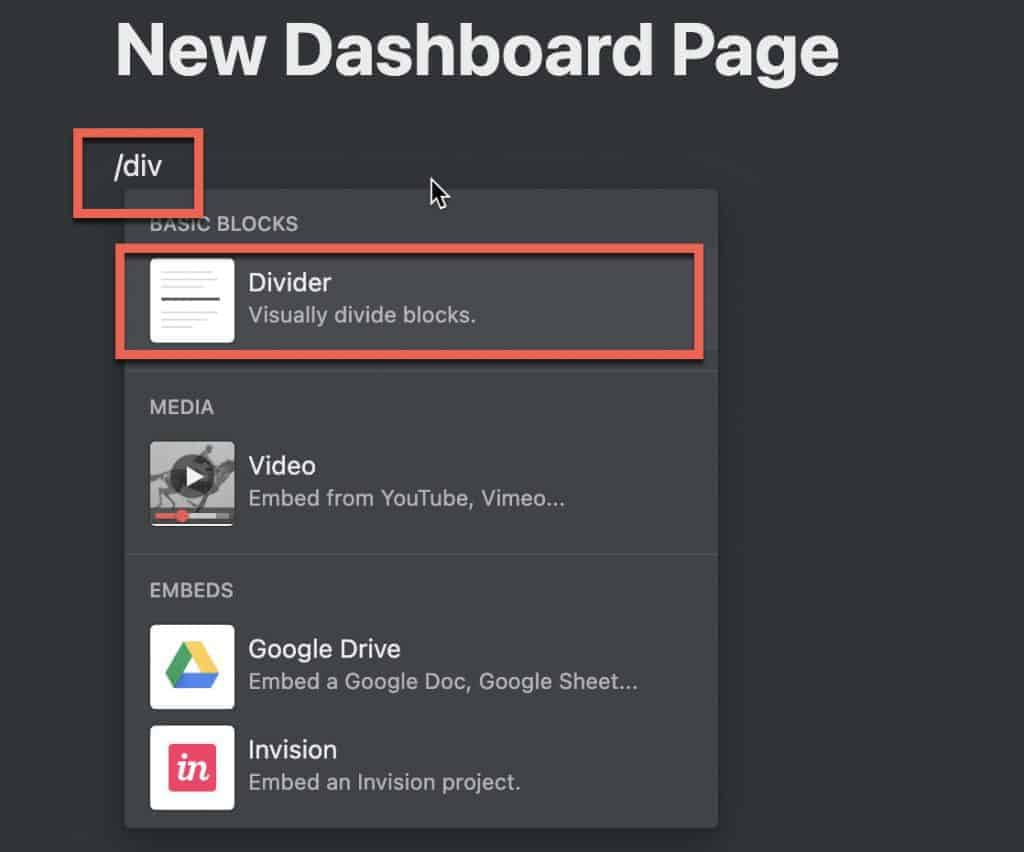
To create a divider in Notion, click where you want the divider to appear and type “/div“. Select the Divider block as shown in the screenshot above.
Your divider line should now appear on your dashboard.
Adding a Quote Block to a Notion Dashboard
Inspirational quotes can be very motivating and having one on your Notion dashboard can help remind you what’s important. Notion has a quote block that you can add that will make your quote stand out.
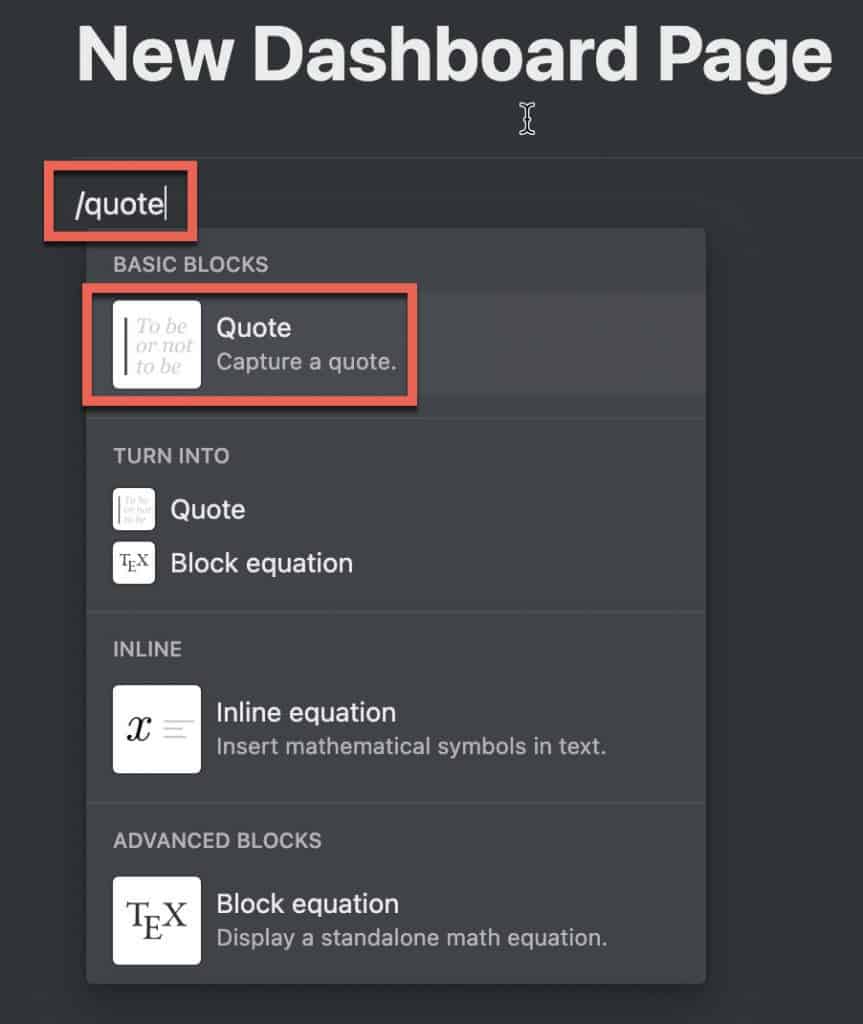
To add a quote block to your page in Notion, simply type “/quote” and select the quote block as shown in the screenshot above.
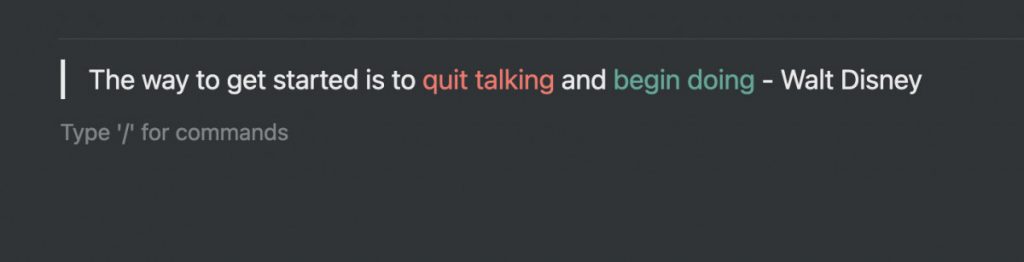
The quote block will appear on the page. Click on the block and type in your quote as shown above. Your quote should now appear in the quote block.
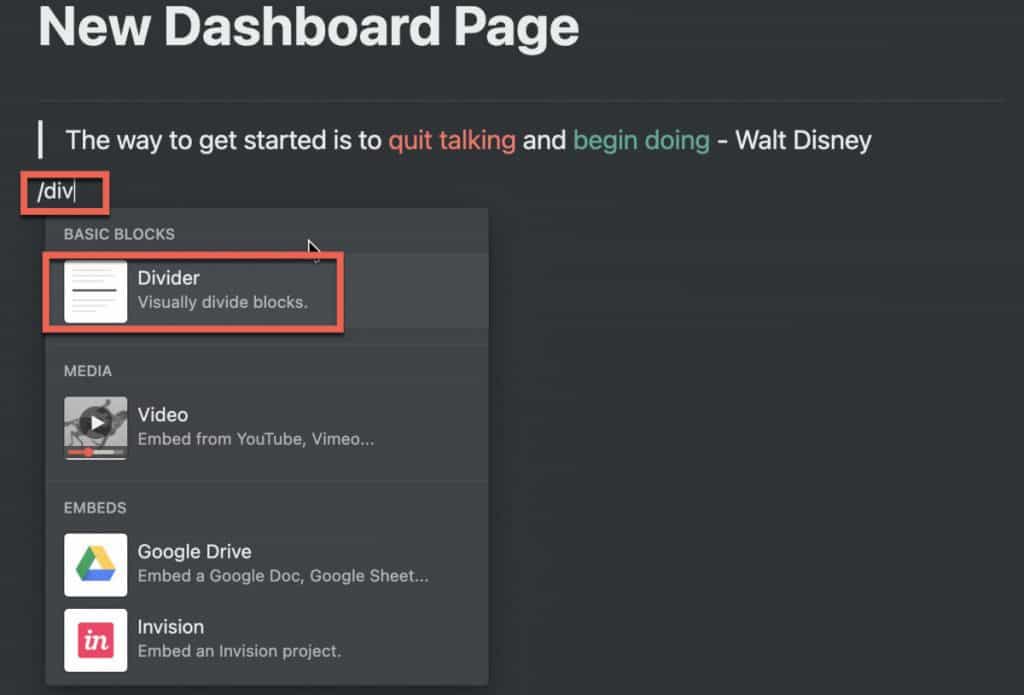
Let’s add another divider to our page in Notion by typing “/div” and selecting the Divider block as shown above.
You should now have two dividers on your page.
Set Notion Dashboard Page to Full Width
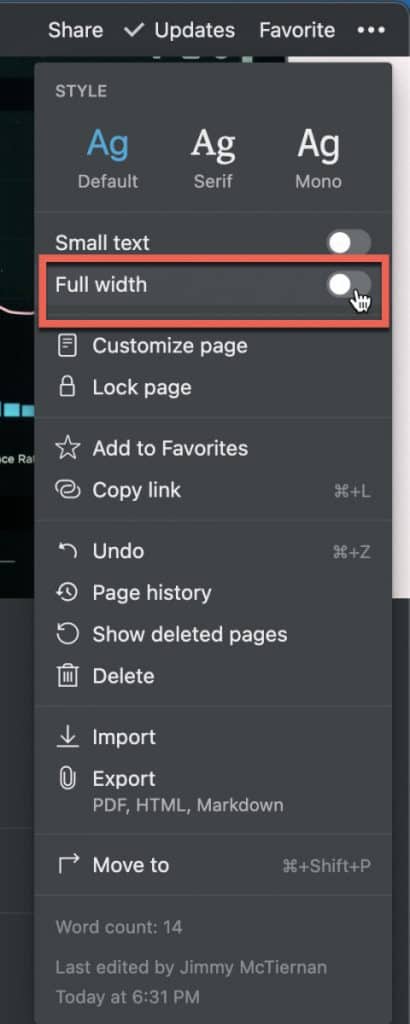
Before we start adding columns, we want to set our dashboard page to full width. Full width allows the content to take up more horizontal space in the Notion window and will make you dashboard look better. To set the page to full width, click on the ellipsis (…) in the upper-right-hand corner of the Notion page and click the Full Width option.
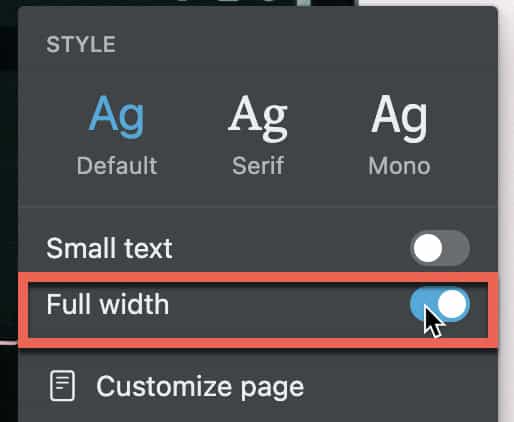
The Full Width button should look like the image above. Your page is now set to Full Width.
Adding Widgets to Notion Dashboard
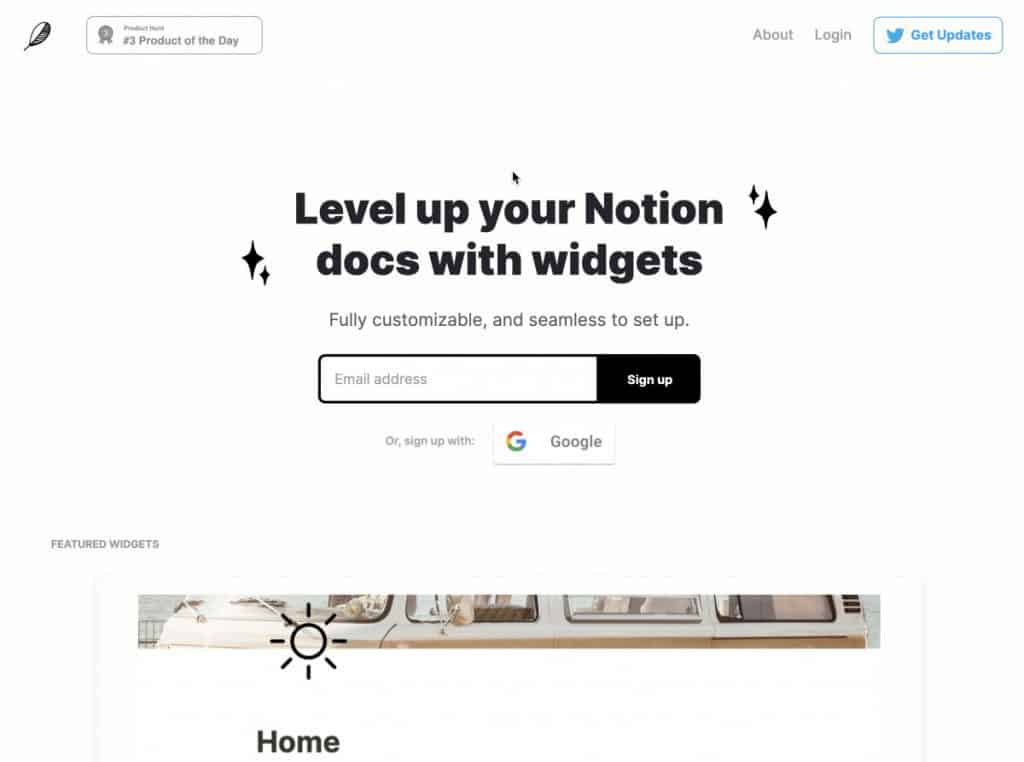
Notion supports the ability to add widgets. Widgets can add contextual information to your Notion page. The place I look to get my widgets is Indify. Indify is a website where you can get pre-made widgets for your Notion dashboard for free.
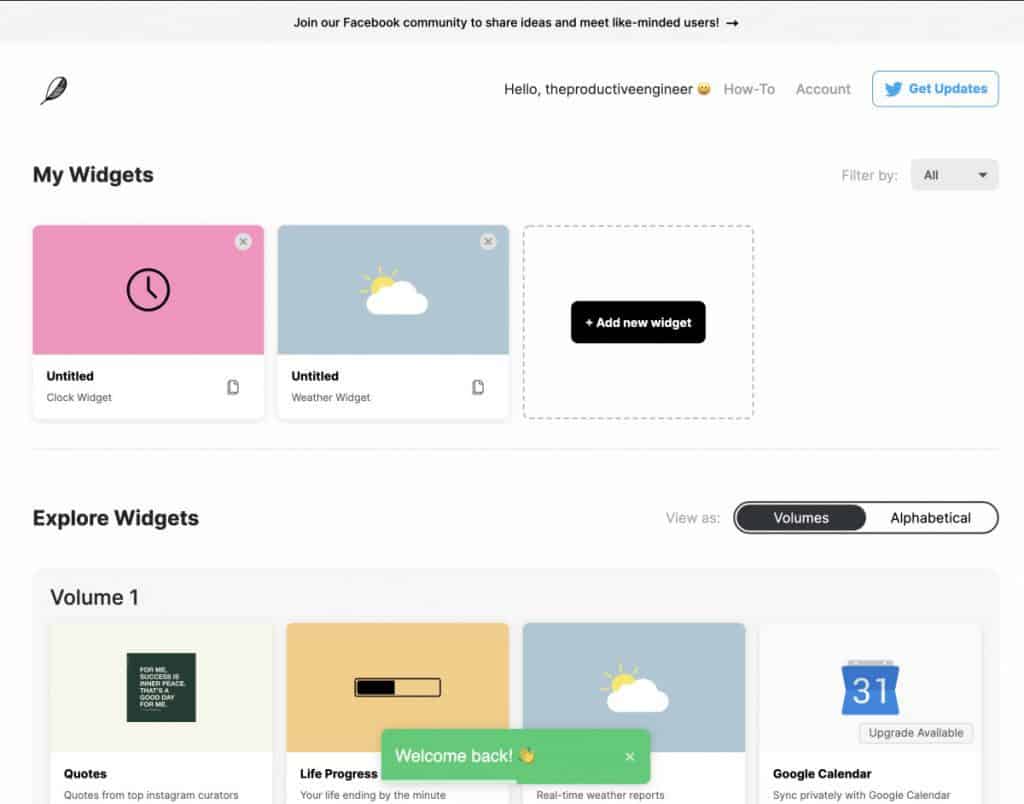
You will need to sign up with Indify in order to use the widgets but at the time of the writing of this tutorial there is no cost to do so. Once you are logged in, your page should look like the one above.
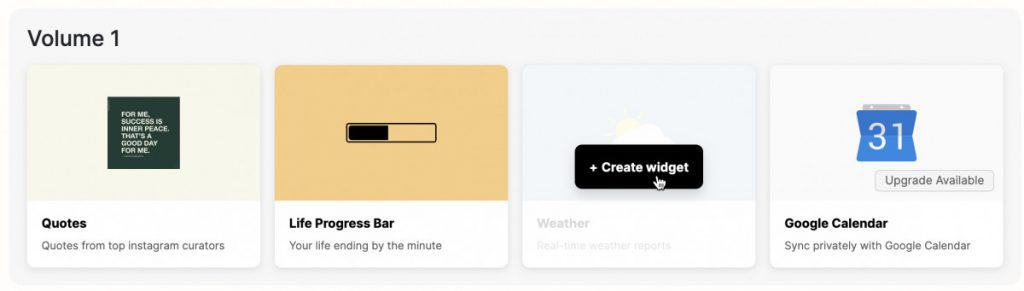
Pick a widget you want to use by hovering over it and clicking the “Create widget” button as shown above.
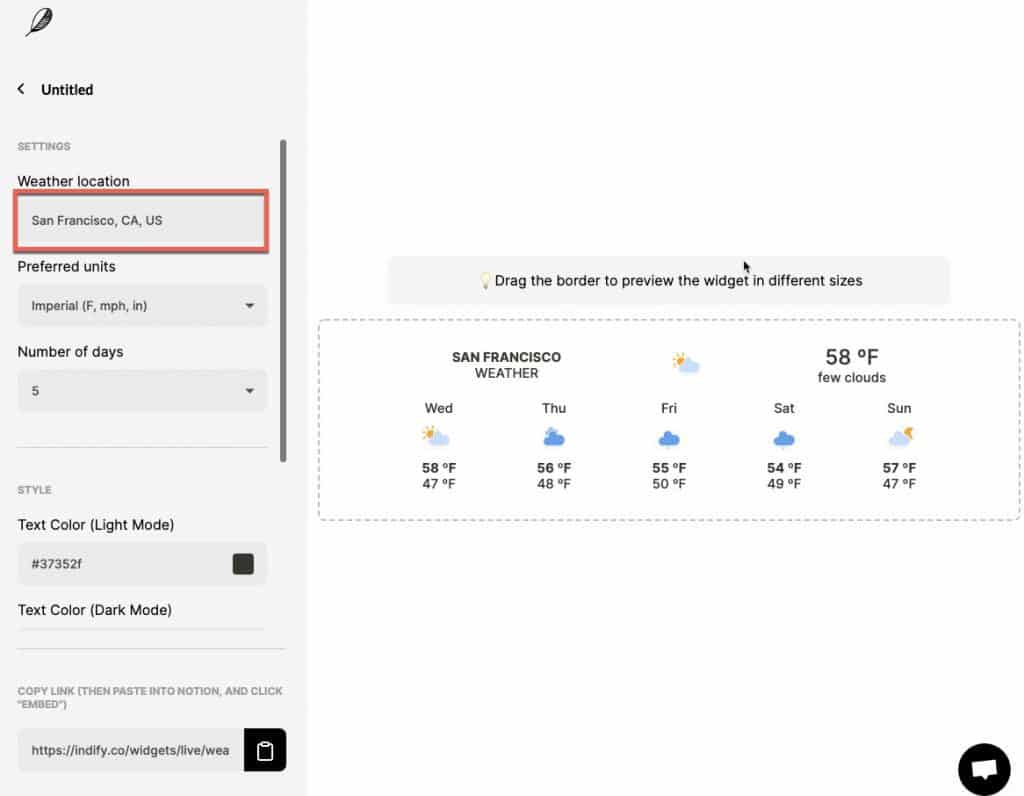
For the purposes of this tutorial, I chose the weather widget, which is typically one of the most common widgets added to Notion dashboards. The weather widget screen should appear as above. The left panel allows you to configure the attributes of your widget. The main one you want to ensure you set to your needs is the Weather location field.
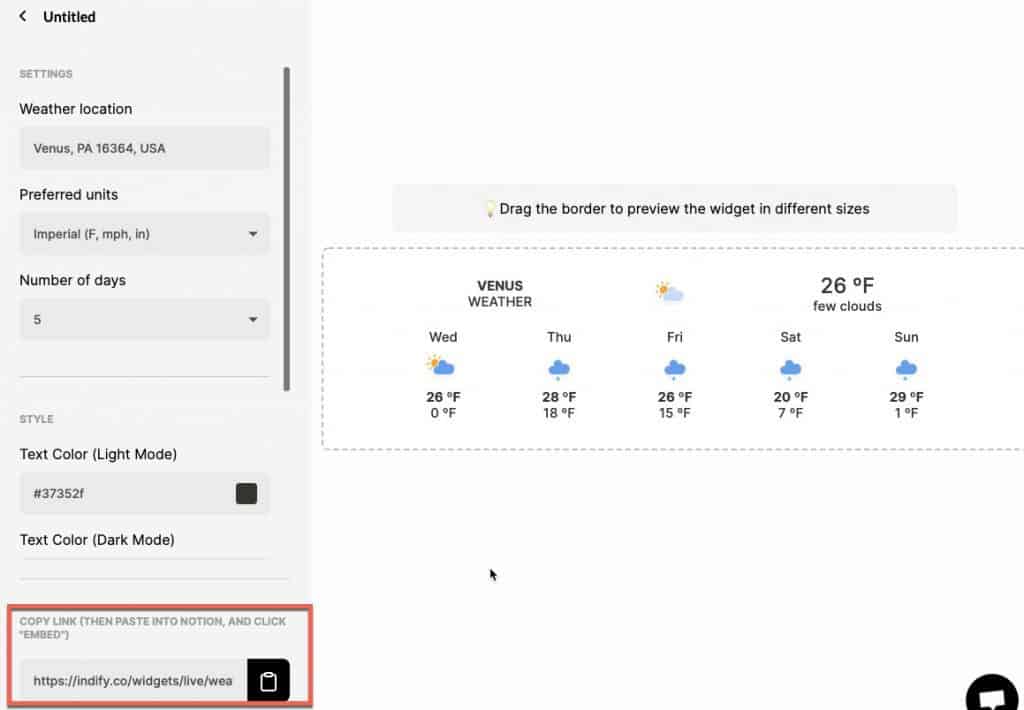
Once you have the widget configured the way you want it, you need to copy the URL of the widget by clicking the Copy Link button as shown above.
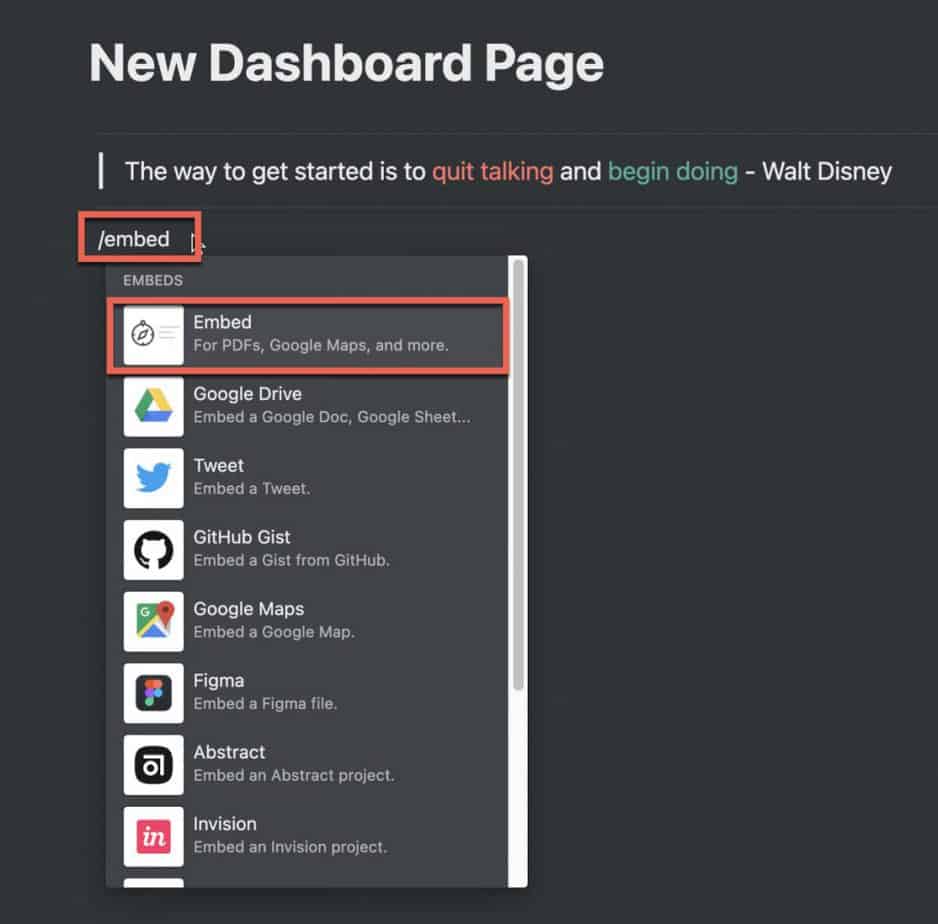
Go back to your Notion dashboard page and type “/embed” and select Embed from the menu as shown in the screenshot above.
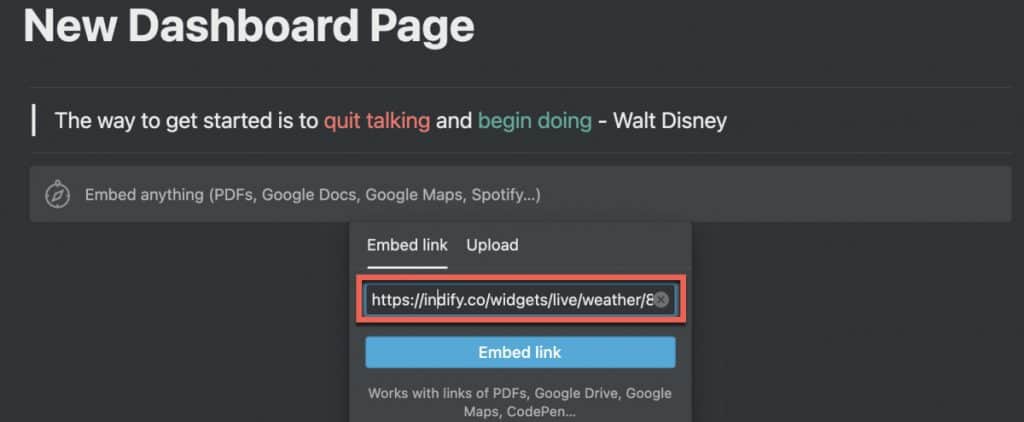
Paste the URL of your widget into the “Embed link” text box as shown above and click the “Embed link” button.
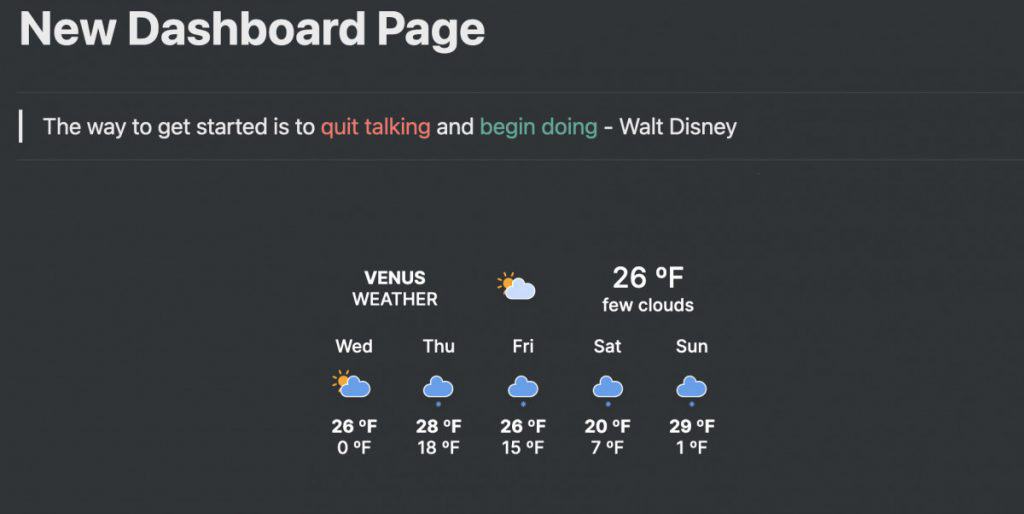
Your widget should appear on your Notion dashboard page.
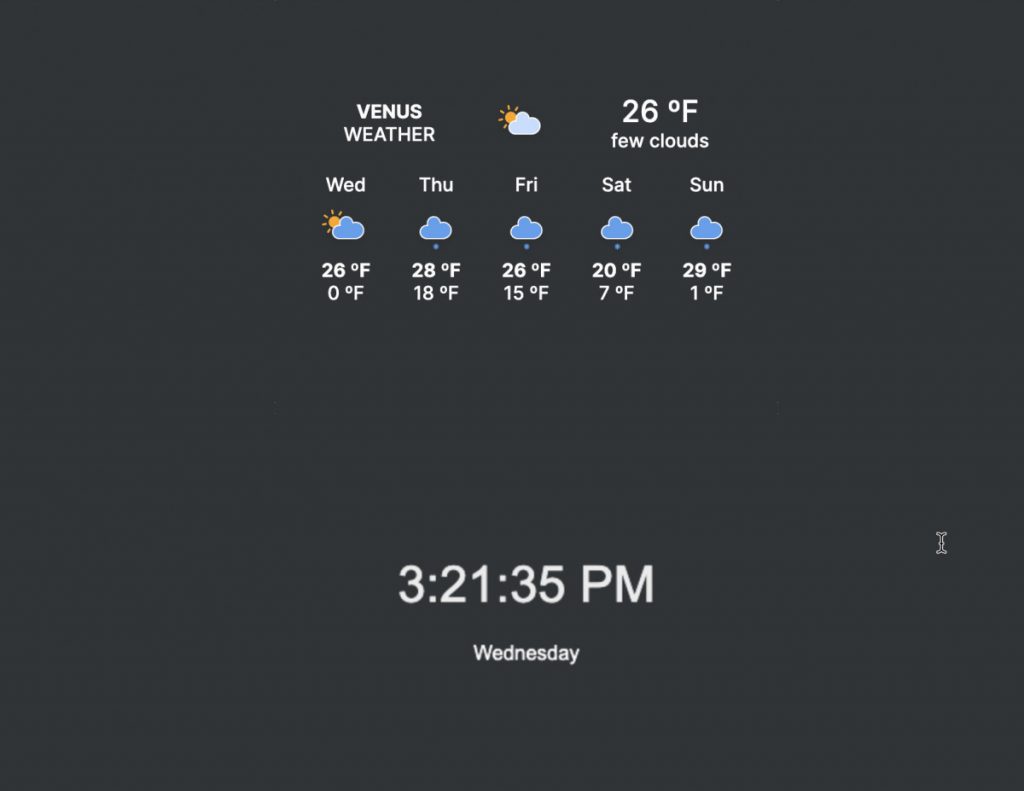
Add another widget underneath the first widget using the same directions as the first widget. I added a clock widget but feel free to add whatever widget you want. Next, we are going to create columns so that our widgets are side-by-side.
Creating Columns in Notion
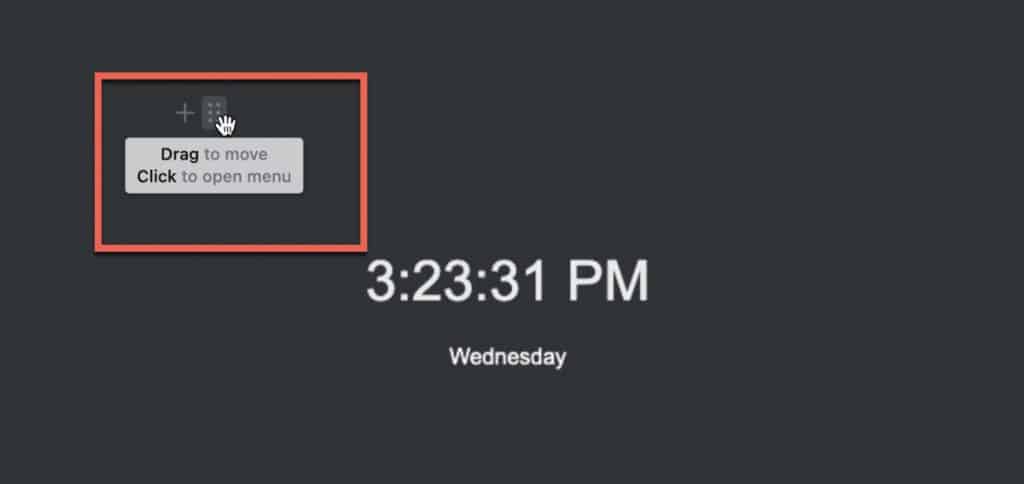
Creating columns in Notion is pretty straight-forward. Hover your mouse over the block you want to move. You should see a double vertical ellipsis as shown above.
Click and drag the double ellipsis to the end of the row you want to create an additional column for. You should see a blue vertical line as shown above to indicate that the block you are moving will be to the right of the current block on that row. In our case, we are dragging the second widget to be to the right of the first widget as shown above.
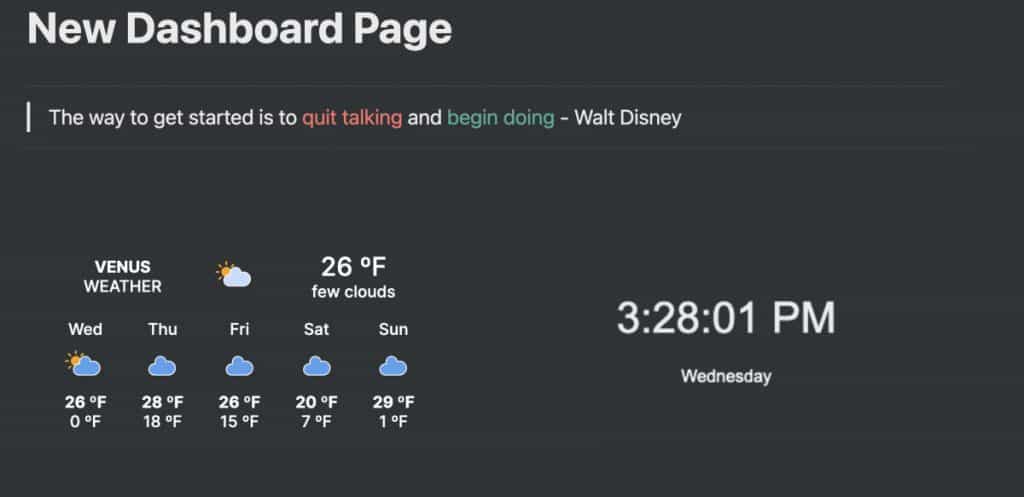
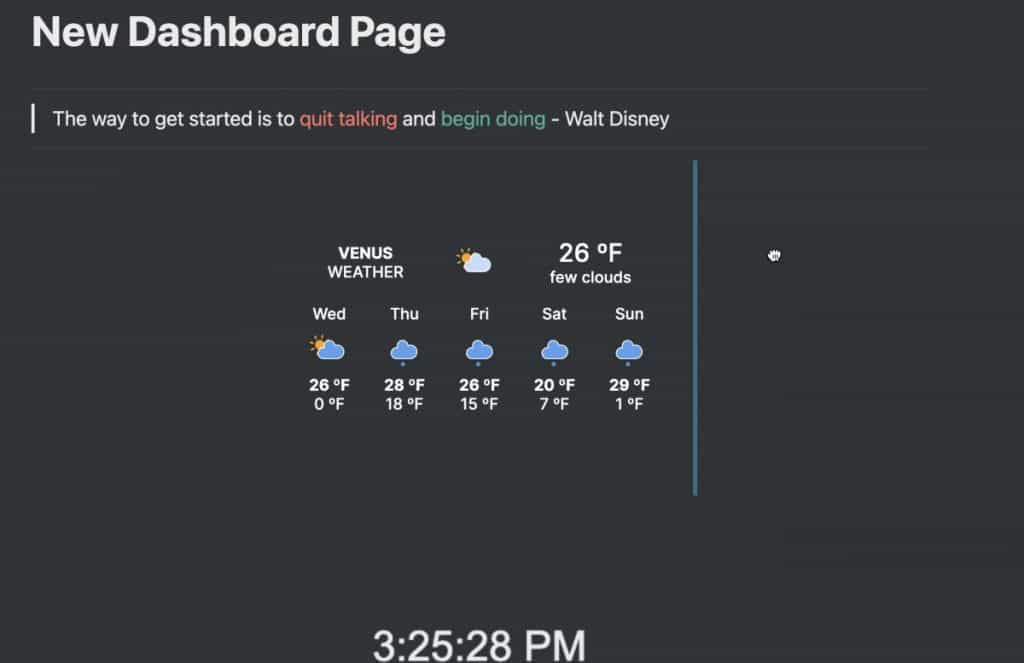
Your widgets should now be side-by-side. Now you have a two-column layout. Next let’s add a linked database view of our tasks that are due today.
Adding a Today View to Notion Dashboard
Linked databases are customized views of existing databases in Notion. They allow you to see filtered, sorted data from an existing database, which makes them perfect for dashboards. Let’s make a linked database of a task database that shows all tasks that are due today.
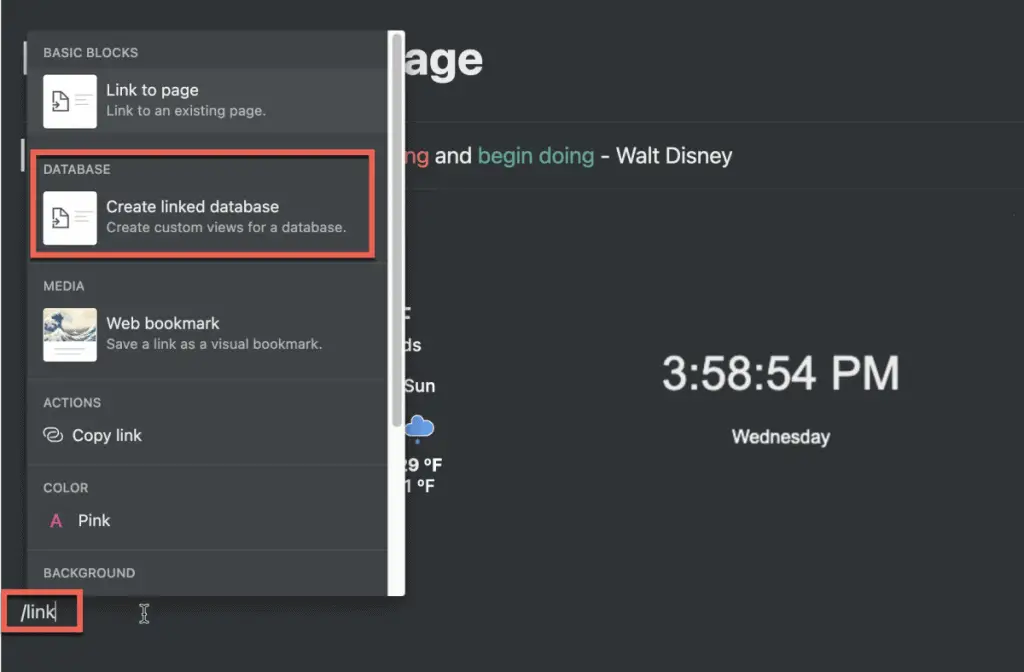
To create a linked database, type “/link” and select “Create Linked Database” from the menu as shown above.
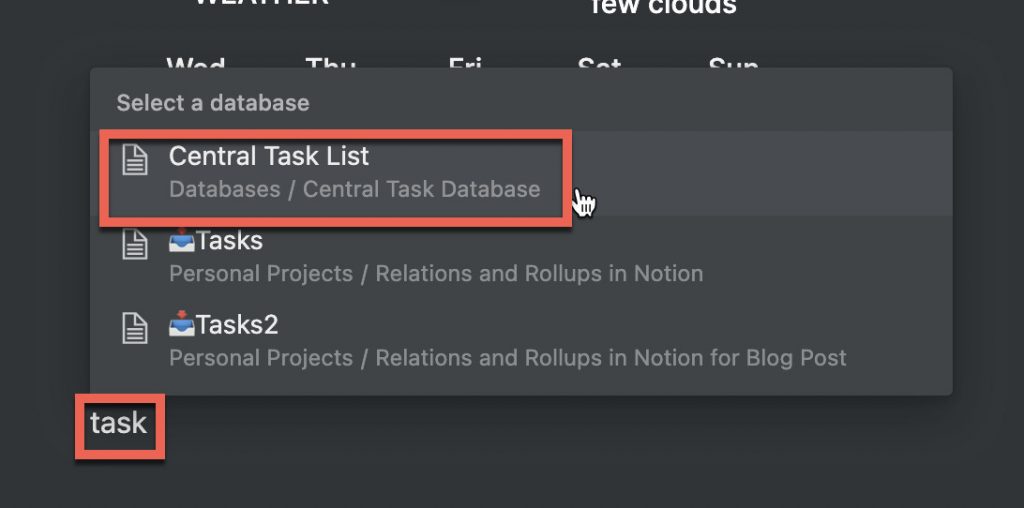
Start typing in the name of your existing database and select it from the menu as shown above.
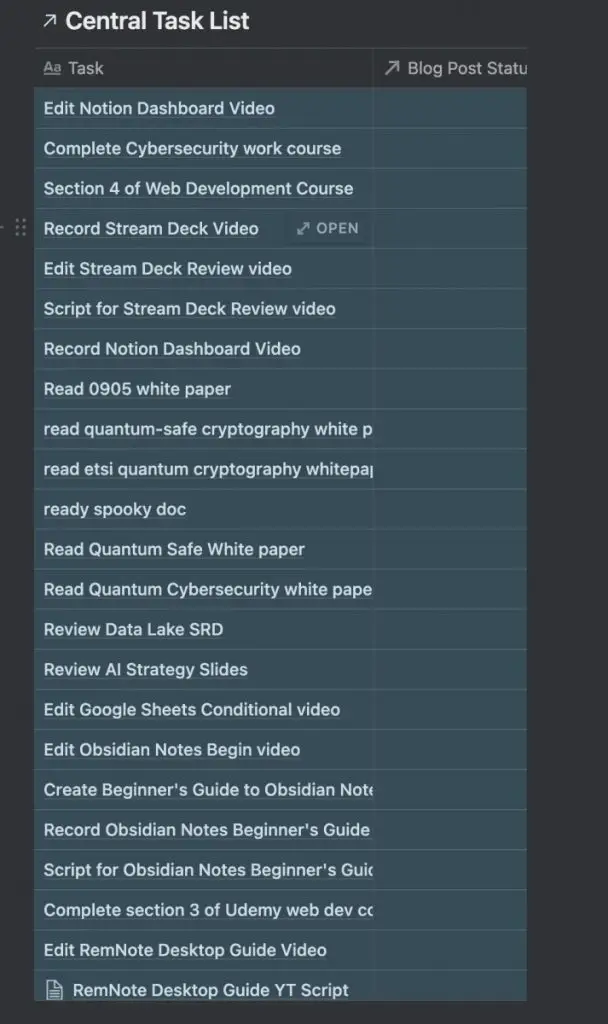
Your linked database should now be visible. Now we need to filter it for tasks due today.

Hover your mouse over your linked database and click on the ellipsis (…) button.
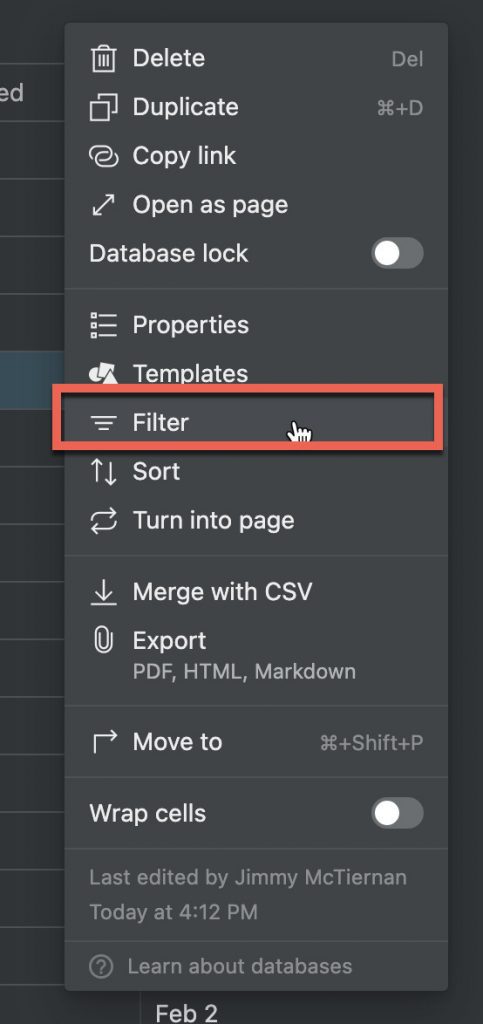
Select the “Filter” option to open the Filter criteria menu.
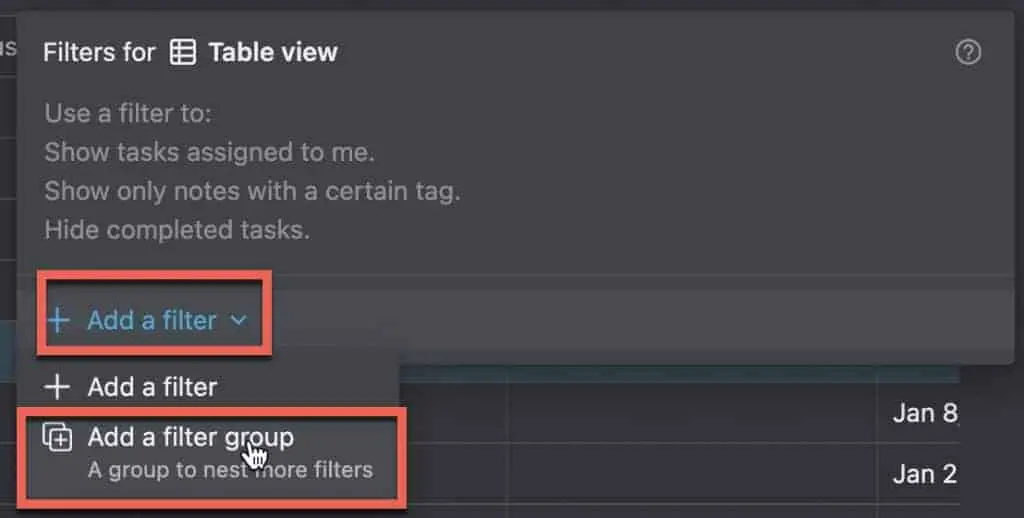
Click on the “+ Add a filter” button and then click the “Add a filter group” option.
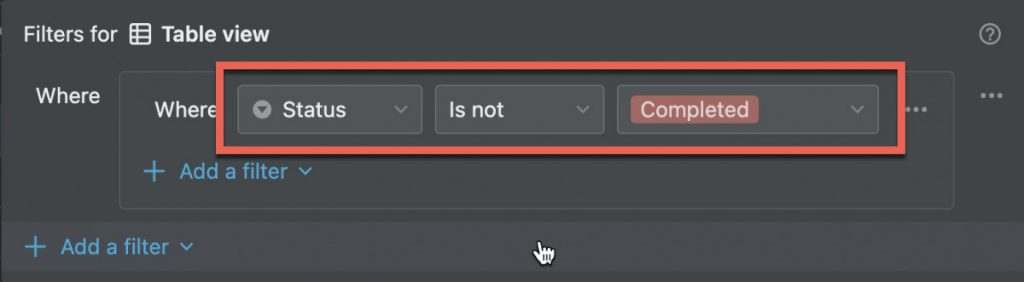
We want to see tasks that are not completed and due today. So I set my filter to show items that are not completed as shown above.
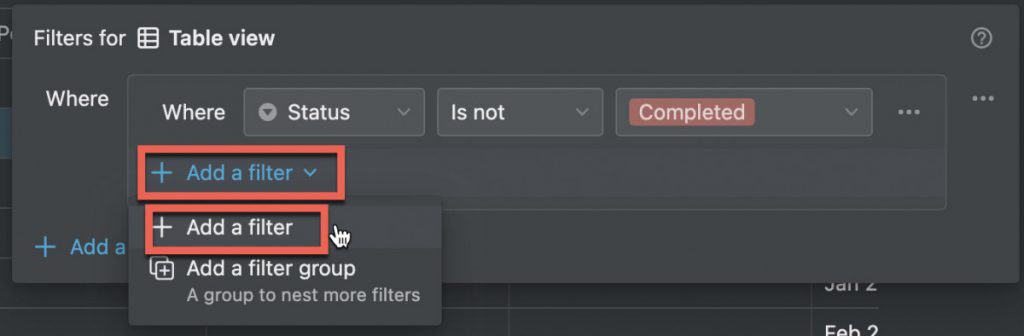
Next, we want to show only items with a due date of today so click “+ Add a filter” and select “+ Add a filter” from the menu.
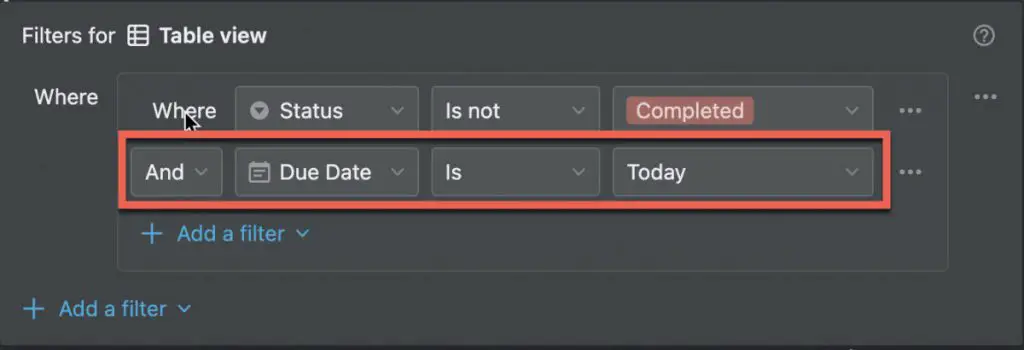
Next set the conditional to “And” and set the filter to show the due date as today as shown above.
Your linked database is now filtered. But there are columns showing that we don’t need to see. Let’s hide them.
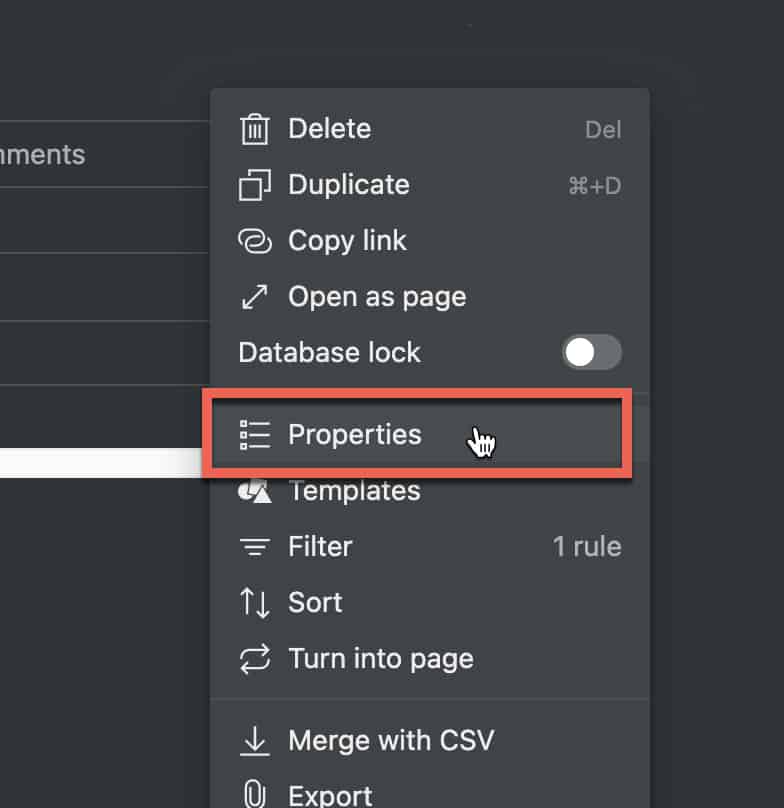
Hover your mouse over the linked database and click on the ellipsis (…). Select “Properties” from the menu options.
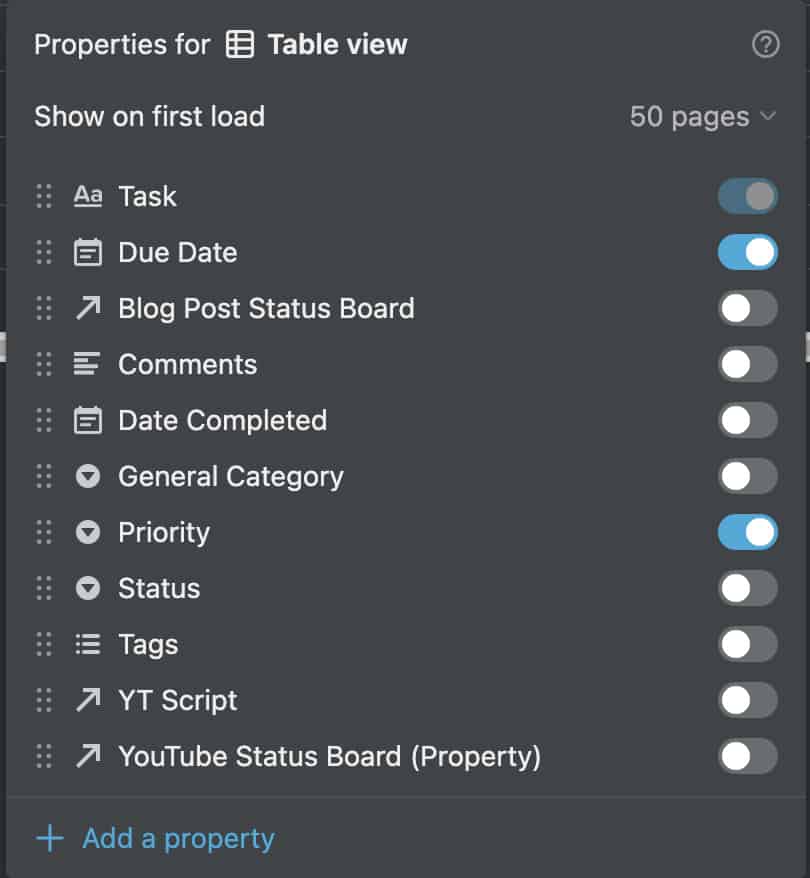
Toggle off all the field you don’t want to see in your linked database. Don’t worry, this doesn’t delete them, just hides them 😀.
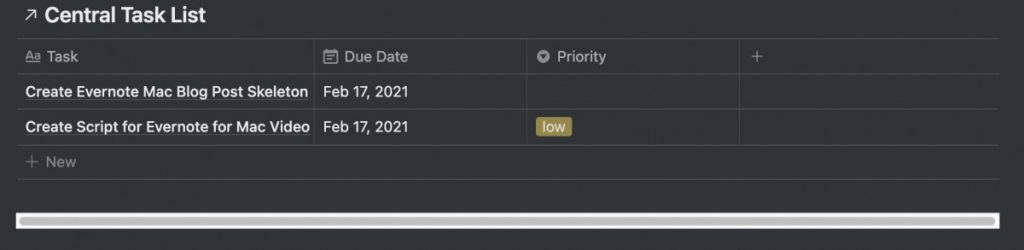
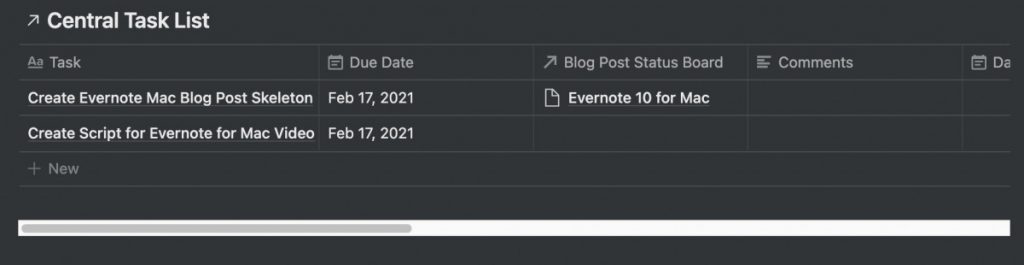
Your linked database should now show only the properties you want.
I hope this tutorial was helpful to you. Good luck!
Subscribe to Our Newsletter
If you like this article, subscribe to our newsletter. It contains tips and tricks to help you get things done.
Check out our Resources page
Check out our resources page for the products and services we use everyday to get things done or make our lives a little easier at the link below:
Check Out Our YouTube Channel!
We have a YouTube channel now and we are working hard to fill it with tips, tricks, how-tos, and tutorials. Click the link below to check it out!
Looking to Get Started Blogging or on YouTube?
Getting started can seem daunting and scary (I know it was for me) but it doesn’t have to be. I was very lucky to find a program that that has helped me grow my blog to over 35,000 page views and a YouTube channel that is growing month-over-month.
Project 24 by Income School is the program that I have used. I have been a member for over a year now and just renewed my membership. I cannot recommend Project 24 enough! For more information on Income School, click the link below:
Project 24 by Income School – Teaching You How to Create Passive Income from Blogs and YouTube