Securing Your Document: A Step-by-Step Guide to Protecting a Document in Google Docs
You may include public and sensitive information when you work on Google Docs. While there’s an option to restrict the access permission to the document, some prefer protecting the document to avoid changes, misuse, and other potential harms. If that sounds like your thought, knowing how to protect a document in Google Docs is essential.
To protect a document in Google Docs, do the following:
- Open the document on Google Docs.
- Click Extensions -> Add ons -> Get add-ons.
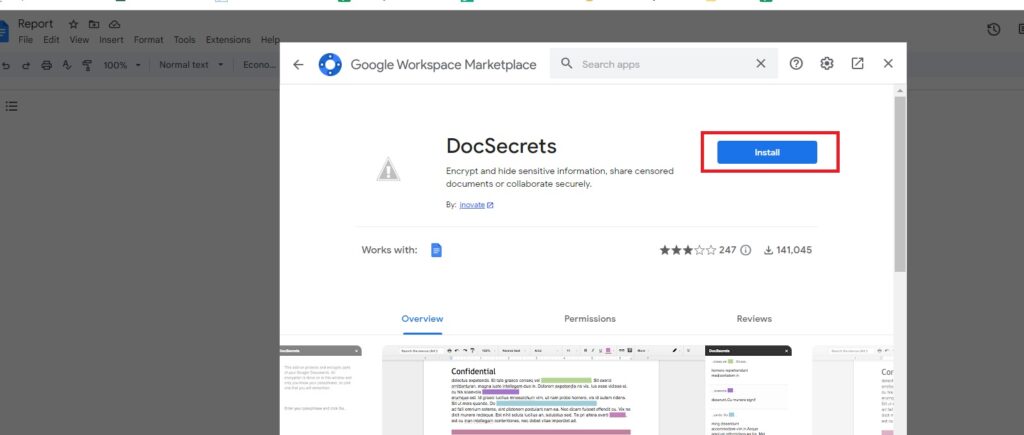
- Type DocSecrets on the search bar.
- Install the extension.
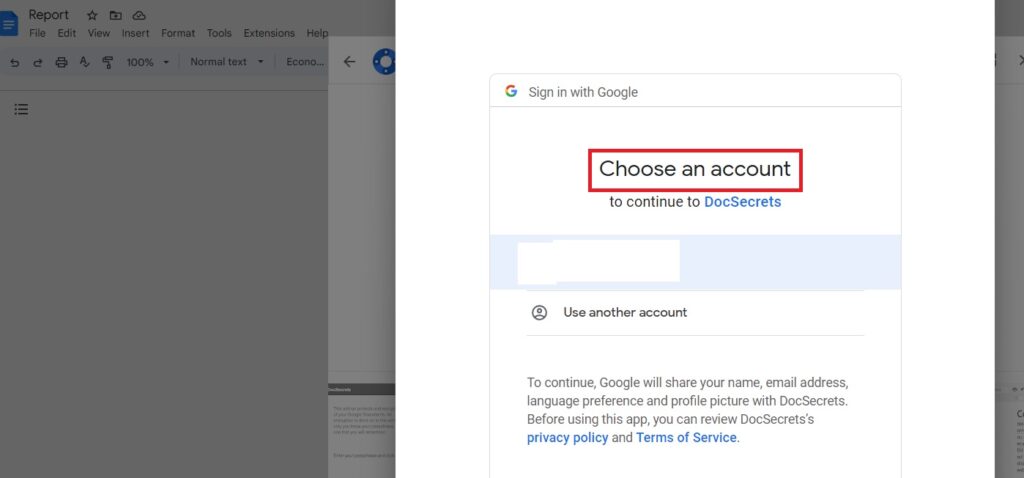
- A new dialog box opens, asking you to choose the account.
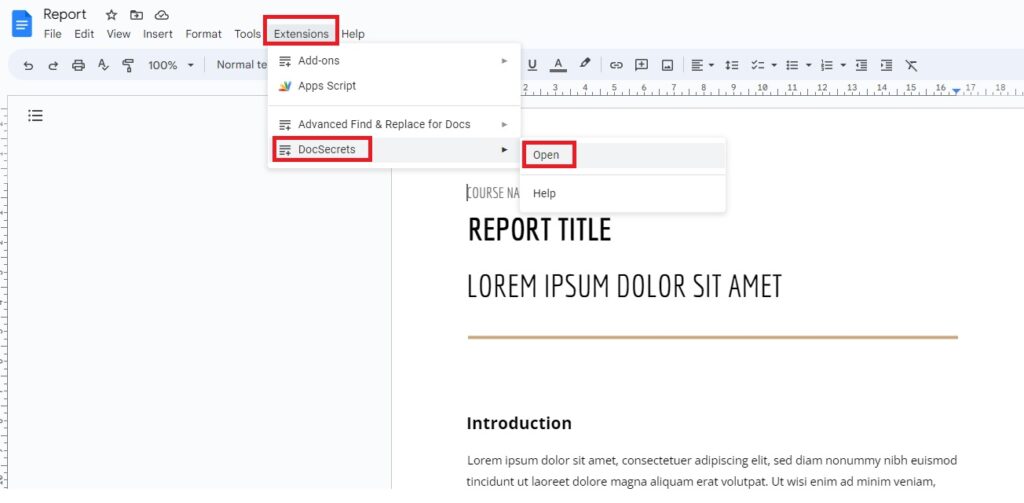
- Once it’s installed, click Extensions -> DocSecrets -> Open.
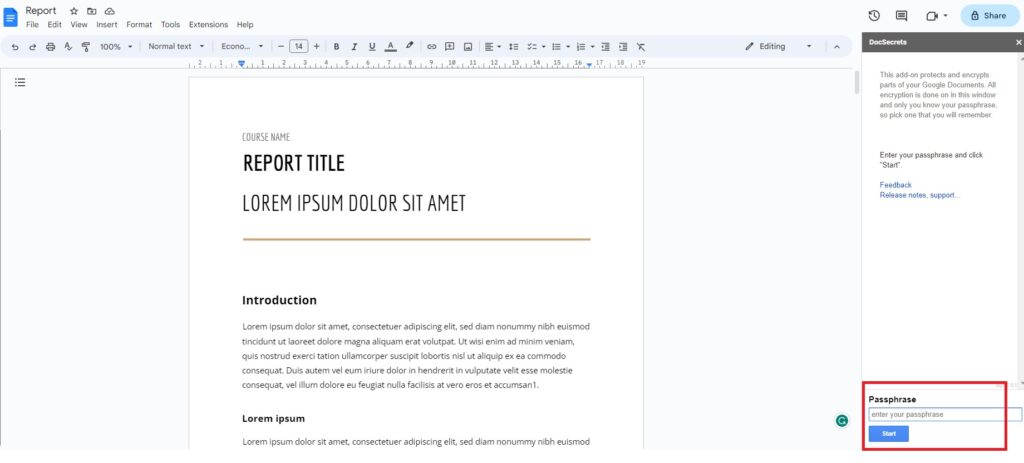
- On the pane that opens on the right, type the password and click Start.
But there’s also an easy way to protect a document. In this article, let’s look at ways to protect a document in Google Docs.
How To Protect A Document In Google Docs
Protecting a document is essential to increase the confidentiality of information. Most people believe that Google applications are highly secure and encrypted. However, that doesn’t mean that you can skip the protective measure.
If you’re looking to password-protect your document on Google Docs, follow the steps below:
- Open the document on Google Docs.
- Click Extensions -> Add ons -> Get add-ons.
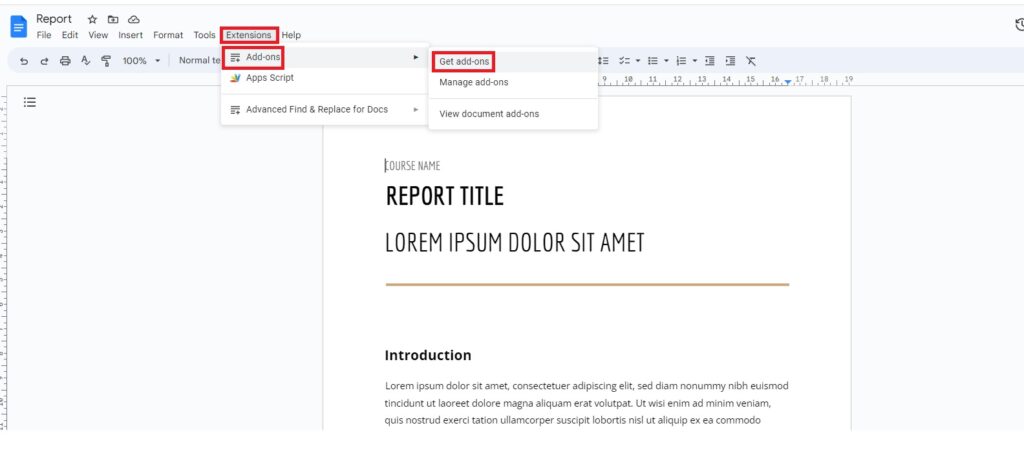
3. Type DocSecrets on the search bar.
4. Install the extension.
5. A new dialog box opens, asking you to choose the account.
6. Once it’s installed, click Extensions -> DocSecrets -> Open.
7. On the pane that opens on the right, type the password and click Start. The document is now protected and might prompt a passphrase going forward.
Alternatively, you can also restrict editing permission to prevent changes made to your document. Follow the steps below.
- Open the document on Google Docs.
- Click Share on the top right corner of the window.
- Enter the email address of the intended recipient.
- Set the access permission to the viewer or editor. You can set it to Anyone with the link if you don’t want to restrict privacy.
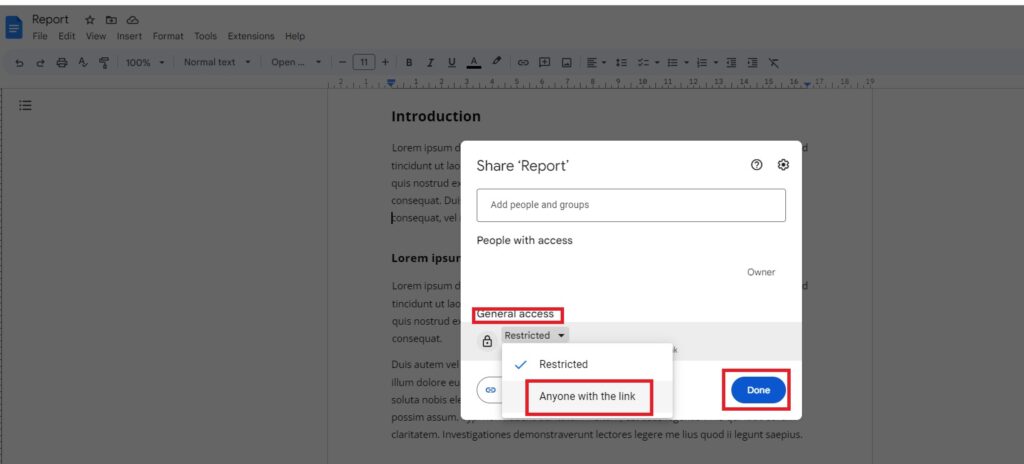
5. Click Done, and the protection is instantly activated.
Perhaps, there’s an easy way to protect your document if you’re using Microsoft Word. However, you may have to rely on add-ons if you’re working on documents in Google Docs.
Importance Of Password Protection For Documents In Google Docs
Password protection is an essential security measure to take when using Google Docs. It prevents unauthorized users from accessing your documents without your knowledge and restricts who can view or edit the document. This is especially important when sharing confidential or sensitive information, such as financial statements, business plans, or personal documents.
Google Docs provides various tools to keep your documents secure and password protected. You can add specific people or groups to your document who will have access to it and be able to make changes, as well as activate the read-only mode, which blocks viewers from making any changes while looking at it.
You should also consider setting up a password for people with access, ensuring that only those with the correct password can open or edit the document – this adds an extra layer of security. Additionally, third-party tools are available online, which provide additional protection for Google Docs documents.
Final Thoughts
When you work on Google Docs, remember to prioritize password protection whenever it contains sensitive information. Therefore, you don’t have to worry about its access rights and permissions. Based on its purpose and content, you can choose to restrict only editing permission or use an add-on to lock the document on the whole.

