How To Bring Image To Front In Google Docs – Complete Tutorial
Google Docs accepts a wide range of input formats. The challenge lies in aligning them effectively to improve readability. If you’re working on a document containing text, images, and other multimedia elements, it’s essential to know the right way to bring an image to the front in Google Docs.
- Right-click on the image and select Image Options.
- On the right pane, click the Text Wrapping section.
- In the list of styles appearing beneath, select “in front of text.”
Switching between text and images on Google Docs is interesting. In this guide, we’ll look at other ways to organize these images and text in a document.
How to Bring an Image to the Front in Google Docs
Enclosed below are the steps required to bring an image to the front in Google Docs:
1. Right-click on the image and select Image Options.
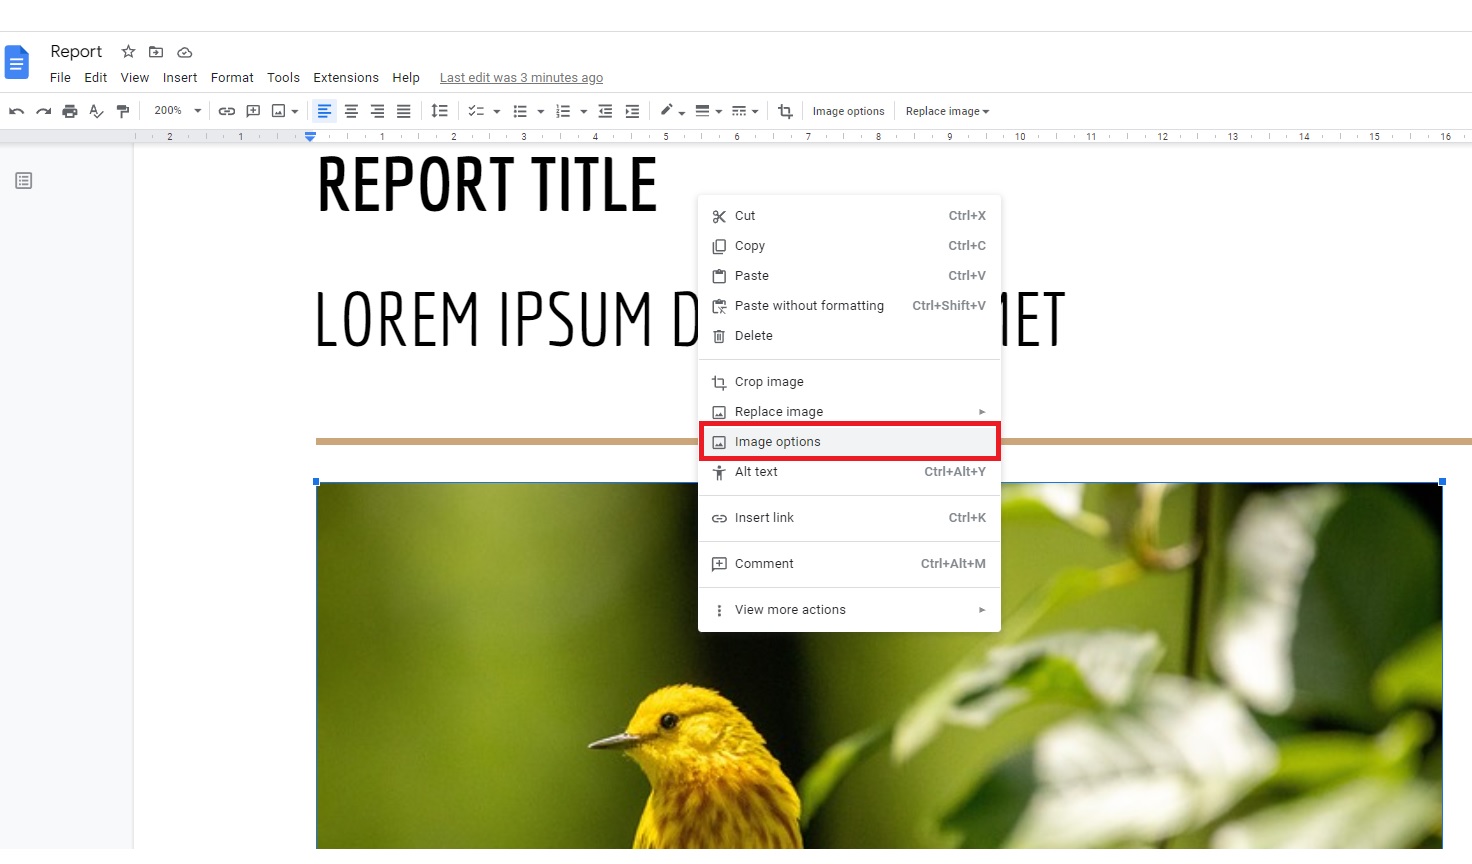
First, right-click on the image you want to bring to the front as shown in the screenshot above.
2. In the right pane, click the Text Wrapping section
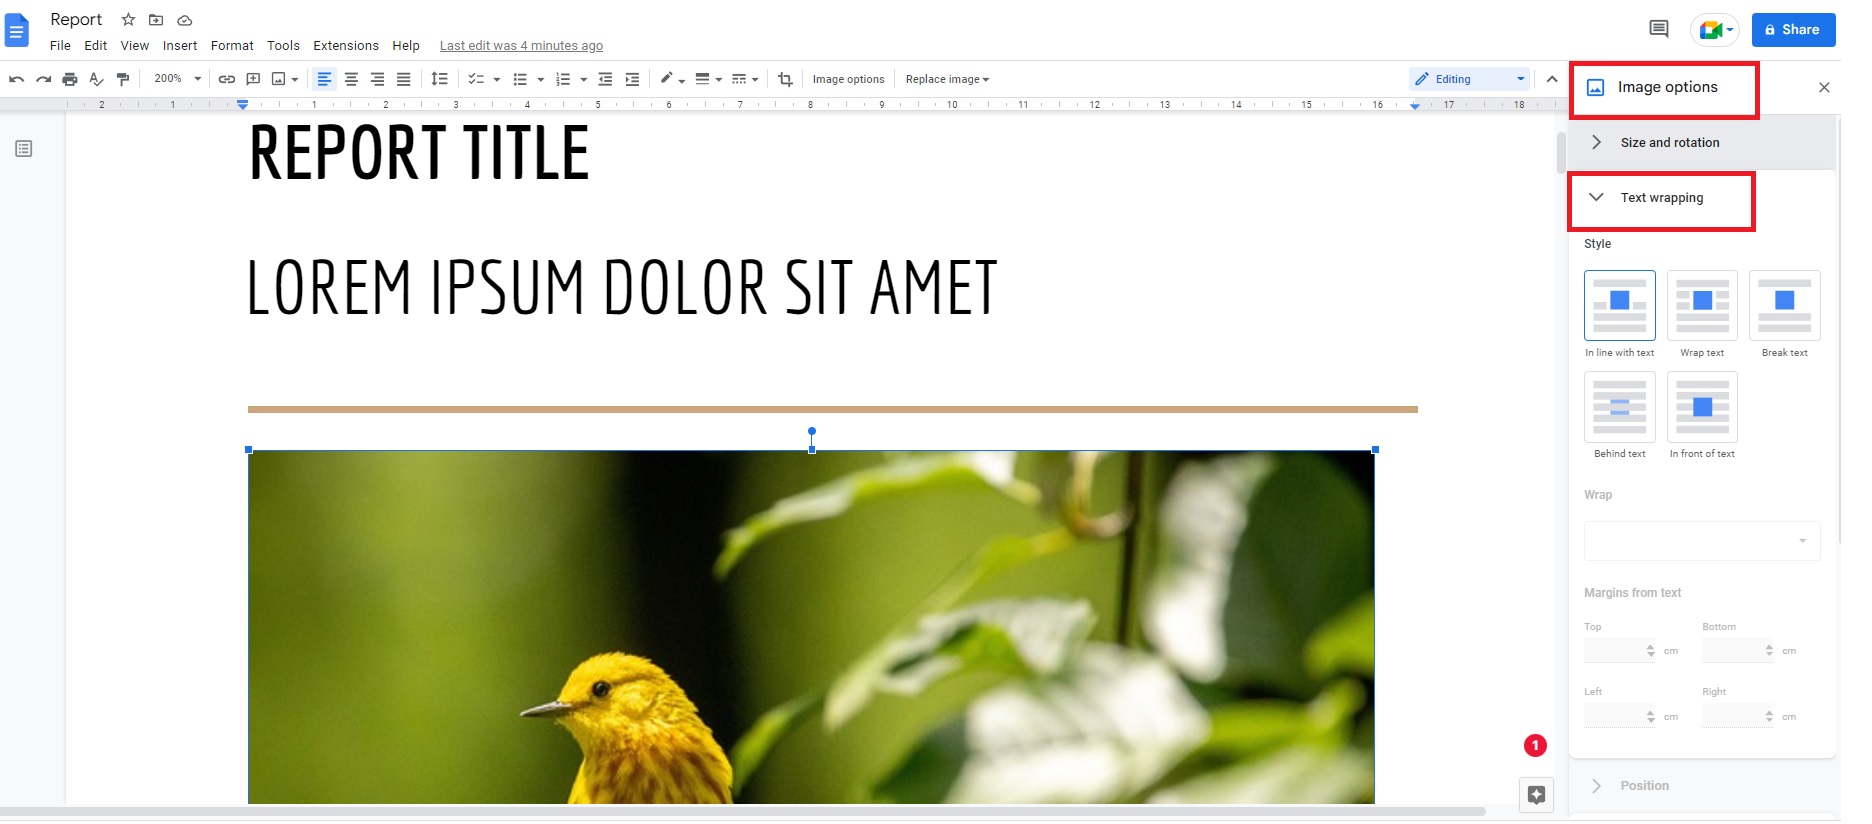
You should now see the image options dialog in the right-hand panel. Click on the “Text wrapping” drop-down menu as shown above.
3. In the list of styles appearing beneath, select “in front of text.”
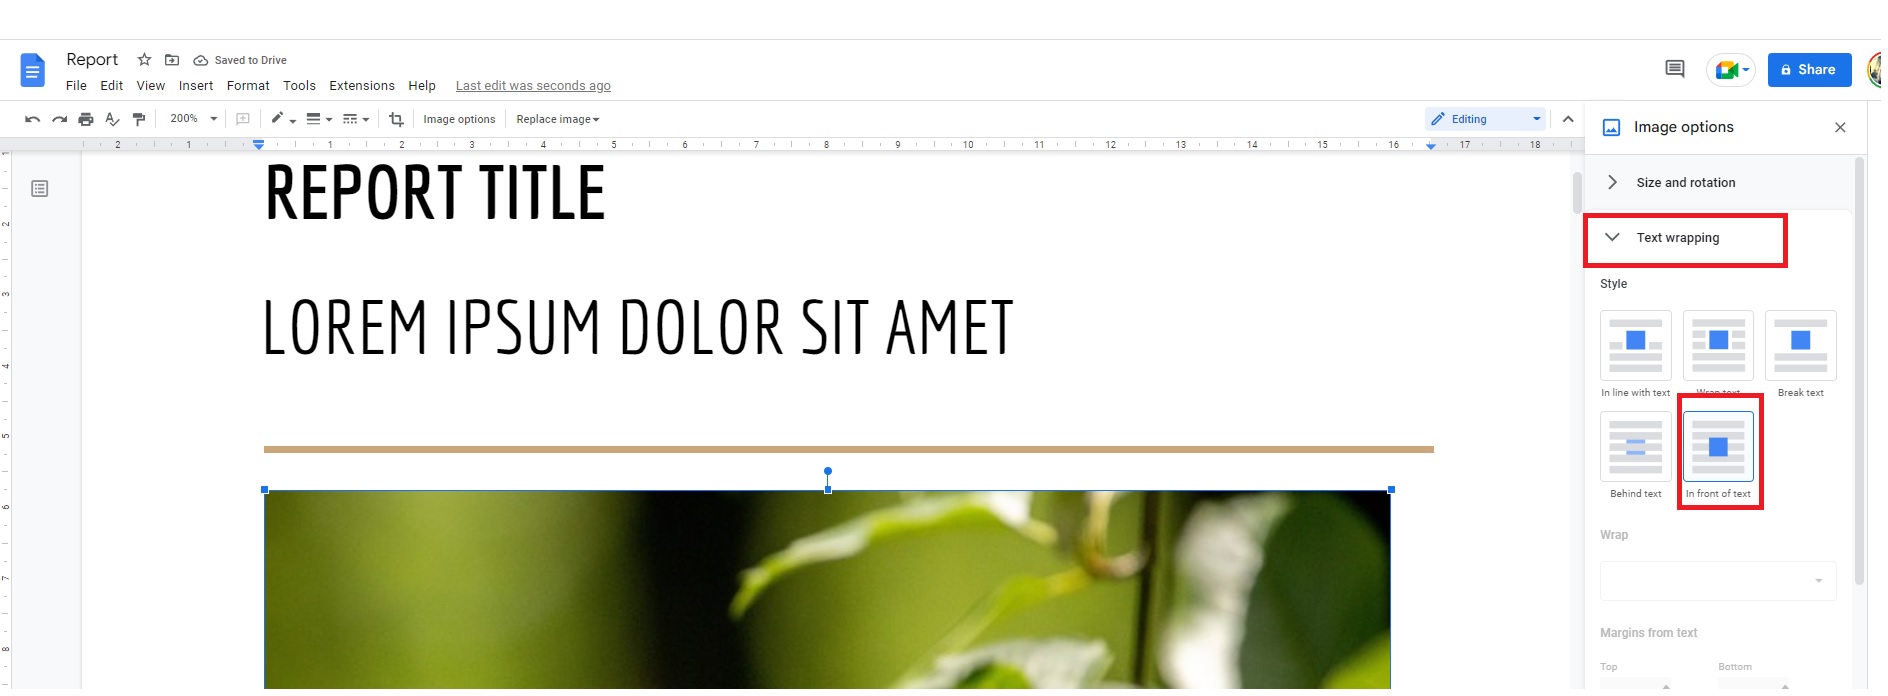
As shown in the screenshot above, under the “style” sub-section of the “text wrapping” section, click on “in front of text”.
If you’d like to change to other styles, you can also choose options such as “in line with text,” “break text,” “behind text,” and “wrap text.”
How To Put One Image On Top Of Another In Google Docs
Let’s assume you’ve multiple images in the same document. If you’d like to layer images in Google Docs, follow the steps below.
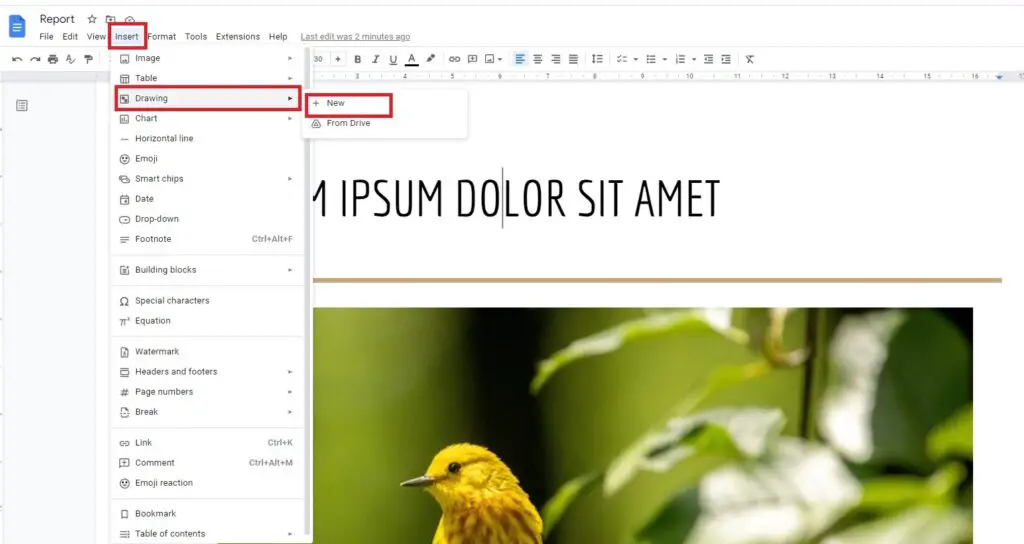
- Click Insert on Toolbar and then select Drawing.
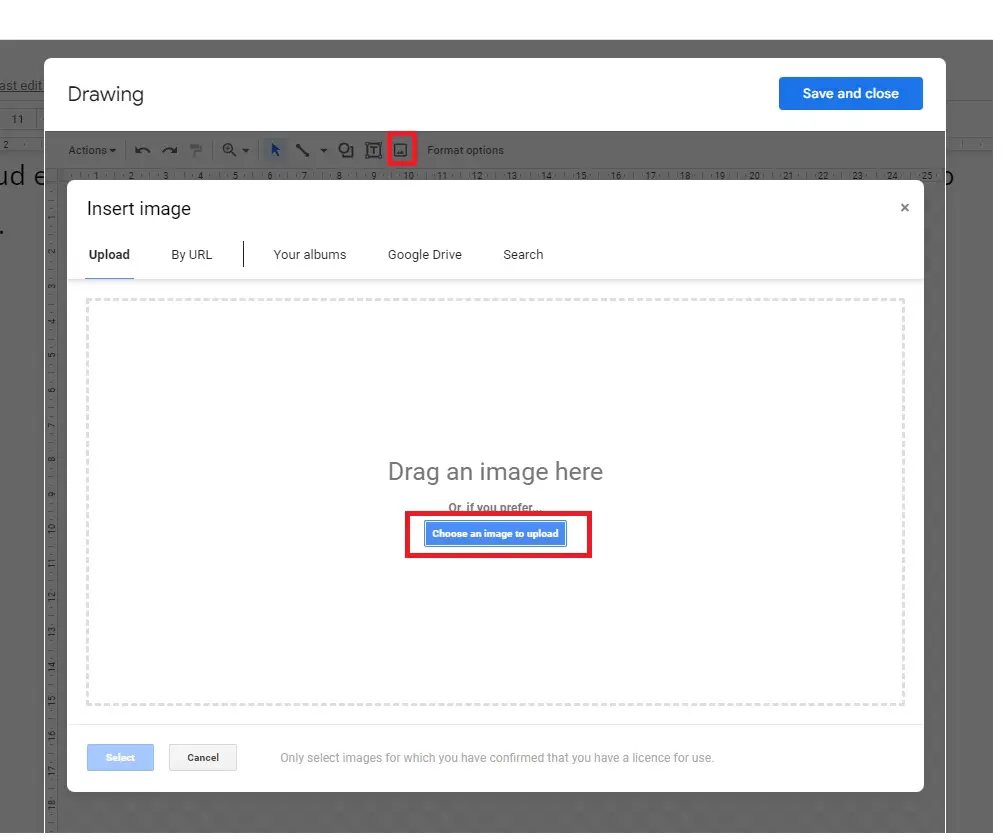
2. Choose the Image option and upload an image from your system.
3. Follow the same step to add one more image.
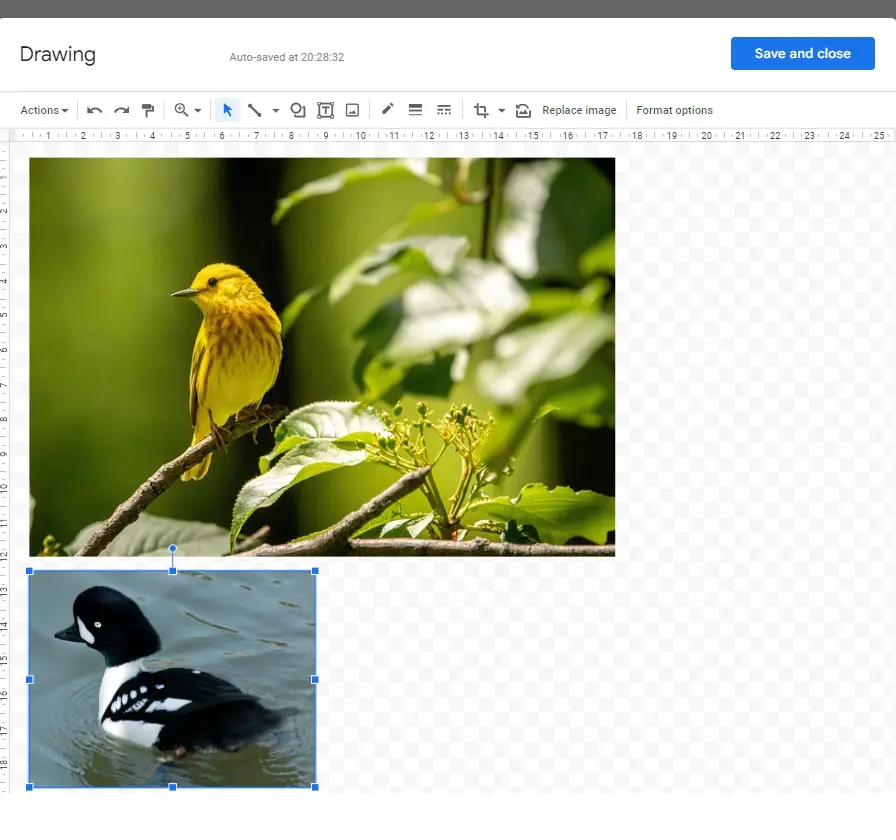
4. Once you’ve added the images to the drawing panel, drag and drop each image based on your requirement.
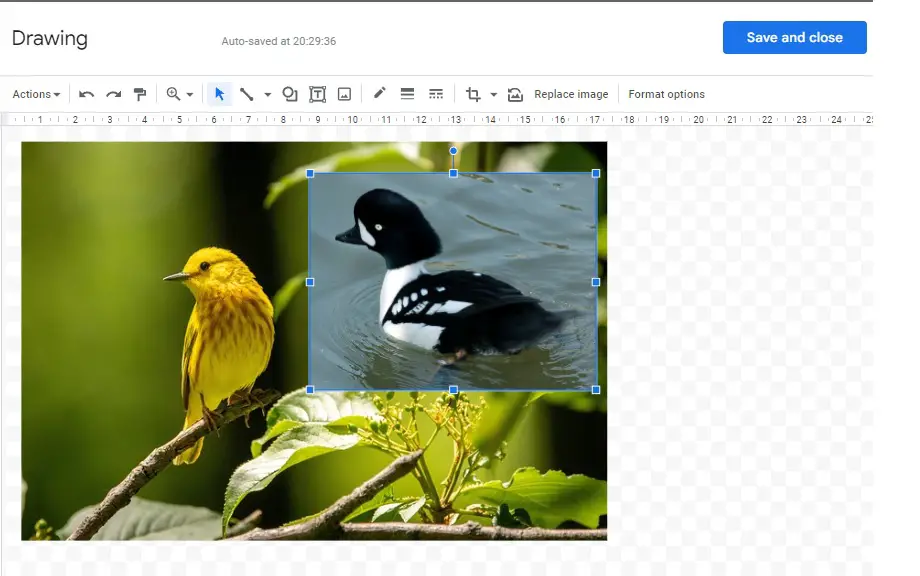
You can now see these images overlaying each other.
5. Click Save & Close.
How To Put Text In Front Of Image In Google Docs
You can perform several customizations to images in Google Docs. One of them is to add text to images. If you’d like to accomplish this feature, follow the steps below:
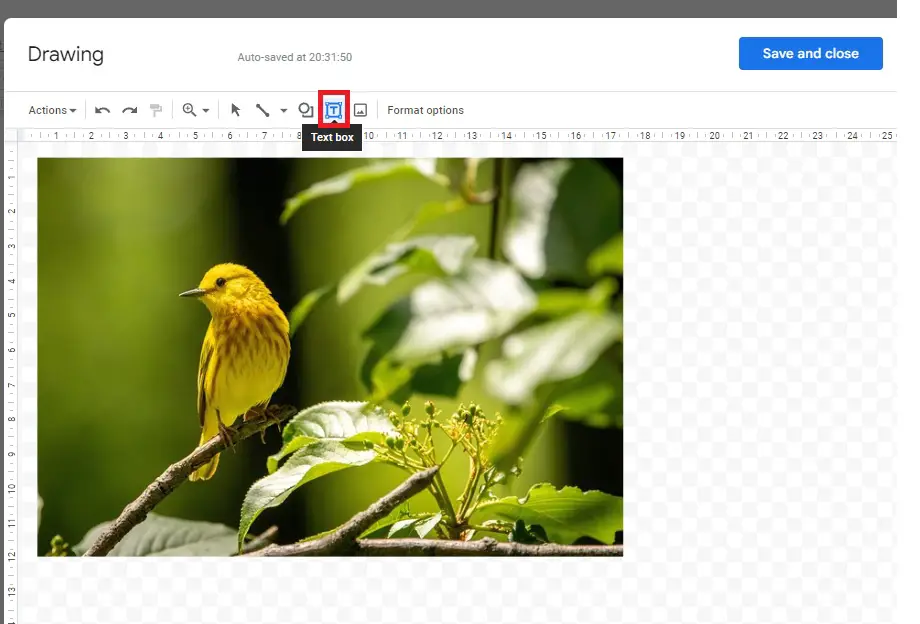
- Click Insert on the toolbar and then select Drawing.
2. Choose the Image option and upload an image from your system.
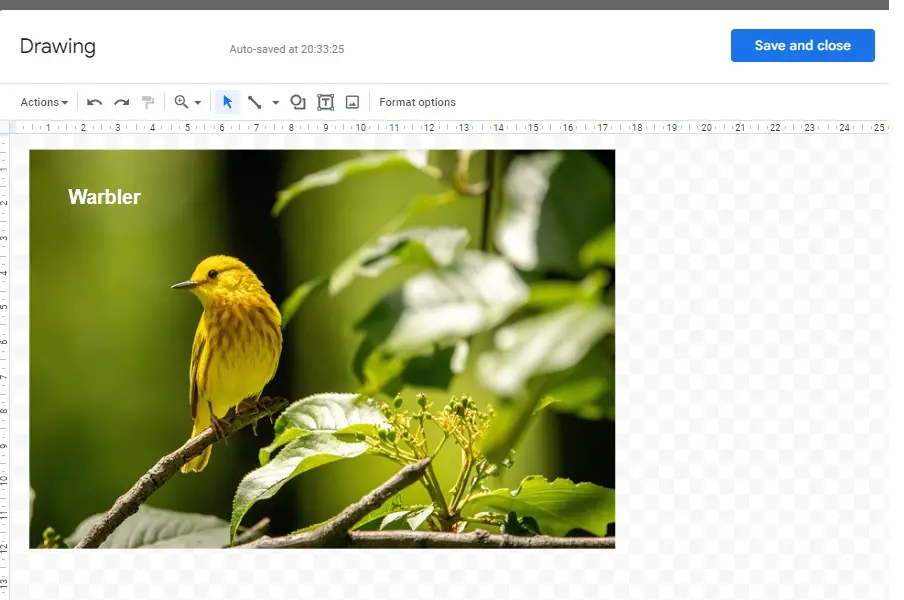
3. Choose Textbox and drag it on the picture.
4. Type the text, and it sets in front of the image.
5. Click Save & Close.
Alternatively, you can also alter the alignments of these formats.
Final Thoughts
When you work with multimedia elements in Google Docs, it’s essential to get used to their sizes and alignment options. Overlaying, wrapping, and pushing them to the front/back are a few options to explore and improve the overall presentation structure.