RemNote Clipper – A Detailed Guide with Video and Screenshots
When using RemNote, there are times when you want to capture content from the web and put it into RemNote. Fortunately, RemNote has created a Google Chrome extension that allows you to capture content from a web page into RemNote quickly and easily.
So how to do you capture web content into RemNote using the RemNote clipper? Enclosed below are the steps required to capture web content into RemNote:
- Install the RemNote Clipper for Google Chrome
- Log into RemNote account in Google Chrome
- Browse to a webpage that you want to capture content from in Google Chrome
- Click on the RemNote Clipper button
- Type a Title for Your Clipping and Click the “Add Note” button
Before we get started with the tutorial, if you are looking to learn more about apps like Notion, Todoist, Evernote, Google Docs, or just how to be more productive (like Keep Productive’s awesome Notion course), you should really check out SkillShare. Skillshare is an online learning platform with courses on pretty much anything you want to learn. To learn more about Skillshare and its vast library of courses and get 30% off, click the link below:
SkillShare – Online Learning Platform
If you are just getting started with RemNote or just looking to brush up on your RemNote skills, check out my Beginner’s Guide to RemNote as it covers everything you need to know to be productive in RemNote quickly. Click the link below to view the guide:
Beginner’s Guide to RemNote – The Productive Engineer
Let’s get started with the tutorial 😀.
Install the RemNote Clipper for Google Chrome
Open up Google Chrome and go to the Chrome Web Store.
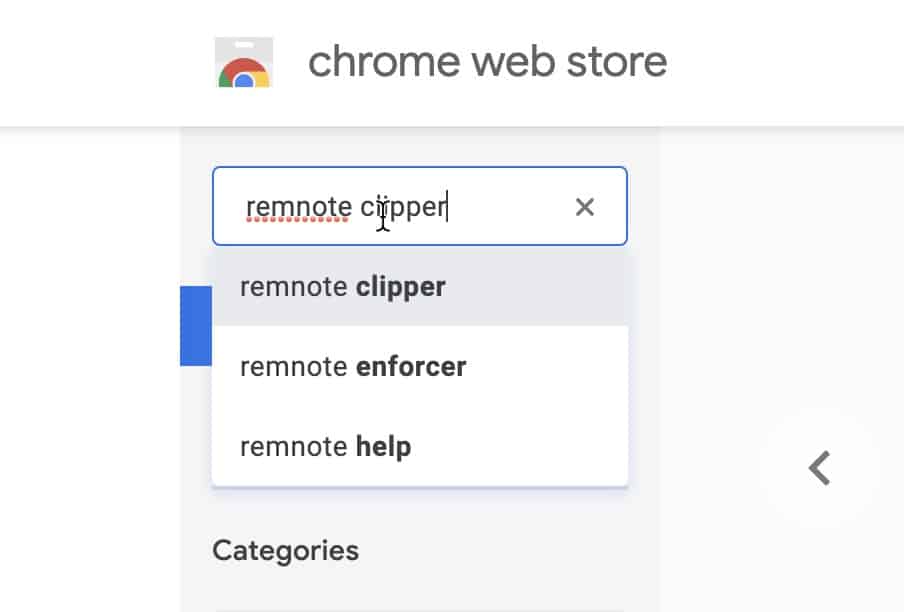
Click in the search box and type “remnote clipper” as shown in the above screenshot.
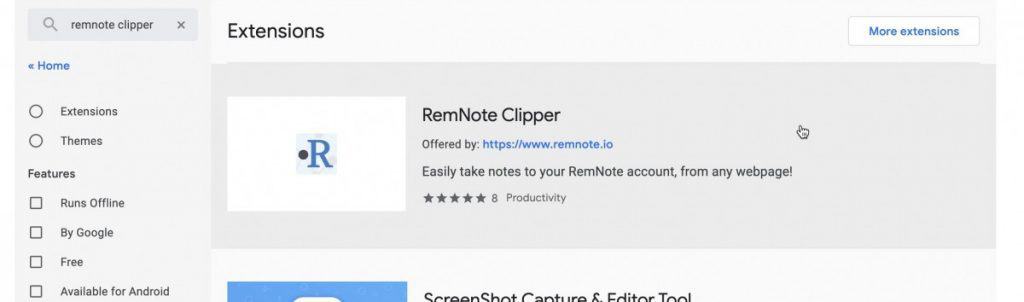
The RemNote Clipper should be the first entry in the search results. Click on it to open the extension page for RemNote Clipper.
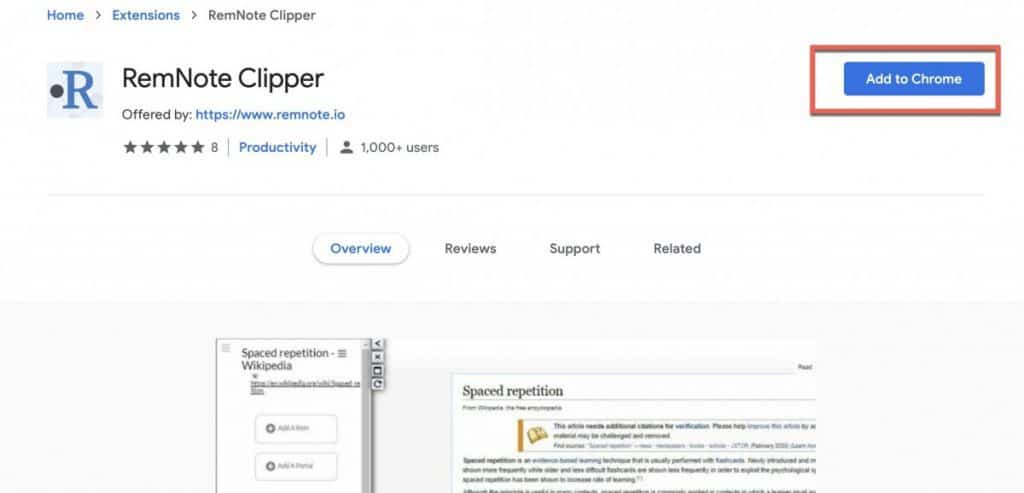
The Chrome extension page for the RemNote Clipper should now be showing on your screen. Click on the “Add to Chrome” button to start the process to install the RemNote Clipper extension into your Google Chrome browser.
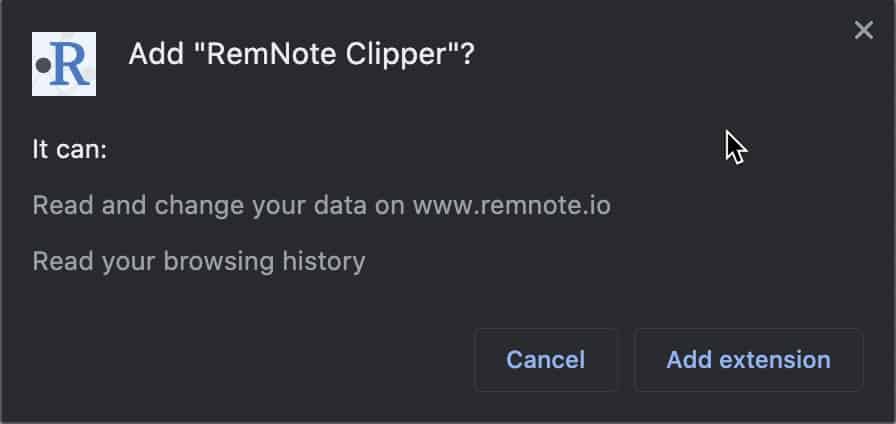
A permissions dialog box will appear that will tell you what level(s) of access the RemNote Clipper extension will have. Click on the “Add extension” button to continue the installation process.
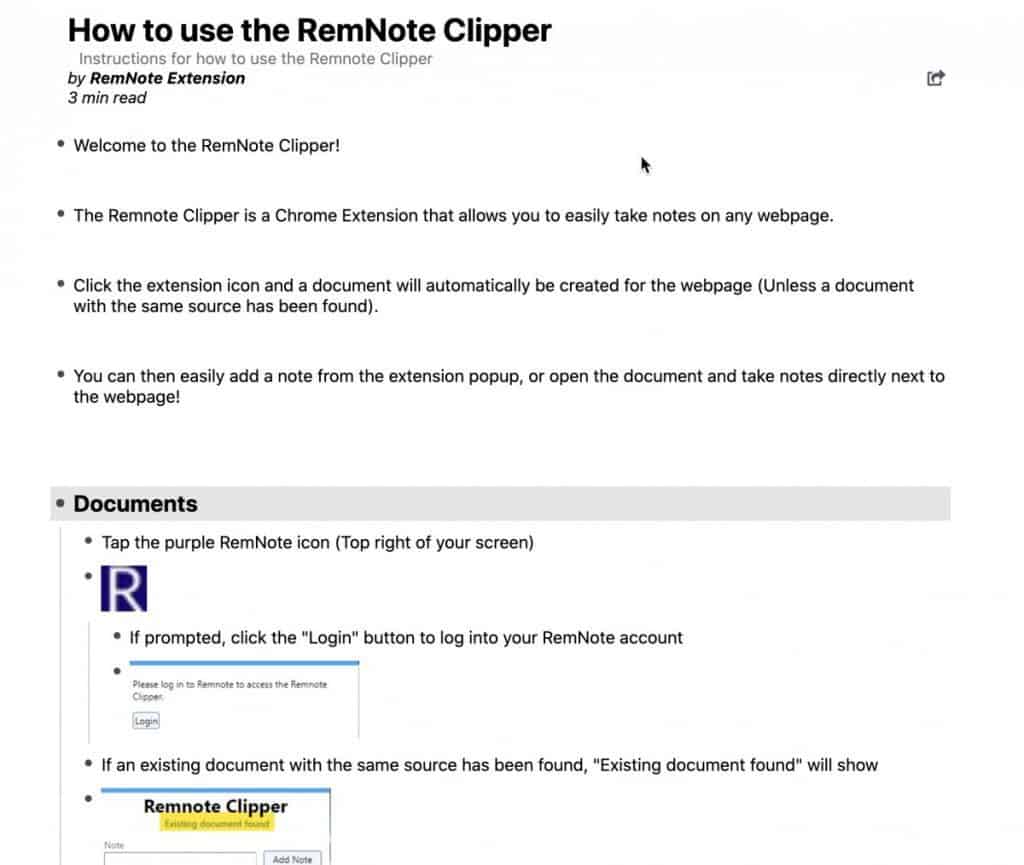
Once installed, you should be redirected to a nice tutorial page on the RemNote Clipper. Bookmark this page for future reference.
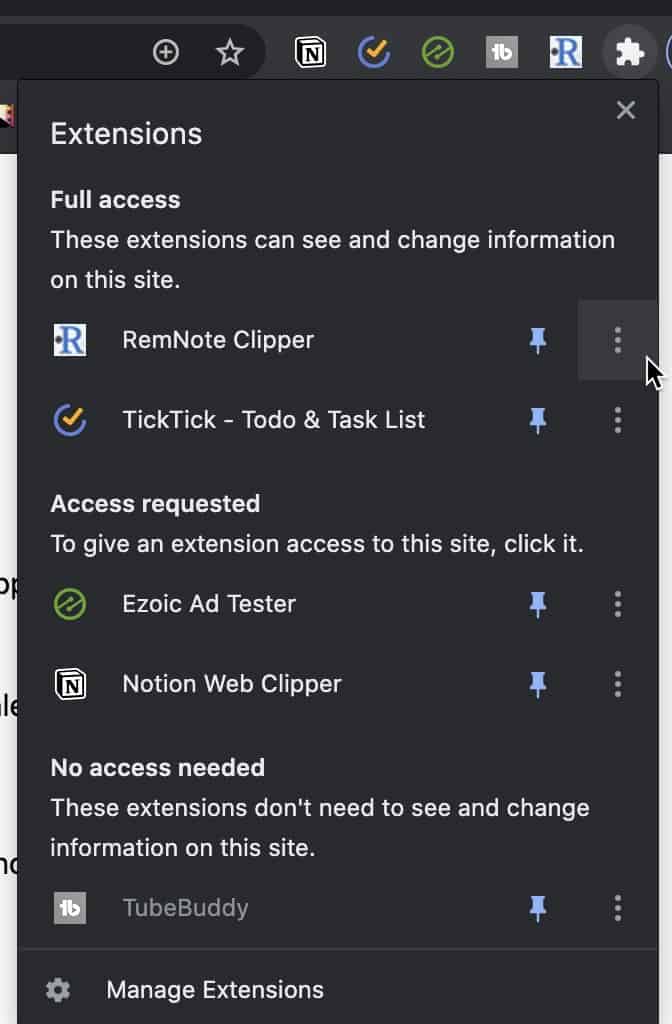
You may not notice the RemNote Clipper in your Chrome toolbar. You need to make sure it is pinned as shown in the above screenshot.
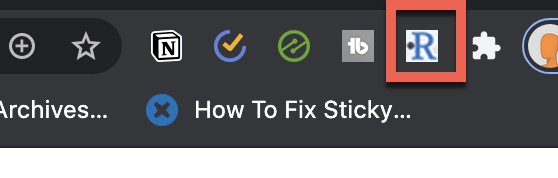
You should now see the RemNote Clipper in your Google Chrome toolbar.
Using the RemNote Clipper
Navigate to a webpage you want to clip content from in Google Chrome.
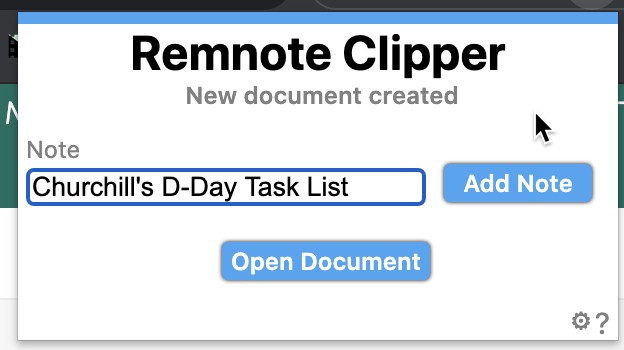
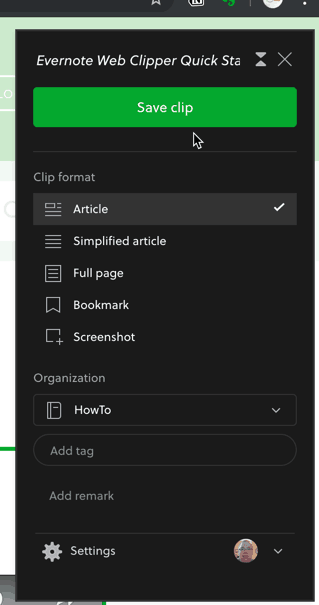
Click on the RemNote Clipper button in your toolbar. You should see a pop-up window like the one above. Type in a name for your note and click “Add Note“. To view your new note, click the “Open Document” button.
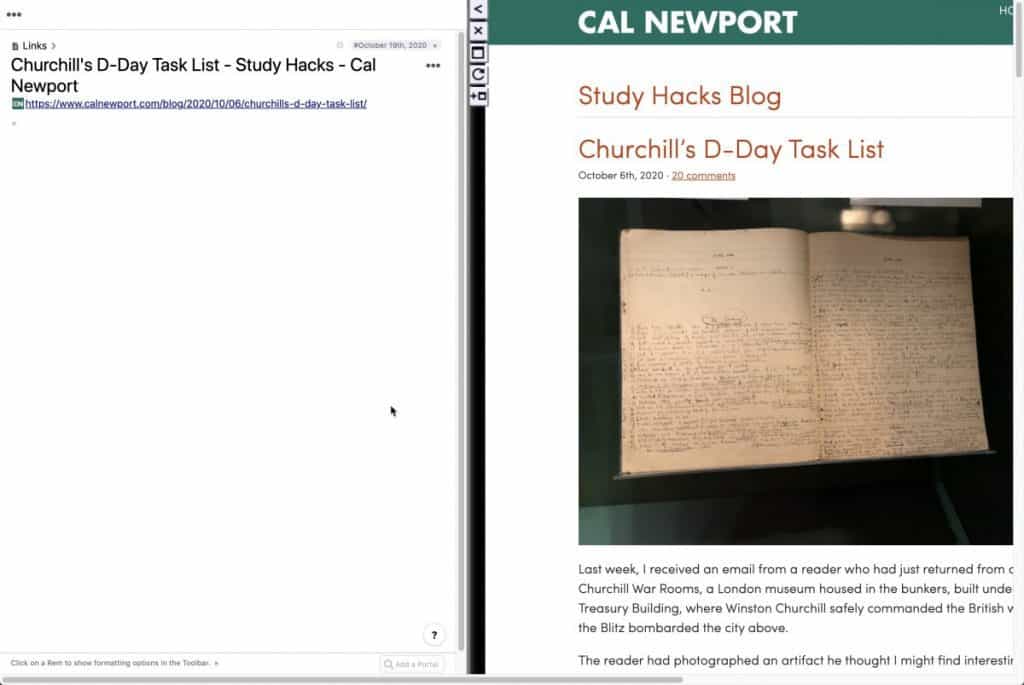
When you click the “Open Document” button, Chrome will present you with a split-screen with your RemNote page on the left and the webpage you just clipped on the right. If your RemNote page doesn’t have anything one it, click on the refresh button on the divider (looks like a circular arrow) to refresh RemNote. Your page should appear.
Note that the RemNote Clipper doesn’t clip the page but rather creates a document for that page with the URL of the page. Anytime you go to this page in Google Chrome going forward and select content to clip from this specific page, RemNote will add it to the same RemNote document you just created.
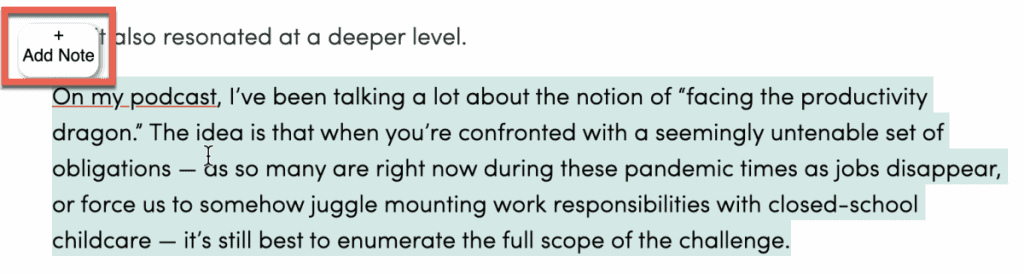
Let’s test this out. Highlight some text on the webpage. An “Add Note” should appear next to the highlighted text as shown above. Click on the “Add Note“.
As you can see, the text you highlighted has been added to the RemNote page for that webpage. Highlight some more text from the webpage.

You should see the same “Add Note” button as before. Click it.
The highlighted text should be appended to your RemNote page for that webpage as shown above.
I hope this tutorial was helpful to you. Good luck!
Subscribe to Our Newsletter
If you like this article, subscribe to our newsletter. It contains tips and tricks to help you get things done.
Check out our Resources page
Check out our resources page for the products and services we use everyday to get things done or make our lives a little easier at the link below:
Check Out Our YouTube Channel!
We have a YouTube channel now and we are working hard to fill it with tips, tricks, how-tos, and tutorials. Click the link below to check it out!
Do You Ever Need to Edit or Annotate PDFs?
If the answer is yes, you should really PDF Expert! PDF Expert is my go-to app for editing and marking up PDF documents. It is easy to use, has a ton of features and is very cost effective compared to other options out there. For more information on PDF Expert, click the link below:
PDF Expert – Fast, robust and beautiful PDF editor
Looking to Get Started Blogging or on YouTube?
Getting started can seem daunting and scary (I know it was for me) but it doesn’t have to be. I was very lucky to find a program that that has helped me grow my blog to over 60,000 page views a month and a Monetized YouTube channel that is growing month-over-month.
Project 24 by Income School is the program that I have used. I have been a member for over a year now and just renewed my membership. I cannot recommend Project 24 enough! For more information on Income School, click the link below:
Project 24 byIncome School – Teaching You How to Create Passive Income from Blogs and YouTube