Improving Your Layout: How to Vertically Align Text in Google Docs for a Professional Finish
When you work with tables in Google Docs, several formatting features can be taken advantage of. For instance, adjusting row height, width, and cell padding. However, the vertical alignment of text is one underused feature. If you’d like to explore this feature, it’s essential to know how to align text in Google Docs vertically.
To vertically align text in Google Docs, do the following:
- Open the document in Google Docs.
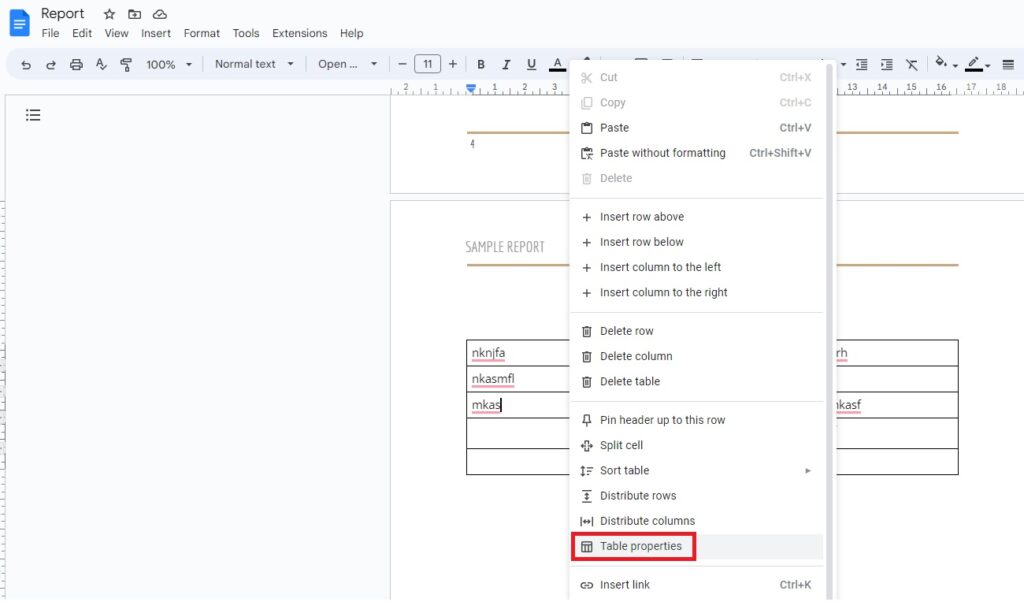
- Insert a table and click one of the rows/columns.
- As it’s selected, right-click on it and select Table Properties.
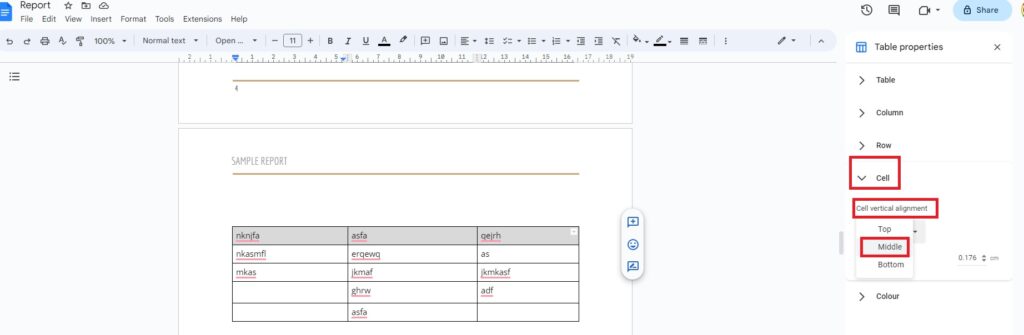
- In the dialog box that opens on the right pane, select the Cell section.
- Click the Cell Vertical Alignment box and change the alignment position.
- As soon as you make the change, the text automatically realigns.
Vertical alignment is an interesting feature to structure the text in each table cell. In this article, let’s look at the step-by-step guide to vertically align text so you can start applying it to your documents.
How To Vertically Align Text In A Table In Google Docs
When discussing vertically aligning the text, it’s often misunderstood as splitting the text into columns. There’s a vast difference between them. Vertical alignment is a feature available in Table Properties that enhances the cell’s formatting in a table.
To vertically align text in Google Docs, follow the steps below.
- Open the document in Google Docs.
- Insert a table and click one of the rows/columns.
- As it’s selected, right-click on it and select Table Properties.
4. In the dialog box that opens on the right pane, select the Cell section.
5. Click the Cell Vertical Alignment box and change the alignment position.
6. As soon as you change, the text automatically realigns.
As you change the alignment of the cell, you can also alter table alignment, cell padding, and left indent in the same section of the Table Properties dialog box.
How To Vertically Align Text On A Document In Google Docs
If you’d like to align the text present on your document vertically, there’s no direct option to get it done. However, it’s still feasible to do with a roundabout process.
Follow the steps below.
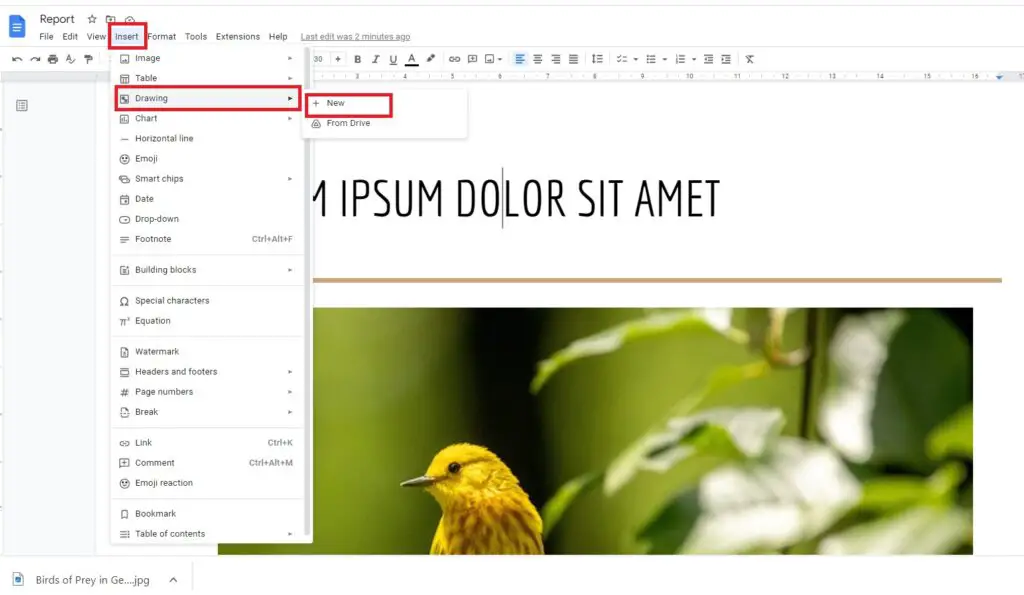
- Open the document on Google Docs.
- Click Insert->Drawing->New.
3. Tap on the Text Box and drag it around.
4. Type the text in it.
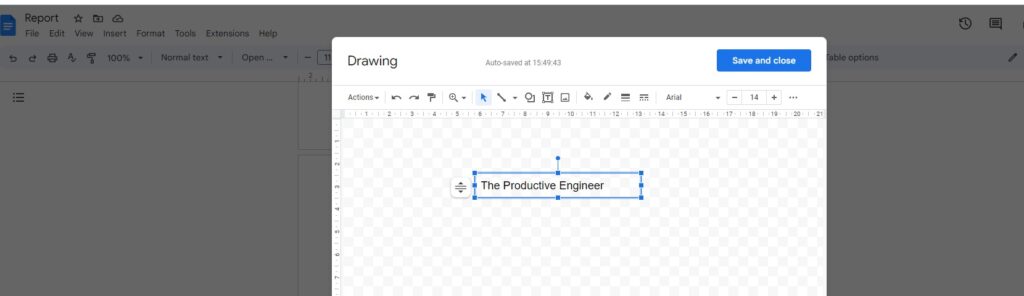
5. Click on Rotate icon and rotate it to 90%.

6. The text automatically changes vertically.
7. Click Save & Close.
Sounds interesting and easy, right? For newbies, this process can take a bit of time, but it does the job effortlessly.
Final Thoughts
Aligning the text is a crucial aspect when it comes to formatting documents. While most people are aware of aligning the text horizontally, there’s often confusion about vertical alignment. As you have tried the steps mentioned in this article, it’s time to apply them to your documents in the future.