How To Add More Rows To A Table In Google Docs – Complete Guide
Every software application that we use is loaded with shortcuts to perform various operations. When I was recently working on tables in Google Docs, I spent a lot of time discovering the exact way to add more rows to a table, and I finally landed on the solution.
To add more rows to a table in Google Docs, do the following:
- Hover your mouse to the left of the table you just created.
- Look for the “+” sign and tap on it.
- A new row is created beneath the existing cursor position.
In this article, you’ll look at more ways to add rows to a table in Google Docs and common errors you may encounter in this process.
Adding More Rows To A Table In Google Docs
If you’re new to using Google Docs, you need to go step-by-step to ensure that you add rows appropriately.
Method 1 for Adding Rows to Table in Google Docs: Using the Plus Button
- Open the document containing the table in Google Docs.
- Hover your mouse to the left of the table row below which you wish to add a new row.
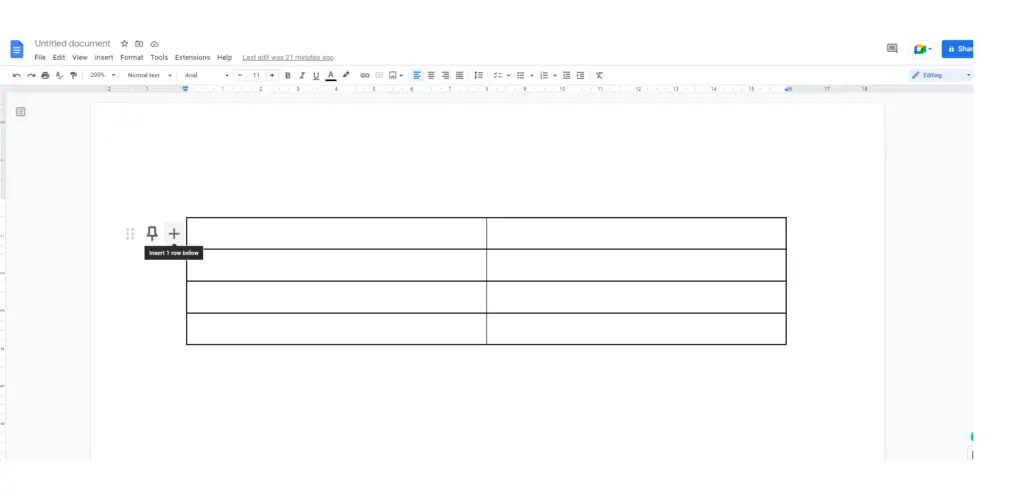
3. Look for the ‘+’ sign (one of the three options).
4. Tap on ‘+.’
5. A new row is created below the row you just pointed to.
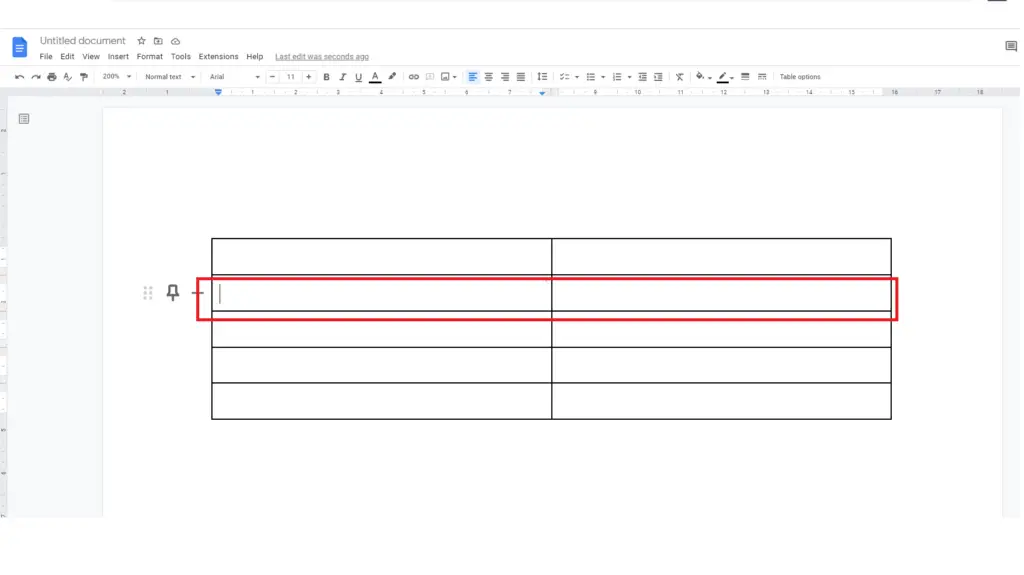
6. Repeat the same steps until you create as many rows as you want.
Method 2: Adding a New Row in a Specific Location in Google Docs
If you’re specific about where you wish to add a row, follow the steps below:
- Right-click on the cell above/below which you wish to add a row.
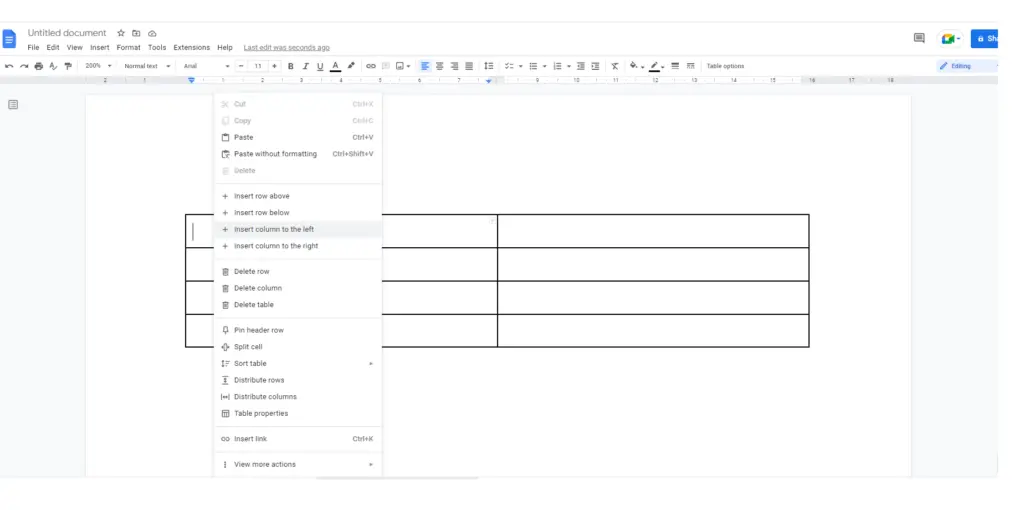
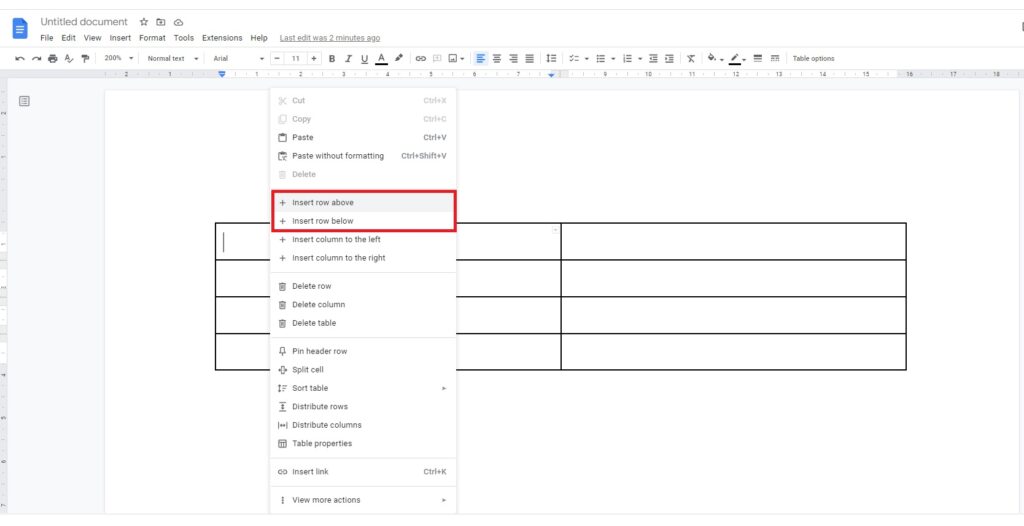
2. You can either add a row below by selecting Insert Row Below or above by selecting Insert Row Above.
How To Add More Than 20 Rows In Google Docs
To add more than 20 rows in Google Docs, follow the steps below:
- Right-click on the cell above/below which you wish to add a row.
- You can either add a row below by selecting Insert Row Below or above by selecting Insert Row Above.

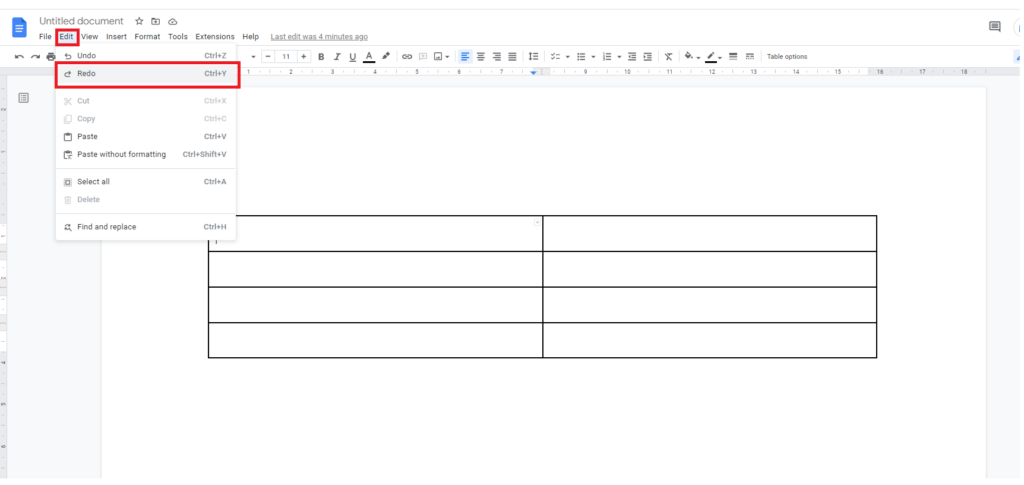
3. To add more rows, you can either press Ctrl + Y or select Redo from the Edit menu. This repeats the previously performed action, which is the insertion of a new row.
How To Add More Rows To A Table In Google Docs on Mac
Performing operations to a table in Google Docs on Apple platforms is highly feasible.
To add more rows to a table in Google Docs on Mac or any other Apple device, follow the steps below:
- Open the document containing the table on Google Docs.
- Click on the location where you wish to add a new row.
- Look for “Add +” on the top-right.
- Select Table.
- Type the number of rows required.
- Select Insert Table.
You can follow the same steps if you’re using an iPad or iPhone to add new rows to a table.
Why Can’t I Add A New Row To A Table In Google Docs
If you’re unable to add a new row to a table in Google Docs, it’s due to one of these reasons – access rights denied or the wrong command to add a new row. If you aren’t the author of the document, you should request editing permission to make changes to the table.
In general, all users using Google Docs are allowed to perform various table operations if they’ve suitable access rights.
Gear I Use in My Home Office
[amazon table=”17112″]
Final Thoughts
When you use the option to right-click on a cell and then add a new row, you’re more likely to get used to other possible options related to tables on Google Docs.
Perhaps, it’s time to become a PRO on Google Docs!


