14 Amazing Notion Tips You Must Know!
If you have read my blog at all, you know how much I love Notion. Notion is an amazing service. It allows you to work the way you want to due to its flexibility and the massive scope of its functionality. While it is easy to get started with Notion, mastering it is a whole other matter.
This guide will teach you fourteen tips that will make you more productive in Notion. Listed below is the list of tips we will teach you in this guide:
- How to Create a Kanban Board in Notion
- How to Embed YouTube Videos in Notion
- Version Control – How to View Page History in Notion
- How to Use Page Lock in Notion
- How to Write Markdown in Notion
- How to Reference Another Page in Notion Using the “@” symbol
- How to Add Background Colors to Text in Notion
- How to Add a Calendar to Your Notion Page
- How to Save Bookmarks to Notion
- How to Use Notion as a Document Repository
- How to Convert a Web Clipping to a Task in Notion
- How to Add Icons, Covers, and Descriptions to Your Notion Page
- How to Enable Dark Mode in Notion
- How to Create a Separate Workspace in Notion
Before we get started with the tutorial, if you are looking to learn more about apps like Notion, Todoist, Evernote, Google Docs, or just how to be more productive (like Keep Productive’s awesome Notion course), you should really check out SkillShare. Skillshare is an online learning platform with courses on pretty much anything you want to learn. To learn more about Skillshare and its vast library of courses and get 30% off, click the link below:
SkillShare – Online Learning Platform
If you are just starting out with Notion and aren’t sure where to get started, you really need to check out my comprehensive beginner’s guide to Notion. It goes through all things you need to know to get started the right way. Enclosed below is the link to the guide:
Link to Beginner’s Guide to Using Notion With Screenshots
If you are looking to learn on the go, Audible is for you. Audible has a huge library of audiobooks on a variety of topics and listening to audiobooks is a great way to learn on the go. Audible includes podcasts and Audible Originals as well. For more information on Audible, click the link below to get your first 30 days on Audible for free:
Audible – Your First Audiobook is On Us
How to Create a Kanban Board in Notion
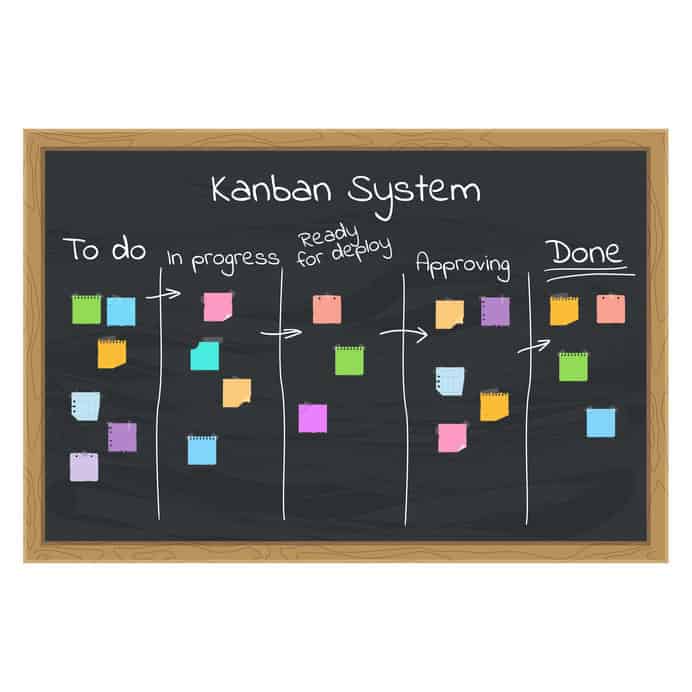
A kanban board is a project management system that displays the various phases of a project structure. Each column of a kanban board represents a phase of the project or system. Projects are represented as cards that are moved from column (phase) to column (phase) as you complete a phase of the project process.
Notion supports the ability to create kanban boards inside a Notion page. To create a kanban board in Notion, do the following:
Create a new page in Notion
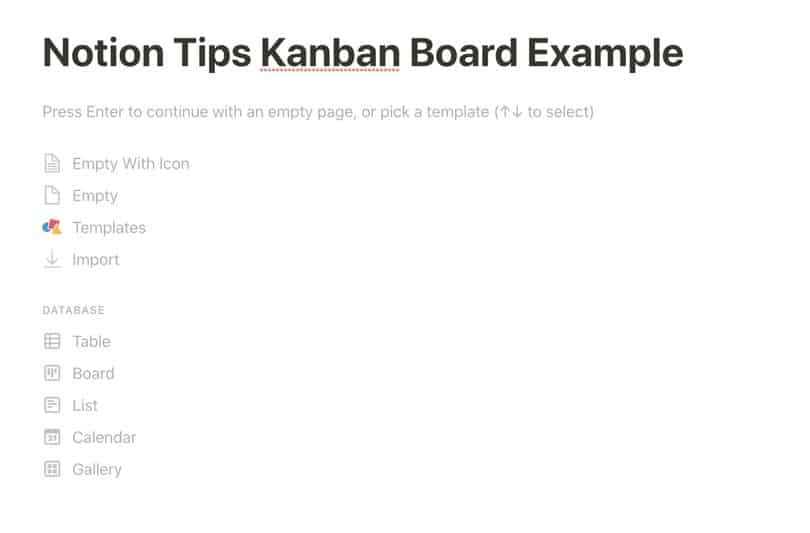
Create a new page in Notion and provide it a title. Alternately, you can simply use an existing Notion page.
Type /board to bring up the Notion board options
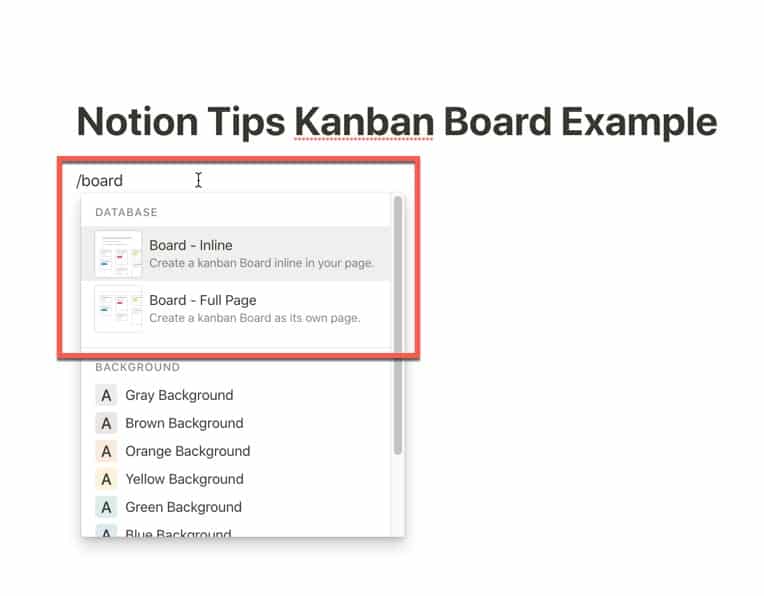
Click inside your Notion page where you want the board to appear. Type /board and a menu will appear with two options for adding a board to Notion:
- Inline
- Full Page
Inline places the Notion board inside the currently selected Notion page. Full Page creates a new page with a board inside it as a subpage of the currently selected page. For the purposes of this tutorial, select Inline. This will create a Notion board on the currently selected page.

For more information on how to create and use Notion boards, check out our Guide to Using Kanban Boards in Notion post at the link below:
link to Guide to Using Kanban Boards in Notion
How to Embed YouTube Videos in Notion
Sometimes there is a YouTube video you want to embed inside a Notion page. An example of this might be a video that helps explain a concept you are trying to learn inside of a Notion page you have on that topic. Embedding a YouTube video inside a Notion page is really straight-forward.
To embed a YouTube video in Notion, do the following:
Go to YouTube and copy the link to the video you want to embed.
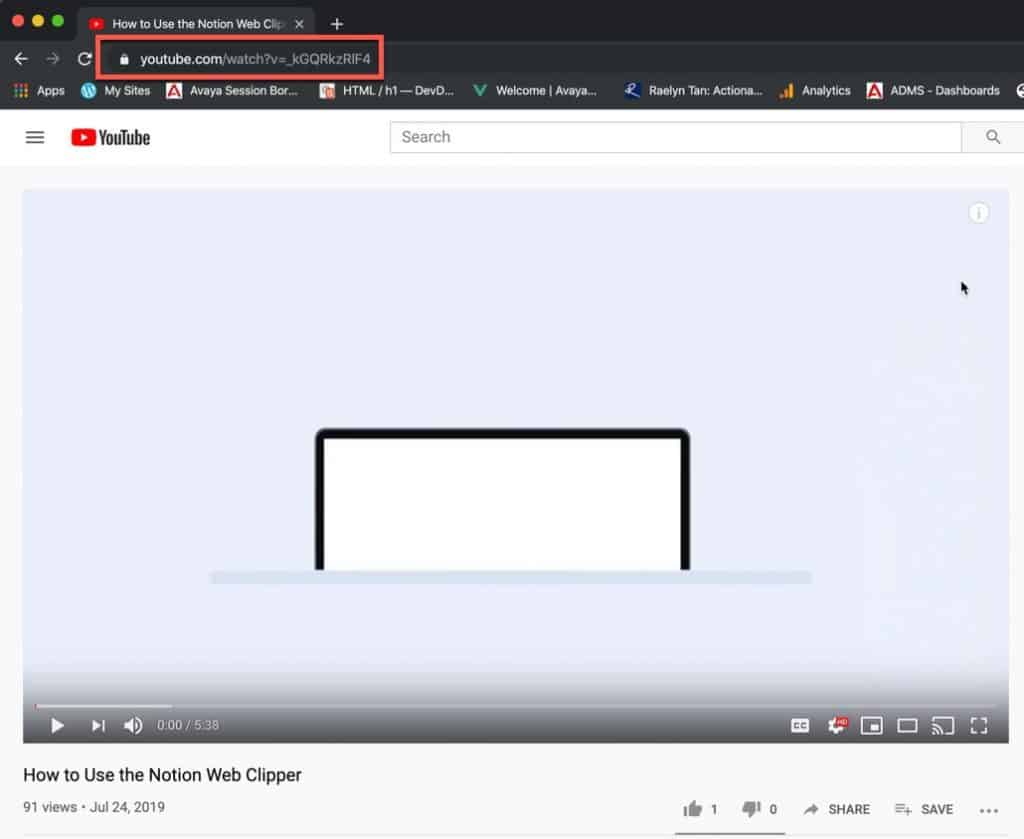
Open a web browser and go to YouTube. Find a video you want to embed and click on it. If you are looking for a video to embed, use my video on how to use the Notion Web Clipper at the link below:
Link to How to Use the Notion Web Clipper video on YouTube
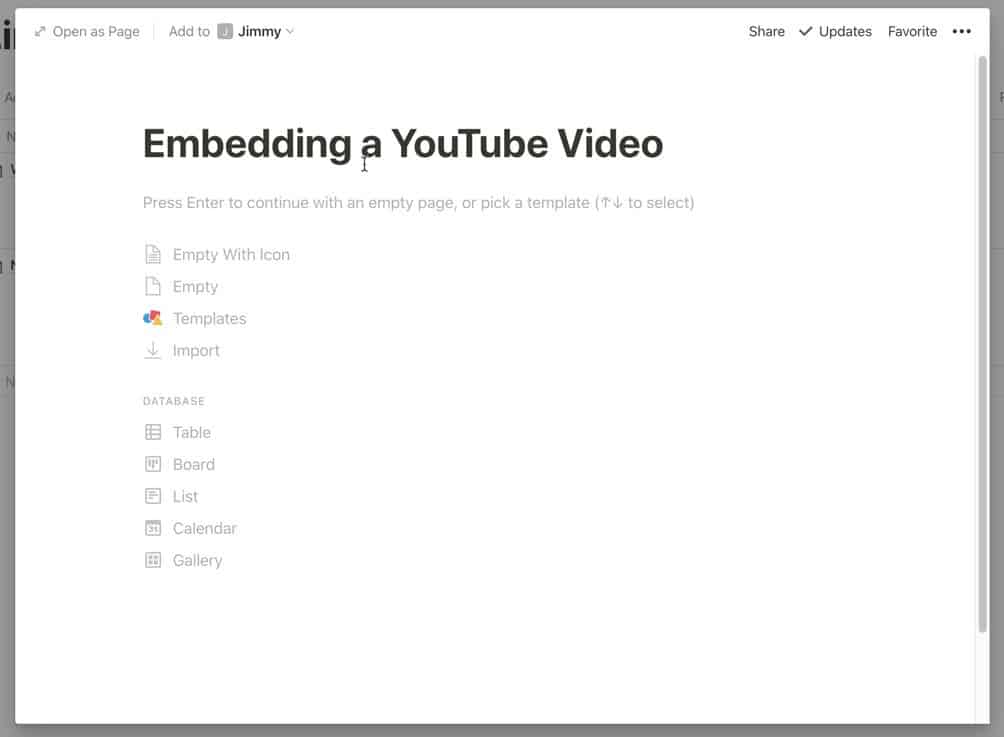
Now that the shameless self-promotion is complete, open Notion. Open the Notion page that you want to add the video.
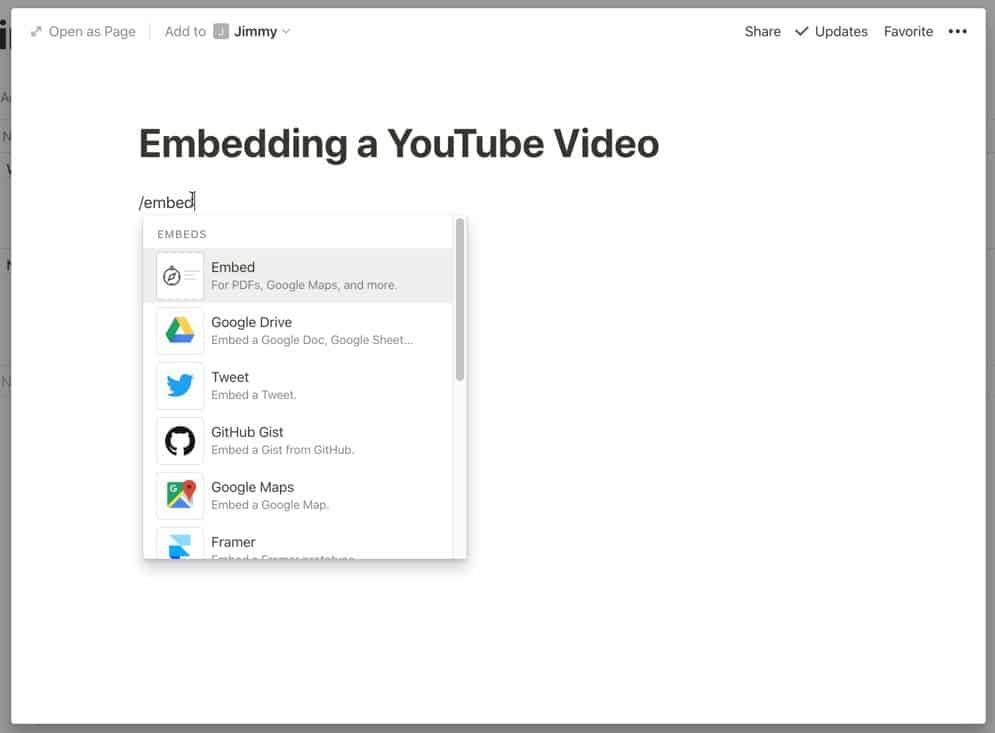
Type /embed to bring up the sub-menu with embed as the top-listed option. Select Embed to bring up the embed menu as shown in the screenshot below:
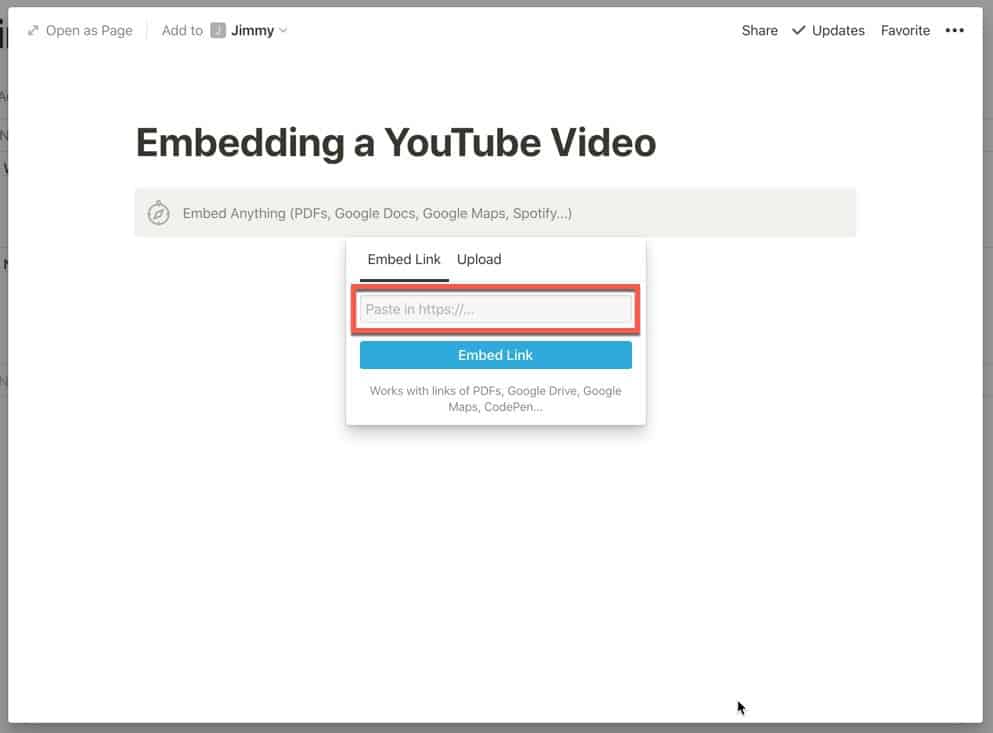
Paste the URL of your YouTube video from your clipboard into the text box under Embed Link and press the Embed Link button.
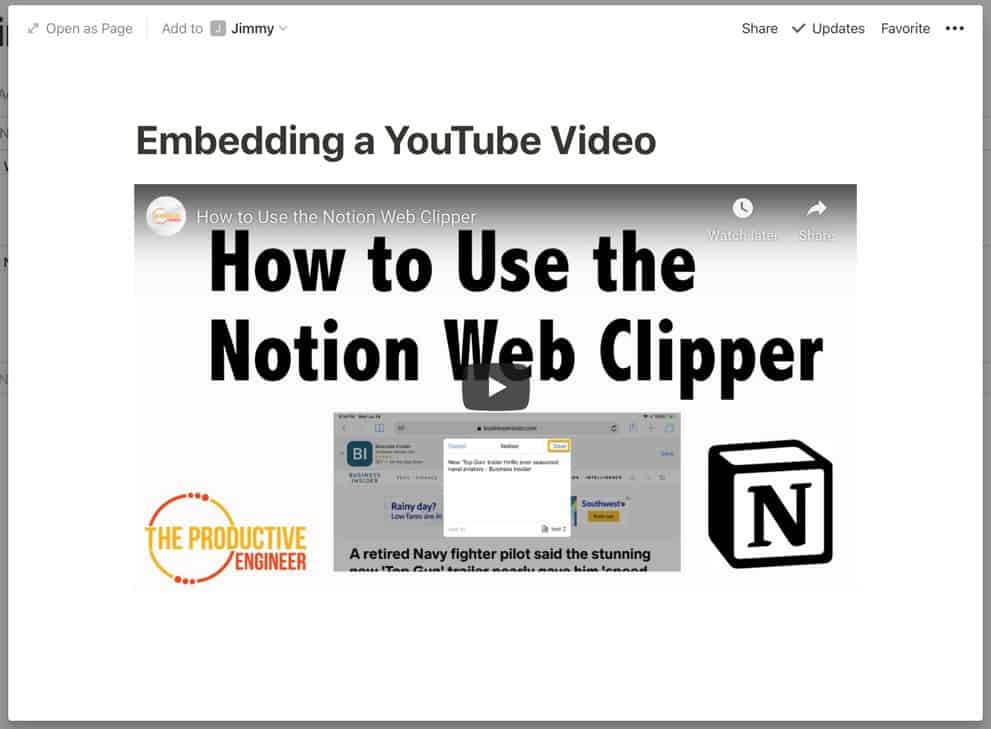
Your video will now appear on your Notion page as shown above.
If you are looking for a system for setting up your Notion Workspace, you should check out The Bulletproof Notion Workspace by Notion VIP. It is an excellent organizational system that provides a strong framework for setting up Notion. You can either manually setup the system using the above video as a reference or purchase the fully developed templates from the link below:
The Bulletproof Notion Workspace – Notion VIP
If you do choose to purchase the templates, use my coupon code productiveengineer for $50 off.
Version Control – How to View Page History in Notion
Notion provides a history of the changes you have made to your page. Not only that, but you can also revert to that version of the page. For example, let’s say you made a bunch of changes to a page but, it turns out, you liked the page the way it was before the changes. Using the page history feature, you can simply revert back to the version of the page before you made the changes.
To use the page history feature in Notion, do the following:
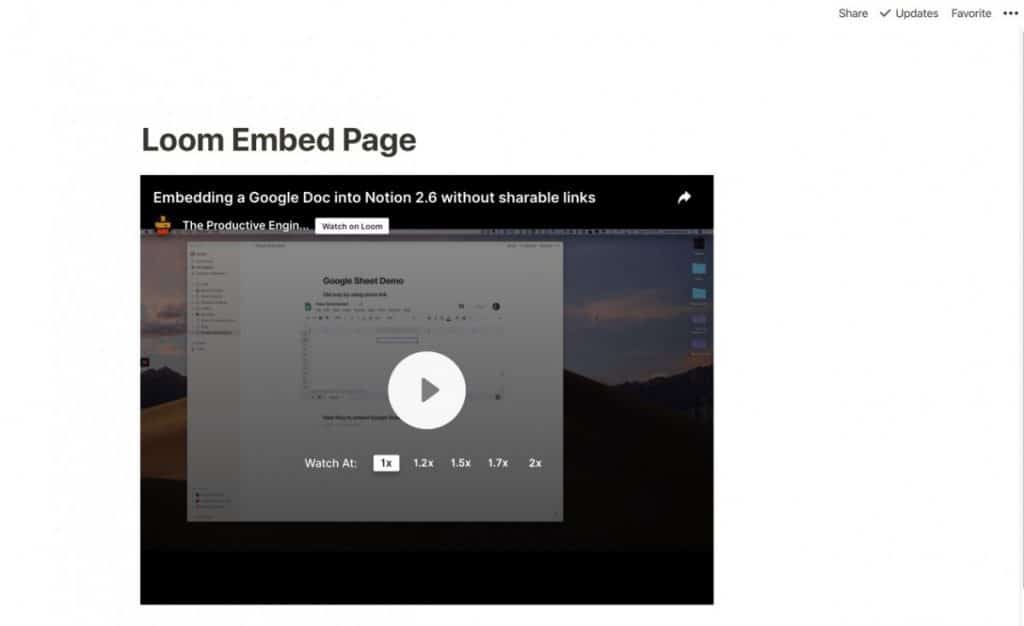
Open the page in Notion.
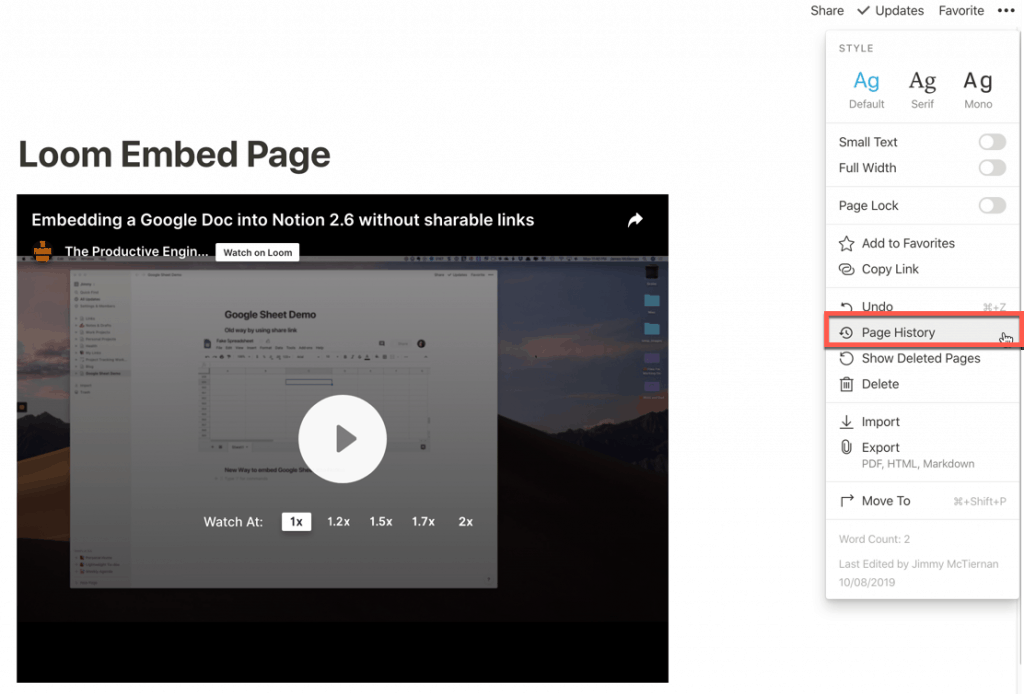
Click on the ellipsis (…) in the upper-right corner of the page and select Page History from the drop-down menu.
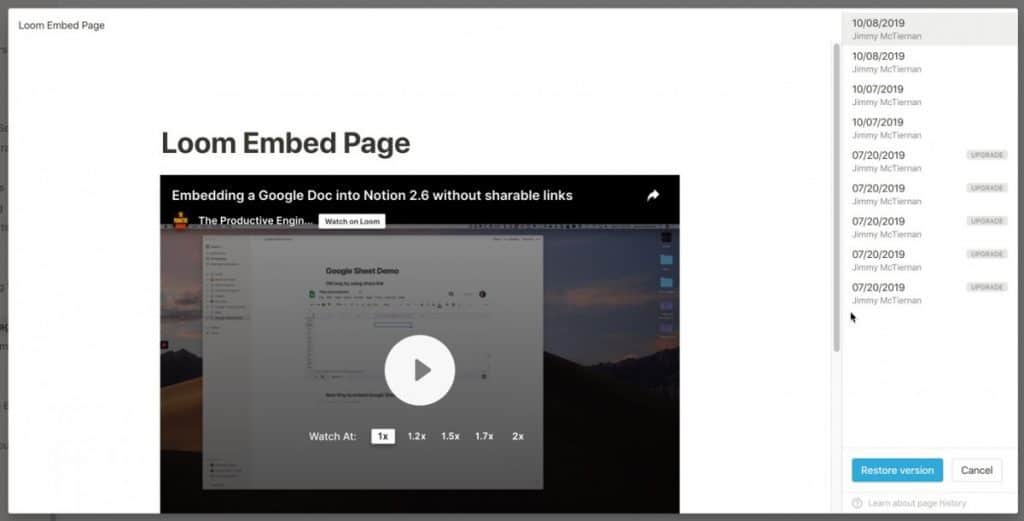
The page history entries will appear on the right side of the page arranged by date from most recent to oldest. If you click on one of the date entries, Notion will render the page as it was on that date.
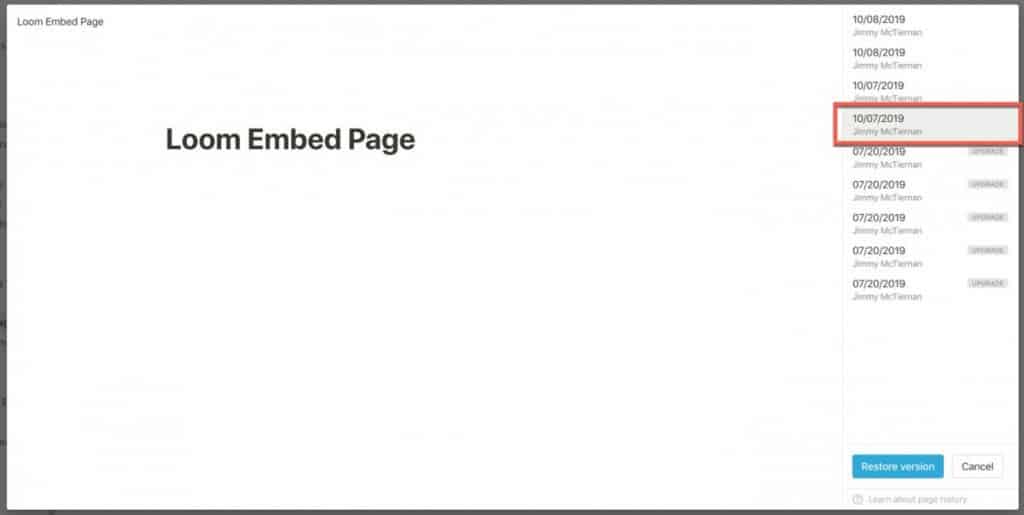
Select the date you want and press the Restore version button to restore your page to its prior version.
How to Use Page Lock in Notion
Sometimes you want to make sure no one can edit a page. If a page has essential content that cannot be lost or modified, it can make sense to turn off the ability to edit it. Notion supports the ability to lock a page via the page lock feature.
To lock a page in Notion, do the following:
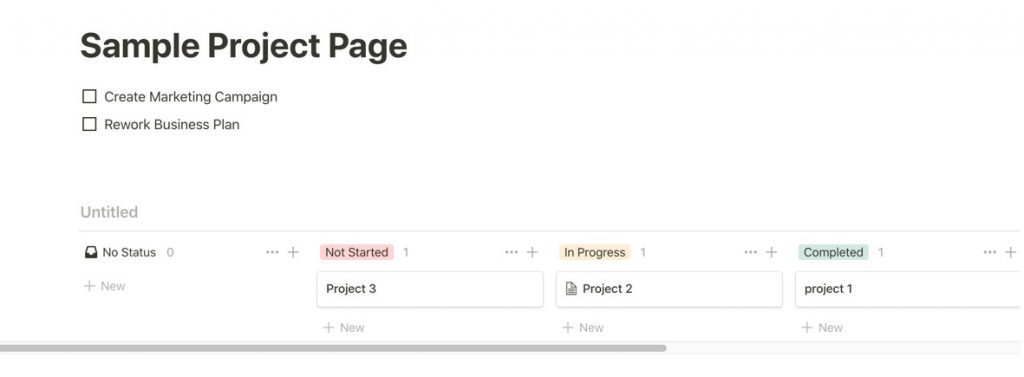
Open the page you want to lock.
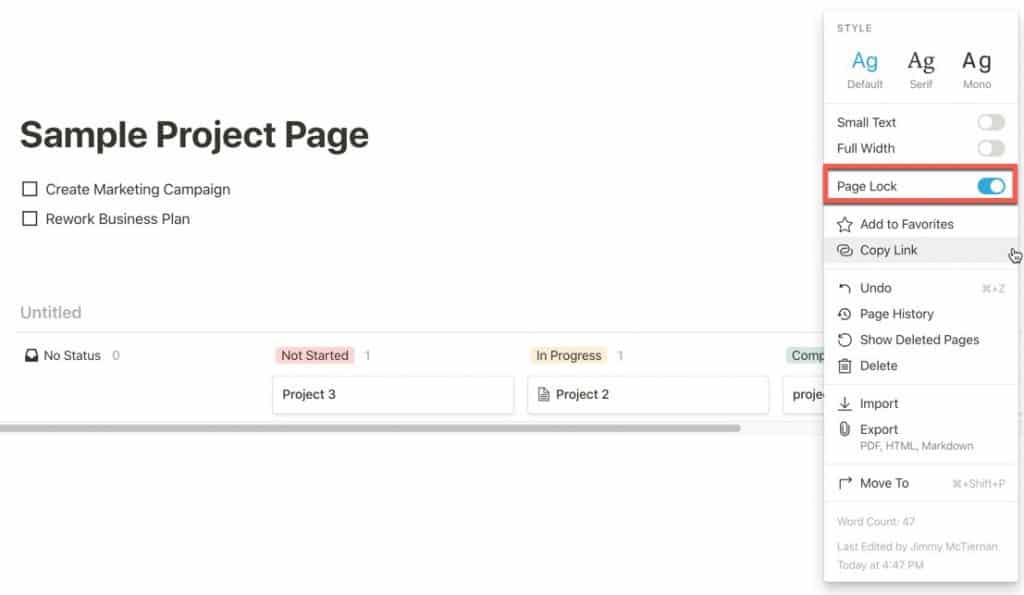
Click on the ellipsis (…) in the upper-right hand corner of the page and toggle the Page Lock switch to On.
Your page is now in view-only mode. To make the page editable again simply toggle the Page Lock switch off.
How to Write Markdown in Notion
Markdown is a text format for writing content for the web. Notion actually has native support for markdown. You can write in markdown in Notion and Notion will automatically render it appropriately, meaning if you write the following:
# This is an H1 Heading
It will appear in the Notion page as an H1 heading, as you can see in the screenshot below:
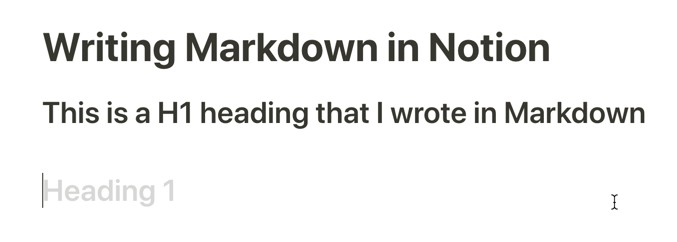
Notion also allows you to paste markdown into Notion. Notion will understand you are pasting in Markdown text and will render it properly. You can also export Notion pages as markdown files as well as import markdown files into Notion and they will render as expected. I actually wrote a blog post that goes deep into how to use Markdown in Notion, which you can read at the link below:
Link to How to Use Markdown in Notion article
How to Reference Another Page in Notion Using the “@” symbol
One of the cool things you can do in Notion is create reference links to other pages in Notion. It works similarly to internal links in Evernote but what stands out for the Notion solution is the clever implementation of the @ symbol. Rather than having to get the internal link of a page, copy it to your clipboard and paste it in your Notion page, you simply type @ followed by the name of your page, as shown below:
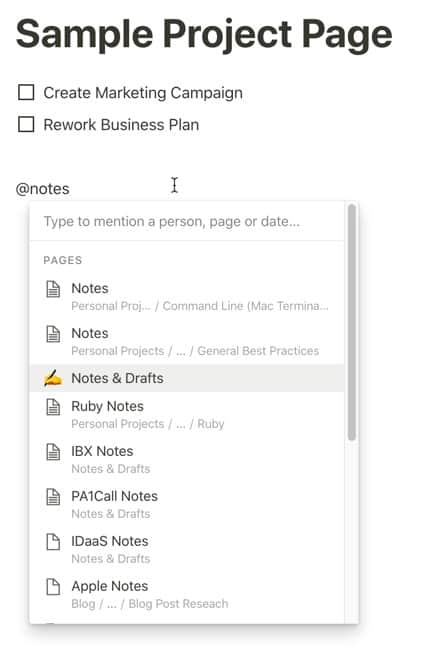
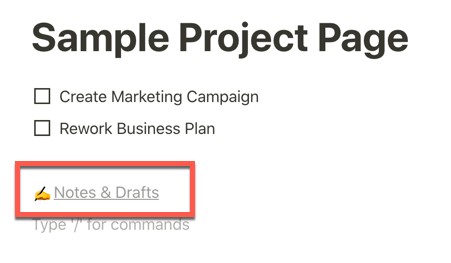
As you type the name of your page, Notion will provide a drop-down display of all the pages that fit what you are typing. Once you see your page simply click on it and the reference link will be added to your Notion page as shown below:
How to Add Background Colors to Text in Notion
Changing the background color of the text in Notion is easy to do. To change the background color of a block of text in Notion, do the following:
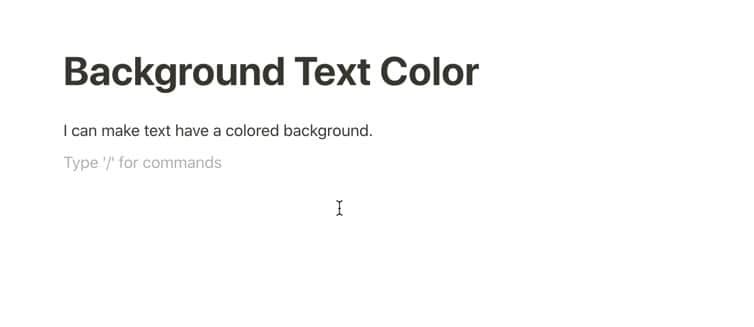
Open the page with the text you want to change the background color in Notion
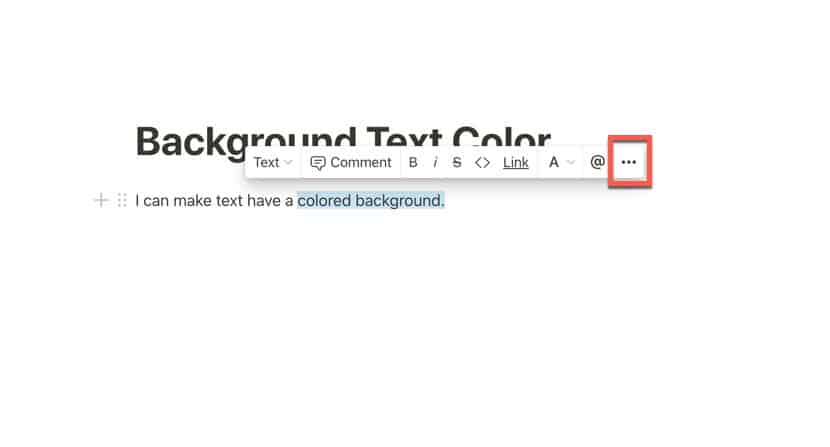
Select the text you want to change and click on the ellipsis (…) in the pop-up menu
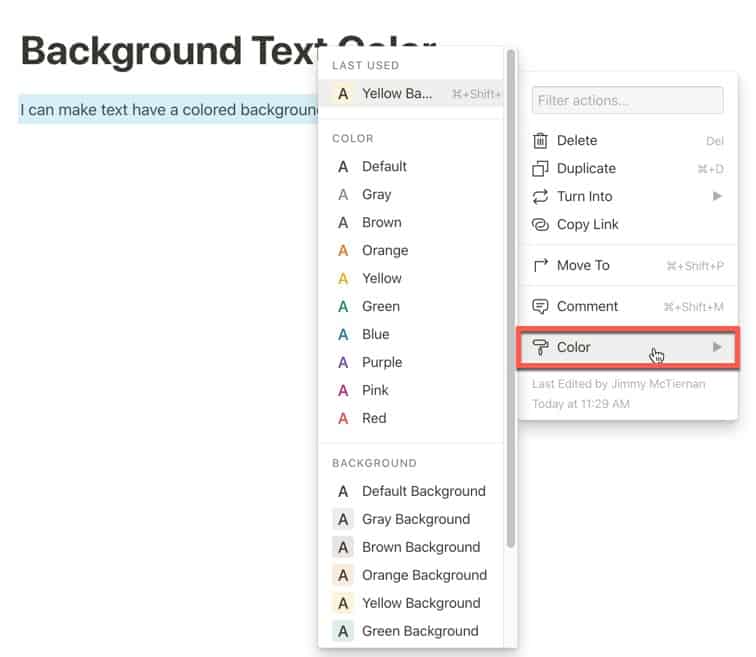
Scroll down to the Background section and select your color from the list of options

Your text should now be highlighted in the color you chose.
How to Add a Calendar to Your Notion Page
Notion supports the ability to add a calendar. To add a calendar, do the following:
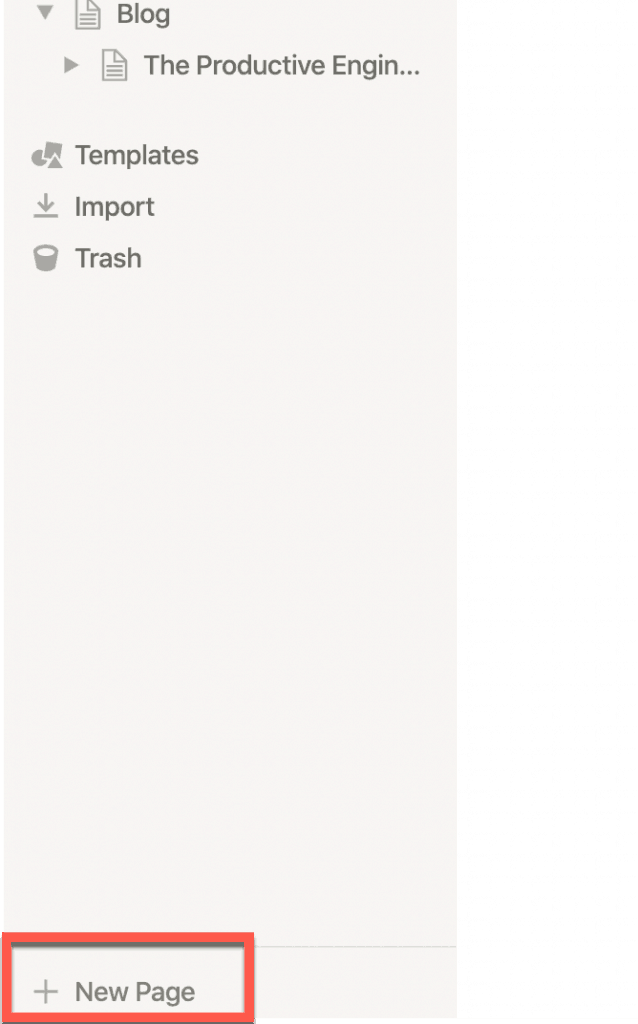
Click on New Page.
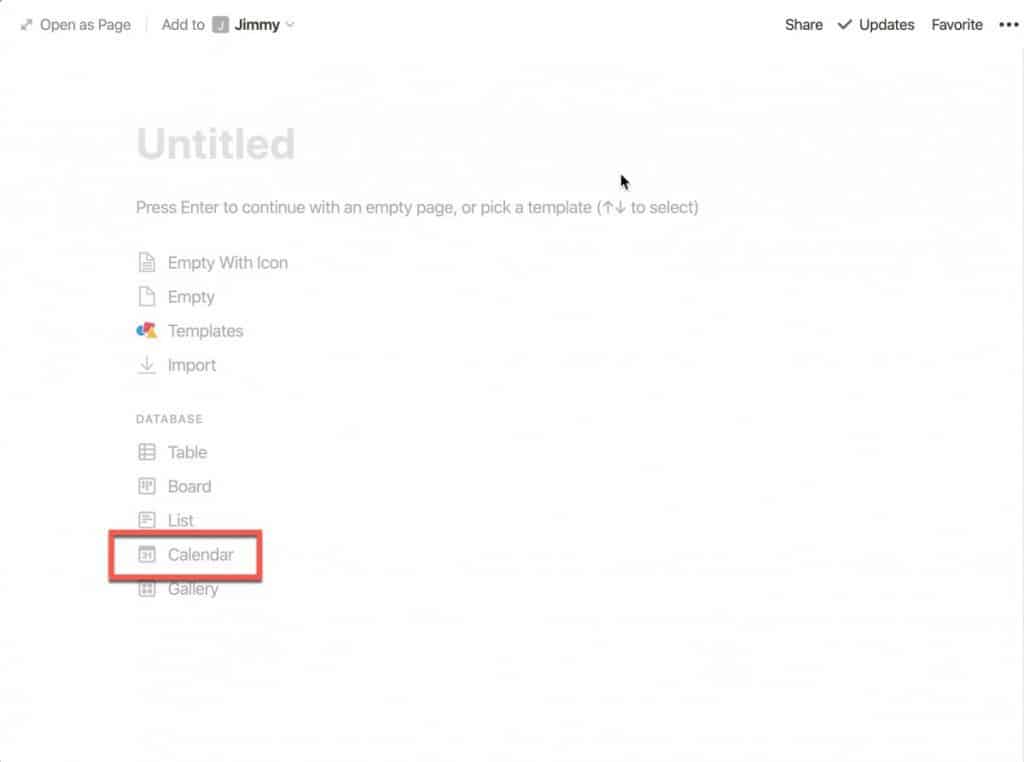
On the new page, click on Calendar
Your calendar will appear on the page.
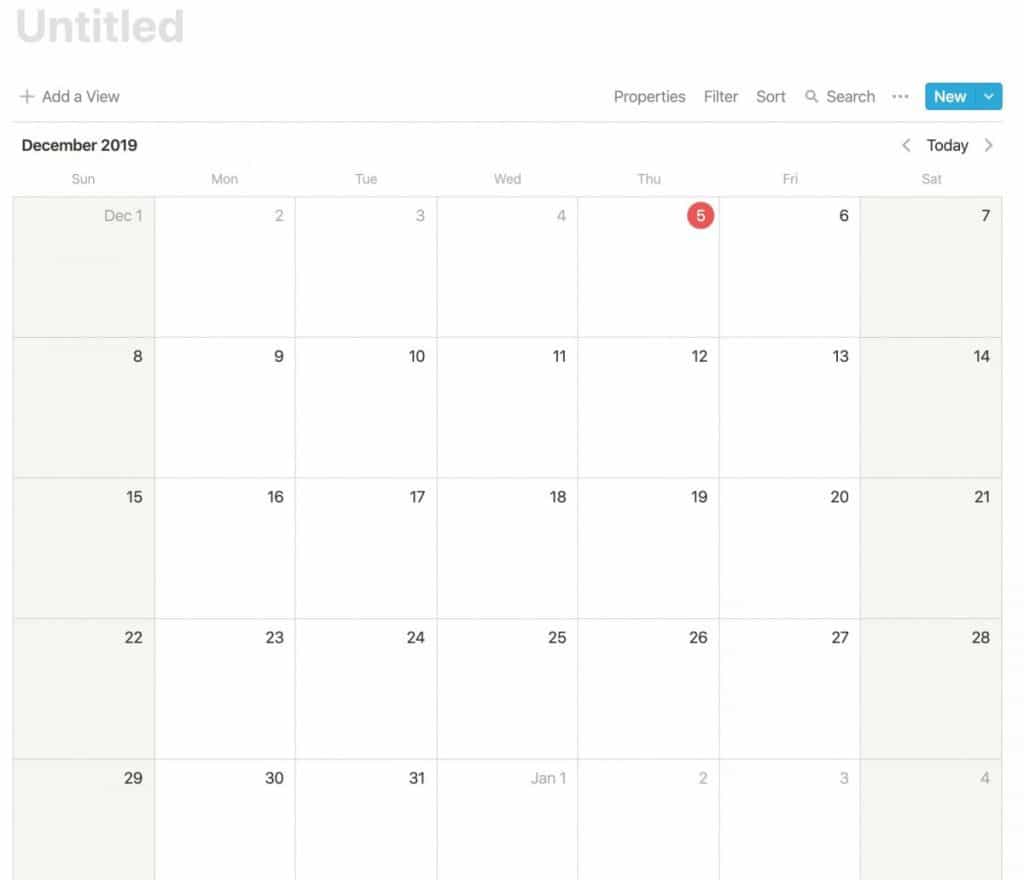
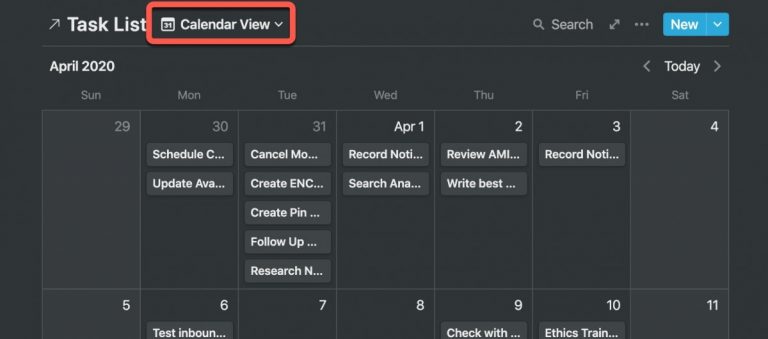
One of the cool things you can do with Notion is to create a Calendar View of an existing database. The calendar view is simply viewing your existing database in a calendar. This view does require your database to have a date field.
To create a Calendar View of an existing database, do the following:
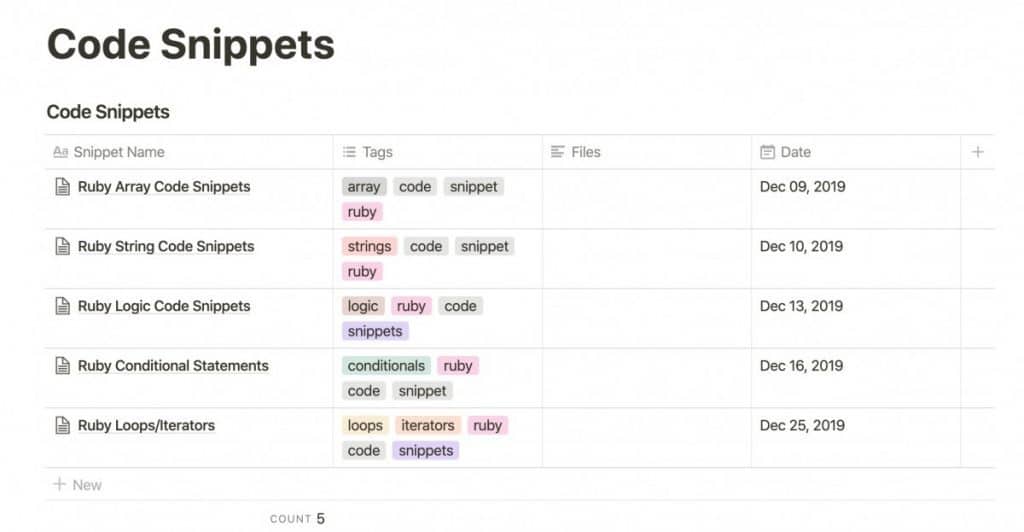
Navigate to your Database Page in Notion
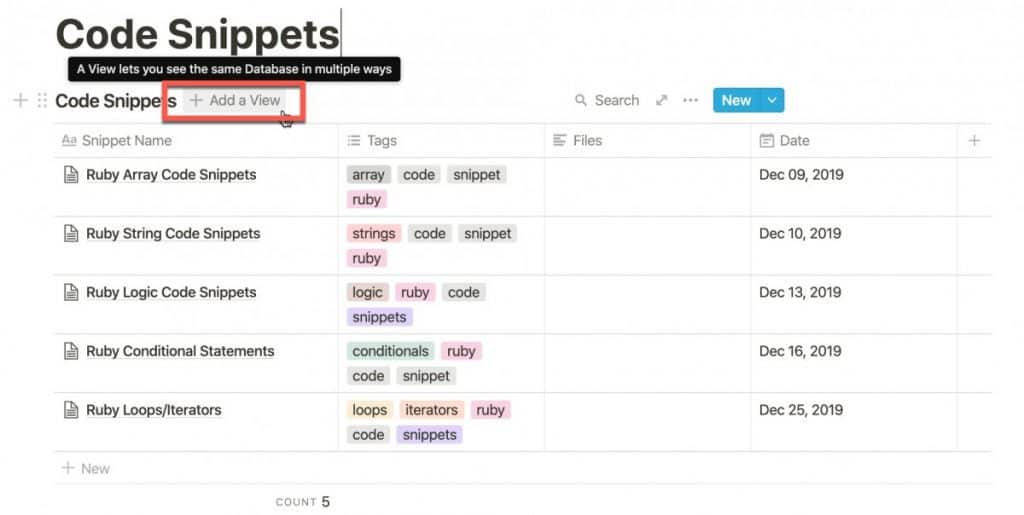
Hover over your Database and click on “Add a View”
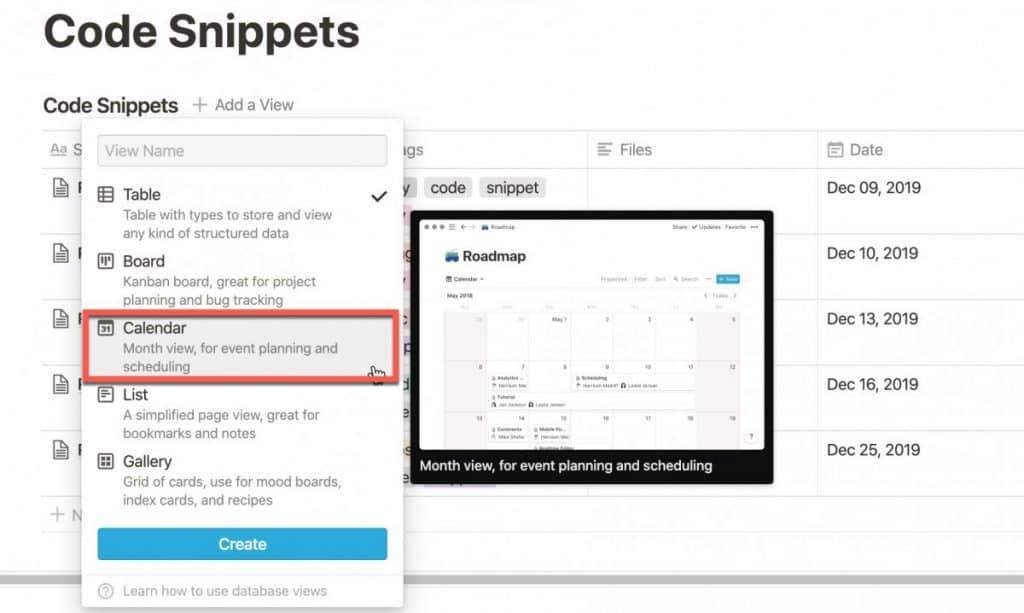
A Pop-up menu will appear. Select the Calendar view and click “Create“
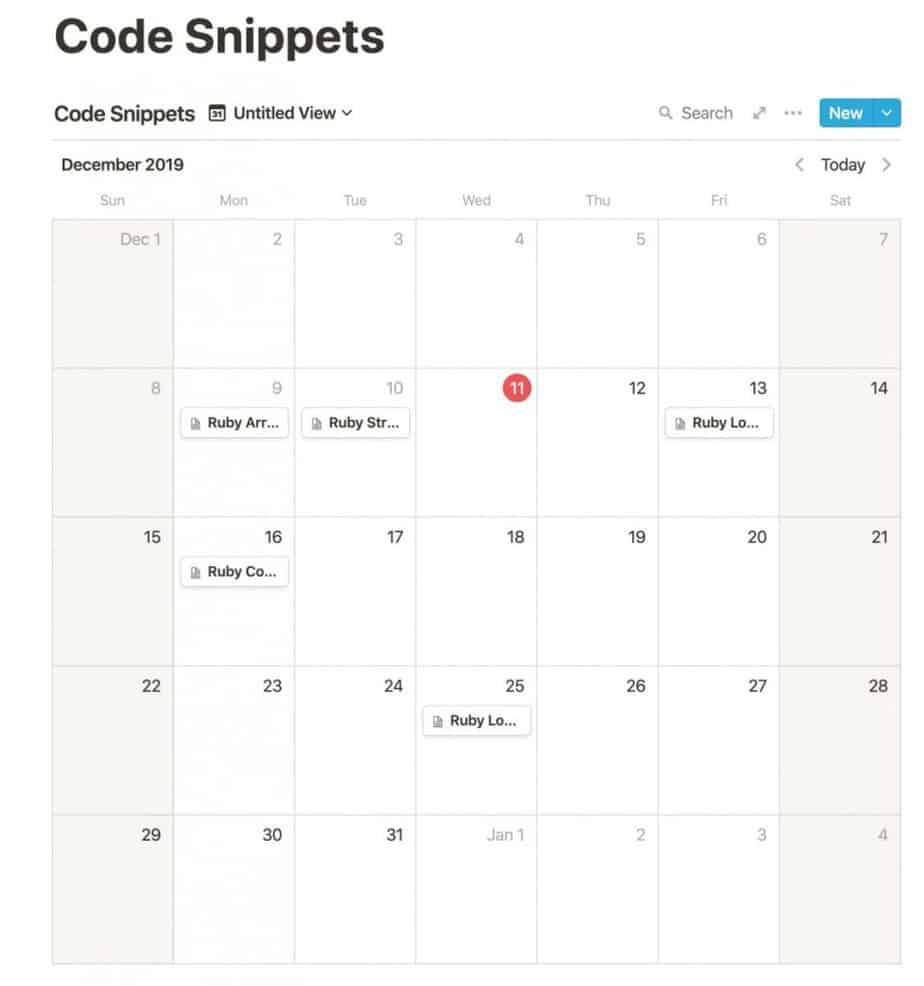
Your database will now appear as a calendar.

To switch back to the default view of your database, simply click on the view dropdown and select “Default View”.
If you are a Google Calendar user, you can actually embed your Google Calendar inside Notion. If you are interested in learning how to do so, please click on the link below:
Link to How to Embed Google Calendar inside Notion
How to Save Bookmarks to Notion
Bookmarks are something that I am always saving into Notion for future use. Typically I do this for projects I am working on where I might want to reference related webpages in the future. Notion has the ability to save bookmarks into Notion.
To save bookmarks to Notion, do the following:
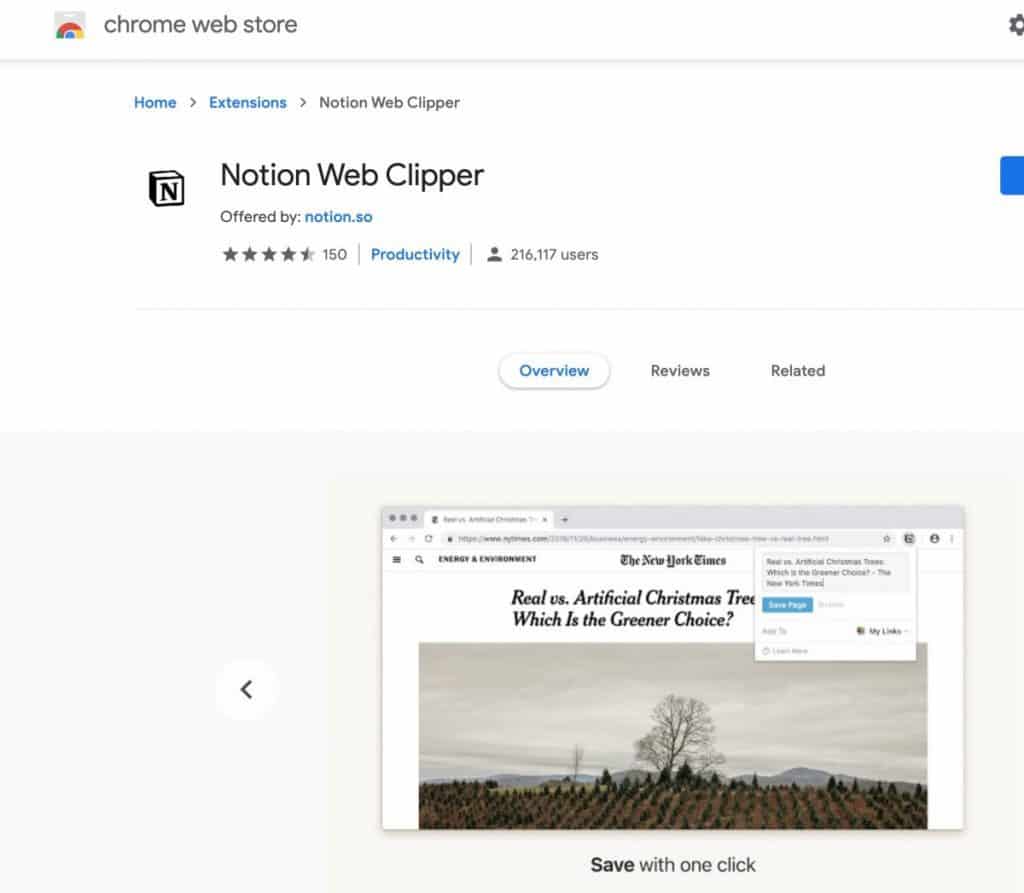

Install the Notion Web Clipper and Log into Notion from Web Clipper to use.
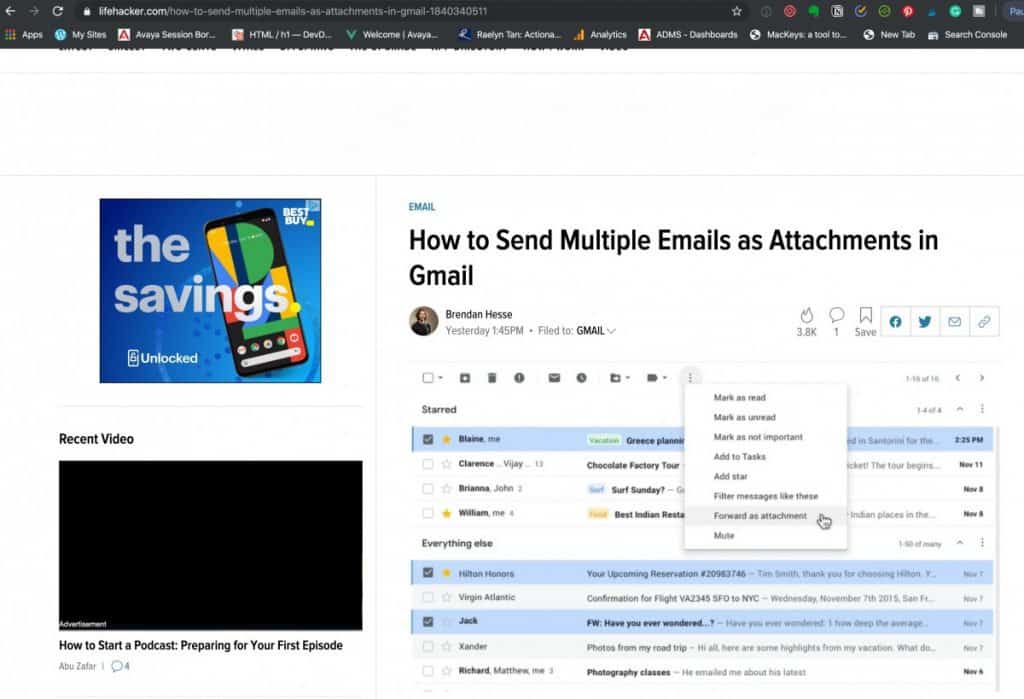
Navigate to the Webpage you want to Bookmark into Notion.
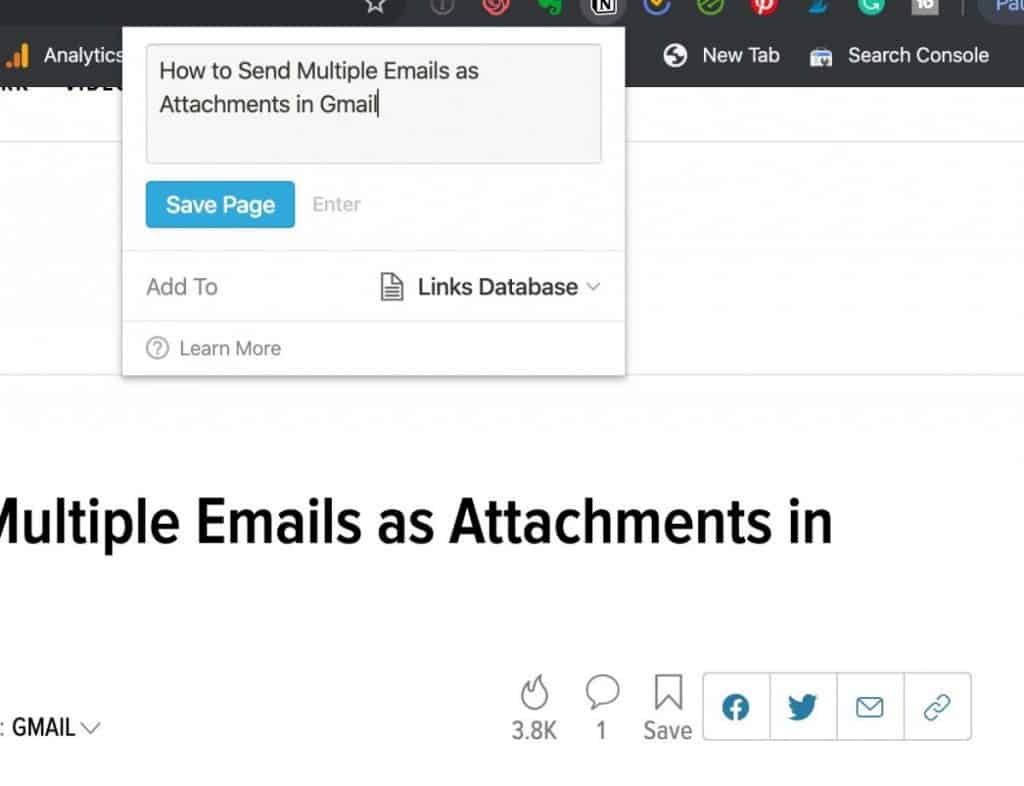
Click on the Notion Web Clipper icon in your browser to bring up the clipping menu.
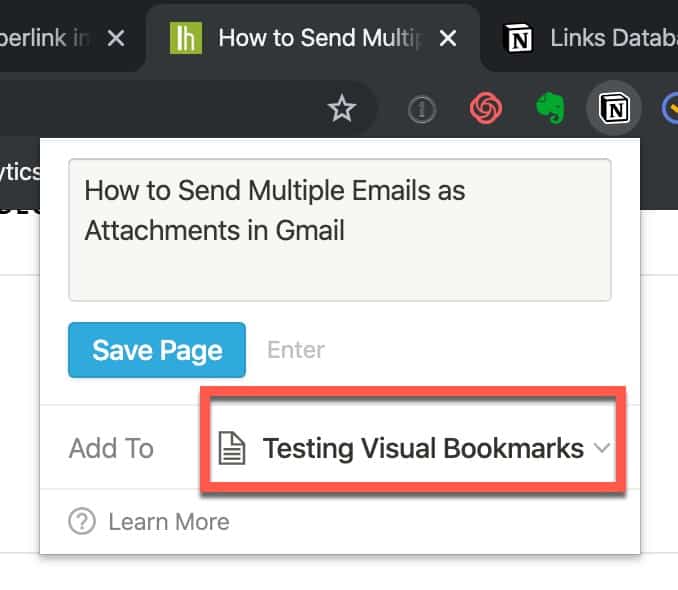
Select the Notion page you want to save the link to but clicking on the “Add To” dropdown and selecting the Notion page. If it doesn’t show up, start typing the name of the page and the web clipper will auto-populate.
For more information on how to use the Notion Web Clipper including complete install instructions for Chrome, Safari, and Firefox, go to our article on how to use the Notion web clipper linked below:
How to Use the Notion Web Clipper
How to Use Notion as a Document Repository
One of the great ways you can use Notion is as a document repository, storing all of your key documents and files in one place. While you can simply create a page in Notion for each file, this is not very scalable or useful in my opinion. The way I do it is to create a table on my Notion page where each row of the table contains a file.
Setting this up in Notion is very easy to do. To set up a document repository table in Notion, do the following:
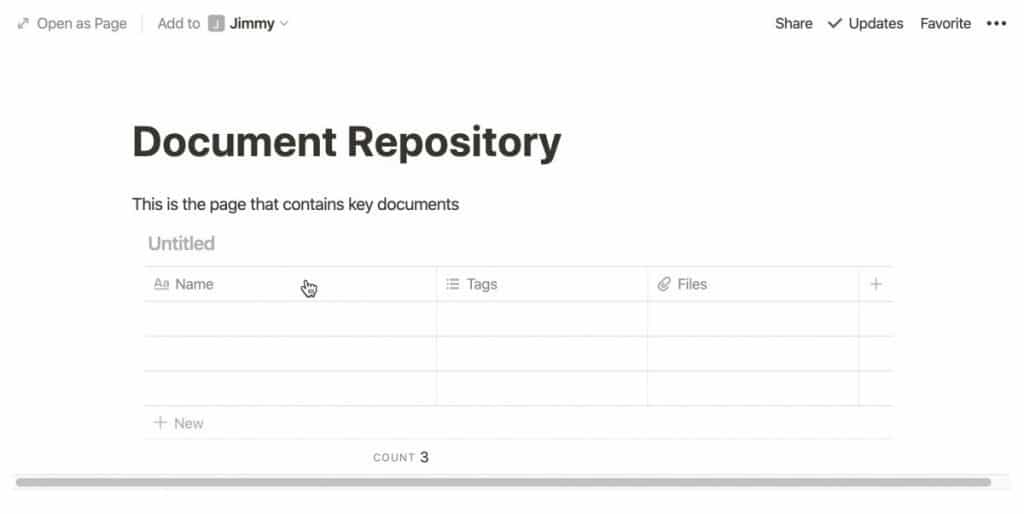
Create a Table in Notion and configure the columns based on your desired design.
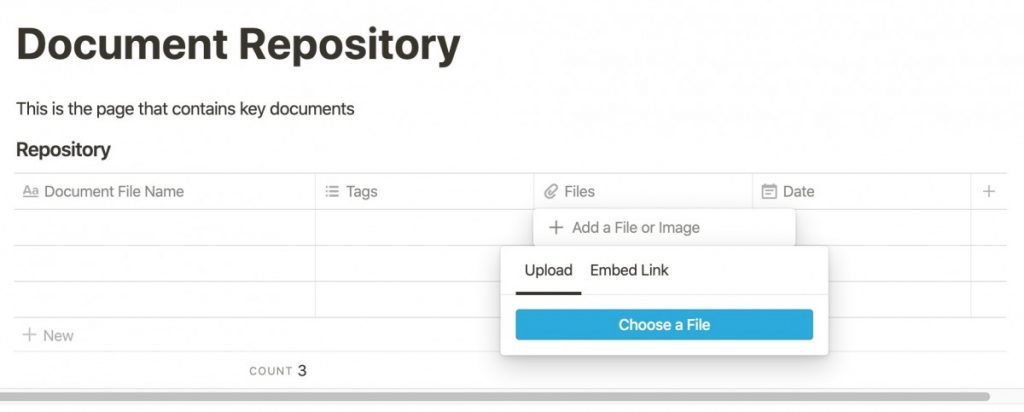
Click on the cell in the Files column. Make sure Upload is selected and click “Choose a File“.
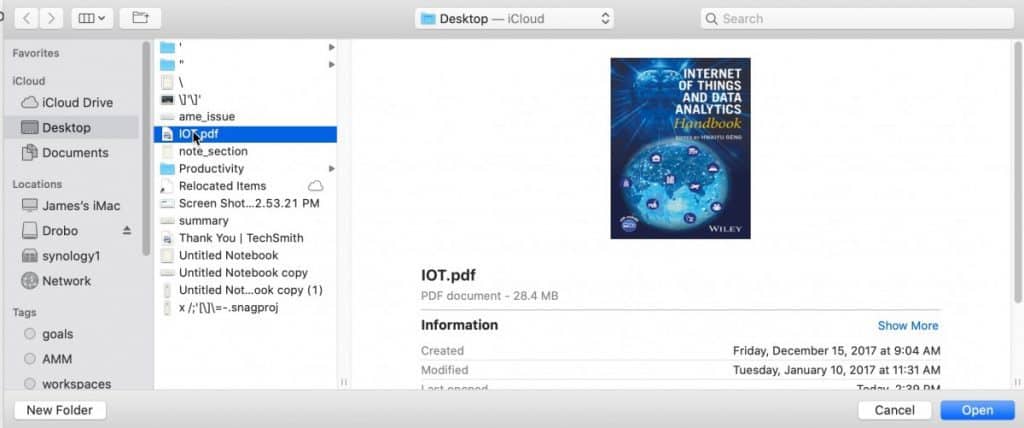
Select your file from the file explorer and click “Open“.

Your file will be uploaded to your Notion page with the file listed in the cell you selected.
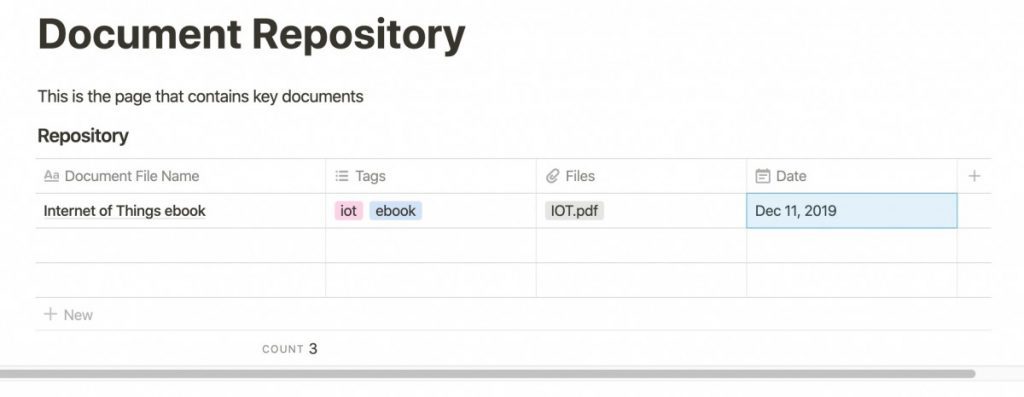
Fill in the other fields in the row.
How to Convert a Web Clipping to a Task in Notion
If you are using Notion as a to-do manager, one of the unique things you can do is convert a web clipping into a to-do. To convert the web clipping to a to-do, do the following:

Open the page that contains the web clipping

Hover your cursor over the web clipping and click on the ellipsis (…)
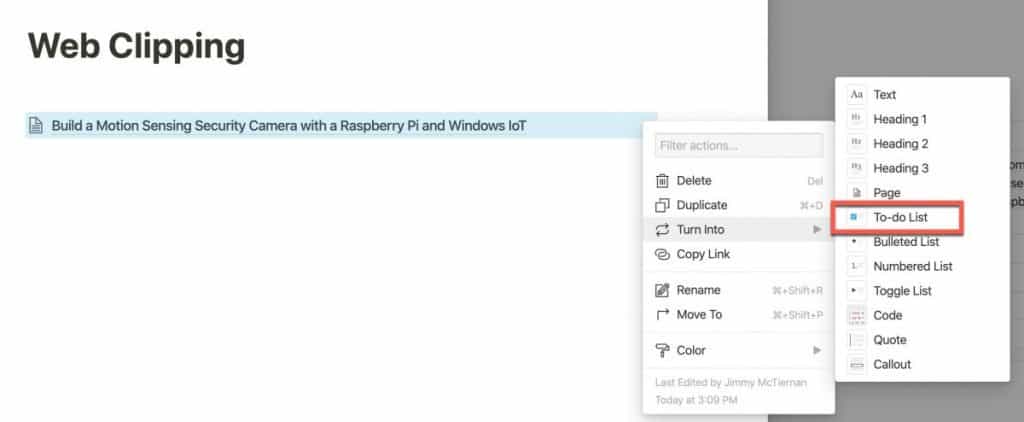
A dropdown menu will appear. Select “Turn Into” and “To-Do List”
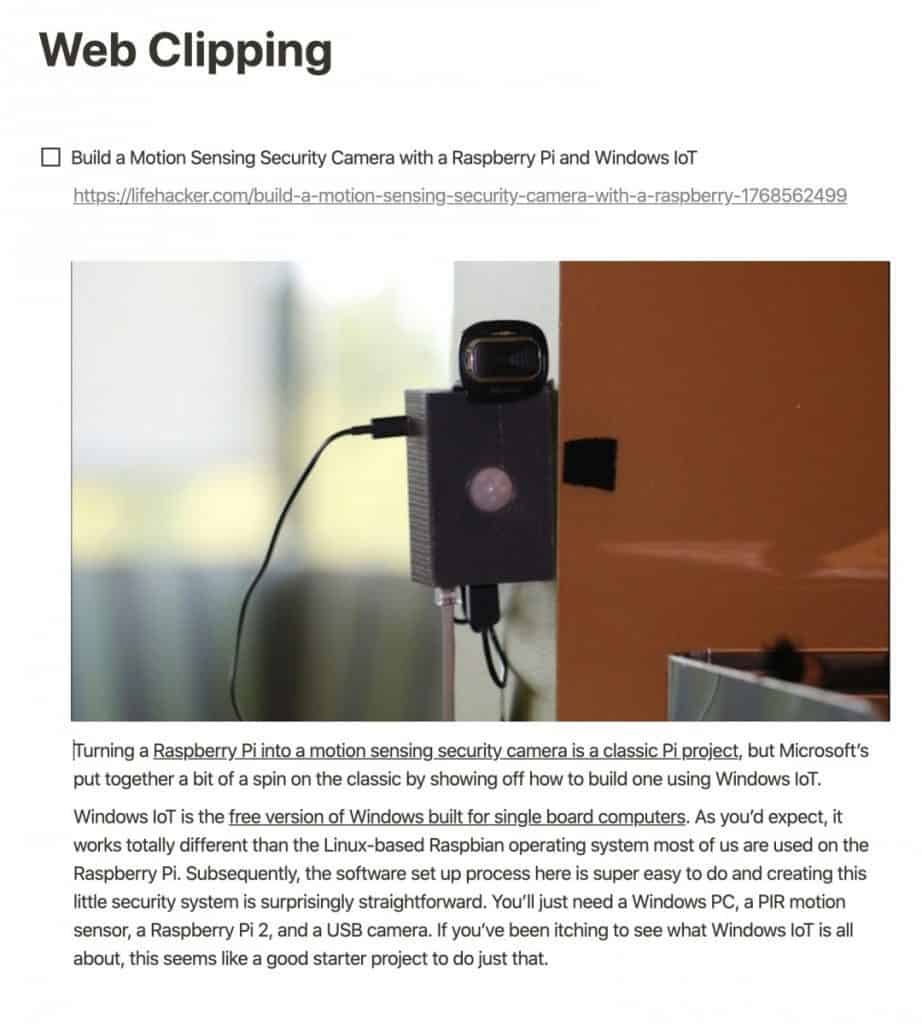
Your web clipping will now be a to-do item. Notice that Notion populates the to-do with the main image and first couple of paragraphs of the web clipped article.
How to Add Icons and Covers to Your Notion Page
You can add some eye-candy to your Notion pages in the form of icons and covers
How to Enable Dark Mode in Notion
Enabling dark mode in Notion is easy. To enable dark mode in Notion, do the following:
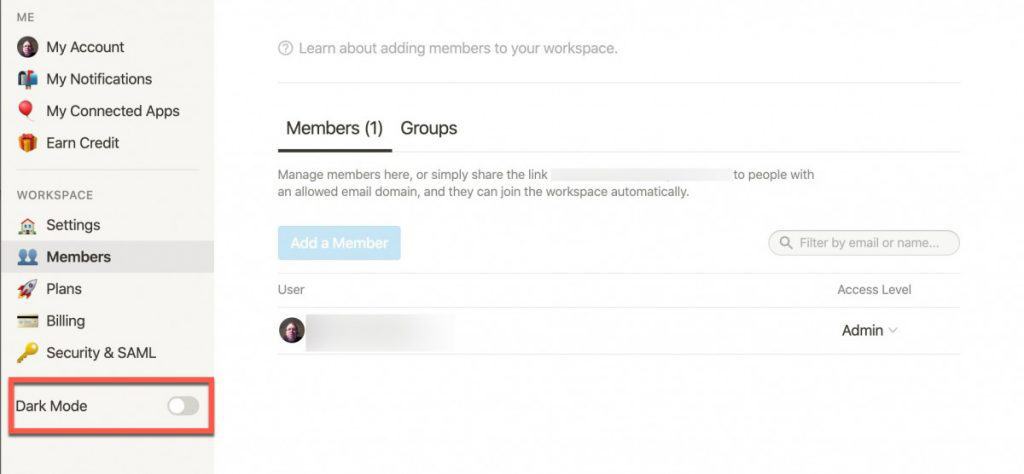
In Notion, click on the Settings & Members button in the upper-left-hand panel.
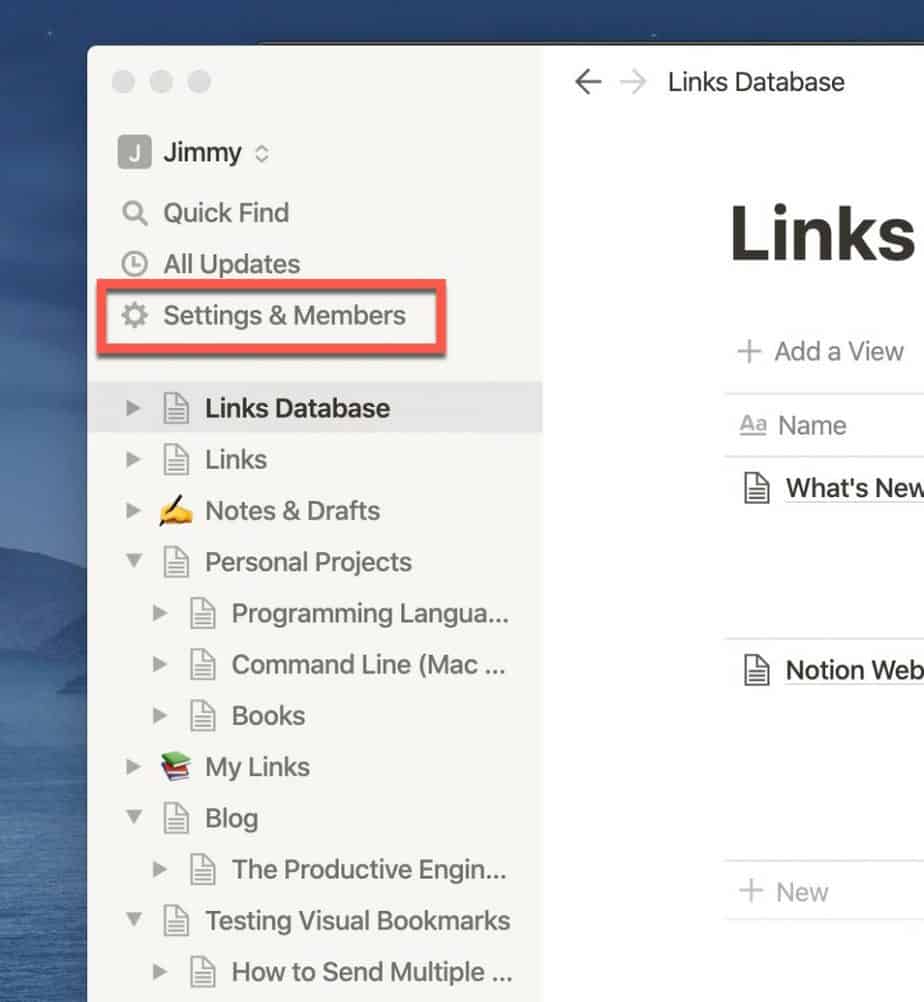
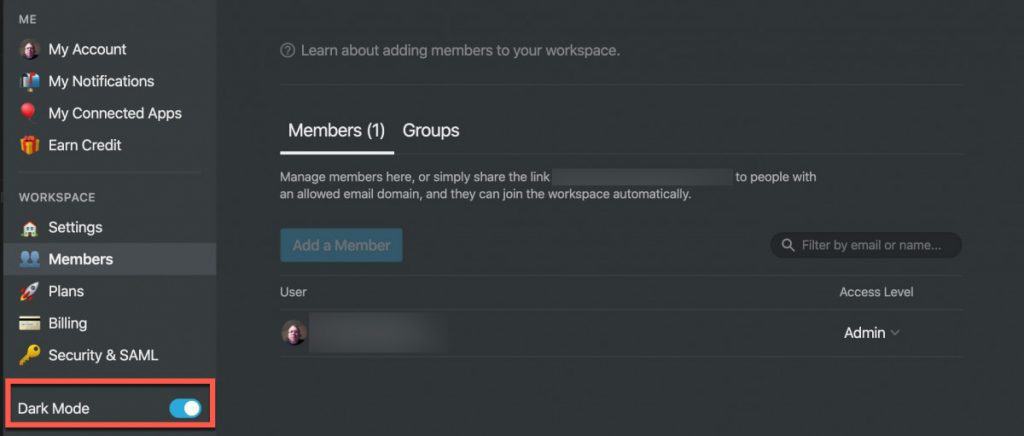
The Dark Mode toggle button is located on the bottom-left corner of the panel. Toggle the setting to enable dark mode.
The user interface should now be in dark mode as shown in the screenshot below:
How to Create a Separate Workspace in Notion
It is possible to create additional workspaces in Notion. There are two things to keep in mind about any additional workspaces you add:
- They are completely separate workspaces
- They are not included in your existing paid subscription (Source)
To add a new workspace, do the following:
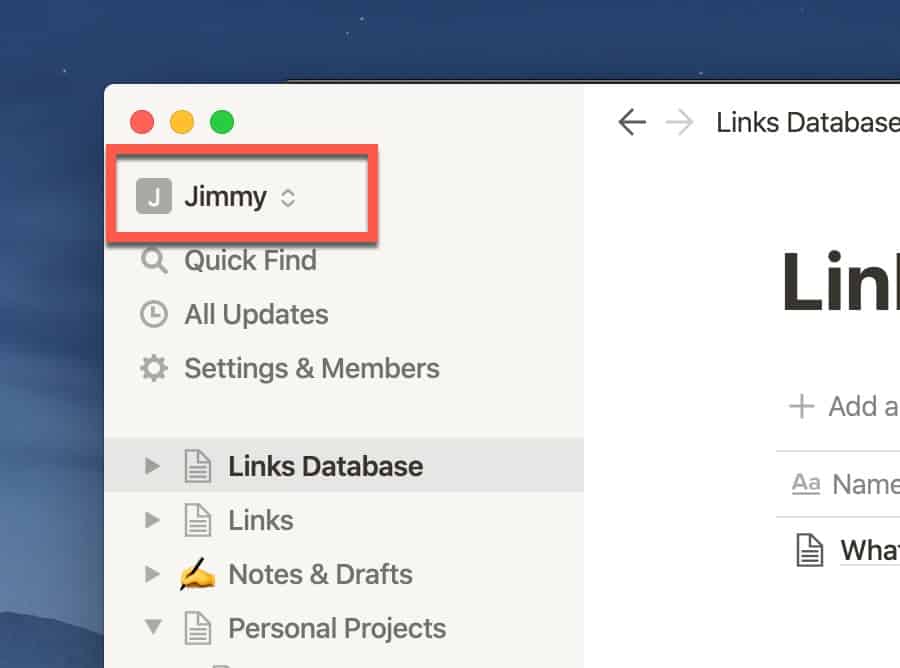
In the upper-right-hand corner of the Notion window, click on the workspace switcher as shown in the screenshot below:
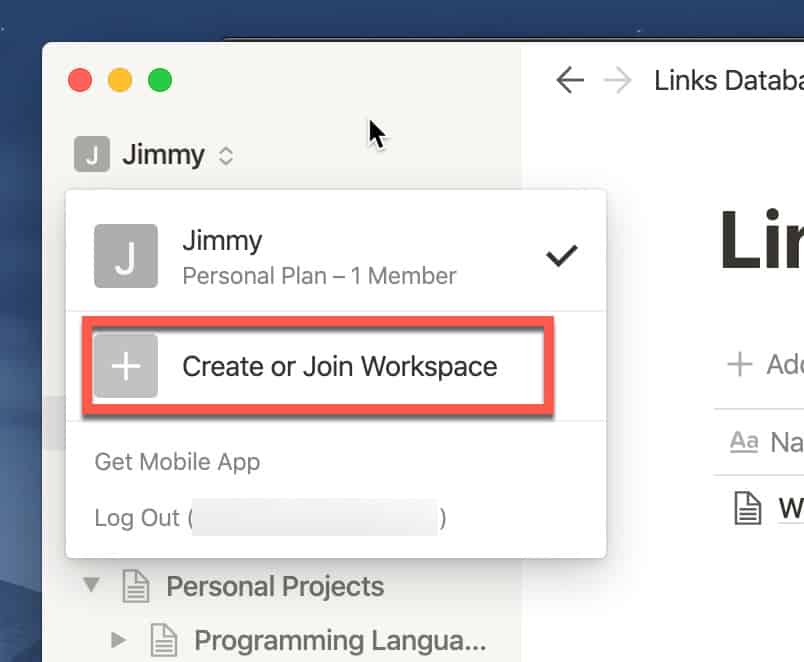
Click on Create or Join Workspace.
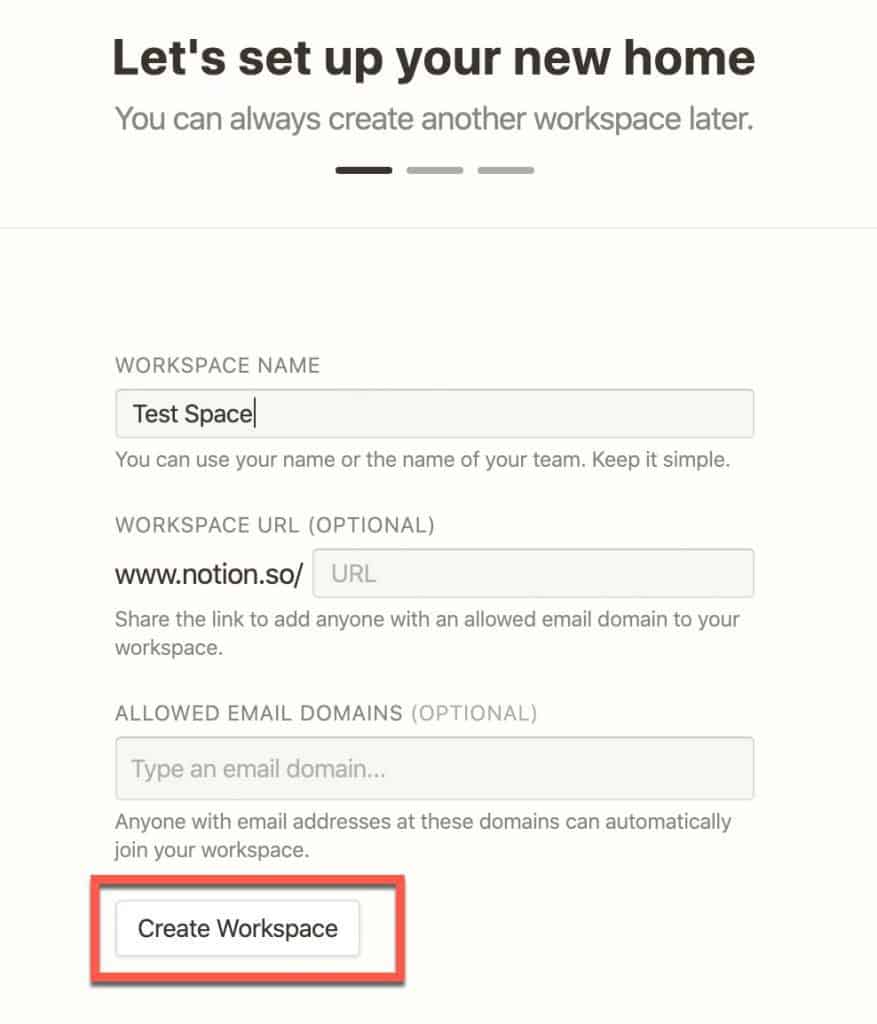
Give your workspace a name and, when ready, click on Create Workspace.
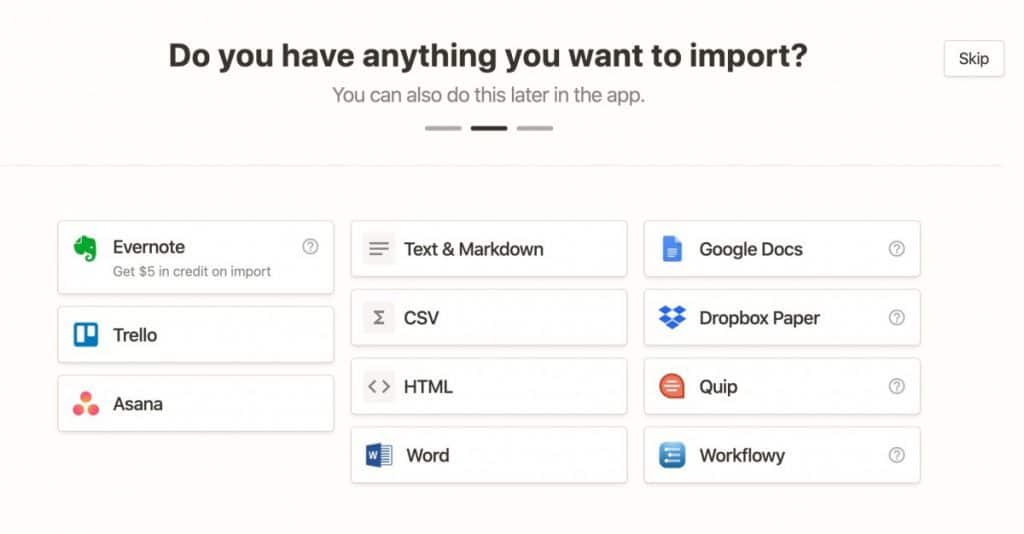
Notion will provide you an option to import files from other services. You can either select the service you want to import or simply click Skip to continue.
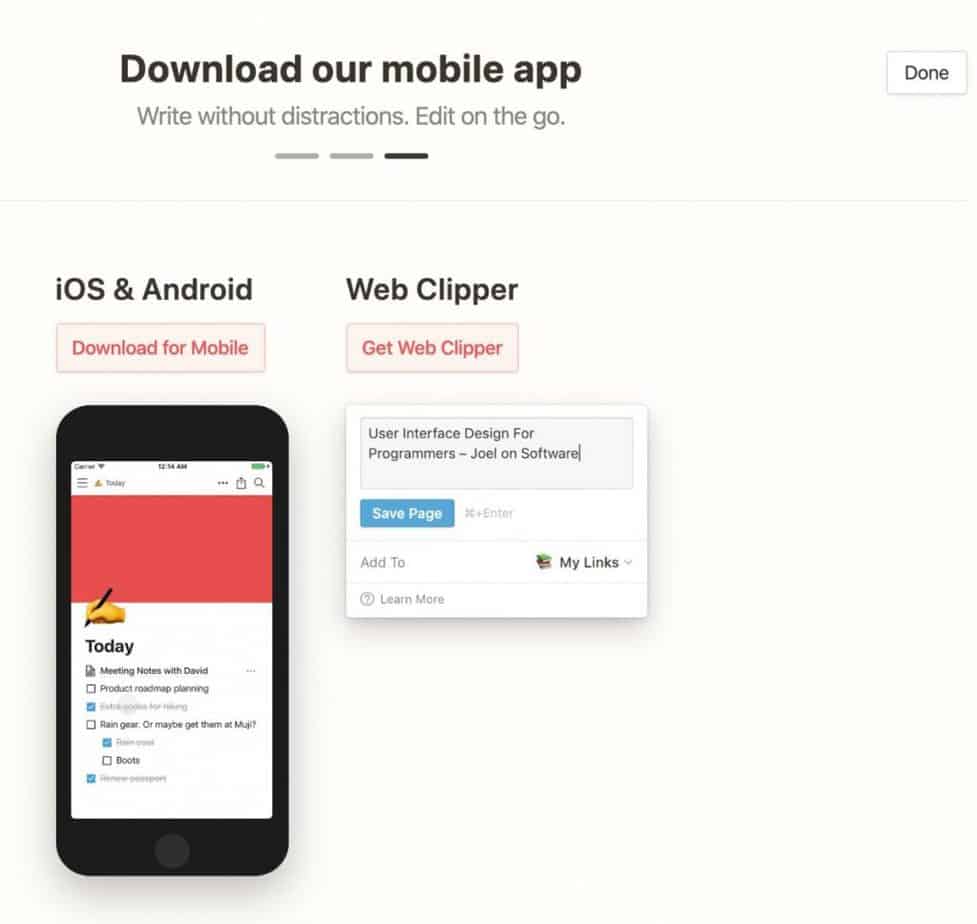
You will be offered the ability to download the mobile clients and web clipper if you wish. Once you are ready, click Done to continue.
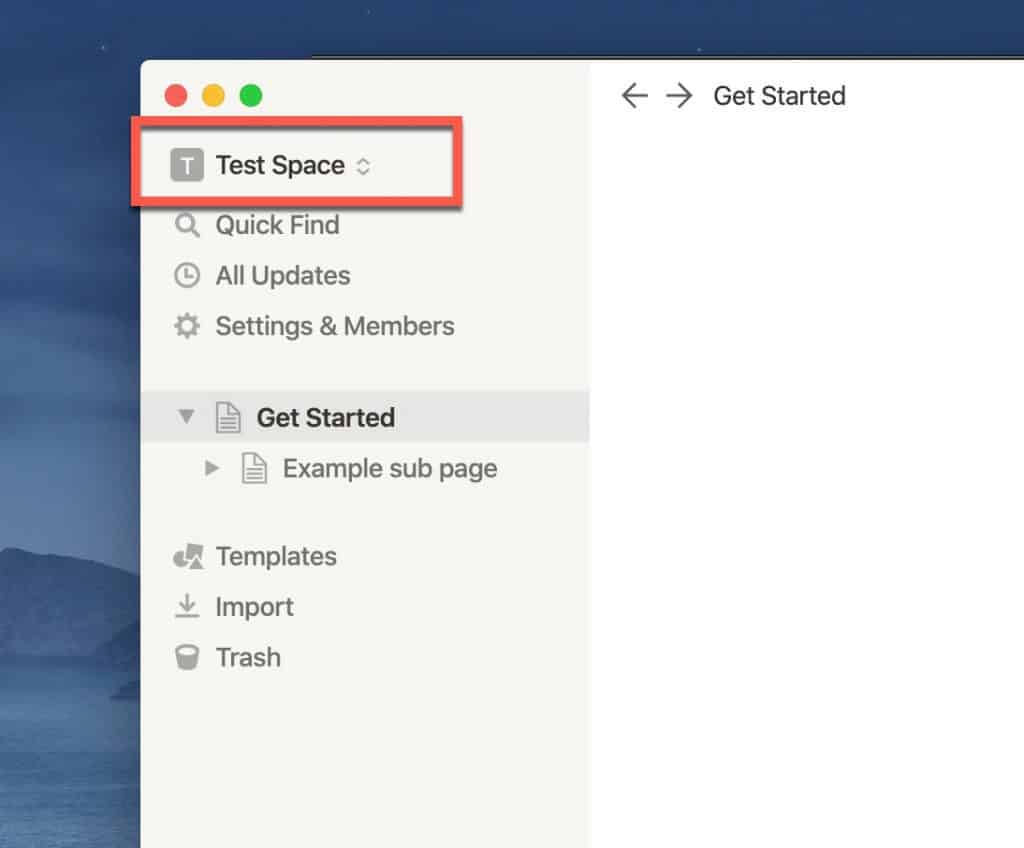
Your new workspace will now appear and will be selected as shown in the screenshot below.
Want More Tips and Tricks? Subscribe to our Newsletter!
If you haven’t already subscribed, please subscribe to The Productive Engineer newsletter. It is filled with tips and tricks on how to get the most out of the productivity apps you use every day. We hate spam as much as you do and promise only to send you stuff we think will help you get things done.
Check Out Our YouTube Channel!
We have a YouTube channel now and we are working hard to fill it with tips, tricks, how-tos, and tutorials. Click the link below to check it out!
Check out our Resources Page
Check out our resources page for the products and services we use every day to get things done or make our lives a little easier at the link below:

