Ultimate Guide to Using Dropbox for Obsidian Notes
Obsidian Notes is a great note-taking application that is built to store your notes locally on your computer. This makes the notes more secure. There is only one problem with this: what if you want to open your notes on another device(s)? Fortunately, because Obsidian uses a simple folder structure and markdown as its format, it is very straight-forward to use a cloud storage service like Dropbox to have your Obsidian Notes be available on all of your devices.
So how do you setup Obsidian Notes to use Dropbox? Enclosed below are the steps to setup an Obsidian vault on Dropbox:
- Open up the Dropbox folder on your computer
- Create a new folder to house the Obsidian Vault(s) you want to access on multiple devices
- Open up Obsidian Notes
- Click on the “Open Another Vault” button
- Click on Create New Vault
- Give new Vault a name
- Click Browse to Bring up the File Explorer
- Navigate to the folder in your Dropbox folder where you want to store your vault(s)
- Click the Create Button
- Click OK
This tutorial will take you step-by-step through the above steps will images of each step in the process.
Before we get started with the tutorial though, if you are new to Obsidian Notes, I highly recommend you check out my Beginner’s Guide to Obsidian Notes which will teach you everything you need to know to be proficient in Obsidian.
If you are looking to learn more about apps like Notion, Todoist, Evernote, Google Docs, or just how to be more productive (like Keep Productive’s awesome Notion course), you should really check out SkillShare. Skillshare is an online learning platform with courses on pretty much anything you want to learn. To learn more about Skillshare and its vast library of courses and get 30% off, click the link below:
SkillShare – Online Learning Platform
Looking to improve your note-taking? Check out our Complete Guide to the Zettelkasten System. Zettelkasten is a structured note-taking system that allows you to create a personal knowledge management system and is tailor-made to use with Obsidian Notes.
Let’s get started with the tutorial 😀.
Create a New Folder in Your Dropbox folder
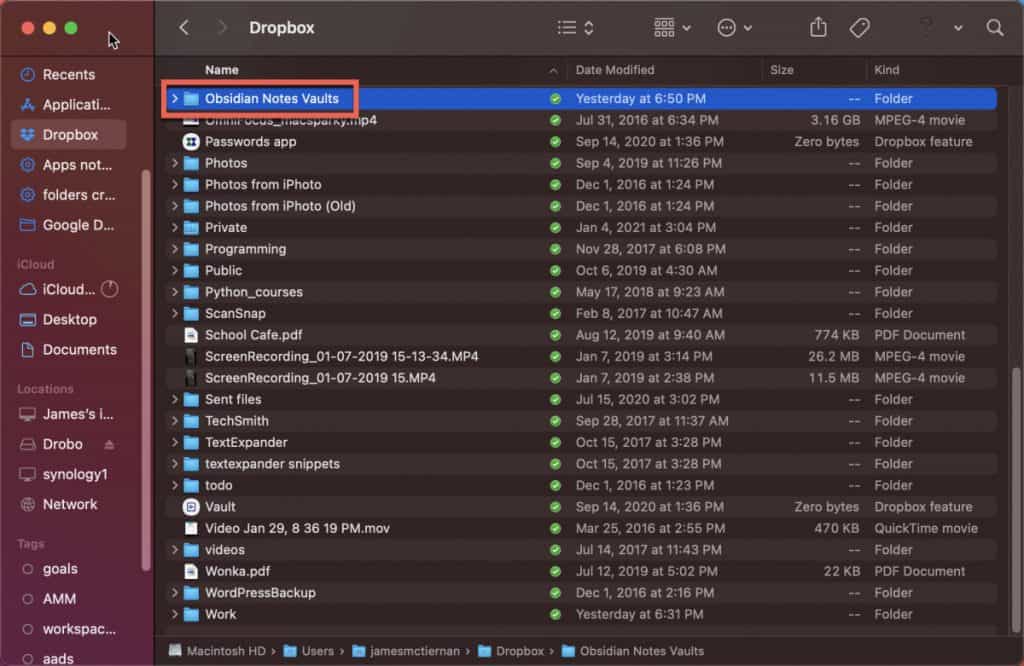
On your computer, navigate to your Dropbox folder. This will require that you have the Dropbox client installed on your computer. Next, create a new folder to hold the Obsidian vaults you want to store in Dropbox.
Create a Folder for Each Vault
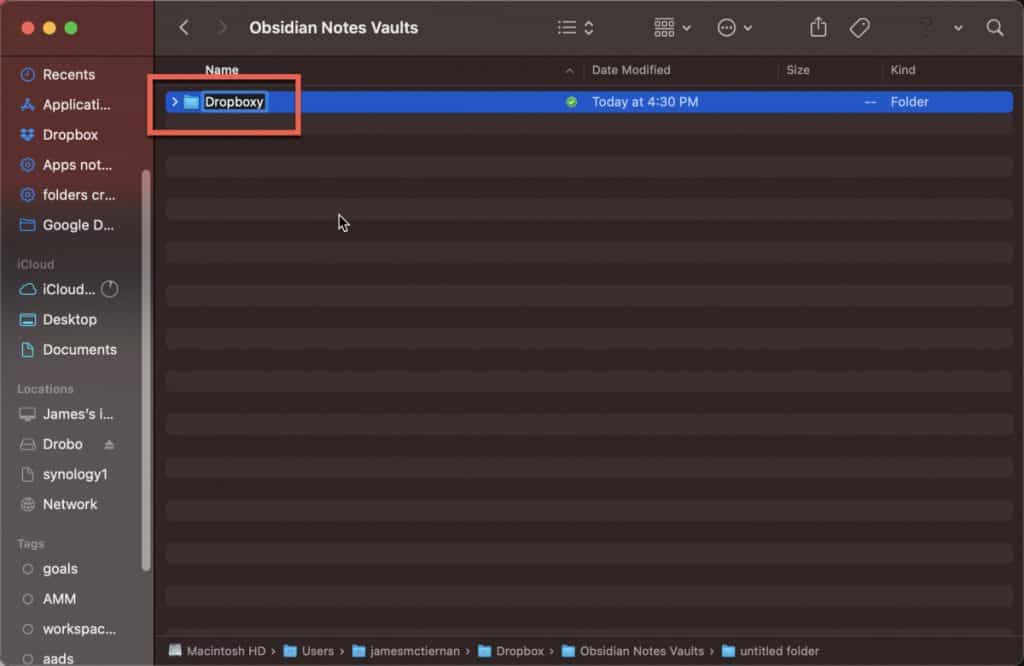
Create a separate folder for each vault you plan on storing in Dropbox. For this tutorial, we are creating one folder called “Dropboxy” to hold a vault we will name Dropboxy.
Open up Obsidian and click “Open another vault”
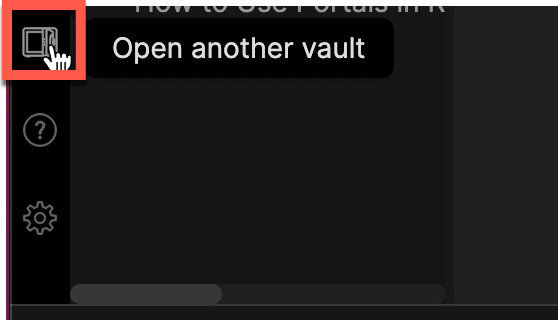
Now you need to open up Obsidian Notes. Toward the bottom of the left panel of the Obsidian Notes window, click the “Open another vault” button as shown in the screenshot above.
Click the “Create new vault” button
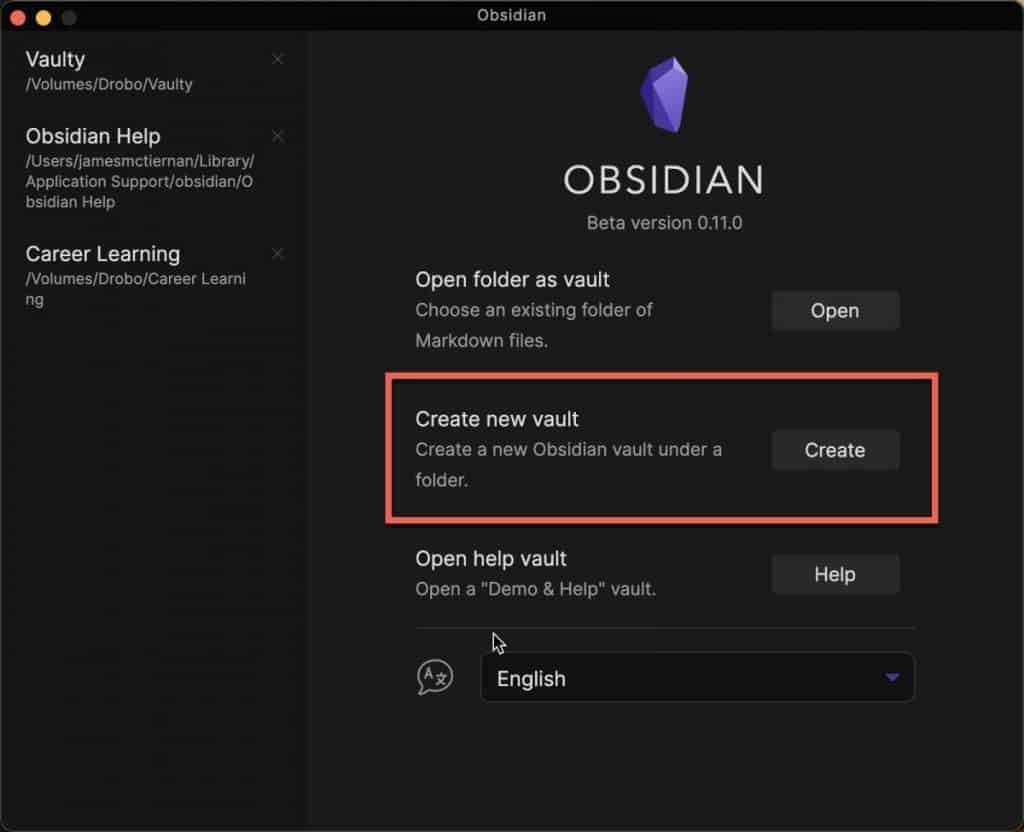
The vault options screen will appear with a list of your existing vaults in the left panel and your vault options in the main window. Click the “Create new vault” button as shown in the screenshot above to create a new vault.
Give Your New Vault a Name
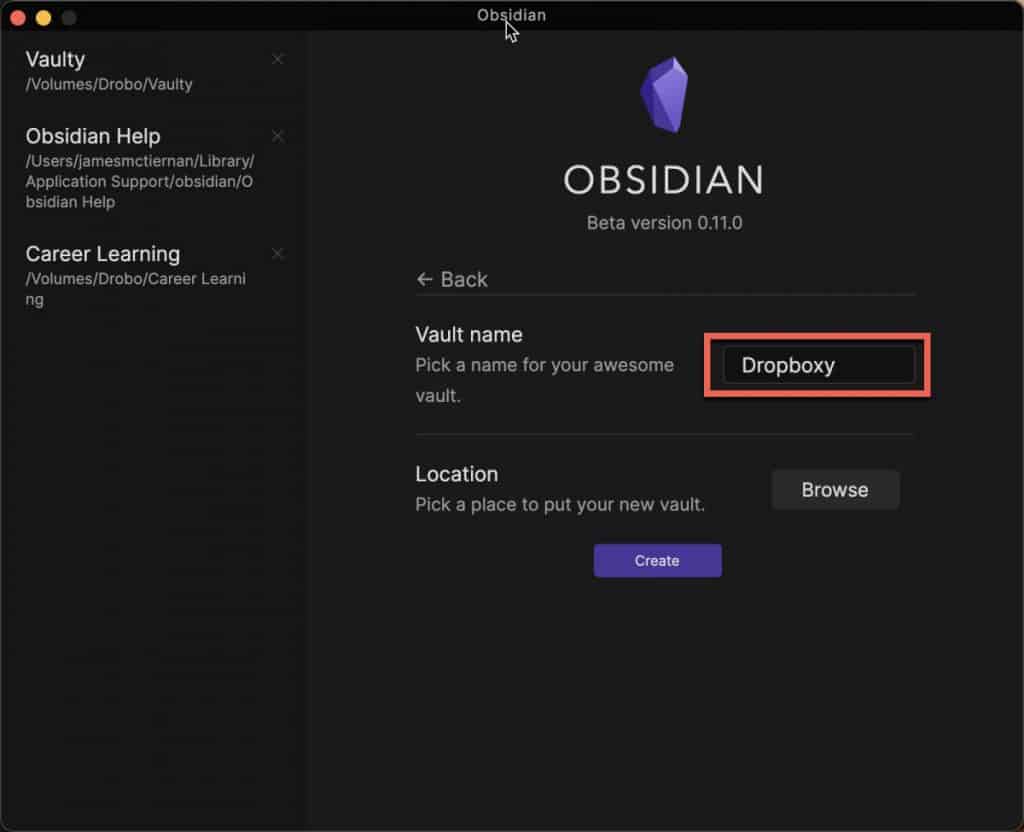
Next, in the “Vault name” text box, fill in the name you want to give your vault. In this tutorial, we will name our vault Dropboxy.
Click “Browse” to Open the File Explorer
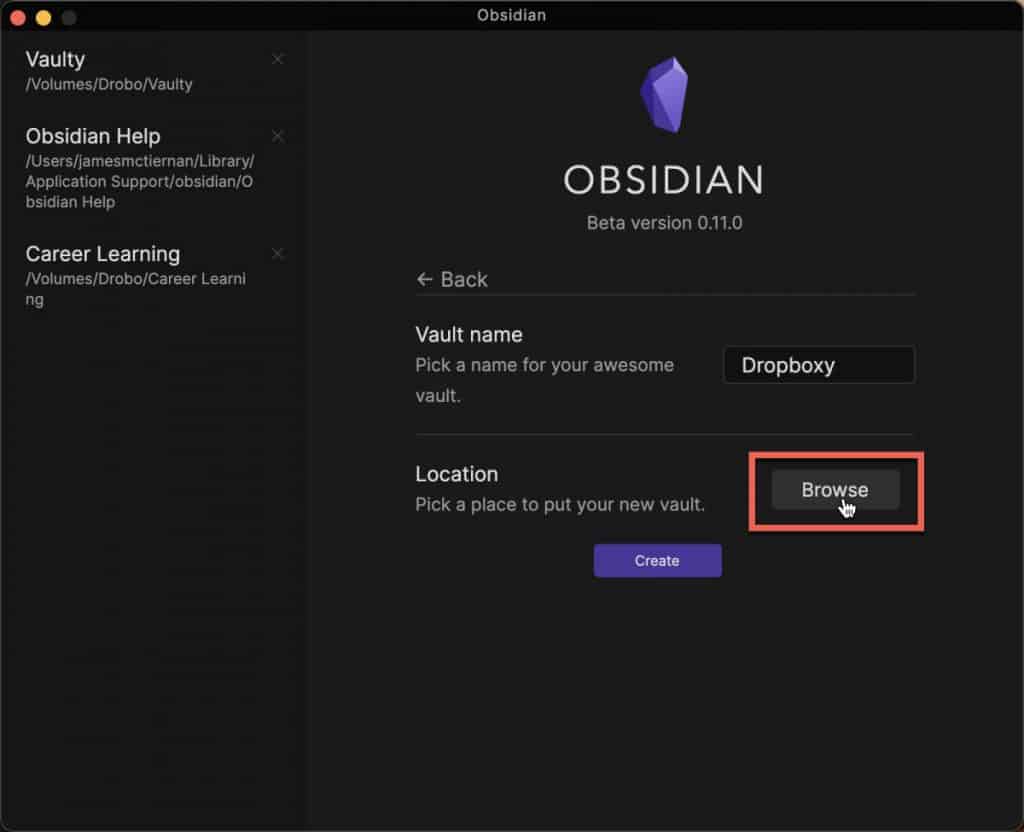
We need to pick our Dropbox folder now. Click the “Browse” button in the Location section as shown in the screenshot above.
Select the Dropbox Folder
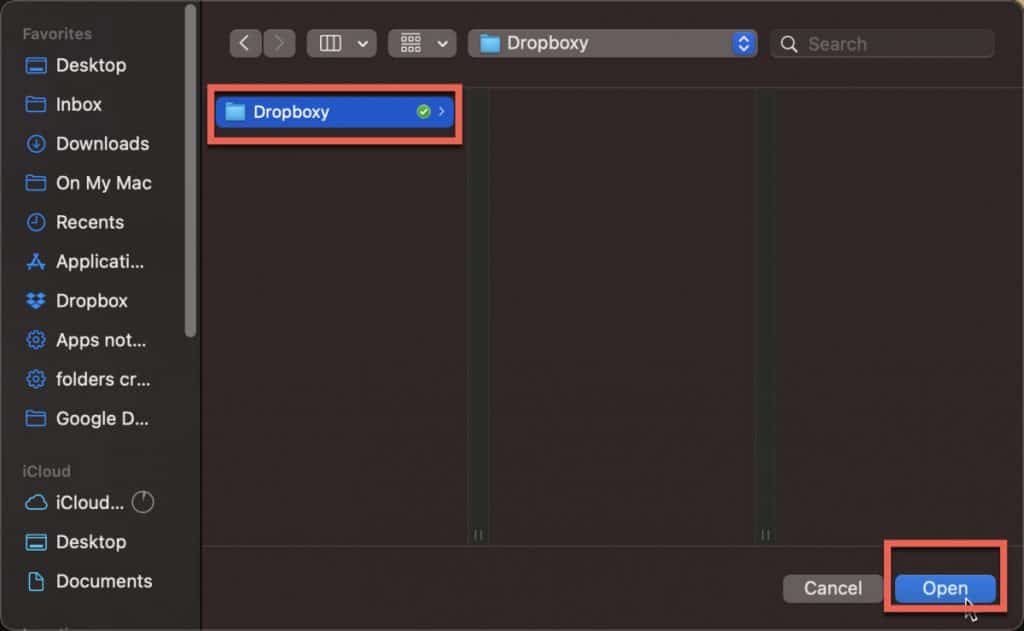
You should now see the file explorer window. Navigate to the Dropbox folder you set up earlier to store your Obsidian Notes.
Click the “Create” Button
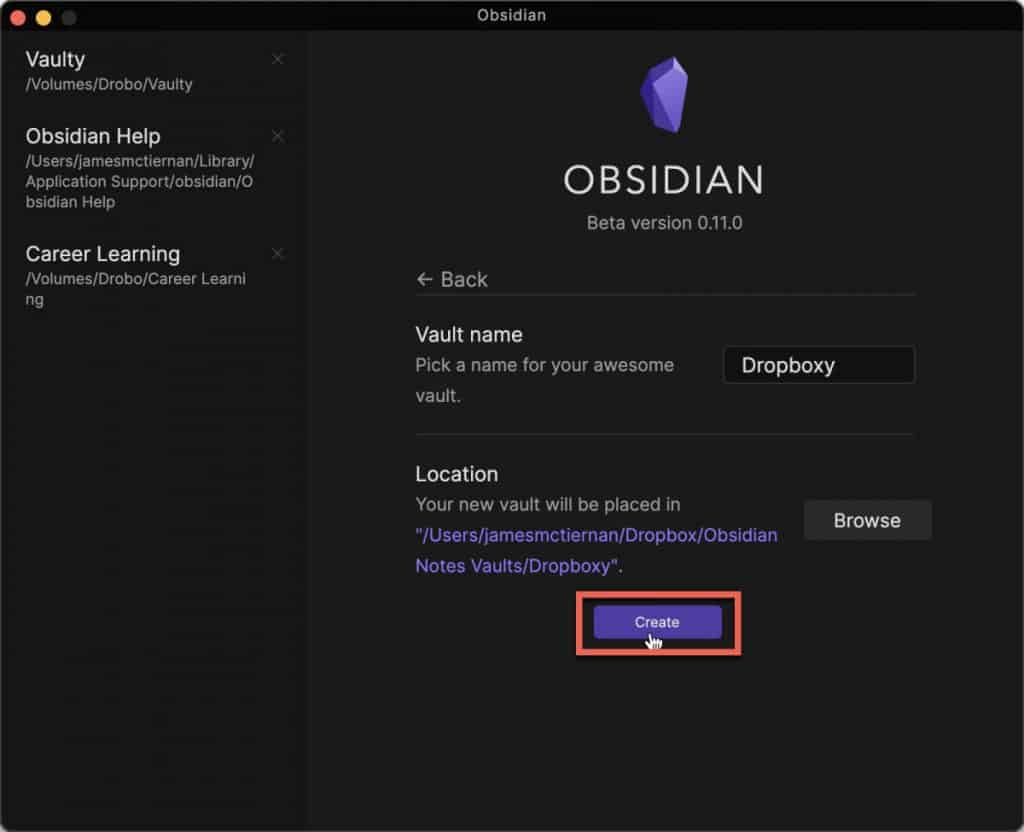
Click the “Create” button to create your vault inside of Dropbox.
Your New Vault
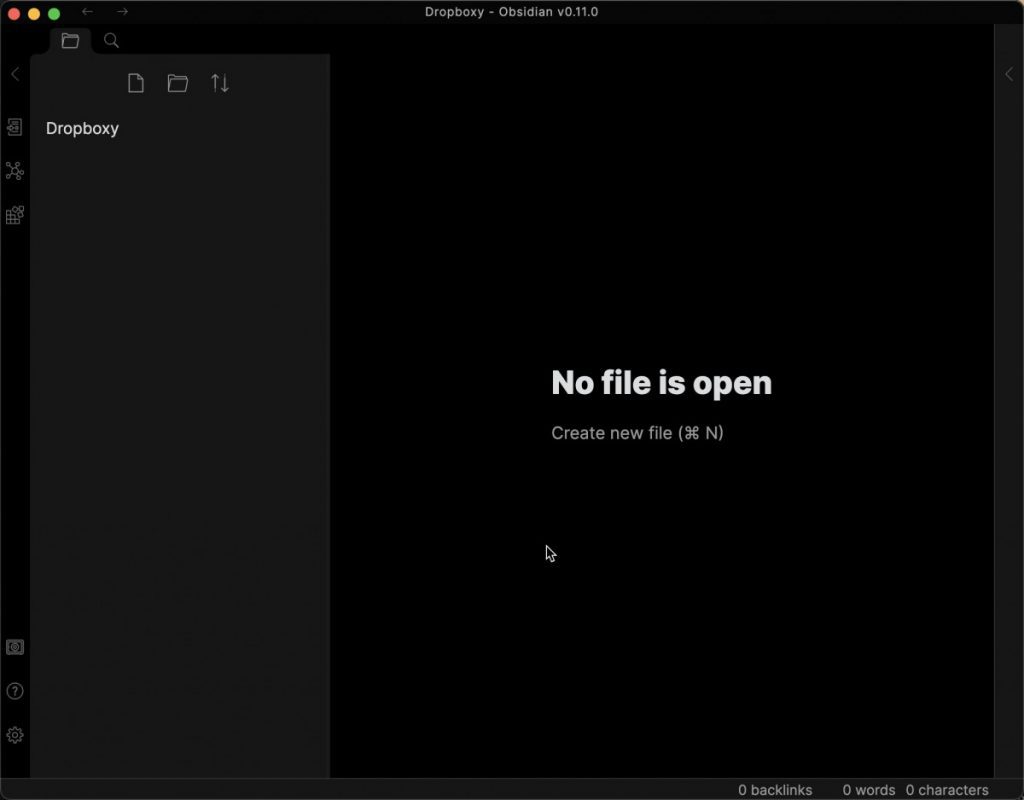
You should now see your new vault. Let’s add some notes to it to test whether the vault is working properly with Dropbox syncing.
If you are wondering how Obsidian stacks up against Notion, you should really check out our Obsidian Notes vs Notion comparison guide.
Create a New Note in Obsidian
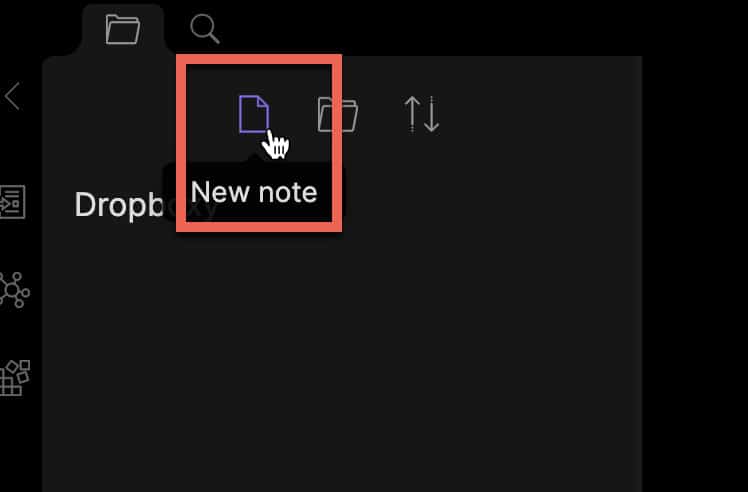
Let’s create a new note to test Dropbox syncing of the Obsidian Notes vault. Click the “New note” button to create a new note.
Fill in your Note with Content

Fill in your note with some content. We will be adding content to this note on another device as well to confirm bi-directional sync.
Setup Dropbox integration on another Device
One of the cool things about Obsidian Notes is that it uses Markdown as its file format. This allows you to open up notes you create in any application that support markdown (.md) files. This is huge, especially if you want to open an Obsidian Note on a platform that Obsidian Notes doesn’t currently (at the time of this blog post being written) support, like iOS and Android.
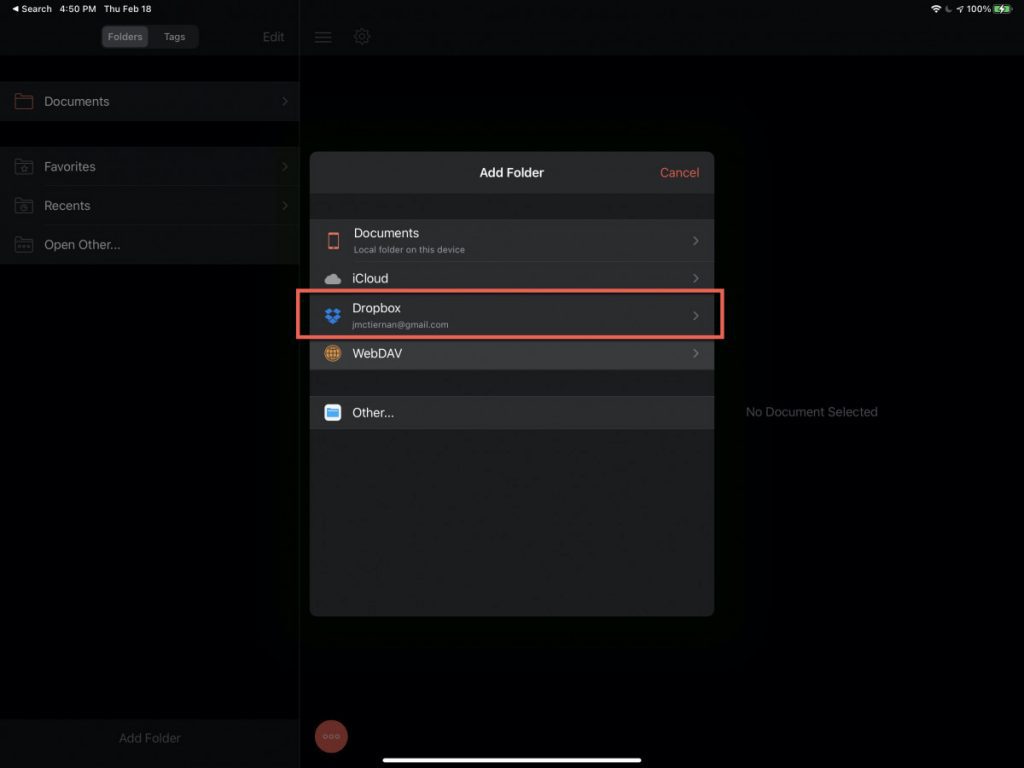
I like to write on my iPad Pro and 1Writer is my favorite text editor on iOS. 1Writer supports markdown files and thus can open Obsidian Notes. Setting up Dropbox integration in 1Writer is really easy, just select Dropbox.
Navigate to your Obsidian Notes folder
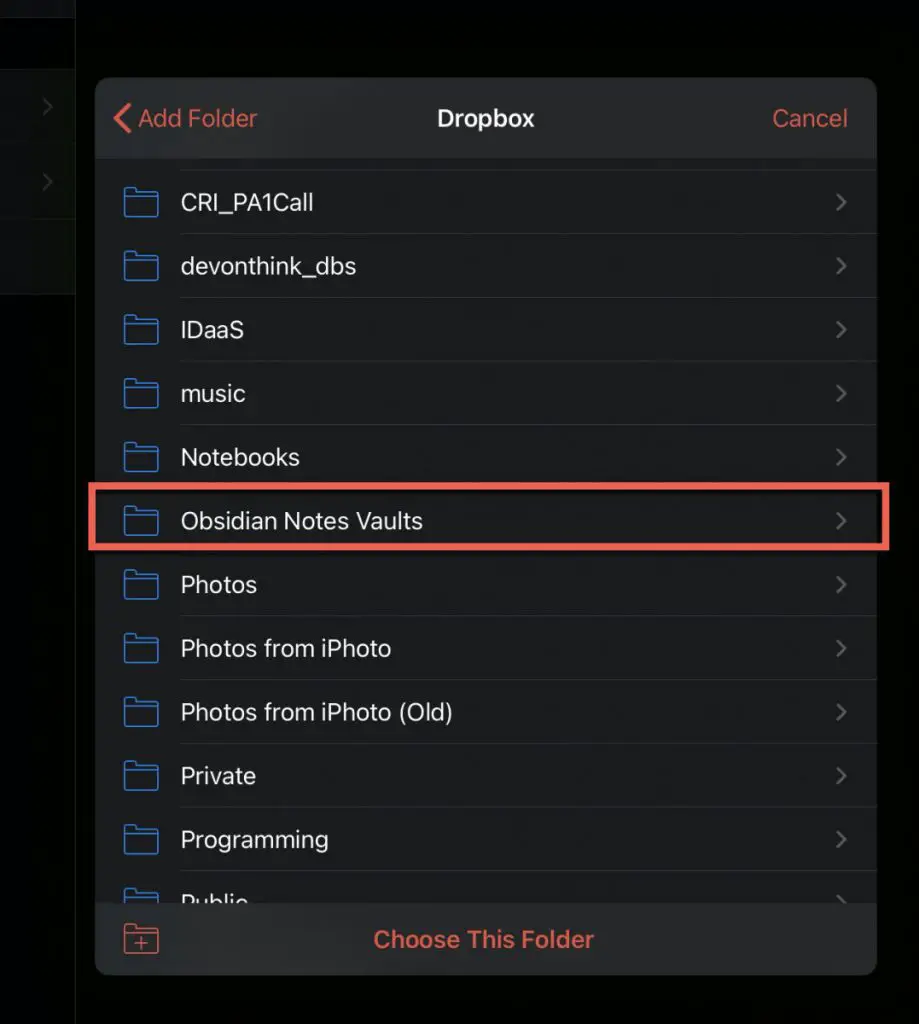
Select the folder containing all your Obsidian Notes vaults that are in Dropbox.
Select the Vault Folder
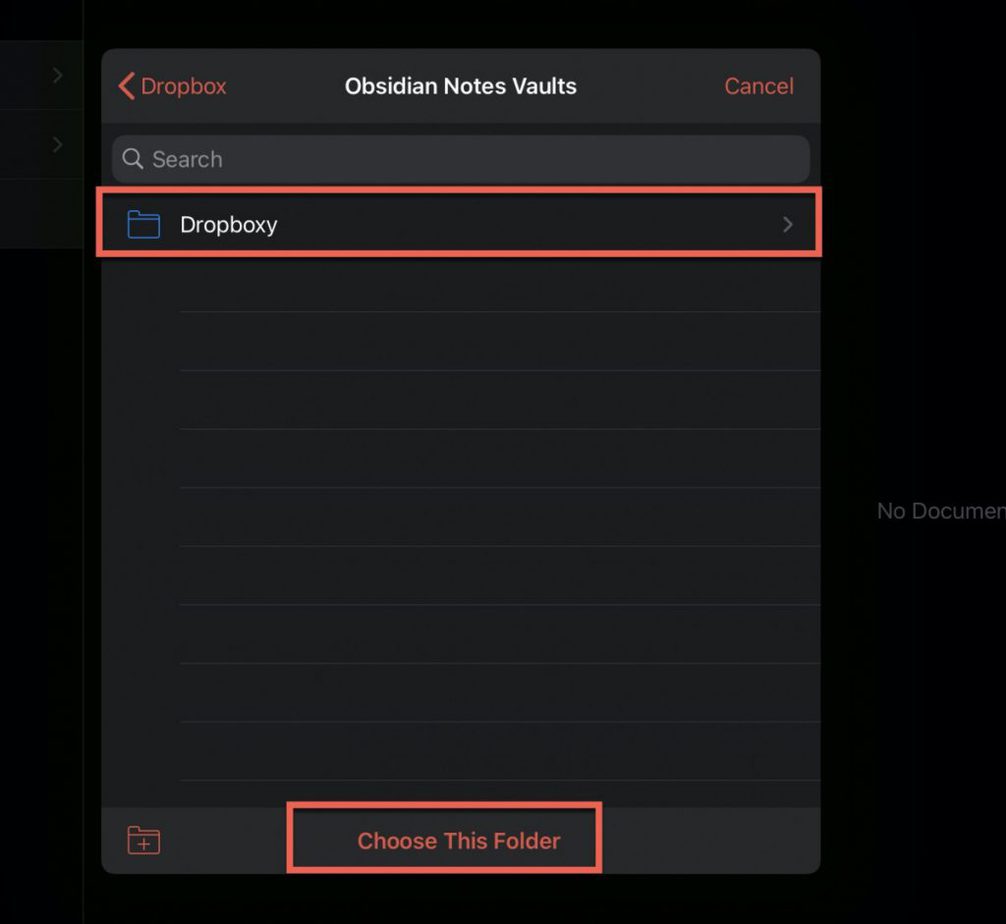
Select the specific vault folder you want to add to 1Writer and click the “Choose This Folder” button to add the folder (vault) to 1Writer.
Opening your Obsidian Note in 1Writer

Click on the folder you just added to 1Writer. A list of the notes in the folder should appear in the left panel as shown in the screenshot above. All of the notes in the vault should be listed in the left panel. Open the note that you edited earlier in this tutorial.
Edit Your Note
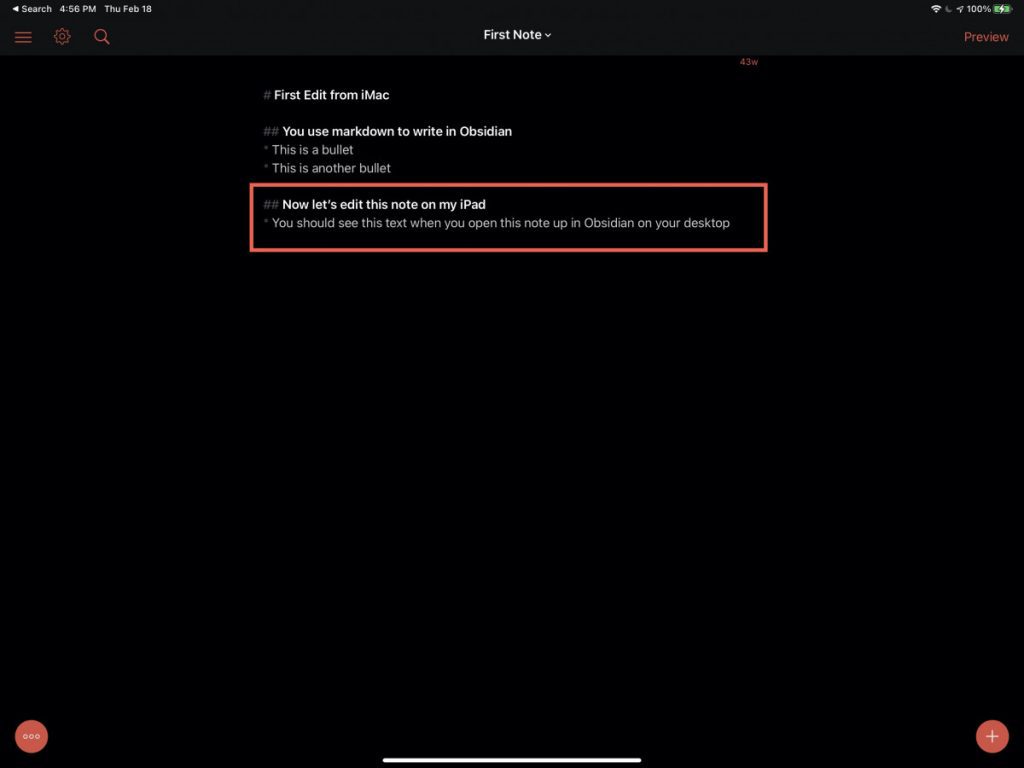
Next, we want to test editing a note on one device and seeing those edits in Obsidian Notes on another device. Make some edits in your note.
Confirm that your edits synced to Obsidian Notes
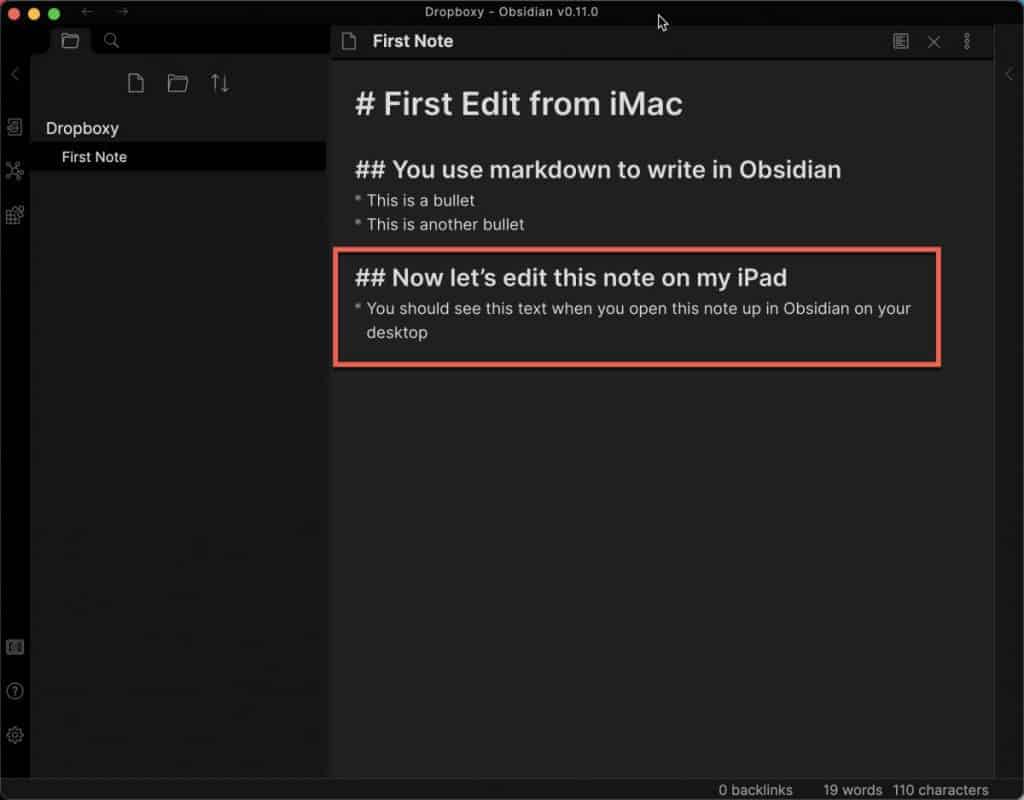
Now go back to Obsidian Notes on your original device and check to see if the note has the updates you made on another device (in the case of our tutorial, the edits we just made in 1Writer on the iPad Pro). You should see the edits you made.
You should be able to edit your Obsidian Notes on any device that is connected to your Dropbox account.
I hope this tutorial was helpful to you. Good luck!
Check Out Our YouTube Channel!
We have a YouTube channel now and we are working hard to fill it with tips, tricks, how-tos, and tutorials. Click the link below to check it out!
Do You Ever Need to Edit or Annotate PDFs?
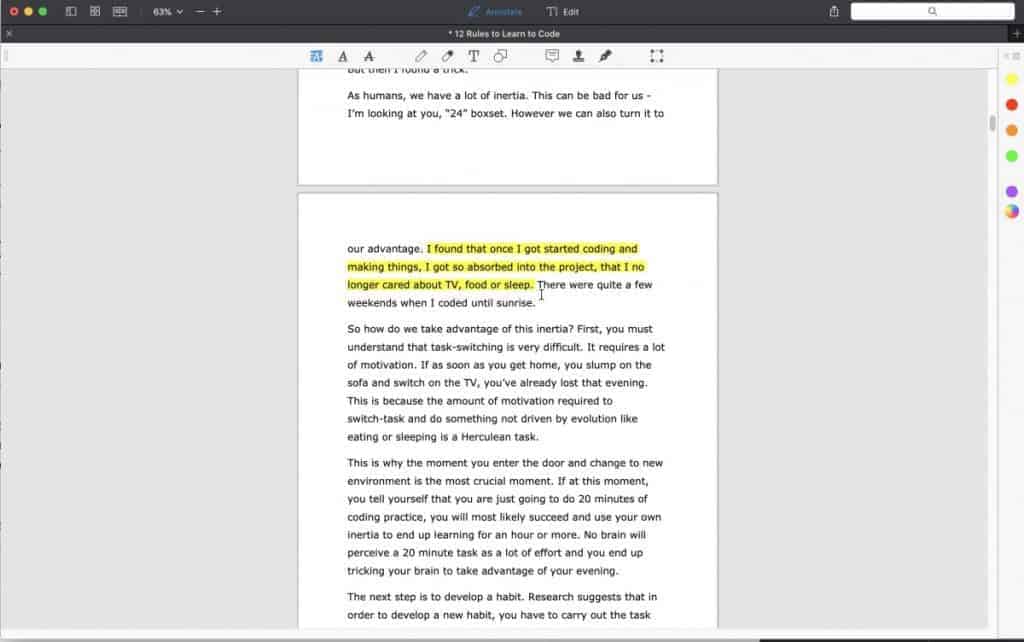
If the answer is yes, you should really PDF Expert! PDF Expert is my go-to app for editing and marking up PDF documents. It is easy to use, has a ton of features and is very cost effective compared to other options out there. For more information on PDF Expert, click the link below:
PDF Expert – Fast, robust and beautiful PDF editor
Looking to Get Started Blogging or on YouTube?
Getting started can seem daunting and scary (I know it was for me) but it doesn’t have to be. I was very lucky to find a program that that has helped me grow my blog to over 60,000 page views and a Monetized YouTube channel that is growing month-over-month.
Project 24 by Income School is the program that I have used. I have been a member for over a year now and just renewed my membership. I cannot recommend Project 24 enough! For more information on Income School, click the link below:
Project 24 byIncome School – Teaching You How to Create Passive Income from Blogs and YouTube

